Advertisement
Quick Links
INSTALLATION
INSTRUCTIONS
BBC / BBCD / BBP110
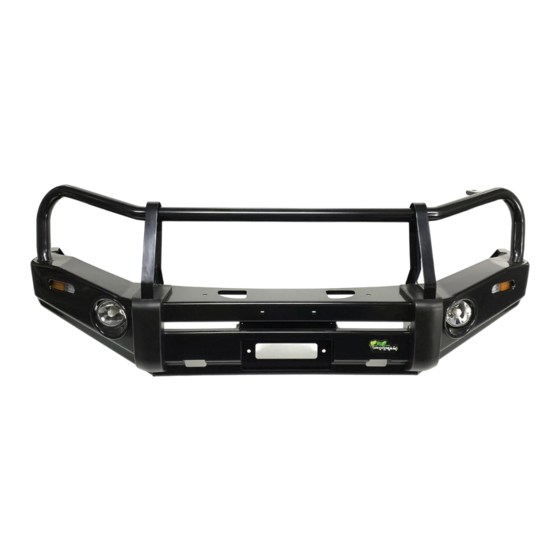
BULL BARS TO SUIT FORD RANGER
Next-Gen 2022+
Bar Weight: 97Kgs (BBC /BBP) & 103Kgs (BBCD)
Bumper Cut
5 Hours
Required
Approximately
SAFETY WARNING
Ironman 4X4 requires you read and understand the safety and pre-install
directions on page 2 and 3 before commencing installation of this product.
Document Number: BB110/241123
This product has been tested for airbag compatibility
Document Number: BBR074/070323
and therefore the mounting system MUST NOT be modified
©Copyright 2023 Ironman 4x4 Pty Ltd. No part of this publication may be reproduced or replicated without the prior written consent of Ironman 4x4 Pty Ltd
Advertisement

Related Manuals for Ironman4x4 BBC110


Summary of Contents for Ironman4x4 BBC110
- Page 1 INSTALLATION INSTRUCTIONS BBC / BBCD / BBP110 BULL BARS TO SUIT FORD RANGER Next-Gen 2022+ Bar Weight: 97Kgs (BBC /BBP) & 103Kgs (BBCD) Bumper Cut 5 Hours Required Approximately SAFETY WARNING Ironman 4X4 requires you read and understand the safety and pre-install directions on page 2 and 3 before commencing installation of this product.
-
Page 2: Pre-Installation Procedures
BBC / BBCD / BBP110 Installation Guide Pre-Installation Procedures SAFETY WARNING • It is always good practice to disconnect the battery while working on 12 Volt systems. - Please check the owner’s manual for vehicle-specific requirements as some models may need battery backup. - Page 3 Installation Guide Installation Guide BBC / BBCD / BBP110 Warning • Ironman 4x4 recovery points are FEA tested during design and destruction tested during development to establish the Working Load Limits (WLL). • Ironman 4x4 recovery points have been designed as a matching pair, supplied as right and left sides for vehicle-specific fitment.
- Page 4 BBC / BBCD / BBP110 Installation Guide Parts List (Item) No. Part Description No. Part Description No. Part Description Bull bar assembly Front chassis bracket spacer - RHS Side wing protection plate bracket 2 - RHS Number plate flip bracket Air trap plate Horn Mounting Bracket Underbody protection plate...
- Page 5 Installation Guide BBC / BBCD / BBP110 Parts List (Item) No. Part Description Dome Hex Head Bolt M10 (30 x1.5mm) Flat Washer M10 (29.5 x 10.5 x 3.0mm) Nyloc Nut M10 Dome Hex Head Bolt M8 (30 x1.25mm) Flat Washer M8 (16 x 8.5 x 2.5mm) x 2 Flat Washer M8 (16 x 8.5 x 2.5mm) Nyloc Nut M8 Flange Hex Head Bolt M10 (30 x 1.25mm) (H17)
-
Page 6: Tools Required
BBC / BBCD / BBP110 Installation Guide Accessories MANDATORY To meet some State Regulations, the bull bar plug-and-play wiring harness (parker/indicator/fog lights) is required to be fitted - IBBPL110 This must be ordered separately. OPTIONAL If installing driving lights or lightbar, you will require a suitable wiring harness to access the IPL connector (High Beam Trigger). - Page 7 Installation Guide BBC / BBCD / BBP110 Before installation, unwrap the hardware. Unwrap the bull bar, taking care not to damage or scratch in the process. Inspect bar for any damage. Ensure bull bar application is compatible with the vehicle and you have the correct cutting template.
- Page 8 BBC / BBCD / BBP110 Installation Guide Remove all factory flare clips from around the vehicle wheel arch. Retain clips for later use. Remove the lower retaining bolt. Repeat procedure on opposite side. Unclip the flare starting at the front lower section and making your way back along the guard.
- Page 9 Installation Guide BBC / BBCD / BBP110 Under the inner guard there are inspection ports. Remove the three (3) clips and twist the guard out of the way to access the bolts and clips behind securing the factory bumper to the guard.
- Page 10 BBC / BBCD / BBP110 Installation Guide 10. Remove the factory bumper and bar foam. Unbolt the three (3) bolts on each side securing the bar reinforcement and place aside for later use. If vehicle is fitted with a radar, unclip the cover, disconnect the plug and remove the two (2) side bolts.
- Page 11 Installation Guide BBC / BBCD / BBP110 14. Mount new lower intercooler brackets supplied to both sides of the vehicle using original factory hardware. Finger tighten only. Item: 15 LHS and 14 RHS. 15. Feed the crush tube and M12 bolt through the chassis bracket and chassis.
- Page 12 BBC / BBCD / BBP110 Installation Guide 17. Lift cradle into position and secure using original factory bolts. Finger tighten only. Repeat procedure on opposite side. Item: 6. 18. Drill the two (2) existing holes out to 10mm. Deburr and paint. Use the remaining cradle hardware through these drilled holes and finger tighten only.
- Page 13 Installation Guide BBC / BBCD / BBP110 20. Find a fixed point on the vehicle and opposing side of cradle as shown. Take measurement to square up and centre cradle. Repeat from left and right fixed points until the cradle is centred. Use the inside edge of the headlight as a guide.
- Page 14 BBC / BBCD / BBP110 Installation Guide 22. Winch Option If installing a winch, you can use the optional winch control box bracket and control box extension wiring loom. P/N: WWBCP001 / P/N: WWB031 Mount the control box bracket to the right-hand side of the lower radiator support/ inner guard.
- Page 15 Please download the latest version of the cutting template from the following Ironman 4x4 link, as bar cuts can vary between models. https://www.ironman4x4.com/fitting-instructions/ Flip the cutting template and repeat the procedure on opposite side. 26. Cut along the lines marked in the previous step, along the lower vent edge then straight across, under the grille opening.
- Page 16 BBC / BBCD / BBP110 Installation Guide IMPORTANT: For parking sensors to function correctly, these instructions must be followed closely. NOTE Before removing sensors from the original bumper If the vehicle doesn’t have factory- bar, note the location and orientation of each fitted parking sensors, the Parking sensor.
- Page 17 Installation Guide BBC / BBCD / BBP110 31. Fit the sensor with the factory silicone sleeve to the sensor holder. Use the flat side of the clamping plate to secure the sensor. The sensor will false alarm if excess pressure is applied to the sensor body.
- Page 18 BBC / BBCD / BBP110 Installation Guide 34. Remove the protective film from one side of the double-sided tape and apply to the mounting surface of the sensor holder. 35. Run the factory harness cabling in between brackets. Clip in parking sensors into parking sensor housings.
- Page 19 Installation Guide BBC / BBCD / BBP110 38. Once camera is secure in place on the bull bar, reconnect the camera extension plug. We suggest carefully unpicking the camera protective harness from the main wiring loom to provide extra length. Take extra care not to damage the wiring loom in the process and retape once completed.
- Page 20 BBC / BBCD / BBP110 Installation Guide 41. Secure radar in place using the previously removed hardware. NOTE Front face of the radar should be perpendicular to the ground. If not, adjust the 8mm bolt on the front of the radar to fine-tune.
- Page 21 Installation Guide BBC / BBCD / BBP110 46. Lift the bull bar into position and align with the chassis mounting holes. Secure in place using M12 x 40mm bolts on both sides. Centralise the bull bar to the vehicle body and nip up lower bolt on each side to allow for manipulating into correct position.
- Page 22 BBC / BBCD / BBP110 Installation Guide 49. Connect lights (if applicable). If winch has been fitted, run the extension harness through the wiring hole, located on the right-hand side and secure in place with hardware supplied. Item: 27. 50. Install the centre protection plate with hardware supplied and refit the centre factory stone tray.
- Page 23 Installation Guide BBC / BBCD / BBP110 53. Install outer wing plate with hardware supplied, securing to lower bull bar and wing protection plate bracket. Item: 4 and 40 LHS. Item: 5 and 40 RHS. Repeat procedure on opposite side. 54.
-
Page 24: Wiring Diagrams
BBC / BBCD / BBP110 Installation Guide Wiring Diagrams DRL/PARKING/INDICATOR LIGHTS Daytime Running Light Brown Park Light Yellow Indicator Light White Ground If vehicle is not fitted with DRL, leave red wire disconnected FOG LIGHTS Ground Lamp Fuse Connector Relay Black Blue Battery... - Page 25 Installation Guide BBC / BBCD / BBP110 Once Installed... • Ensure all bolts are tensioned correctly • Doing a pre-trip check before heading away, or every 10,000km (6,200 miles) is good practice. • Visually inspect bull bar and hardware, retention bull bar hardware or when needed. •...
Need help?
Do you have a question about the BBC110 and is the answer not in the manual?
Questions and answers