
Related Manuals for Omron CJ1W-NC271 - 12-2009


Summary of Contents for Omron CJ1W-NC271 - 12-2009
- Page 1 Cat. No. W426-E1-10 SYSMAC CJ1W-NC271/NC471/NCF71/ NCF71-MA CS1W-NC271/NC471/NCF71 Position Control Units OPERATION MANUAL...
- Page 3 CJ1W-NC271/NC471/NCF71/NCF71-MA CS1W-NC271/NC471/NCF71 Position Control Units Operation Manual Revised December 2009...
- Page 5 © OMRON, 2004 All rights reserved. No part of this publication may be reproduced, stored in a retrieval system, or transmitted, in any form, or by any means, mechanical, electronic, photocopying, recording, or otherwise, without the prior written permission of OMRON.
- Page 7 Data Areas ........
- Page 8 MECHATROLINK Settings ..........MECHATROLINK Communications Control ........
-
Page 9: Table Of Contents
SECTION 10 Other Operations ........369 10-1 Servo Lock/Unlock ............ - Page 10 Changing to CS1W/CJ1W-NC271/471/F71 from CS1W/CJ1W-NC113/133/213/233/413/433 621 Additional Functions for the CJ1W-NCF71-MA ....... . .
- Page 11 CS1W-NC271/NC471/NCF71 Position Control Units and includes the sections described below. Please read this manual carefully and be sure you understand the information provided before attempting to install or operate the Position Control Unit. Be sure to read the precautions provided in the following section.
- Page 12 Unit upgrades. Notation of Unit Versions The unit version is given to the right of the lot number on the nameplate of the on Products products for which unit versions are being managed, as shown below.
- Page 13 Functions Supported According to Position Control Unit Versions Model CJ1W-NC@71/CS1W-NC@71 Unit Ver. 1.0 Unit Ver. 1.1 Unit Ver. 1.2 Unit Ver. 1.3 Unit Ver. 2.0 Unit Ver. 2.1 Linear interpolation Supported. Supported. Supported. Supported. Supported. Absolute encoder setup function --- Supported.
- Page 14 Linear interpolation can performed for up to four axes each of axes 1 to 4 and axes 5 to 8 for Servo Drive axes connected to the Posi- tion Control Unit. (Refer to 9-7 Linear Inter- polation.)
- Page 15 Functional upgrade Unit version 1.2 Unit version 1.3 Establishing connections If any of the axes registered in the scan list Axis operations using MECHATROLINK com- when there are unconnected are not connected, have the control power munications are possible for any axes regis-...
- Page 16 If an attempt is made to lock the Servo while the main circuit power supply is interrupted, a Servo Drive main circuit OFF error will be detected again.
- Page 17 • Setting the Axes to Be Connected Axes registered in the scan list can be set temporarily so that they are not registered. The axes can be set so that they are tempo- rarily not used without resetting the scan list. Operations can be performed without errors occurring for these axes.
- Page 18 Axis Communications Status Flags will not change unless communications are disconnected (including Unit errors that required disconnection). With unit version 2.0 or later, the Axis Communications Status Flags will turn OFF after connections have been established whenever axis operation becomes impossible due to a communications error (synchronous communications alarm or communications alarm).
- Page 19 WHETHER SUCH CLAIM IS BASED ON CONTRACT, WARRANTY, NEGLIGENCE, OR STRICT LIABILITY. In no event shall the responsibility of OMRON for any act exceed the individual price of the product on which liability is asserted. IN NO EVENT SHALL OMRON BE RESPONSIBLE FOR WARRANTY, REPAIR, OR OTHER CLAIMS...
- Page 20 The following are some examples of applications for which particular attention must be given. This is not intended to be an exhaustive list of all possible uses of the products, nor is it intended to imply that the uses listed may be suitable for the products: •...
- Page 21 PERFORMANCE DATA Performance data given in this manual is provided as a guide for the user in determining suitability and does not constitute a warranty. It may represent the result of OMRON's test conditions, and the users must correlate it to actual application requirements.
- Page 22 xxii...
- Page 23 Conformance to EC Directives ........
-
Page 24: Intended Audience
This manual provides information for programming and operating the Unit. Be sure to read this manual before attempting to use the Unit and keep this man- ual close at hand for reference during operation. -
Page 25: Operating Environment Precautions
As a countermeasure for such errors, external safety measures must be provided to ensure safety in the system. • The PLC or PCU outputs may remain ON or OFF due to deposits on or burning of the output relays, or destruction of the output transistors. As a countermeasure for such problems, external safety measures must be provided to ensure safety in the system. -
Page 26: Application Precautions
Always heed these precautions. Failure to abide by the following precautions could lead to serious or possibly fatal injury. • Always connect to a ground of 100 Ω or less when installing the Units. Not connecting to a ground of 100 Ω or less may result in electric shock. - Page 27 • Do not pull on the cables or bend the cables beyond their natural limit. Doing either of these may break the cables. • Do not place objects on top of the cables or other wiring lines. Doing so may break the cables.
-
Page 28: Conformance To Ec Directives
EMC Directives OMRON devices that comply with EC Directives also conform to the related EMC standards so that they can be more easily built into other devices or the overall machine. The actual products have been checked for conformity to EMC standards (see the following note). -
Page 29: Features And System Configuration
Other Operations........ -
Page 30: Features
Compatible with the A MECHATROLINK-II high-speed (10 Mbps) communications interface is MECHATROLINK-II High- used to control Servo Drives for up to 16 axes with a single CS/CJ-series Unit. speed Field Network Shielded twisted-pair cables in daisy-chain formation make wiring simple and enable multi-axis systems that require less wiring and are smaller in size. -
Page 31: System Configuration
Section 1-2 System Configuration System Configuration The PCU receives commands from the CPU Unit's ladder program and con- trol signal status (forward/reverse rotation limit, origin, origin proximity, and interrupt input signals) from devices connected externally to the Servo Drive, and uses them to control Servo Drive positioning. -
Page 32: Basic Operations
CPU Unit. Positioning is executed according to operating commands sent to the PCU from the CPU Unit. It is also possible to change the speed or to send commands to move axes to dif- ferent positions while positioning is being performed. -
Page 33: Speed Control And Torque Control
Position) Stop Functions The DECELERATION STOP command decelerates positioning to a stop. The EMERGENCY STOP command cancels operating commands immedi- ately and stops the axis after moving it for the number of pulses remaining in the Servo Drive's deviation counter. -
Page 34: List Of Functions And Specifications
Possible unit number settings 0 to F I/O allocations Common Operating Memory Area Words allocated in CPU Bus Unit Area: 25 words (15 output words, 10 input words) Axis Operating Memory Area Allocated in one of the following areas (user-specified): CIO, Work, Auxiliary, Holding, DM, or EM Area. - Page 35 0 (unit version 1.3 or later). External I/O Position Control Unit One MECHATROLINK-II interface port Servo Drive I/O Forward/reverse rotation limit inputs, origin proximity inputs, exter- nal interrupt inputs 1 to 3 (can be used as external origin inputs)
-
Page 36: List Of Functions By Purpose
Deceleration stop or The moving axis is decelerated to 10-9 Stop Functions during operation tion emergency stop a stop or the axis is moved for the number of pulses remaining in the deviation counter and then stopped. Changing the Servo Data transfer... -
Page 37: Comparison With Existing Models
Unit type CPU Bus Unit Special I/O Unit Unit number alloca- Unit numbers can be set from 0 to F Unit numbers can be set from 0 to 95. tion (CPU Bus Units). • One-axis and two-axis PCUs: One unit number used. - Page 38 Unit are being operated simulta- neously) Note The response time depends on the cycle time of the PLC and the MECHA- TROLINK communications settings. The time shown in the table is the maxi- mum value obtained when calculated according to specified measurement...
-
Page 39: Basic Procedures
2-2-1 Overview of Operation ........2-2-2 System Configuration and Wiring . -
Page 40: Basic Flow Of Operations
Section 2-1 Basic Flow of Operations The basic flow of Position Control Unit (PCU) operation is described in this section. The steps from installation through setting the MECHATROLINK devices are required only when installing the devices for the first time. When PCU and MECHATROLINK device settings have been completed, start oper- ation from starting MECHATROLINK communications in the flow of operation. - Page 41 4-5 Servo Parameter Area 4-7 Axis Operating Output Transfer the Servo parameters from the CPU Memory Areas Unit to the PCU using the WRITE SERVO PA- 4-8 Axis Operating Input RAMETER Bit and SAVE SERVO PARAMETER Memory Areas Bit in the PCU's Axis Operating Memory Areas.
- Page 42 Flow of operation Details (Continued from previous page.) 4-7 Axis Operating Output Memory Areas Turn ON the SERVO LOCK Bit in the PCU's 4-8 Axis Operating Input Axis Operating Memory Area. Memory Areas 10-1 Servo Lock/Unlock Check that the SVON Flag indicating the Servo Drive status in the PCU's Axis Operating Memory Area is ON.
- Page 43 PCU's Axis Operating Memory Area. Memory Areas 7-4 Acceleration and Deceleration Operations Set the target speed in the speed command val- ue of the PCU's Axis Operating Memory Area. Set the acceleration and deceleration times for positioning in the Servo Parameters.
-
Page 44: Starting Operation
Section 2-2 Starting Operation Starting Operation Examples of operating the Servomotor using RELATIVE MOVEMENT com- mands for direct operation are provided in this section for first-time users of a PCU. 2-2-1 Overview of Operation The following example is for operating the Servomotor using direct operation under the following operation conditions. - Page 45 Set the station address of the MECHATROLINK-II I/F Unit using the rotary switch (SW1) on the Unit. Use the default settings for the DIP switch (SW2). SW1: 1 SW2: Default settings (pin 1: ON; pin 2: ON; pin 3: OFF; pin 4: OFF)
-
Page 46: Setting The Pcu
2-2-3 Setting the PCU Creating I/O Tables Turn ON the power to the PLC and create the I/O tables. Refer to the CJ Series PLC Operation Manual for details on creating I/O tables. Setting Common Set the Common Parameters of the PCU. The minimum required Common... - Page 47 1838 hex = Beginning word of Common Parameter Area Data is written to the PCU by turning ON the WRITE DATA Bit in the Common Operating Memory Area. For the PCU with unit number 0, the WRITE DATA Bit is allocated in CIO 150001. Turn ON this bit using the Programming Con- sole.
- Page 48 Saving PCU Settings The Common Parameters are saved in the PCU's flash memory. Data is saved to the PCU's flash memory by turning ON the SAVE DATA Bit in the Common Operating Memory Area. For the PCU with unit number 0, the SAVE DATA Bit is allocated in CIO 150003.
-
Page 49: Starting Mechatrolink Communications
0, the Restart Bit is allocated in A50100. Note Do not turn OFF the power to the PLC or restart the PCU while data is being saved to the PCU’s flash memory. Doing so may corrupt the PCU’s memory. -
Page 50: Setting Servo Parameters
SAVE SERVO PARAMETER Bits in the PCU's Axis Operating Output Memory Areas. The Servo Parameters are transferred one at a time. The following three parameters must be set as shown below to allocate the above input sig- nals. Parameter No. - Page 51 CIO 120 Write data (leftmost word) Writing Servo Parameters The Servo Parameter settings in CIO 117 to CIO 120 are written to the Servo to the Servo Drive Drive. In this example, to transfer three Servo Parameters, execute the opera- tion to write to the Servo Drive three times.
- Page 52 OFF when saving is completed. Servo Parameter Transferring Flag The set values for Pn50B and Pn511 are written in the same way, i.e., by changing the details of the Servo Parameters to be transferred and turning ON the WRITE DATA Bit.
-
Page 53: Operating The Servomotor From The Pcu
NECT Bit in the Common Operating Memory Area. For the PCU with unit number 0, the CONNECT Bit is allocated in CIO 150100. Use the Program- ming Console to turn OFF this bit, which was turned ON at the start of MECHATROLINK communications. - Page 54 In this operation example, the Common Parameters are set so that the begin- ning word of the Axis Operating Input Memory Area for axis 1 is allocated in CIO 500. Therefore, the SVON Flag for axis 1 is allocated in CIO 50103.
- Page 55 1,000,000 pulses/s .The target speed is 100,000 pulses/s, so after starting, the motor accelerates up to the target speed in 0.1 s, and decelerates to a stop from the target speed in 0.1 s. Speed Pn80B...
- Page 56 In this operation example, the Common Parameters are set so that the begin- ning word of the Axis Operating Output Memory Area for axis 1 is allocated in CIO 100. Therefore, the SERVO UNLOCK Bit for axis 1 is allocated in CIO 10101.
- Page 57 Programming Console, but the basic operation flow is the same when sequences are programmed into the ladder program. Other functions are also used in the same way by changing the parameter settings and manipulating bits.
- Page 58 Section 2-2 Starting Operation...
-
Page 59: Installation And Wiring
Nomenclature and Functions ........ -
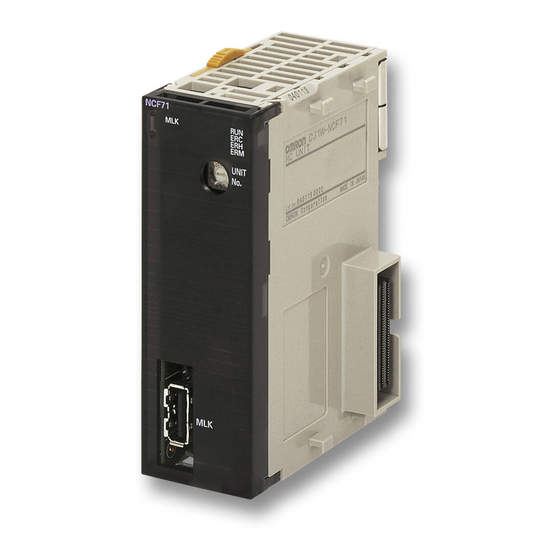
Page 60: Nomenclature And Functions
An error has occurred in a con- nected MECHATROLINK device. Not lit Other condition MECHA- Yellow MECHATROLINK communica- TROLINK Com- tions in progress munications Not lit MECHATROLINK communica- Status tions stopped For details on errors, refer to SECTION 12 Troubleshooting. -
Page 61: Mechatrolink-Ii I/F Unit For W-Series Servo Drives
The versions of both the W-series Servo Drive and MECHATROLINK-II I/F Unit can be found on the nameplate on the side of each device. If an earlier version of the device is used, it will not function properly. Always use products with versions listed in the table above (or later versions). - Page 62 Section 3-1 Nomenclature and Functions Note Refer to the user’s manual for the Servo Drive for the nomenclature and func- tions of Servo Drives with Built-in MECHATROLINK-II Communications. • G5-series Servo Drives with Built-in MECHATROLINK-II Communications (R88D-KN@-ML2) • G-series Servo Drives with Built-in MECHATROLINK-II Communications (R88D-GN@-ML2) •...
-
Page 63: Installing The Position Control Unit
Number Setting Switch on the front of the Unit. • The PCU can be mounted in either the CPU Rack or an Expansion Rack (only up to 10 Units per Rack for a CJ-series PLC) and up to 16 Units can be controlled by one CPU Unit. - Page 64 If the latches are not completely locked, the PCU may not function properly. To remove the PCU, slide the latches in the “release” direction and remove the PCU. CS1W-NC@71 1,2,3... 1. Catch the hook on the top back of the PCU on the Backplane to mount the unit. Mounting hook Backplane...
-
Page 65: Installation Precautions
Always tighten the mounting screw on the bottom of the PCU to a torque of 0.4 N⋅m. To remove the PCU, loosen the screw at the bottom of the PCU using a Phil- lip’s screwdriver and then lift up on the bottom of the PCU. -
Page 66: Dimensions
Section 3-2 Installing the Position Control Unit Remove the label after wiring is completed. U N IT N o. 3-2-4 Dimensions CJ1W-NC@71 NCF71 UNIT... -
Page 67: External I/O Circuits
Backplane Connecting Cable Approx. 193 External I/O Circuits This section describes the external I/O when a Position Control Unit is used with any of the following Servo Drives. • G-series Servo Drives (R88D-GN@-ML2 with built-in MECHATROLINK-II communications) • W-series Servo Drives (equipped with R88D-WT@ and FNY-NS115) •... -
Page 68: Pcu I/O Signals
Control I/O Connector (CN1) when MECHATROLINK is being used with the Servo Drive's default settings. This diagram shows only the I/O signals used when connecting to the PCU. For details of the Servo Drive's standard settings, refer to 6-4 Standard Set-... - Page 69 General- 36 OUTM1 purpose Output 1 Note (1) Do not connect anything to unused pins (*). (2) Inputs for pins 1 to 8 are determined by parameter settings.The diagram shows the default configuration. CN1 Connector (26 Pin) Name Model Manufacturer...
- Page 70 Servo Drive will not stop the Servomotor when the signal is input, and the Position Control Unit will also not detect limit inputs as errors. When using a Posi- tion Control Unit, always allocate the Servo Drive's forward drive prohib- ited signal and reverse drive prohibited signal to enable use of the limit input signals.
-
Page 71: G-Series Servo Drive I/O Signals (R88D-Gn@-Ml2 With Built-In Mechatrolink-Ii Communications)
ON to OFF during the origin search. If a switch with con- tacts is used, the origin position may shift due to the switch contact's chat- tering. - Page 72 36 OUTM1 purpose Output 1 Note (1) Do not connect anything to unused pins (*). (2) Inputs for pins 19 and 20 are determined by parameter settings. The dia- gram shows the default configuration. CN1 Connector (36 Pin) Name Model...
- Page 73 Input for emergency stop. Stop Input When this signal is enabled and pin 1 is not connected to pin 2, an Emergency Stop Input error (alarm code 87) occurs. Set this signal to be enabled or disabled in the Emergency Stop Input Setting (Pn041).
- Page 74 ON to OFF during the origin search. If a switch with con- tacts is used, the origin position may shift due to the switch contact's chat- tering.
-
Page 75: W-Series Servo Drive I/O Signals (R88D-Wt@ With Fny-Ns115)
3-3-4 W-series Servo Drive I/O Signals (R88D-WT@ with FNY-NS115) This section explains the I/O signals used between the PCU and a W-series Servo Drive equipped with a FNY-NS115 MECHATROLINK-II I/F Unit. Use the OMNUC W Series User's Manual together with this manual for infor- mation on I/O signals. - Page 76 1 Note (1) Do not connect wiring to unused pins. (2) Connect the control I/O signal cable's shield wire to the connector shell. The connector on the Servo Drive side is connected to the FG (frame ground). CN1 Connector (50 Pin)
- Page 77 Servo Drive will not stop the Servomotor when the signal is input, and the Position Control Unit will also not detect limit inputs as errors. When using a Posi- tion Control Unit, always allocate the Servo Drive's forward drive prohib- ited signal and reverse drive prohibited signal to enable use of the limit input signals.
-
Page 78: W-Series Servo Drive I/O Signals (R88D-Wn@-Ml2 With Mechatrolink-Ii Built-In Communications)
ON to OFF during the origin search. If a switch with con- tacts is used, the origin position may shift due to the switch contact's chat- tering. - Page 79 Section 3-3 External I/O Circuits For details on the Servo Drive's standard settings, refer to 6-4 Standard Set- tings for Servo Drives Using MECHATROLINK. Backup battery BKIR Brake interlock 14 BAT + input output (SO1+) Backup battery Brake interlock BKIRCOM 15 BATGND −...
- Page 80 ON to OFF during the origin search. If a switch with con- tacts is used, the origin position may shift due to the switch contact's chat- tering.
-
Page 81: Smartstep Junior Servo Drive I/O Signals (R7D-Zn@-Ml2 With Built-In Mechatrolink-Ii Communications)
Drive settings for using MECHATROLINK. The default pin arrangement of the control I/O connector (CN1) on the Servo Drive are shown below. Only the I/O signals that are connected to the Position Control Unit are shown. Refer to 6-4 Standard Settings for Servo Drives Using MECHATROLINK for the standard Servo Drive settings for using MECHATROLINK. - Page 82 Section 3-3 External I/O Circuits (2) Connect the shield in the control I/O signal cable to the connector hood. At the Servo Drive connector, connect it to the FG (Frame ground). CN1 Connector (14 Pins) Name Model Manufacturer Receptacle on Servo Drive Side...
- Page 83 ON to OFF during the origin search. If a switch with con- tacts is used, the origin position may shift due to the switch contact's chat- tering.
-
Page 84: Wiring
JEPMC-W6003-05 5.0 m JEPMC-W6003-10 10 m JEPMC-W6003-20 20 m JEPMC-W6003-30 30 m Terminators Make sure to connect the following Terminator at the end of the MECHA- TROLINK-II communications line. Name Model number Manufacturer MECHATROLINK-II Terminator JEPMC-W6022 Yaskawa Electric Corporation Repeaters The wiring distance for the MECHATROLINK-II can be extended to a maxi- mum of 100 m by using Repeaters. - Page 85 Terminator Note When not using Repeaters, the maximum total length of the Connection Cable (L1 + L2 + ... + Ln) is 50 m when using fewer than 16 axes or 30 m when using 16 axes. MECHATROLINK-II The maximum total length of the Connection Cables depends on the number...
-
Page 86: Wiring The Servo Drive I/O Signals
Wiring the Servo Drive I/O Signals The following example shows a Servo Drive's control I/O signal connections when a Position Control Unit is connected to a G5-series Servo Drive, a G- series Servo Drive, a W-series Servo Drive, or a SMARTSTEP Junior Servo Drive. - Page 87 General- purpose Input 2 Shell Note (1) If a backup battery is connected, a cable with a battery is not required. (2) Inputs for pins 19 and 20 are determined by parameter settings. The dia- gram shows the default configuration.
- Page 88 Section 3-4 Wiring R88D-WT@ with FNY-NS115 The following example shows the connections when the standard I/O signal settings are being used. 3.3 kΩ 24 VDC +24VIN INP1 Positioning completed 3.3 kΩ Max. voltage: Not used. output 1 30 VDC INP1COM 3.3 kΩ...
- Page 89 Servomotor when the corre- sponding PCU control signal is received, the Servo Drive's drive prohibited input signal is received, or an error occurs. Use an external fail-safe circuit (outside of the Servo Drive), such as a circuit that disconnects the Servo Drive's main power supply, to stop the system in an emergency.
- Page 90 Cable (R88A-CPW@S) WT@ W-series Servo Drive's Control I/O Connector (CN1). There is no con- nector attached to the other end of the cable. Attach an appropriate connector to connect the desired I/O device in order to use the cable. Standard Cables...
- Page 91 Connector Case model: 10350-52A0-008 (Sumitomo 3M) Cable: 24 AWG, 25 wire, UL20276 Note (1) Wires with the same wire color and number of marks make up a twisted pair. For example, the Orange/Red (−) and Orange/Black (−) wires make up a twisted pair.
- Page 92 *Set the signal names of driver Connector Plug: 10126-3000PE (Sumitomo 3M) connectors shown above. Connector Case: 10326-52A0-008 (Sumitomo 3M) Connector on Connector Terminal Block Connector Socket: XG4M-2030 (OMRON) Strain Relief: XG4T-2004 (OMRON) Cable: AWG28 x 3P + AWG28 x 7C UL2464...
- Page 93 Section 3-4 Wiring Connector-Terminal Block This cable connects to the R88D-WN@-ML2 G series Servo Drive’s connector Cables (XW2Z-@J-B33) terminal block. Standard Cables Model Length (L) Outer diameter of Approx. weight cable XW2Z-100J-B33 8.0 dia. 0.1 kg XW2Z-200J-B33 0.2 kg Connection Configuration and Dimensions...
- Page 94 Strain Relief: XG4T-2004 (OMRON) Cable: AWG28 × 3P + AWG28 × 7C UL2464 Note Signal names for the connector on the Servo Drive end are for standard I/O allocations. Connector Terminal Block This is the Connector Terminal Block Cable for W-series Servo Drives (R88D- Cables (XW2Z-@J-B16) WN@-ML2 with built-in MECHATROLINK-II communications).
- Page 95 Strain Relief: XG4T-2004 (OMRON) Cable: AWG28 × 3P + AWG28 × 7C UL2464 Note Signal names for the connector on the Servo Drive end are for standard I/O allocations. Connector Terminal Block This is the Connector Terminal Block Cable for the SMARTSTEP Junior Servo Cable (XW2Z-@J-B19) Drive Control I/O Connector (CN1).
- Page 96 The Connector-Terminal Block Conversion Unit can be used along with a Conversion Units Connector Terminal Block Cable (XW2Z-@J-B15/B16/B19/B33/B34) to con- vert the control I/O connector (CN1) of a G5-series Servo Drive, G-series Servo Drive, W-series Servo Drive, or SMARTSTEP Junior Servo Drive to a terminal block.
- Page 97 (1) Use 0.30 to 1.25 mm wire (AWG22 to AWG16). (2) The wire inlet is 1.8 mm (height) × 2.5 mm (width). (3) Strip the insulation from the end of the wire for 6 mm as shown below. 6 mm XW2B-20G5 The XW2B-20G5 is an M3.5 Screw Terminal Block.
- Page 98 Section 3-4 Wiring Note (1) When using crimp terminals, use crimp terminals with the following di- mensions. (2) When connecting wires and crimp terminals to a terminal block, tighten them with a tightening torque of 0.59 N·m. Fork Terminals Round Crimp Terminals 3.2-mm dia.
- Page 99 (2) The XB contacts are used to turn ON/OFF the electromagnetic brake. (3) Assign BKIR (brake interlock) to CN1-36 pin to use. (4) The absolute encoder backup battery is not required when using a Ser- vomotor with an incremental encoder.
- Page 100 Wiring Section 3-4 (5) Connect the absolute encoder backup battery to only one of either the connector terminal block or absolute encoder backup battery cable. (6) Use cable clips with double-sided adhesive tape to secure the absolute encoder backup battery in place.
- Page 101 • Wire the control lines (communications lines, external I/O signal lines, etc.) separately from the power lines (AC power supply lines and motor power lines). Do not wire these lines together in the same duct or bundle them together. • Use shielded cables for the control lines.
- Page 102 In this case, insert a noise filter in the power supply input line. • Connect to a ground of 100 Ω or less and use the thickest possible wire, greater than 1.25 mm...
-
Page 103: Data Areas
Servo Status Flags........ -
Page 104: Overall Structure
Section 4-1 Overall Structure Overall Structure The PCU is used by exchanging data with the CPU Unit as shown in the fol- lowing diagram. Servo Drive CPU Unit Commu- CPU Bus Unit Area nications Common Operating cycle I/O refresh Memory Area... - Page 105 Overall Structure Section 4-1 The data handled by the PCU can be classified into the following six types. Data name Contents Setting area Enable timing Common This area contains the parameters PCU's internal memory The settings saved in the PCU are...
- Page 106 ON the power from the beginning word obtained using the fol- to the PCU. lowing equation: n = CIO 1500 + (unit No. × 25) Set common Write the common parameters to the The axes being used (scan list) and MECHA- parameters.
-
Page 107: Data Areas
Data Areas The following tables provide the bit/word addresses for the parameters and data handled by the PCU. For further details, refer to the relevant sections. Only the Servo parameters for applicable models are listed here. For details on Servo parameters, refer to the operation manual for the model being used. - Page 108 Servo Parameter Area The following table provides information on the parameters for the main func- tions of the PCU that are described in this manual when using an R88D-WT@ OMRON W-series Servo Drive together with a FNY-NS115 MECHATROLINK- II I/F Unit or an R88D-WN@-ML2 W-series Servo Drive with built-in MECHA- TROLINK-II communications.
- Page 109 No. eter setting range setting size Pn202 Electronic gear ratio G1 Set the pulse rate for the command 1 to 65535 Offline (numerator) pulses and Servomotor travel dis- tance. Pn203 Electronic gear ratio G2 1 to 65535 Offline 0.01 ≤ G1/G2 ≤ 100...
- Page 110 Sets the range of positioning completed. Com- 0 to 250 Online completion mand range 1 unit Pn502 Rotation Sets the rotation speed for the Servomotor rotation r/min 1 to Online speed for detection output (TGON). 10000 motor rota- tion detec-...
- Page 111 (Do not change the Fixed setting.) setting: POT (forward Allocated to CN1, Offline Stan- drive prohib- pin 40: Valid for low dard ited input) sig- input setting: nal Input Allocated to CN1, terminal allo- pin 41: Valid for low cation...
- Page 112 Same as Pn50A.3 Offline Stan- nal selec- drive prohib- dard tion 2 ited) signal setting: input terminal allocation Not used. (Do not change the Fixed setting.) setting: PCL (forward 0 to F Same as Pn50A.3 Offline Fixed rotation current setting: limit) signal...
- Page 113 Digit Name Set- Explanation size ting Pn502 Rotation Sets the number of rotations for the Servomotor r/min 1 to 10000 Online speed for rotation detection output (TGON). motor rota- tion detec- tion Pn503 Speed Sets the allowable fluctuation (number of rotations)
- Page 114 Allocated to CN1, pin 11: Valid for high input Allocated to CN1, pin 12: Valid for high input Pn50B Input sig- NOT (reverse 0 to F Same as Pn50A.3. Offline Stan- nal selec- drive prohibited dard tions 2 input) signal setting:...
- Page 115 5 allocation setting: EXT1 signal 0 to F Same as Pn50A.3. Offline Stan- input terminal (0 to 3 and 9 to C dard allocation are always dis- setting: abled.) EXT2 signal 0 to F Same as Pn50A.3. Offline...
- Page 116 Setting range for positioning completed range Com- 0 to Online 1,073,741,8 ing com- mand pleted unit range 1 Pn524 Position- Setting for proximity range for the Positioning Prox- Com- 1 to Online 1,073,741,8 ing com- imity Flag. mand pleted unit range 2...
- Page 117 Section 4-2 Data Areas Control Function Parameters ■ R88D-WT@ and R88D-WN@-ML2) Param- Parame- Param- Contents Default Unit Setting Enable Details eter No. ter name eter setting range setting Digit Name Set- Explanation size ting Pn800 Communi- MECHA- Detects both com-...
- Page 118 Pn803 Zero point Sets the detection range Command 0 to 250 Online width for the Origin Stop Flag. unit −1,073,741,823 to Pn804 Forward soft- Sets the forward soft- 819,191,808 Command Online ware limit ware limit. unit 1,073,741,823 −819,191,808 Command...
- Page 119 Online Settings ear decelera- eration speed for the command can be tion constant acceleration/decelera- changed units/s tion curve used in posi- when the tion control. axes are stopped (Busy Flag for each axis = 0). Pn80E Second-step Sets the second-step ×10,000...
- Page 120 1,073,741,823 changed zero point when the axes are stopped (Busy Flag for each axis = 0). Note The parameters for backlash compensation are different for the R88D-WT@ and R88D-WN@-ML2. ■ R88D-WT@ Param- Parame- Param- Contents Default Unit Setting Enable Details eter No.
- Page 121 Sets the backlash compensation time constant. Online compen- 65535 sation time constant Common Operating Beginning word of Common Operating Memory Area: n = CIO 1500 + (unit number × 25) Memory Area Word Name Not used (reserved by the system). SAVE...
- Page 122 Note The REJOIN Bit and the Axes to Connect parameter are supported for unit version 2.0 or later. The allocated bit and word are not used for earlier unit versions. Axis Operating Beginning Word of Axis Operating Output Memory Areas:...
- Page 123 Data Areas (3) Allocated in Axis Operating Output Memory Area for axis 5 for Position Control Unit version 1.1 or later. These bits are not used in the Axis Op- erating Output Memory Areas for other axes. (4) The DEVIATION COUNTER RESET can be used with unit version 1.3 or later.
-
Page 124: Common Parameter Area
PCU's flash memory using the SAVE DATA command. After setting and saving the Common Parameters, either cycle the power to the CPU Unit, or restart the PCU. This operation will enable the set parameters. The Common Parameter Area is used to set the following information. -
Page 125: Common Parameter Details
The Axis Operating Output Memory Area designation and the word deter- mined using this parameter are used as the beginning word of the Operat- ing Output Memory Area for Axis 1. Each axis is allocated 25 words in sequence up to the highest axis number registered in the scan list. - Page 126 Axis 2: Output Area: CIO 6125 to CIO 6149 The highest word in the CIO Area is CIO 6143. Therefore, an error will occur. (3) If the ranges set for the Axis Operating Output Memory Area and Axis Op- erating Input Memory Area overlap, an Initialization Common Parameter...
- Page 127 Check Error (Unit error code 0028) will occur when the PCU power is turned ON or the Unit is restarted. (4) Do not set the bank number of the EM Area that is being saved to file memory in the CPU Unit. When the EM Area for the bank saved to file memory has been specified, the information in the Operating Data Area will not be reflected, resulting in a malfunction.
- Page 128 CS1W/CJ1W-NC471. An error will occur if you allocate more axes than your Unit supports. Setting Example In this example, axes 1 to 3, axis 5, and axis 8 are allocated to the Servo Drive. (The axis number corresponds to the station number for the MECHA- TROLINK device.)
-
Page 129: Axis Parameter Area
MECHATROLINK devices. Set value: 0 to 7, F The default setting 0 is the same as when the number of retries is set to 1. When F is specified, the number of retires is 0 (no retries). C2 Master Connection This parameter is used to set whether a separate communications master is connected to the PCU for MECHATROLINK system support. -
Page 130: Axis Parameter Details
The reversal mode 3 setting for the origin search operation, the origin detec- tion method, and the origin search preset can be used only with Position Con- trol Units with unit version 2.0 or later. They cannot be used with Position Control Units with unit version 1.3 or earlier. - Page 131 03: External latch signal 3 input Note (1) When 01, 02, or 03 (external latch signals 1 to 3) is selected in the origin input signal selection/interrupt input signal selection, the external latch signal to be used must be allocated in the Servo Drive's external input al- locations.
-
Page 132: Servo Parameter Area
4-5-1 G5-series Servo Drive (R88D-KN@-ML2 with Built-in MECHATROLINK-II Communications) This shows a list of Servo Parameters that can be used by the Position Con- trol Unit of a G5-series Servo Drive (R88D-KN@-ML2) with built-in MECHA- TROLINK-II Communications. For details on each parameter, refer to the user’s manual of the respective... - Page 133 Section 4-5 Servo Parameter Area • Some parameters are enabled by turning the power supply OFF and then ON again. (Those parameters are indicated in the table.) After changing these parameters, turn OFF the power supply, confirm that the power supply indicator has gone OFF, and then turn ON the power supply again.
- Page 134 (002) 0: Disabled 1: Emphasizes stability 2: Emphasizes positioning 3: If there is an unbalanced load on the vertical axis or the like. 4: When friction is large. 5: If there is an unbalanced load on the vertical axis or the like and friction is too large.
- Page 135 210/ 0.1ms 1 to 10000 Time Constant 1 (102) Speed Feedback Fil- The speed feedback filter 1 can be set to one of 6 val- 0 to 5 ter Time Constant 1 ues. (103) Torque Command Fil- Set the time constant for the torque filter 1.
- Page 136 TROLINK-II communications 3: Torque command change amount 4: Speed command change amount 5: Command speed Gain Switching Delay Set the delay time for switching from gain 2 to gain 1. 0.1ms 0 to 10000 Time in Speed Con- (115) trol Gain Switching Level Set the gain switching level.
- Page 137 Damping Frequency Set the damping frequency 1. 0.1Hz 0 to 2000 (20E) The function is enabled if the set value is 10 (= 1 Hz) or greater. Damping Filter 1 Set- Finely adjust damping control function 1. 0.1Hz 0 to 1000...
- Page 138 1 to 2 Feedback Pulse mand (31C) Error Counter Over- unit flow Level Internal/External Clear to 0 the feedback pulse error value for each set Rota- 0 to 100 Feedback Pulse rotation speed. tion (31D) Error Counter Reset Interface Monitor Setting Parameters...
- Page 139 0: Output range is -10 to 10 V 1: Output range is 0 to 10 V 2: Output range is 0 to 10 V (5 V as the center) Positioning Comple- Set the allowed number of pulses for the positioning...
- Page 140 OFF. (507) The settable values are the same as those on the Pn506. Undervoltage Alarm Select either to let the servo off or to stop the alarm 0 to 1 Selection when a main power alarm occurs. (508) 0: Bring the Servo-OFF state in accordance with the Pn507 setting.
- Page 141 3: 1.666 ms Position Setting Unit Select the setting units of Positioning Completion 0 to 1 Selection Range 1 and 2 (Pn431 and Pn442) and of the Error (514) Counter Overflow Level (Pn014). 0: Command unit 1: Encoder unit Torque Limit Selec-...
- Page 142 Reverse Direction Set the value to add to a torque command for reverse -100 to 100 Torque Offset direction operation. (609) Function Expansion Set the function expansion. The setting contents vary 0 to 63 Setting depending on the function.
- Page 143 (80B) Linear Deceleration Set the deceleration for positioning. -32768 to Constant 32767 (80E) Position Command Set the time constant of FIR filter for the position com- 0.1ms 0 to 10000 FIR Filter Time Con- mand. (812) stant Final Distance for Sets the distance to travel after the latch signal input 0.1ms...
-
Page 144: G-Series Servo Drive (R88D-Gn@-Ml2 With Built-In Mechatrolink-Ii Communications)
G-series Servo Drive (R88D-GN@-ML2) with built-in MECHA- TROLINK-II communications. For further details on each of the parameters, refer to the user’s manual for G- series Servo Drives. The timing for Servo Parameters to be enabled are classified into the following two types. - Page 145 Pn000 Reserved Do not change. Pn001 Default Dis- Selects the data to be displayed on the 7-segment LED display on 0 to 4 Online play the front panel. Normal status ("--" Servo OFF, "00" Servo ON) Indicates the machine angle from 0 to FF hex.
- Page 146 0. Control Note Use with thi]s parameter set to 0. Program to stop immedi- ately if using a value other than 0. Set the Consecutive Communications Error Detection Count in COM_ERR (bit 8 to 11). The communications error (alarm code...
- Page 147 Pn007 Speed Selects the output to the Analog Speed Monitor (SP on the front 0 to 11 Online monitor panel). (SP) Selec- Note This monitor output has a delay due to filtering. The Oper-...
- Page 148 Sets the speed loop responsiveness. 1 to 30000 Online Flag for Gain (RT) If the Inertia Ratio (Pn020) is set correctly, this parameter is set to each axis the Servomotor response frequency. = 0). Increasing the gain increases the speed control responsiveness, but too much gain may cause oscillating.
- Page 149 Sets the operating mode for realtime autotuning. 0 to 7 Online Flag for Autotuning A setting of 3 or 6 will provide faster response to changes in inertia each axis Mode during operation. Operation, however, may be unstable depending = 0).
- Page 150 0 when disabled. when the Note When the Vibration Filter Selection (Pn024) is set to a axes are low-pass filter type (Pn024 = 3 to 5), the adaptive filter is stopped forcibly set to disabled (Pn023 = 0). (Busy Flag for Adaptive filter disabled.
- Page 151 This parameter is disabled when Vibration Filter 1 is dis- abled. • Normal type Setting range: 100 ≤ Pn02B + Pn02C ≤ Pn02B × 2 or 2000 • Low-pass type Setting range: 10 ≤ Pn02B + Pn02C ≤ Pn02B × 6 ×0.1...
- Page 152 Sets the judgment level to switch between Gain 1 and Gain 2 0 to 20000 Online Level Set- when the Gain Switch Setting (Pn031) is set to 3, 5, 6, 9, or 10. ting (RT) The unit for the setting depends on the condition set in the Gain Switch Setting (Pn031).
- Page 153 Reserved Do not change. Pn052 Reserved Do not change. −20000 to Pn053 Speed Limit 2 Sets the speed limit for torque control mode. (The value is an r/min Online Settings absolute value) 20000 can be changed This parameter is limited by the Overspeed Detection Level Set- when the ting (Pn073).
- Page 154 Online formity Sig- (VCMP) signal. nal Output Speed conformity is achieved when the absolute value of the dif- Width ference between the internal speed command (before acceleration and deceleration limits are applied) and the Servomotor speed is less than the set speed.
- Page 155 (stopped), the deceleration mode will not be activated even if the drive prohibit input is enabled. Note 3. When the parameter is set to 2 and an operation com- mand in the drive prohibited direction is received after stopping, a command warning (warning code 95h) will be issued.
- Page 156 Sets the overload detection level. The overload detection level will 0 to 500 Online Detection be set at 115% if this parameter is set to 0. Normally, use a setting Level Set- of 0, and set the level only when reducing the overload detection ting level.
- Page 157 Limit (Pn201) and Reverse Software Limit (Pn202). Note The response value for limit signals disabled by this set- ting will be set to 0. The response value for limit signals is also set to 0 when the Servomotor does not complete its return to origin.
- Page 158 Pn110 Origin Sets the operating speed for origin return from when the origin 1 to 32767 Online Return proximity signal is turned ON, to when it is turned OFF and the [com- Approach latch signal is detected. mand Speed 1...
- Page 159 If the Servomotor exceeds the limit, the network response status Limit units 1073741823 (PSOT) will turn ON (=1). Note Be sure to set the limits so that Forward Software Limit > Reverse Software Limit. Note PSOT is not turned ON when origin return is incomplete. −500000 −1073741823...
-
Page 160: W-Series Servo Drives (R88D-Wt@ With Fny-Ns115)
OMRON W-series Servo Drive (R88D-WT@) with a MECHA- TROLINK-II I/F Unit (FNY-NS115). For further details on each of the parameters, refer to the user’s manuals for W-series Servo Drives and MECHATROLINK-II I/F Unit (FNY-NS115). The default settings for parameters Pn000 to Pn601 in the parameter tables... - Page 161 CW direction is taken for positive command. Not used. The setting is dis- abled. (Do not change the set- ting.) Unit No. setting 0 to F Servo Drive com- Offline munications unit number setting when using per- sonal computer monitoring soft- ware Not used.
- Page 162 Option command tion switch ing speed con- value 1 used as trol) torque limit input. Option command value 1 used as the torque feed for- ward input. Option command values 1 and 2 used as torque limit inputs according to...
- Page 163 Position Adjusts position loop responsiveness. 1 to Online loop gain 2000 Pn103 Inertia Sets using the ratio between the machine system 0 to Online ratio inertia and the Servomotor rotor inertia. 20000 Pn104 Speed Adjusts speed loop responsiveness (enabled by auto-...
- Page 164 Not used. (Do not change the setting.) Pn10C P control Sets level of torque command to switch from PI con- 0 to 800 Online switching trol to P control. (torque command) Pn10D P control...
- Page 165 Pulses 16 to Offline divider rate Drive. /rota- 16384 tion Pn202 Electronic Sets the pulse rate for the command pulses and Ser- 1 to Offline gear ratio vomotor travel distance. 65535 0.01 ≤ G1/G2 ≤ 100 (numera- tor) Pn203 Electronic...
- Page 166 Digit Name Set- Explanation size ting Pn205 Absolute Sets the limit to the rotation speed when using a Ser- 65535 Rota- 0 to Offline encoder vomotor with an absolute encoder. tions 65535 multi-turn limit set- ting...
- Page 167 Reverse Reverse rotation output torque limit (rated torque 0 to 800 Online torque limit ratio). Pn404 Forward Output torque limit during input of forward rotation cur- 0 to 800 Online rotation rent limit (rated torque ratio). external current limit Pn405...
- Page 168 32767 overflow level ×10 Pn506 Brake tim- Sets the delay from the brake command to the Servo- 0 to 50 Online ing 1 motor turning OFF. Pn507 Brake Sets the rotation speed for outputting the brake com- r/min...
- Page 169 Not used. (Do not change the Fixed setting.) setting: POT (forward Allocated to CN1, Offline Stan- drive prohibited pin 40: Valid for low dard input) signal input setting: input terminal Allocated to CN1, allocation pin 41: Valid for low input...
- Page 170 Offline Stan- nal selec- drive prohibited dard tion 2 input) signal setting: input terminal allocation Not used. (Do not change the Fixed setting.) setting: PCL (forward 0 to F Same as Pn50A.3 Offline Stan- rotation cur- dard rent limit) sig-...
- Page 171 Same as Pn50E.0 Offline Stan- nal selec- ing completed dard tion 3 2) signal output setting: terminal alloca- tion Not used. (Do not change the setting.) Not used. (Do not change the setting.) Not used. (Do not change the setting.)
- Page 172 Pn511 Input sig- DEC signal Allocated to CN1, Offline Stan- nal selec- input terminal pin 40: Valid for low dard tion 5 allocation input setting: Allocated to CN1, pin 41: Valid for low input Allocated to CN1, pin 42: Valid for low...
- Page 173 Not used. (Do not change the setting.) Not used. (Do not change the setting.) Pn51A Motor-load Sets the allowable range for the number of pulses for Pulse 0 to Online deviation fully-closed encoders and semi-closed encoders. 32767 over level Pn51B Not used.
- Page 174 Unit Setting Enable Details eter No. eter setting range setting size ×10 W From 0 Pn600 Regeneration resistor Setting for the regeneration resistance Online capacity load ratio monitoring calculations. (Varies by Unit.) Pn601 Not used. (Do not change the setting.)
- Page 175 Communica- 0 to F Detects a commu- Online tions error nications error count at single (A.E6) when the transmission number of errors specified by the set value + 2 have occurred continu- ously. Not used. (Do not change the setting.)
- Page 176 Setting range Enable Details eter No. name eter ting setting size Pn802 Not used. (Do not change the set- 0000 ting.) Pn803 Zero point width Sets the detection range Command 0 to 250 Online for the Origin Stop Flag. unit −1,073,741,823 to...
- Page 177 S- can be curve acceleration/ changed deceleration is used, and when the an average movement axes are filter is used for the posi- stopped tion command filter. (Busy Flag for each axis = 0). Pn813 Not used.
- Page 178 ×100 0 to 65535 Online Settings can point distance positioning speed used after the ori- com- be changed return gin input signal has been detected in an ori- mand when the approach gin search. units/s axes are speed 2 stopped...
-
Page 179: W-Series Servo Drive (R88D-Wn@-Ml2 With Built-In Mechatrolink-Ii Communications)
W-series Servo Drive with Built-in MECHATROLINK-II Commu- nications (R88D-WN@-ML2). For further details on each of the parameters, refer to the user’s manual for W- series Servo Drives. The timing for Servo Parameters to be enabled are classified into the following two types. - Page 180 AC/DC power AC power supply: Offline input selection AC power supplied from L1, L2, (L3) terminals DC power supply: DC power from +, − (2) terminals Not used. (Do not change the setting.) Pn002 Function Torque com- Do not use option...
- Page 181 Digit Name Set- Explanation size ting Pn004 Function Not used. (Do not change the selection setting.) applica- Not used. (Do not change the tion setting.) switches 4 Not used. (Do not change the setting.) Not used.
- Page 182 Set- Explanation size ting Pn007 Function 0 to 1 Analog moni- Servomotor rota- Online selection tor 2 (NM) sig- tion speed: 1V/ applica- nal selection 1000 r/min tion Speed command: switches 7 1 V/1000 r/min Torque command: gravity compensa- tion torque (Pn422)
- Page 183 2 to 3 Not used. Not used. (Do not change the setting.) Pn10C P control Sets level of torque command to switch from PI con- 0 to 800 Online switching trol to P control. (torque command) Pn10D P control...
- Page 184 Pn135 Gain The time from when gain switching condition A is sat- 0 to Online switching isfied until switching from the No. 1 gain to the No. 2 65535 waiting time gain begins. Pn136 Gain The time from when gain switching condition B is sat-...
- Page 185 Adjusts position deviation for predictive control. 0 to 300 Online control weighting ratio Pn1A0 Servo Adjusts the Servo rigidity for the No. 1 gain. 1 to 500 Online rigidity Pn1A1 Servo Adjusts the Servo rigidity for the No. 2 gain. 1 to 500 Online...
- Page 186 Digit Name Set- Explanation size ting × 0.01 Pn1A2 Speed Sets the filter time constant for No. 1 gain speed feed- 30 to Online feedback back. 3200 filter time constant × 0.01 Pn1A3 Speed Sets the filter time constant for No. 2 gain speed feed-...
- Page 187 (Do not change the setting.) Pn20A Not used. (Do not change the setting.) 32768 Pn20E Electronic Sets the pulse rate for the command pulses and 1 to Offline 1073741824 gear ratio Servomotor movement distance. 0.001 ≤ G1/G2 ≤ 1000 (numera-...
- Page 188 Sets rotation speed during jog operation (using Servo r/min 0 to Online Drive’s personal computer monitoring software) 10000 Pn305 Soft start Sets acceleration time during speed control soft start. 0 0 to Online accelera- 10000 tion time Pn306 Soft start Sets deceleration time during speed control soft start.
- Page 189 0 to Online torque mands. 65535 command filter time constant × 0.01 Pn412 1st step Sets the filter time constant for No. 2 gain internal 0 to Online 2nd torque torque commands. 65535 command filter time constant Pn413 Not used.
- Page 190 (VCMP). signal out- put width ×10 Pn506 Brake tim- Sets the delay from the brake command to the Ser- 0 to 50 Online ing 1 vomotor turning OFF. Pn507 Brake Sets the number of rotations for outputting the brake...
- Page 191 Not used. (Do not change the setting.) POT (forward Allocated to CN1, Offline Stan- drive prohib- pin 13: Valid for low dard ited input) input setting: signal Input Allocated to CN1, terminal allo- pin 7: Valid for low cation...
- Page 192 Digit Name Set- Explanation size ting Pn50C Input sig- Not used. (Do not change the nal selec- setting.) tions 3 Not used. (Do not change the setting.) Not used. (Do not change the setting.) Not used. (Do not change the setting.)
- Page 193 (Do not change the setting.) Pn511 Input sig- DEC signal Allocated to CN1, Offline Stan- nal selec- input termi- pin 13: Valid for low dard tions 5 nal allocation input setting: Allocated to CN1, pin 7: Valid for low input Allocated to CN1,...
- Page 194 Pn515 Not used. (Do not change the setting.) 8888 Pn51B Not used. (Do not change the setting.) 1000 Pn51E Deviation Sets the detection level for the deviation counter 10 to 100 Online counter overflow warning. overflow warning level Pn520 Deviation...
- Page 195 Servo ON. overflow warning level at Servo-ON Pn529 Speed Sets the speed limit for when the Servo turns ON 10000 r/min 0 to 10000 Online limit level with position deviation accumulated. at Servo- Pn52A Not used.
- Page 196 (Do not change the setting.) Pn531 Program Sets the program JOG movement distance. 32768 Com- 1 to Online 1073741824 mand movement unit distance Pn533 Program Sets the program JOG operation movement speed. 500 r/min 1 to 10000 Online movement speed...
- Page 197 JOG operation. accelera- tion/decel- eration time Pn535 Program Sets the delay time from the program JOG opera- 0 to 10000 Online JOG wait- tion start input until operation starts. ing time Pn536 Number of Sets the number of repetitions of the program JOG...
- Page 198 A.96@. Ignores A.94@, A.95@ and A.96@. Communica- 0 to F Detects communi- Online tions error cations errors count at single (A.E60) if they transmission occur consecutively for the set value plus two times. Not used. (Do not change the setting.)
- Page 199 Pn80C Acceleration Sets the switching speed ×100 com- 0 to 65535 Online Settings can constant switch- for the step 1 and step 2 mand be changed ing speed acceleration when two- units/s when the step acceleration is exe- axes are cuted.
- Page 200 Pn80F Deceleration Sets the switching speed ×100 com- 0 to 65535 Online Settings can constant switch- for the step 1 and step 2 mand be changed ing speed deceleration when two- units/s when the step deceleration is exe- axes are cuted.
- Page 201 = 0). 1 to 3 Not used. (Do not change the setting.) Pn817 Zero Sets the origin search speed after the decel- ×100 0 to 65535 Online Settings can point eration limit switch signal turns ON. com- be changed...
-
Page 202: Smartstep Junior Servo Drive (R7D-Zn@-Ml2 With Built-In Mechatrolink-Ii Communications)
SMARTSTEP Junior Servo Drive with Built-in MECHA- TROLINK-II Communications (R7D-ZN@-ML2). For further details on each of the parameters, refer to the user’s manual for SMARTSTEP Junior Servo Drives. The timing for Servo Parameters to be enabled are classified into the following two types. - Page 203 No. ter name eter setting setting Digit Name Set- Explanation size ting Pn20E Elec- Set the pulse rate for the command pulses 1 to Offline tronic and Servomotor travel distance. 1073741824 gear ratio 0.01≤G1/G2≤100 (numera- tor) Pn210 Elec- 1 to...
- Page 204 Setting range for positioning completed Com- 0 to Online ing com- range mand 1,073,741,824 pletion unit width 1 Pn524 Position- Setting for proximity range for the Positioning Com- 1 to Online ing com- Proximity Flag. mand 1,073,741,824 pletion unit width 2...
- Page 205 Servo Parameter Area Section 4-5 ■ Control Function Parameters Param- Parame- Param- Contents Default Unit Setting range Enable Details eter No. ter name eter setting setting Digit Name Set- Explanation size ting Pn800 Commu- Not used. (Do not nications change the control setting.)
- Page 206 (Do not change the setting.) Not used. (Do not change the setting.) Not used. (Do not change the setting.) Sets the detection range for the Origin Stop PN803 Zero Com- 0 to 250 Online point mand Flag. width unit −1073741823...
-
Page 207: Common Operating Memory Area
Common Operating Memory Area Overview The area allocated as the Common Operating Memory Area is contained in the CPU Bus Unit Area within the CPU Unit's CIO Area. The beginning word of the Common Operating Memory Area is determined by the unit number set for the PCU using the following equation. - Page 208 Commands are sent to the PCU when the respective bit in the output memory area turns ON or while the respective bit is ON. The common PCU status and MECHATROLINK communications status are input from the PCU to the input...
-
Page 209: Common Operating Memory Area Words
Common Operating Memory Area Words The memory allocation of the Common Operating Memory Area is shown in the following table. For details on functions and operations of each word, such as operation timing, refer to the section given in the Details column. - Page 210 These bits are reserved by the by the system). system. Do not use. Note The REJOIN Bit and the Axes to Connect parameter are supported for unit version 2.0 or later. The allocated bit and word are not used for earlier unit versions.
- Page 211 Section 4-6 Common Operating Memory Area n = CIO 1500 + (unit number × 25) Common Operating Input Memory Area Word Bits Category Name Operation Details Input n+15 00 to 11 PCU com- Not used (reserved These bits are reserved by the...
- Page 212 1 to 16. cations Status Axis 2 communica- Unit) bits tions status The bits will turn ON if the cor- responding axes registered in Axis 3 communica- the scan list are communicat- tions status ing normally. Axis 4 communica-...
-
Page 213: Axis Operating Output Memory Areas
The designated beginning word corresponds to the beginning word of the area for axis 1, and the other areas are allocated words in sequence up to the highest axis number registered in the scan list. For details on area allocations, refer to 6-2-2 Scan List and PCU Area Allocations. -
Page 214: Axis Operating Output Memory Area Allocations
Axis Operating Output Memory Area Allocations The memory allocation of the Axis Operating Output Memory Areas is shown in the following table. For details on functions and operations of each word, such as operation timing, refer to the section given in the Details column. - Page 215 SPEED CONTROL Starts speed control using the 10-5 Speed Control speed command value for speed control as the target speed when this bit turns ON. TORQUE CON- Starts torque control using the 10-6 Torque Control TROL torque command value when this bit turns ON.
- Page 216 (rightmost word) Torque command value (leftmost word) a+10 Position/ Option command Set the command value of the 9-7 Linear Interpola- speed/ value 1 auxiliary functions for position/ tion torque con- (rightmost word) speed/torque control, such as...
- Page 217 Specifies the torque limit in rent limit designation the reverse direction for axis operation. a+17 Operating Servo Parameter No. Specifies the parameter num- 5-3 Transferring data for ber for the Servo Parameters Servo Parameters transferring to be written from or read to Servo the CPU Unit.
-
Page 218: Axis Operating Output Memory Area Priority
Note (1) Allocated in Axis Operating Output Memory Areas for axis 1 and axis 5 for Position Control Unit Ver. 1.1 or later. These bits are not used in the Axis Operating Output Memory Areas for other axes. (2) Allocated in Axis Operating Output Memory Area for axis 1 for Position Control Unit Ver. - Page 219 × Other than above status ❍: Execution possible ×: A multistart error (axis error code: 3050) will occur and the function will not be executed. ---: Execution not possible (ignored) Note: The above table assumes that the conditions required for executing jog-...
- Page 220 × SERVO LOCK ❍: Execution possible ×: A multistart error (axis error code: 3050) will occur and the function will not be executed. ---: Execution not possible (ignored) Note: The above table assumes that the conditions required for executing jog-...
- Page 221 RESET, and EMERGENCY STOP. All other operation functions are disabled while the DECELERATION STOP Bit is ON. ABSOLUTE/RELATIVE A Multistart Error (error code: 3050) will occur if these MOVEMENT (with commands are executed at the same time. INTERRUPT FEEDING) ORIGIN SEARCH...
-
Page 222: Axis Operating Input Memory Areas
The designated beginning word corresponds to the beginning word of the area for axis 1, and the other areas are allocated words in sequence up to the highest axis number registered in the scan list. For details on area allocations, refer to 6-2-2 Scan List and PCU Area Allocations. -
Page 223: Axis Operating Input Memory Area Allocations
4-8-2 Axis Operating Input Memory Area Allocations The memory allocation of the Axis Operating Input Memory Areas is shown in the following table. For details on functions and operations of each word, such as operation timing, refer to the section given in the Details column. - Page 224 Axis Operating Input Memory Areas Word Bits Category Name Function Details Input Axis Con- No Origin Flag ON when the origin is not 4-8-3 Axis Control (PCU trol Status established. Status Flags to CPU Flags 8-2 Origin Search Unit) Operation...
- Page 225 Servo Sta- Reserved by the sys- Used by the PCU system. (PCU tus Flags tem. to CPU Servo ON (SVON) ON while Servo Drive is in 4-8-4 Servo Status Unit) Flag Servo lock status. Flags 10-1 Servo Lock/ Unlock Main Power ON Flag...
- Page 226 Axis Operating Input Memory Areas Word Bits Category Name Function Details Input External I/O Forward rotation limit Returns the status of I/O sig- 4-8-5 External I/O (PCU status input nals for each axis. Status Bits to CPU Reverse rotation limit 1: Signal valid...
- Page 227 Note Allocated in Axis Operating Input Memory Areas for axis 1 and axis 5 for Posi- tion Control Unit Ver. 1.1 or later. These bits are not used in the Axis Operat- ing Output Memory Areas for other axes.
-
Page 228: Axis Control Status Flags
Transferring Servo Parameters. Receiving Command Flag Word Function This flag turns ON when the PCU is in the process of receiving any of the fol- lowing operating commands. ABSOLUTE MOVEMENT (including INTERRUPT FEEDING), RELATIVE MOVEMENT (including INTERRUPT FEEDING), ORIGIN SEARCH, ORI-... - Page 229 The PCU turns ON the Receiving Command Flag when an operating com- mand is received from the CPU Unit, and the flag remains ON for at least CPU Unit cycle time. The flag turns OFF when the command reception processing is completed.
- Page 230 PCU Positioning Completed Flag will not turn ON if the set value for the Positioning Completion Range 1 is too small. Adjust the set value for the Positioning Completion Range 1 to suit the...
- Page 231 SERVO LOCK. The established origin is held even if SERVO UNLOCK is exe- cuted, and will not be set to no origin status. No origin status (No Origin Flag ON) occurs under the following conditions.
- Page 232 Word Function This flag turns ON to indicate that the Position Control Unit is executing one of the following operating commands. The flag will turn ON when the operation command is started and remain ON for at least one cycle time of the CPU Unit.
- Page 233 (stop) position (i.e., when sending the command to the Servo Drive is com- pleted) regardless of the axis feedback position. This flag then turns OFF when the power is turned ON, a connection is released, or when another axis operation is started.
-
Page 234: Servo Status Flags
Axis Operating Input Memory Areas 4-8-4 Servo Status Flags The Servo Status Flags (word b+1) are flags that monitor the control status of the Servo Drive. This enables monitoring of the Servo Drive control status (position, speed, torque control loop). - Page 235 This flag turns ON when the SERVO LOCK Bit (a+1, bit 00) in the Axis Oper- ating Output Memory Area turns ON, and turns OFF when the SERVO UNLOCK Bit (a+1, bit 01) turns ON or an error that sets the Servo in free run state occurs.
- Page 236 This flag turns ON when the command position reaches the target (stop) position (Sending position control command to Servo Drive completed), and the feedback position is within the range set for the target (stop) posi- tion Servo Parameter Positioning Completion Range 1 (Pn431 for R88D- KN@, Pn060 for R88D-GN@, Pn500 for R88D-WT@, and Pn522 for R88D- WN@-ML2 and SMARTSTEP Junior).
- Page 237 Zero Speed Flag (during Speed Control) Word Function The function of these flags depends on whether position control or speed con- trol is being used. During Position Control: Distribution Completed Flag This flag turns ON when the command position reaches the target (stop) position (When sending the position control command to Servo Drive is completed).
- Page 238 This flag turns ON when the Servomotor's output torque is limited by the torque limit. For W-series Servo Drives, the torque limit will be the lowest among all the limit values that are enabled for the torque limits specified in Forward Torque...
-
Page 239: External I/O Status Bits
Refer to 10-8 Software Limits. 4-8-5 External I/O Status Bits The External I/O Status Bits (word b + 3) show the I/O status of the I/O signals allocated to the Servo Drive. b = Beginning word of Axis Operating Input Areas specified in Common Parameters + (Axis No. -
Page 240: Expanded Monitoring
When using a G5-series Servo Drive or W-series Servo Drive, the allocation and polarity of Servo Drive input signals can be set in the Servo Parameters, but the external I/O status depends on the polarity of the Servo Drive's input... - Page 241 + 12, b + 13). The information to be monitored by each is selected using Mon- itor 1 type (Word a + 15, bits 00 to 03) and Monitor 2 type (Word a + 15, bits 04 to 07) in the Axis Operating Output Memory Areas.
- Page 242 For further details on operation timing, refer to 10-6 Torque Control. Note (1) Control data is used to monitor the control status of the Servo Drive. The resolution of the monitor value depends on the specifications of the con- nected Servo Drive.
- Page 243 (2) If MECHATROLINK communications are stopped (connection released) during speed or torque control and MECHATROLINK communications are restarted to execute SERVO LOCK (Servo ON), the power to the Ser- vomotor will be recovered with the previous control mode maintained. At this point, the PCU cannot obtain correct monitor values for speed or torque monitor in its expanded monitoring.
- Page 244 Section 4-8 Axis Operating Input Memory Areas...
-
Page 245: Transferring And Saving Data
Transferring PCU Parameters ........ -
Page 246: Transferring Data
• Using the Support Software to transfer parameters to and from a Win- dows computer connected to the CPU Unit • Using the bits in the Operating Memory Areas allocated to the PCU in the CPU Unit to transfer parameters to and from I/O Memory in the CPU Unit... - Page 247 TER, and SAVE SERVO PARAMETER Bits allocated in the Axis Operating Memory Areas. Servo Parameters for a single axis are written and read by parameter by spec- ifying the parameter number. Parameters for different axes can be transferred at the same time.
-
Page 248: Transferring Pcu Parameters
PCU power is turned ON or the Unit is restarted, and enables them as operating parameters. Parameters transferred to the PCU using the WRITE DATA Bit will be lost if the PCU power is turned OFF or the Unit is restarted. - Page 249 (Unit error code: 0021) will occur and data will not be written to the PCU. (5) Do not restart the PCU or turn OFF the power to the PLC while data is being written. The data will not be transferred correctly, and normal PCU operations may not be possible.
- Page 250 1843 hex 0000 Timing Chart for Writing Data can be written to the PCU during axis operation if the Unit Busy Flag is Data to the PCU not ON (i.e., except when the PCU is initializing or reading/writing Memory Card backup data). WRITE DATA, READ DATA, and SAVE DATA cannot be executed at the same time.
-
Page 251: Reading Pcu Parameters
(PCU initializing or reading/writing Memory Card backup data). (2) If READ DATA is executed while data is being transferred, a Multistart Er- ror (Unit error code: 0021) will occur and data will not be read from the PCU. Data reading starts when the READ DATA Bit in the Common Operating Mem- ory Area turns ON. - Page 252 1843 hex 0000 hex Timing Chart for Reading Data can be read from the PCU during axis operation if the Unit Busy Flag is Data From the PCU not ON (i.e., except when the PCU is initializing or reading/writing Memory Card backup data).
-
Page 253: Saving Pcu Parameters
PCU. (3) Do not restart the PCU or turn OFF the power to the PLC while data is being saved. Doing so may result in damage to the PCU's internal flash memory and the PCU may not operate normally. -
Page 254: Transferring Servo Parameters
Data can be saved to the PCU while MECHATROLINK communications are Data to the PCU stopped if the Unit Busy Flag is not ON (i.e., except when the PCU is initializ- ing or reading/writing Memory Card backup data). SAVE DATA, WRITE DATA, and READ DATA cannot be executed at the same time. -
Page 255: Writing Servo Parameters
Multistart Error (axis error code: 3050) will occur and the Servo Parame- ter will not be written. (2) Do not restart the PCU or turn OFF the power to the PLC while writing a Servo Parameter. Doing so may result in parameters not being trans- ferred correctly and cause unexpected operations. - Page 256 Servo Parameter Transferring Flag (ON while transferring data) a = Beginning word of Axis Operating Output Areas specified in Common Parameters + (Axis No.−1) × 25 b = Beginning word of Axis Operating Input Areas specified in Common Parameters + (Axis No.−1) × 25...
-
Page 257: Reading Servo Parameters
Flag (word b, bit 14) turns OFF. If an error occurs during Servo Parameter transfer, the Error Flag (word b, bit 12) or the Warning Flag (word b, bit 11) will turn ON, and the corresponding axis error (warning) code is input in word b+4 of the Axis Operating Input Memory Area. - Page 258 (word b + 15). a = Beginning word of Axis Operating Output Areas specified in Common Parameters + (Axis No. −1) × 25 b = Beginning word of Axis Operating Input Areas specified in Common Parameters + (Axis No. −1) × 25...
-
Page 259: Saving Servo Parameters
If an error occurs while transferring Servo Parameters, the Error Flag (word b, bit 12) or the Warning Flag (word b, bit 11) will turn ON, and the correspond- ing axis error (warning) code will be input in word b+4 of the Axis Operating Input Memory Area. - Page 260 Multistart Error (axis error code: 3050) will occur and the Servo Parame- ter will not be saved. (3) Do not restart the PCU or turn OFF the power to the PLC while a Servo Parameter is being saved. Doing so may result in the parameter not being saved correctly and cause unexpected operations.
- Page 261 Servo Parameters Transferring Flag (ON while transferring) a = Beginning word of Axis Operating Output Areas specified in Common Parameters + (Axis No. −1) × 25 b = Beginning word of Axis Operating Input Areas specified in Common Parameters + (Axis No. −1) × 25...
-
Page 262: Device Setup
If an error occurs while executing SAVE SERVO PARAMETER, the Error Flag (word b, bit 12) or the Warning Flag (word b, bit 11) will turn ON, and the cor- responding axis error (warning) code will be input in word b+4 of the Axis Operating Input Memory Area. - Page 263 (ON while executing) a = Beginning word of Axis Operating Output Areas specified in Common Parameters + (Axis No. −1) × 25 b = Beginning word of Axis Operating Input Areas specified in Common Parameters + (Axis No. −1) × 25...
- Page 264 Section 5-3 Transferring Servo Parameters...
-
Page 265: Mechatrolink
MECHATROLINK Settings ........ -
Page 266: Mechatrolink Overview
This PCU is designed to be used with MECHATROLINK-II. The maximum compatible Devices number of stations that can be connected to the PCU is 16, and the station Supported by PCU addresses of the MECHATROLINK-compatible devices must be set in the range 1 to 16. -
Page 267: Mechatrolink Settings
(For details, refer to 3-1-2 MECHATROLINK-II I/F Unit.) The version of R88D- WT@ W-series Servo Drives is shown on the nameplate located on the side of the Servo Drive. Make sure that the Servo Drive is version 39 or later. Earlier versions will not function properly. - Page 268 PCU's internal addresses from 183C to 1843 hex, as shown in the following table. To allocate an axis to the Servo Drive, set the data to 40 hex and when an axis is not used, set the data to 00 hex. (Nothing is registered for the default setting.) Up to 16 axes can be allocated for the CS1W/CJ1W-NCF71,...
-
Page 269: Scan List And Pcu Area Allocations
6-2-2 Scan List and PCU Area Allocations Words are allocated to the PCU in the Work Area in the CPU Unit for use as Axis Operating Output Memory Areas and Axis Operating Input Memory Areas for the Servo Drives registered in the scan list. An output area of 25 words and an input area of 25 words are allocated to each axis according to the axis number registered in the scan list. - Page 270 Axis 7 Output Area:CIO 250 to CIO 274; Axis 7 Input Area:CIO 650 to CIO 674 Axes 1, 3, 4, and 6 are not used, but are still allocated words in the PCU. These words cannot be used as work words.
-
Page 271: Mechatrolink Communications Settings
MECHATROLINK-II communications is connected to the PCU, the setting range for the transfer cycle is 0.5 to 4 ms. When a G5-series Servo Drive or a G-series Servo Drive is connected to the PCU, the setting range for... - Page 272 The actual communi- cations cycle (data refresh cycle) is a time cycle that is a multiple of the trans- fer cycle's set value. The set value for the communications cycle is determined by the number of connected MECHATROLINK devices and depends on the PCU communications processing.
- Page 273 For example, if up to 3 Servo Drives (axis number 1 to 3) equipped with FNY- NS115 MECHATROLINK-II I/F Unit are connected to the PCU, either set the transfer cycle to 0.5 ms min.
- Page 274 Servo Drive, or the SMARTSTEP Junior Servo Drive to the PCU, set the transfer cycle to 4 ms max. The PCU default settings are 1.0 ms for the transfer cycle and 3 for the com- munications cycle (multiplier 3: 1.0 ms × 3 = 3.0 ms). Without changing the...
- Page 275 Number of Min. set values when setting the absolute encoder zero point position offset using an origin search devices Linear interpolation not...
-
Page 276: Mechatrolink Communications Control
When a connection is released, the active axis is put in the Servo free run state. For all axes registered in the scan list, the status that is input in the Axis Oper- ating Input Memory Areas for each axis becomes the initial status (non-exe- cuting status), except for the Error Flag and axis error code. -
Page 277: Mechatrolink Communications Status
The Connection Status Flag turns OFF when the connection is released. The Connection Status Flag is allocated in CIO 1516 + (unit number × 25), bit 15. Common Operating Memory Area (Input) - Page 278 Flags will not change unless communications are disconnected (including Unit errors that required disconnection). With unit version 2.0 or later, the Axis Communications Status Flags will turn OFF after connections have been established whenever axis operation becomes impossible due to a communications error (synchronous communi- cations alarm or communications alarm).
- Page 279 Same as above for axis 16. n = CIO 1500 + (unit number × 25) Bits 00 to 15 correspond to the communications status for axes 1 to Word n+22 The bits will turn ON (1) if the corresponding axes registered in the scan list are communicating normally.
- Page 280 Command Flags or Busy Flags for the connected axes when a connection is established or released. n = CIO 1500 + (unit number × 25) b = Beginning word of Axis Operating Input Areas specified in Common Parameters + (Axis No. −1) × 25 CPU Unit Servo Drives...
- Page 281 ■ PCUs with Unit Version 1.3 or Later Axis operation is possible for axes that are registered in the scan list and for which MECHATROLINK communications was started (i.e., axes for which Axis Communications Status Flags are ON), regardless of whether an alarm is present in the Servo Drive or whether the connected axes match the scan list.
-
Page 282: Mechatrolink Communications Errors
In this example, the axes for which MECHATROLINK communications can actually be started are 1, 3, and 4. This does not match the axes registered in the scan list (i.e., axes 1 to 5), so an MLK initialization error (unit error code 0020 hex) occurs. - Page 283 For PCUs with unit version 1.2 or earlier, operation will not be possible for all axes registered in the scan list. For PCUs with unit version 1.3 or later, all or part of the axis operations will be possible assuming that MECHATROLINK communications can be established (i.e., if the Axis Communications Status...
- Page 284 MECHATROLINK communications, such as not receiving communications data. The corresponding axis will stop oper- ating if this alarm occurs according to the stop method that is set in the Servo Drive for when alarms occur.
- Page 285 Memory Areas of the PCU, and the corresponding error code is input in the axis error code word. After the cause of the error is removed, the axis error is cleared by turning ON the ERROR RESET Bit in the Axis Operating Output Memory Area. When clearing the axis error, make sure that the ERROR RESET Bit will remain ON until the Busy Flag for the corresponding axis turns ON.
-
Page 286: Rejoining The Connection
This function can be used only with Position Control Units with unit version 2.0 or later. If any axis registered in the scan list is in either of the following conditions, the error cannot be cleared with the normal error reset procedure and axis opera- tions will not be possible from the Position Control Unit. - Page 287 TROLINK communications is performed in the same way as when a connec- tion is established. This can be used to restart communications for any axes registered in the scan list that are not part of the connection or for which axis operations are not possible due to a communications error.
- Page 288 When executing processing for an axis to rejoin a connection, the Unit Busy Flag will turn ON for a minimum of one scan time and until the Axis Communi- cations Status Flags turn ON for the axes being processed or until a MLK ini- tialization error (Unit error code: 0020 (hex)) occurs after the REJOIN command bit is turned ON.
-
Page 289: Specifying The Axes To Connect
Status Flag turns ON. n = CIO 1500 + (unit number × 25) b = First word specified in the Common Parameters for the Axis Operating Input Memory Area + (Axis No. −1) × 25 6-3-5 Specifying the Axes to Connect The Axes to Connect parameter can be used to temporarily disable MECHA- TROLINK communications for one or more axes registered in the scan list. - Page 290 Axes 3 and 4: MECHATROLINK communications not started In this case, axes 3 and 4 are treated as if they are not registered in the scan list and an MLK initialization error does not occur in the Position Control Unit.
-
Page 291: Standard Settings For Servo Drives Using Mechatrolink
MECHATROLINK communica- tions cycle. If the input signal width is shorter than the communications cycle, the PCU will not be able to detect the input signal, and operation will not be performed normally. -
Page 292: G-Series Servo Drive Settings
TROLINK-II communications) is used, the default settings for the Servo Drive are the standard settings when the MECHATROLINK communications is used. Compulsory Parameter The following Servo Parameter must be set to enable PCU control. Do not Settings change this setting. Pn005 Communications Control... -
Page 293: W-Series Servo Drive Settings (R88D-Wt@ Equipped With Fny-Ns115)
Standard Settings for Servo Drives Using MECHATROLINK Section 6-4 the PCU will not be able to detect the input signal, and operation will not be performed normally. 6-4-3 W-series Servo Drive Settings (R88D-WT@ Equipped with FNY- NS115) When the R88D-WT@ W-series Servo Drive equipped with a FNY-NS115 MECHATROLINK-II I/F Unit is used, settings for some parameters of the W- series user constants (Servo Parameters) may be limited. - Page 294 The MECHATROLINK communications errors A.E6 (communications errors) and A.E5 (synchronization errors) are used when the PCU is controlling com- munications. Make sure to set this parameter so that these errors are always detected. Leave Pn800.0 set to the default setting 0 (detects communications errors (A.E6) and synchronization errors (A.E5)).
- Page 295 Note The PCU uses the forward drive prohibited input, reverse drive prohibited input, and origin return deceleration limit switch allocated in the Servo Drive’s external inputs as the forward rotation limit input signal, reverse rotation limit input signal, and origin proximity input signal, respectively. Make sure that these input signals maintain a signal width no shorter than the MECHA- TROLINK communications cycle.
-
Page 296: With Built-In Mechatrolink-Ii Communications)
MECHATROLINK-II communications is used, the Servo Drive’s default set- tings are used as the standard settings for MECHATROLINK communications. Compulsory Parameter The following Servo parameters must be set to enable PCU control. Do not Settings change this setting. Pn800.0 Communications Control: MECHATROLINK Communications... -
Page 297: Smartstep Junior Servo Drive Settings (R7D-Zn@-Ml2 With Built-In Mechatrolink-Ii Communications)
MECHATROLINK-II communications is used, the Servo Drive’s default settings are used as the standard settings for MECHATROLINK com- munications. Compulsory Parameter The following Servo parameter must be set to enable PCU control. Do not Settings change this setting. Pn800.1 Communications Control: Warning Check Mask... - Page 298 STOP Note The PCU uses the forward drive inhibit input, reverse drive inhibit input, and origin proximity input allocated in the Servo Drive’s external inputs as the for- ward rotation limit input signal, reverse rotation limit input signal, and origin proximity input signal, respectively.
- Page 299 Position Control ........
-
Page 300: Pcu Control System
PCU Control System Section 7-1 PCU Control System This section describes the configuration, principles, and basic information on position control when using a control system configured with a PCU and a W-series Servo Drive. 7-1-1 Control System Configuration and Principles... -
Page 301: Control Units
(denominator) 1073741824 Set the electronic gear ratio such that 0.01 ≤ G1/G2 ≤ 100 when using R88D- GN@ G-series Servo Drives, R88D-WT@ W-series Servo Drives, or SMART- STEP Junior Servo Drives and such that 0.001 ≤ G1/G2 ≤ 1000 when using R88D-KN@-ML2 G5-series Servo Drives or R88D-WN@-ML2 W-series Servo Drives. -
Page 302: Control Units For Speed/Torque Control
(pulses/mm) P (mm/rotation) If the command unit used is 0.01 mm (= 10 μm), the unit is converted by mul- tiplying the travel distance per encoder resolution pulse by 100, and the elec- tronic gear ratio is set as follows: R (pulses/rotation) ×... -
Page 303: Units Of The Pcu's Main Controlled Variables
0.001% (percentage of Servomo- tor's momentary maxi- mum torque) The units for speed and torque depend on the control mode (position, speed, or torque control). For details, refer to 10-5 Speed Control, and 10-6 Torque Control. Note The resolution of the controlled variables that can be monitored by the PCU depends on the specifications of the connected Servo Drive. -
Page 304: Coordinate System And Present Position
(Servomo- tor) position, should exist. The PCU outputs to the I/O memory area allocated for each axis in the CPU Unit the amount of feedback indicating the actual position of the machine (Servomotor) as the feedback present position and the position given in the command as the command present position. -
Page 305: Acceleration And Deceleration Operations
If the physical position is point P in the diagram, the physical position that can be moved to using ABSOLUTE MOVEMENT or RELATIVE MOVEMENT is 2,147,483,648 to 6,442,450,943 (command units). -
Page 306: Acceleration/Deceleration Settings
Do not change the acceleration/deceleration constants during axis operation (i.e., while the Busy Flag for the corresponding axis is ON due to execution of an operating command). Changing parameters while the axis is operating may result in incorrect positioning or other malfunction. - Page 307 Servo parameters. The setting of the command unit can cause the setting unit for the accelera- tion/deceleration constants to become imprecise or changes in the setting can...
-
Page 308: Acceleration/Deceleration Filter Settings
] = 200 [ms] If the precision of the command unit is increased by 2 digits to 0.001 mm, the acceleration constant would be set to 400 to reach the same target speed of 1,000 mm/s (1000.000 mm/s = 1,000,000 command units/s) in the same time of 250 ms. - Page 309 5100 ported time) For W-series Servo Drives, Pn810 and Pn811 must be set when using an exponential curve, and Pn812 must be set when using an S-curve for the acceleration/deceleration curve. For G-series Servo Drives, Pn10E must be set when using an S-curve.
- Page 310 Bias (Pn810) and Exponential Acceleration/Deceleration Time Constant (Pn811). The speed set in Exponential Acceleration/Decelera- tion Bias (Pn810) is used as the start speed. The time until reaching 63.2% of the difference between the speed command value and the start speed is set in the Exponential Acceleration/Deceleration Time Constant (Pn811).
- Page 311 In the S-curve acceleration/deceleration curve, a moving average is taken based on the Moving Average Time Interval (Pn812 (this is possible with Pn10E in the G series Servo Drive and with Pn818 in the G5 series Servo Drive)) for the linear acceleration/deceleration curve specified in Pn80A to...
-
Page 312: Origin Search Acceleration/Deceleration Operations
W Series, Pn107 and Pn10A for G Series, Pn811 and Pn814 for G5 Series). When the final travel distance to return to zero point (origin) is a negative or small value, the axis will decelerate to a stop as shown in the following dia- gram, and then reverse and perform the set positioning. -
Page 313: Acceleration And Deceleration Operations During Speed Control
If the reversal mode operation using limit input is set, however, the stop opera- tion when a limit input signal is input will depend on the Servo Drive setting. For details on stop operations when using limit input signal inputs, refer to 7-5 Limit Input Operations and Reversal Mode Operation Using Limit Inputs in 8- 2-4 Origin Search Operation. -
Page 314: Limit Input Operations
At the PCU, a software limit error occurs, causing an emergency stop. 1. This operation occurs when a limit input signal is input in the direction opposite to the travel direction due to incorrect wiring or other cause. 2. For details on software limit functions, refer to 10-8 Software Limits. - Page 315 When using a G5-series Servo Drive, a G-series Servo Drive or a W-series Servo Drive, the Servomotor's stop operation at the Servo Drive when a limit input signal is input or a software limit is reached is set in the Servo Parame- ters for limit input operations.
- Page 316 0 to 300 torque Pn066 is used to set the stop operation of the Servomotor when a for- ward/reverse rotation limit is input or a forward/reverse software limit is reached. The parameter size of Pn066 is the value to be specified when trans- ferring the Servo Parameter Pn066 including the above settings.
- Page 317 Pn001.1 is used to set the stop operation of the Servomotor when a for- ward/reverse rotation limit input is input or a forward/reverse software limit is reached. The parameter size of Pn001.1 in the above table is the set value to be specified when transferring the Servo Parameter Pn001 (including Pn001.1).
- Page 318 Servo locked Note The brake interlock output (BKIR output) will not function while there is a limit input signal (Servo Drive's forwarded drive prohibited signal or reverse drive prohibited signal) or while the Servo is unlocked as the result of reaching a...
-
Page 319: Defining The Origin
Origin Search Preset ........ -
Page 320: Overview
When performing positioning for a system in terms of absolute positions in that system, it is first necessary to define the origin. For example, in the X-Y plane shown below, before positioning to (X, Y) = (100 mm, 200 mm), the ori- gin (0,0) of the machine must be established, i.e., it is necessary to define the... -
Page 321: Origin Search Operation
ON. When the executable functions shown in the above table are executed by the PCU without a defined origin, the present position will be calculated from the position of the axis (0) when the power was turned ON with no origin established. -
Page 322: Origin Search Procedure
Command present position (leftmost word) a: Beginning word of Axis Operating Output Areas specified in Common Parameters + (Axis No. −1) × 25 b: Beginning word of Axis Operating Input Areas specified in Common Parameters + (Axis No. −1) × 25 d: 1860 hex + (Axis No. -
Page 323: Data Settings Required For Origin Search
Set the origin search speed data in the speed command value of the Axis Operating Output Memory Area. 8. Execute ORIGIN SEARCH. When using the PCU for the first time or to change the PCU parameter set- tings, steps 1 to 3 must be performed. Note... - Page 324 1: Absolute encoder d = 1860 hex + (Axis No. −1) × 14 hex * The reversal mode 3 setting for the origin search operation, the origin detec- tion method, and the origin search preset can be used only with Position Control Units with unit version 2.0 or later.
- Page 325 Use this parameter to select the origin input signal to be used with origin search. When external latch signals 1 to 3 are used as the origin input signal, the external latch signal used must be allocated in the Servo Drive's external input allocations.
- Page 326 Pn406 for W Series) sets the stopping torque when the stop operation for limit inputs is set to 1 (decelerates to a stop at set torque or lower, and locks Servo in zero clamp mode), or 2 (decelerates to a stop at set torque or lower, and puts Servo in free run state).
- Page 327 These parameter settings are disabled if a Servomotor with incremental encoder is used. Set this parameter to 1 or 2 for a G-series Servo Drive, and 1 for a W-series Servo Drive, if using a Servomotor with absolute encoder as a Servomotor with incremental encoder.
- Page 328 32767 units/s Accelera- Pn10E Moving average time 0.1 ms 0 to 5100 2 tion/ decelera- tion filters W-series and SMARTSTEP Junior Acceleration/Deceleration Constants Type Parame- Parameter name Unit Setting Parame- Default W Series SMART- ter No. range ter size...
- Page 329 Pn80B and Pn80E only. When using an exponential curve for the acceleration/deceleration curve, Pn810 and Pn811 must be set for W-series Servo Drives. Movement Average Time for W- series Servo Drives (Pn812) or Moving Average Time for G-series Servo Drives (Pn10E) must be set when using an S-curve for the acceleration/decel- eration curve.
- Page 330 Position Control Unit when one of the following origin search operation patterns are selected. • When the origin detection method is set to any value except for 0 (Origin proximity input signal reversal) • When setting a zero point position offset for an origin search using an...
- Page 331 1: Use forward torque limit Supported Supported Not sup- limit ported Reverse rotation current 1: Use reverse torque limit Supported Supported Not sup- limit ported a = Beginning word of Axis Operating Output Areas specified in Common Parameters + (Axis No. −1) × 25...
- Page 332 Section 8-2 The speed command value specifies the initial origin search speed until the origin proximity signal is input. When an origin search is started with the speed command set to 0 (command units/s), a Speed Designation Error (axis error code: 3061) will occur and the origin search will not be executed.
-
Page 333: Origin Search Operation
The value is set as the relative travel distance in the origin search direction. When Final Travel Distance to Return to Zero Point (Pn819) is set to a nega- tive or small value, the axis will decelerate to a stop, and then reverse and per- form the set positioning. - Page 334 3: Reversal mode 3 (Can be used only for Position Control Units with unit version 2.0 or later.) If reversal mode 1 is used in the G series, set the Servo Parameter Drive Prohibit Input Selection (Pn004) to 0 or 1.
- Page 335 ORIGIN SEARCH. The forward/reverse rotation limit signal (forward/reverse drive prohibited sig- nal) must be allocated to use a reversal mode. If these input signals are not allocated, ORIGIN SEARCH cannot be executed properly. For details on allocating Servo Drive input signals, refer to 6-4 Standard Settings for Servo Drives Using MECHATROLINK.
- Page 336 Origin proximity signal reversal input signal Origin input signal (Phase Z signal) Speed command value Zero point return approach speed 1 Final travel distance to return to zero point Zero point return approach speed 2 Origin search Origin search direction...
- Page 337 Start the origin search after moving the position where the limit input in the origin search direction does not turn ON by jogging. • If the origin search is started when the limit input is ON in the origin search direction, an error terminates when the origin search operation is completed (data setting error, error code: 3099).
- Page 338 2.0 or later) Origin input signal (Phase Z signal) Speed command value Zero point return approach speed 1 Final travel distance to return to zero point Zero point return approach speed 2 Origin search Origin search direction reverse direction...
- Page 339 Origin input signal (Phase Z signal) Speed command value Zero point return approach speed 1 Final travel distance to return to zero point Zero point return approach speed 2 Origin search Origin search direction reverse direction Stop...
- Page 340 Start Limit input signal in origin search direction 2: Not use origin proximity Cannot be set. (An axis parameter check error (error code: 3091) will occur when the data input signal (unit version 2.0 is transferred.) or later)
- Page 341 If the Servo Parameter (Pn505 for G5 Series, Pn066 for G Series and Pn001.1 for W Series) is set to stop operation with a free run when a limit input is input when using a G-series or a W-series Servo Drive, the momen- tum of the previous operation may cause the machine to run in the limit input direction.
-
Page 342: Starting Origin Search
Pn511 for G5 Series, the emergency stop torque set in Pn06E for G Series or Pn406 for W Series or lower and locks Servo in zero clamp mode) or 2 (decel- erates to a stop using the immediate stop torque set in Pn511 for G5 Series,... -
Page 343: Origin Search Preset
(word b, bit 13) a = Beginning word of Axis Operating Output Areas specified in Common Parameters + (Axis No. −1) × 25 b = Beginning word of Axis Operating Input Areas specified in Common Parameters + (Axis No. −1) × 25... - Page 344 = 1860 hex + (Axis No. −1) × 14 hex The position command value set in the Axis Operating Output Memory Areas is used as the preset value to be set after completing an origin search. Axis Operating Output...
-
Page 345: Present Position Preset
Axis Operating Output Memory Areas. during present position preset, the Busy Flag is ON (1 cycle time min.). The Busy Flag turns OFF to indicate that pre- set operation has been completed. After this, the origin is established. If the present position is changed to “0,”... - Page 346 Execute PRESENT POSITION PRESET when the Busy Flag for the corre- sponding axis is OFF. If PRESENT POSITION PRESET is executed while the axis's Busy Flag is ON, a Multistart Error (axis error code: 3050) will occur and PRESENT POSITION PRESET will not be executed. When executing PRESENT POSITION PRESET, make sure that the PRESENT POSITION PRESET Bit will remain ON until the Busy Flag turns ON.
-
Page 347: Origin Return
1 cycle time min. a = Beginning word of Axis Operating Output Areas specified in Common Parameters + (Axis No. −1) × 25 b = Beginning word of Axis Operating Input Areas specified in Common Parameters + (Axis No. −1) × 25... - Page 348 Origin Return Section 8-4 The command unit default setting is pulses. G5-series Acceleration/Deceleration Constants Type Parame- Parameter name Unit Setting Parame- Default ter No. range ter size setting −32768 Accel- Pn811 Linear acceleration constant 10,000 eration/ command to 32767 decel-...
- Page 349 Pn80B and Pn80E only. When using an exponential curve for the acceleration/deceleration curve, Pn810 and Pn811 must be set for W-series Servo Drives. Movement Average Time for W- series Servo Drives (Pn812) or Moving Average Time for G-series Servo Drives (Pn10E) must be set when using an S-curve for the acceleration/decel- eration curve.
- Page 350 Execute ORIGIN RETURN when the Busy Flag for the corresponding axis is OFF. If ORIGIN RETURN is executed while the axis's Busy Flag is ON, a Mul- tistart Error (axis error code: 3050) will occur and ORIGIN RETURN will not be executed.
- Page 351 Control Unit is completed until positioning has been completed. a = Beginning word of Axis Operating Output Areas specified in Common Parameters + (Axis No. −1) × 25 b = Beginning word of Axis Operating Input Areas specified in Common Parameters + (Axis No. −1) × 25...
-
Page 352: Phase Z Margin
ON to OFF until the phase Z was detected. If this value is close to 0 or close to one motor rotation, there is a possibility of origin displacement during origin search. A simple way of reducing the proba-... -
Page 353: Phase Z Margin For Specific Operation Patterns
• When the origin detection method is set to any setting other than 0 (Origin proximity input signal reversal) •... -
Page 354: Absolute Encoder Origin
The absolute encoder's battery backup enables absolute value data to be held even if the power to the CPU Unit (PCU) or Servo Drive is turned OFF. Therefore, after turning ON the power to the CPU Unit (PCU), the saved abso- lute value data can be read, enabling positioning at the present position that existed before the power was turned OFF. -
Page 355: Absolute Encoder Operating Procedure
Beginning word of Common Operating Memory Area: n = CIO 1500 + (unit number × 25) a = Beginning word of Axis Operating Output Areas specified in Common Parameters + (Axis No. −1) × 25 b = Beginning word of Axis Operating Input Areas specified in Common Parameters + (Axis No. −1) × 25 Applicable Servomotors The following Servomotors with absolute encoders support this function. - Page 356 When the origin search operation is executed, the present position is cleared to 0 or, if the origin search preset function is enabled, it is set to the present command value after the origin has been established. Any absolute value data previously read by the Position Control Unit is lost.
-
Page 357: Pcu Data Settings For Using Absolute Encoders
(Set this combination when using an absolute encoder.) If the settings do not match, reading absolute data will not be possible, or another malfunction may occur. Servo Parameter Area Parameters for Using G5-series Absolute Encoders... - Page 358 This parameter sets the offset for the mechanical origin from the absolute encoder's absolute value data. The present position will be the absolute value data that was read added to the value in this parameter, and that position is set as the origin.
-
Page 359: Absolute Encoder Setup
Absolute Encoder Setup The absolute encoder setup must be performed when using the absolute encoder for the first time, initializing the rotation amount to 0, or having left the absolute encoder for a long time without connecting a battery. The following methods can be used to set up the absolute encoder when using a Position Control Unit with unit version 1.2 or later. -
Page 360: Absolute Encoder's Origin (Zero Point) Position Offset Setting
Section 8-6 8-6-5 Absolute Encoder's Origin (Zero Point) Position Offset Setting When Absolute Origin Offset for G Series (Pn200) or Absolute Encoder Zero Point Position Offset for G5 Series/W Series (Pn808) = 0 (Default) 1,2,3... 1. Start MECHATROLINK communications (establish a connection using CONNECT). - Page 361 When setting the absolute encoder's zero point position offset using an origin search, set the position command value (i.e., the present position preset value) to 0 and enable the origin search preset even when the preset value is not being used for the origin search.
-
Page 362: Establishing The Origin Using An Absolute Encoder
= Beginning word of Common Operating Memory Area: n = 1500 + (unit number × 25) b = Beginning word of Axis Operating Input Memory Areas specified in Common Parameters + (Axis No. −1) × 25... - Page 363 = Beginning word of Common Operating Memory Area: n = 1500 + (unit number × 25) a = Beginning word of Axis Operating Output Memory Areas specified in Common Parameters + (Axis No. −1) × 25 b = Beginning word of Axis Operating Input Memory Areas specified in Common Parameters + (Axis No. −1) × 25...
- Page 364 = Beginning word of Common Operating Memory Area: n = 1500 + (unit number × 25) a = Beginning word of Axis Operating Output Memory Areas specified in Common Parameters + (Axis No. −1) × 25 b = Beginning word of Axis Operating Input Memory Areas specified in Common Parameters + (Axis No. −1) × 25...
-
Page 365: Positioning
Direct Operation Procedure ........ -
Page 366: Direct Operation Overview
(leftmost word) a = Beginning word of Axis Operating Output Areas specified in Common Parameters + (Axis No. −1) × 25 b = Beginning word of Axis Operating Input Areas specified in Common Parameters + (Axis No. −1) × 25... -
Page 367: Direct Operation Procedure
Set the positioning data for direct operation in the position command value of the Axis Operating Output Memory Area. Set the speed data for direct operation in the speed command value of the Axis Operating Output Memory Area. 7. Start ABSOLUTE MOVEMENT or RELATIVE MOVEMENT. - Page 368 PCU Data Settings for Direct Operation Section 9-3 G5-series Acceleration/Deceleration Servo Parameters Servo Parameter Area Type Parame- Parameter name Unit Setting Parame- Default ter No. range ter size setting −32768 to Accelera- Pn811 Linear acceleration constant 10,000 command tion/decelera- 32767...
- Page 369 First-step acceleration/deceleration curve operations require parameter set- tings for Pn80B and Pn80E only. For the acceleration/deceleration curve, Pn810 and Pn811 must be set when using an exponential curve, and Pn812 must be set when using an S-curve. The SMARTSTEP Junior Servo Drives do not support the following parame- ters: Pn80A, Pn80C, Pn80D, and Pn80F.
- Page 370 Not sup- limit ported a = Beginning word of Axis Operating Output Areas specified in Common Parameters + (Axis No. −1) × 25 The settings of the following are enabled when the movement command start bit turns ON: Position command value, Acceleration/Deceleration Curve Des- ignation Bit, Interrupt Feeding Designation Bit, and Forward/Reverse Rotation Current Limit Designation Bit.
-
Page 371: Using Direct Operation
= Beginning word of Axis Operating Input Areas specified in Common Parameters + (Axis No. −1) × 25 The Receiving Command Flag turns ON for at least one cycle time when the command to start direct operation is received by the PCU. Use the Receiving Command Flag when starting and changing target positions to control the ON/OFF timing for ABSOLUTE MOVEMENT and RELATIVE MOVEMENT. -
Page 372: Direct Operation Timing Charts
If ABSOLUTE MOVEMENT is executed for an absolute position that exceeds this range, positioning will be performed not to a position based on the present origin, but to a position exceeding the upper or lower limit of the com- mand present position. - Page 373 Busy Flag turns ON. a = Beginning word of Axis Operating Output Areas specified in Common Parameters + (Axis No. −1) × 25 b = Beginning word of Axis Operating Input Areas specified in Common Parameters + (Axis No. −1) × 25...
- Page 374 = Beginning word of Axis Operating Output Areas specified in Common Parameters + (Axis No. −1) × 25 b = Beginning word of Axis Operating Input Areas specified in Common Parameters + (Axis No. −1) × 25...
- Page 375 = Beginning word of Axis Operating Output Areas specified in Common Parameters + (Axis No. −1) × 25 b = Beginning word of Axis Operating Input Areas specified in Common Parameters + (Axis No. −1) × 25...
-
Page 376: Changing Target Position
Target position changed a = Beginning word of Axis Operating Output Areas specified in Common Parameters + (Axis No. −1) × 25 b = Beginning word of Axis Operating Input Areas specified in Common Parameters + (Axis No. −1) × 25... - Page 377 ABSOLUTE MOVEMENT executed to a posi- Travel Distance tion near the present position, positioning will be performed to the target posi- tion after decelerating to a stop and reversing direction. RELATIVE MOVEMENT for position...
-
Page 378: Changing Target Speed
The speed command value is enabled at the I/O refresh after it is set in the Axis Operating Memory Area. The PCU starts changing to the new target speed at the acceleration/deceleration set in the Servo Param- eters when the new speed command value is enabled. -
Page 379: Interrupt Feeding
The specified amount of travel is performed at the speed being used when the external interrupt sig- nal was input. -
Page 380: Data Settings For Using Interrupt Feeding
03: External latch signal 3 input d = 1860 hex + (Axis No. −1) × 14 hex When using external latch signals 1 to 3, the external latch signal to be used must be allocated in the Servo Drive's external input allocations. -
Page 381: Timing Chart For Interrupt Feeding
(Pn814) is used for internal processing in the Position Control Unit when one of the following origin search operation patterns are selected. • When the origin detection method is set to any value except for 0 (Origin proximity input signal reversal) •... -
Page 382: Present Position During Interrupt Feeding
(target position for when no interrupt input signal is input), target speed, and override value can be changed by executing another movement command. Note that, however, in the interval of positioning for the final travel distance for external positioning after the input of the interrupt input signal, another INTERRUPT FEEDING cannot be executed (it will be ignored). -
Page 383: Linear Interpolation
Linear interpolation can be executed for the axes of a Servo Drive connected to the Position Control Unit, using up to four axes in any combination for axes 1 to 4 or axes 5 to 8. - Page 384 Example: Linear Interpolation for 4-axis (Axis 1 to Axis 4) Operation Axis 1 speed = Interpolation speed × Movement of Axis 1 / Total movement Axis 2 speed = Interpolation speed × Movement of Axis 2 / Total movement Axis 3 speed = Interpolation speed ×...
-
Page 385: Linear Interpolation Operation Procedure
Axis Operating Output Memory Area for axis 1 or axis 5, and position and speed command values for individual linear interpolation axes are set in the Axis Operating Output Mem- ory Area for those particular axes. -
Page 386: Setting Data For Linear Interpolation Operation
PCU linear interpolation operations can be executed simultaneously for two combinations of axes, from axes 1 to 4 and axes 5 to 8. For a combination of axes 1 to 4, set the following linear interpolation-related data in the Axis 1 Operating Output Memory Area, and for a combination of axes 5 to 8 set the data in the Axis 5 Operating Output Memory Area. - Page 387 (1) When executing interpolation operations using a combination of axes 5 to 8, the interpolation axis designation and interpolation position designa- tion are made for axes 5 to 8 respectively in the Axis 5 Operating Output Memory Area, in bits 04 to 07 in the corresponding words in the above diagram.
- Page 388 04 to 07 in bits 04 to 07 (Axis 5 Operating Output Memory Area). (Axis 5 to Bits 00 to 03, and bits 04 to 07, correspond respectively to axes 1 to 4 and Axis 8) axes 5 to 8.
- Page 389 (2) The interpolation acceleration time and interpolation deceleration time are set by converting to the units [×10,000 command unit/s2] of the Sec- ond-step Linear Acceleration Constant for W-series Servo Drives (Pn80B), Linear Acceleration Constant for G-series Servo Drives (Pn107)
- Page 390 SETTING or LINEAR INTERPOLATION START) is executed, the linear inter- polation operation status can be checked in the Axis Operating Input Memory Area of the axis (Axis 1 or Axis 5) for which the command was executed. The operation status of axes designated by linear interpolation designation can be checked in the Axis Operating Input Memory Areas for individual interpolation axes.
-
Page 391: Linear Interpolation Operation
Linear Interpolation Setting Completed Flag in the Axis Operating Input Memory Area for axis 1 (or axis 5), and the Busy Flag and Error Flag for the axes designated by the interpolation axis designation, are reset. If the Lin- ear Interpolation Setting Completed Flag for axis 1 (or axis 5) is set, or if an axis designated by the interpolation axis designation is busy (i.e., Busy Flag... - Page 392 5 when a combination of axes 5 to 8 is used. Likewise, “b” indicates the beginning word of the Axis Operating Input Memory Area for axis 1 when a combination of axes 1 to 4 is used, and axis 5 when a combina- tion of axes 5 to 8 is used.
- Page 393 (i.e., while the Linear Interpolation Executing Flag is ON). If it is executed again, it is disabled. It is possible, however, to start an independent linear interpolation for a combination of axes 1 to 4, or of axes 5 to 8, while an operation involving the other combination is already in progress.
- Page 394 The speeds resolved from the interpolation speed command value (in com- mand units/s) are 1,200 for axis 1 and 1,600 for axis 2, but for linear interpola- tion operation the speeds are reduced to the following values in order for the maximum speeds set by the speed command values for individual axes to not be exceeded.
- Page 395 If an alarm in the Servo Drive results in an axis error, the axis for which the error occurred will be stopped according to the stop method set in the Servo Drive, but the other interpolated axes will be decelerated to a stop.
- Page 396 Linear Interpolation Section 9-7...
- Page 397 10-2 Jogging ............10-2-1 Overview of Operation ........
-
Page 398: Servo Lock/Unlock
Execute SERVO LOCK when the Busy Flag for the corresponding axis is OFF. If SERVO LOCK is executed while the axis's Busy Flag is ON, a Multistart Error (axis error code: 3050) will occur and SERVO LOCK will not be exe- cuted. -
Page 399: Jogging
8-6-6 Establishing the Origin Using an Absolute Encoder. a = Beginning word of Axis Operating Output Areas specified in Common Parameters + (Axis No. −1) × 25 b = Beginning word of Axis Operating Input Areas specified in Common Parameters + (Axis No. −1) × 25... -
Page 400: Pcu Data Settings For Jogging Operations
Axis Operating Output Memory Area. 7. Start the jogging operation. When using the PCU for the first time or to change the Common Parameter data, steps 1 and 2 must be performed. After executing SERVO LOCK, WRITE SERVO PARAMETER can be executed to set the acceleration/decel- eration used each time the jogging operation is performed. - Page 401 First-step acceleration/deceleration curve operations require parameter set- tings for Pn80B and Pn80E only. For the acceleration/deceleration curve, Pn810 and Pn811 must be set when using an exponential curve, and Pn812 must be set when using an S-curve. The SMARTSTEP Junior Servo Drives do not support the following parame- ters: Pn80A, Pn80C, Pn80D, and Pn80F.
- Page 402 Parameters + (Axis No. −1) × 25 The direction designation setting when the jogging operation starts (JOG Bit turns ON) is enabled. Even if the designation is changed during jogging, the direction will not change. The settings for the Acceleration/Deceleration Curve Designation Bit, and For- ward/Reverse Rotation Current Limit Designation Bit when jogging starts (JOG Bit turns ON) and stops (JOG Bit turns OFF) are enabled.
-
Page 403: Starting Jogging
Servo Drive. a = Beginning word of Axis Operating Output Areas specified in Common Parameters + (Axis No. −1) × 25 b = Beginning word of Axis Operating Input Areas specified in Common Parameters + (Axis No. −1) × 25... -
Page 404: Override
Override Enable Bit is ON, the target speed is changed by applying the override value that is set in the Axis Operating Output Memory Area. The override can be set from 0.01% to 327.67% in units of 0.01%. The speed command values (Speed command value for speed control in speed control mode) set for direct operation, origin return, jogging, and speed control opera- tions are taken to be 100%. -
Page 405: Torque Limits
= Beginning word of Axis Operating Output Areas specified in Common Parameters + (Axis No. − 1) × 25 b = Beginning word of Axis Operating Input Areas specified in Common Parameters + (Axis No. −1) × 25... -
Page 406: Constant Torque Limits
Servomotor will always be lim- ited by the set ratio of the rated torque. Also by setting the Torque Limit Selec- tion (Pn521), the forward torque limit and reverse torque limit will be as shown in the following table. -
Page 407: Torque Limits Set By Operating Commands
Servo lock status after positioning stops). Note If the axis stops due to an error during axis operation with the torque limit function enabled, the torque limit when stopped will depend on the setting of the Forward/Reverse Current Limit Designation Bit. When the Current Limit... - Page 408 OFF for a minimum of either the PLC cycle time × 2 or the MECHATROLINK communications cycle × 2, whichever is longer. If the time that the movement command bit is OFF is too short, the...
- Page 409 Torque Limits Section 10-4 PCU will not be able to detect the rising edge of the movement command bit, preventing reception of the command.
- Page 410 Servomotor rotation. a = Beginning word of Axis Operating Output Areas specified in Common Parameters + (Axis No. −1) × 25 b = Beginning word of Axis Operating Input Areas specified in Common Parameters + (Axis No. −1) × 25...
- Page 411 Time in which accumulated position deviation is consumed a = Beginning word of Axis Operating Output Areas specified in Common Parameters + (Axis No. −1) × 25 b = Beginning word of Axis Operating Input Areas specified in Common Parameters + (Axis No. −1) × 25...
- Page 412 To prevent this from occurring, set the positioning target position as close to the pushing stop position as possible to minimize the accumulated position deviation during pushing. (See below.)
-
Page 413: Speed Control
Note The DEVIATION COUNTER RESET can be used to reset the remaining posi- tion deviation to 0 for PCUs with unit version 1.3 or later. Refer to 10-10 DEVI- ATION COUNTER RESET for details on DEVIATION COUNTER RESET. 10-5 Speed Control... - Page 414 CONTROL command will be ignored. Be sure that all of these command bits are OFF before executing speed control. The speed command value for speed control is set in units of 0.001% as a ratio of the Servomotor's momentary maximum rotation speed. (The unit is different from that used for the speed command value for position control (command units/s).) The speed command value is specified in the range...
- Page 415 The data length for Pn002.0 is the set value specified to transfer Pn002 (including Pn002.0) when transferring Servo Parameters. Pn502 is set as the detection threshold of the Zero Speed Flag (word b+1, bit 08) in the Axis Operating Input Memory Area. Pn503 is set as the detection width of the Speed Conformity Flag (word b+1, bit 07) in the Axis Operating Input Memory Area.
- Page 416 The allowable setting ranges for speed and torque control, however, are different. When switching between speed and torque control, be sure that the option command value is set within the proper range for the cur- rent type of control.
- Page 417 Command Flag when starting and changing option commands to control the ON/OFF timing for SPEED CONTROL. During speed control, bits 07 and 08 in the Servo Status Flags (word b+1) of the Axis Operating Input Memory Area function as the Speed Conformity Flag and Zero Speed Flag respectively.
- Page 418 (speed command value for speed control: 0%) and the momentary maximum rotation speed of the Servomotor (speed command value for speed control: 100%). The acceleration time and deceleration time for the actual target speed are as follows: Speed command value for speed control (r/min) ×...
- Page 419 Pn013 functions as a forward torque limit value, and Pn522 functions as a reverse torque limit value when the torque limit function is enabled. Option command value 1 (words a+10, a+11) functions as a torque feed forward command value when the torque feed forward function is enabled.
- Page 420 Note PCL ON: When either the external signal Forward Torque Limit or the For- ward Rotation Current Designation (a+1614) is ON. NCL ON: When either the external signal reverse torque limit or the Forward Rotation Current Designation (a+1615) is ON.
- Page 421 Note PCL ON: When either the Forward Torque Limit (CN1 PCL: Pin 7) or Forward Rotation Current Limit Designation (word a+1614) is turned ON. NCL ON: When either the Reverse Torque Limit (CN1 NCL: Pin 8) or Reverse Rotation Current Limit Designation (word a+1615) is turned ON.
- Page 422 ON the SPEED CONTROL Bit again enables the option command values and Current Limit Designation Bits to be changed during operation. The torque limit for speed control set in the option command values can be used together with the torque limit function (refer to 10-4 Torque Limits). When enabling multiple torque limit functions simultaneously, the Servomotor's out- put torque is limited by the minimum torque limit setting.
- Page 423 (unit: 0.001%) is used from when the a = Beginning word of Axis Operating Output Areas specified in Common Parameters + (Axis No. −1) × 25 speed control command is received (when the b = Beginning word of Axis Operating Input Areas specified in Common Parameters + (Axis No. −1) × 25...
-
Page 424: Switching Control Mode
Servo Status Flags in Axis The functions of bits 07 and 08 in the Servo Status Flags of the Axis Operat- Operating Input Memory ing Input Memory Area change depending on whether position control or Area (Word b+1) speed control is used. - Page 425 SERVO LOCK is executed. If operation stops due to an error (except stopping that puts Servo in free run state), the Servomotor stops in position control mode (deceleration stop or emergency stop) and remains in position control mode (Servo lock status) after stopping.
-
Page 426: Torque Control
When switching from the control mode that requires a constant torque limit, such as for pushing or pulling a load, make sure that the torque limit is also enabled for the next operating command to be executed to prevent a sudden change in output torque. - Page 427 Pn321 Speed limit value setting r/min 0 to 20000 Pn317 is used to select the function of the option command value for torque control. The option command value for torque control is described in the following pages. Pn321 is used to set the fixed speed limit for torque control.
- Page 428 Change parameter in the Function Selection Application Switches 2 when using W-series Servo Drives is set to disable using the option com- mand value. Always set the option command value to 0 when it is not be- ing used.
- Page 429 Command Flag when starting and changing option commands to control the ON/OFF timing for TORQUE CONTROL. During torque control, bit 11 in the Servo Status Flags (word b+1) of the Axis Operating Input Memory Area functions as the Speed Limit Status Flag.
- Page 430 1 (words a+10, a+11) as the speed limit value. Option command value 2 is not used. Use set value 0. The data for option command value 1 (speed limit value) is enabled when the bit for TORQUE CONTROL turns ON. Changing option command value 1...
- Page 431 (when the Receiving Command Flag turns OFF) and 1% from when the command to switch to a = Beginning word of Axis Operating Output Areas specified in Common Parameters + (Axis No. −1) × 25 position control or speed control is received (when the b = Beginning word of Axis Operating Input Areas specified in Common Parameters + (Axis No.
- Page 432 Current Limit Des- ignation Bit. during torque control execution, if the Current Limit Designation Bit is not set to ON, the axis stop operation due to error will be executed with the torque limit disabled. To enable the torque limit for axis stop operations due to errors, turn ON the Current Limit Designation Bit while torque control is being executed and set Servo Parameters No.2...
-
Page 433: Backlash Compensation
Same position In the above diagram, after positioning from the positive side, backlash is compensated for up to the amount of the output of pulses set for the backlash compensation either when positioning in the negative direction or when the positioning direction is reversed. -
Page 434: Backlash Compensation Data Settings
Backlash compensation is applied for the first operating command that operates in the opposite direction from which backlash compensation was previously applied. Once backlash compensation has been applied, it will not be applied again as long as operation is continued in the same direc- tion. Compensation amount... - Page 435 Backlash compensation time 0.01ms 0 to 6400 constant The backlash compensation amount is set in Pn101 in command units. The minimum setting unit for the backlash compensation amount, however, depends on the encoder resolution. Backlash Compensation Parameters (R88D-WT@ + FNY-NS115)
-
Page 436: Software Limits
PCU also has a function that mon- itors positioning at a software level. This function is called the “software limit”... -
Page 437: Software Limit Data Settings
The software limit settings are provided in the following pages. Set the soft- ware limits so that the reverse software limit is less than the forward software limit. If the forward software limit is less than or equal to the reverse software limit, the software limit will always be enabled. -
Page 438: Software Limit Operation
= Beginning word of Axis Operating Input Areas specified in Common Parameters + (Axis No. −1) × 25 10-8-4 Software Limit Operation The software limit function operates as described in the following table for the present position when the software limits are set. Software limit function... - Page 439 Designation Error (error code: 3060) will occur when the command is executed. Note The stop operations when the software limit is reached is the same as when limit input signals are input. For details, refer to 7-5 Limit Input Operations.
-
Page 440: Stop Functions
If PRESENT POSITION PRESET is executed for a position beyond the software limit in the direction opposite to the travel direction, the present position will change and a Soft- ware Limit Error will occur for the software limit in the opposite direction. - Page 441 DECELERATION STOP can be executed for an axis that is servo-locked as long as SERVO UNLOCK, DEVIATION COUNTER RESET, or EMERGENCY STOP is not being executed and the command bits for these commands are not ON and as long as an axis error has not occurred.
-
Page 442: Emergency Stop
The SMARTSTEP Junior Servo Drives do not support the following parame- ters: Pn80D and Pn80F. They also do not support acceleration/deceleration filters, so the filters cannot be set. A one-step linear deceleration curve is set using only Pn80E. Axis Operating Output Memory Areas (Operating Commands) -
Page 443: Stop Function Timing Chart
EMERGENCY STOP can be executed for an axis that is servo-locked as long as SERVO UNLOCK or DEVIATION COUNTER RESET is not being executed and the command bits for these commands are not ON and as long as an axis error has not occurred. - Page 444 Servo Drive is not checked. a = Beginning word of Axis Operating Output Areas specified in Common Parameters + (Axis No. −1) × 25 b = Beginning word of Axis Operating Input Areas specified in Common Parameters + (Axis No. −1) × 25...
- Page 445 = Beginning word of Axis Operating Output Areas specified in Common Parameters + (Axis No. −1) × 25 b = Beginning word of Axis Operating Input Areas specified in Common Parameters + (Axis No. −1) × 25...
-
Page 446: Deviation Counter Reset
With this function, the PCU’s deviation counter reset function uses a move- ment command in the direction opposite to and the same size as the accumu- lated position deviation so that the command present position will match the feedback present position. -
Page 447: Using Deviation Counter Reset
A deviation counter reset can be executed for any axis for which position con- trol that includes a Servo lock is being executed, as long as there is no axis error, the Servo is locked, and the Servo Unlock Bit is not ON. The command is invalid if executed during speed control or torque control, or when the Servo is unlocked. - Page 448 Stop Execution Bit (word b, bit 15) a = Beginning word of Axis Operating Output Area specified in Common Parameters + (Axis No. −1) × 25 b = Beginning word of Axis Operating Input Area specified in Common Parameters + (Axis No. −1) × 25...
-
Page 449: Sample Programs
11-2-4 Servo Lock/Unlock ........ -
Page 450: Overview
Beginning word of Axis Operating Input Areas specified in Common Pa- rameters + (Axis No. −1) × 25 Refer to 11-3-1 Initial PCU Settings for an example that shows how to set the beginning words of Axis Operating Input/Output Areas. -
Page 451: Basic Program Examples
Overview The parameters set in the PCU (Common Parameters and Axis Parameters) can be transferred to and from the CPU Unit's EM Area using the READ DATA Bit and WRITE DATA Bit. Also, the parameters that have been written to the PCU can be saved to the PCU's internal flash memory using the SAVE DATA Bit. - Page 452 Basic Program Examples Section 11-2 Sample Ladder Program Program name: Write Data Section name: Write Data [OP1] 000000 [OP2] (021) (000000) Number of words to write &40 Write Data execution 1506 condition [OP1] [OP2] (021) Write source area #0082 1507...
- Page 453 Basic Program Examples Reading Data Use the READ DATA Bit in the Common Operating Memory Area to read the read data from the PCU's internal memory to the CPU Unit's DM Area. When the execution condition for the read operation goes ON, the 40 words of read data are read from the PCU's internal memory (starting at address 1838 hex) to the CPU Unit's DM Area (starting at D10000).
- Page 454 Section 11-2 Basic Program Examples Sample Ladder Program Program name: Read Data Section name: Read Data [OP1] 000000 [OP2] (021) (000000) Number of words to read &40 Read Data execution 1510 condition [OP1] [OP2] (021) Read source address #1838 1511...
- Page 455 Section 11-2 Saving Data Use the SAVE DATA Bit in the Common Operating Memory Area to save the PCU's Common Parameters and Axis Parameters to the PCU's flash memory. The PCU's Save Data operation is executed when the Save Data execution condition goes from OFF to ON.
- Page 456 While the PCU connection is established, MECHATROLINK communications will be stopped automatically if normal communications are not established with all of the axes registered in the scan list within the preset timeout time. (If the PCU cannot start communications with an axis registered in the scan list within 10 seconds, an MLK Initialization Error will occur.
- Page 457 11-2-3 Transferring Servo Parameters Overview The Servo Parameters in Servo Drives connected through MECHATROLINK communications can be transferred to and from the CPU Unit's DM Area with the PCU's WRITE SERVO PARAMETER Bit, READ SERVO PARAMETER Bit, and SAVE SERVO PARAMETER Bit.
- Page 458 Basic Program Examples Data Memory Area (DM Area) D10500 to D10503 These words are used to store the data required for a single Servo Parameter transfer, including the Servo Parameter number, parameter size, and transfer data (2 words). Work Area (WR Area) Writing Servo Parameters: W400.00 to W400.06...
- Page 459 Section 11-2 Basic Program Examples Sample Ladder Program Program name: Write Servo Parameter Section name: Write Axis 1 Servo Parameter [OP1] 000000 Parameter Number to Transfer (021) (000000) [OP2] D10500 Transfer Servo Axis 1 Servo Parameter number Parameter execution condition...
- Page 460 Servo Parameter No. D10501 Parameter size (Unit: bytes) When the Servo Parameter data has been read normally, W401.05 is turned ON for one cycle and the parameter is stored in the DM Area as shown in the following table. Word Details...
- Page 461 Section 11-2 Basic Program Examples Sample Ladder Program Program name: Read Servo Parameter Section name: Read Axis 1 Servo Parameter [OP1] 000000 Parameter Number to Transfer (021) (000000) [OP2] Transfer Servo D10500 Axis 1 Servo Parameter number Parameter execution condition...
- Page 462 Use the SAVE SERVO PARAMETER Bit in the Axis Operating Output Mem- Parameters ory Area to write the transfer data (preset in the CPU Unit's DM Area) to the Servo Drive's non-volatile flash memory. When the Servo Parameter transfer operation's execution condition goes ON,...
- Page 463 Section 11-2 Basic Program Examples Sample Ladder Program Program name: Save Servo Parameter Section name: Save Axis 1 Servo Parameter [OP1] 000000 Parameter Number to Transfer (021) (000000) [OP2] D10500 Transfer Servo Axis 1 Servo Parameter number Parameter execution condition...
- Page 464 Servo Lock Switch execution condition goes from OFF to ON. If the Axis 1 Servo Lock is not engaged within 5 seconds after the Servo Lock function is executed, a Servo Lock Execution Timeout will occur, bit W305.05 will be turned ON for one cycle, and the Servo Unlock function will be exe- cuted.
- Page 465 With the above programming example, if the Servo is unlocked by any means other than the SERVO UNLOCK command bit (e.g., if a Driver main circuit OFF error occurs), the status of the work bit will be held. When using this pro- gramming example as reference for actual programming, add interlocks suit-...
- Page 466 Axis 1 Operating Output Memory Area before executing this sample program. If the Axis 1 origin is not established within 10 seconds after the origin input signal is detected and the Final Travel Distance to Return to Zero Point posi- tioning is performed, the Origin Search Timeout will occur and W305.02 will...
- Page 467 In addition, when executing ABSOLUTE MOVEMENT, establish the origin by performing an origin search before sending the position command. In this example, positioning is performed on the Servo Drive registered as axis 1 using the ABSOLUTE MOVEMENT Bit or RELATIVE MOVEMENT Bit in the Axis Operating Output Memory Area.
- Page 468 These Work Area bits are used to show the progress of function execution and the execution status. Holding Area (HR Area) H1.00 This bit is used as a switch to indicate whether positioning is performed with ABSOLUTE MOVEMENT or RELATIVE MOVEMENT. Timer Area TIM0003 Used as a watchdog timer to monitor the positioning operation.
- Page 469 Axis 1 RELATIVE MOVEMENT Bit [OP1] W201.02 1001.08 1000.05 000001 Positioning Watchdog Timer (000007) [OP2] 0003 Controlling Axis 1 Pulse Axis 1 PCU Positioning Completed Axis 1 Distribution #100 Position Complete Positioning Timeout T0003 1000.05 W201.03 000002 (000011) Positioning Axis 1 PCU Positioning Completed...
- Page 470 Receiving Command Flag is OFF is ANDed with the Speed Control execution condition (in the W202.00 output circuit). The Axis 1 SPEED CONTROL Bit has been added as an OR condition so that the W202.00 is not output again when the Receiving Command Flag goes from ON to OFF.
- Page 471 Servo Lock is engaged. In this example, torque control is performed on the Servo Drive registered as axis 1 using the TORQUE CONTROL Bit in the Axis 1 Operating Output Mem- ory Area. The Axis Operating Output/Input Memory Areas are based on the settings of the Common Parameter Area, as shown below.
- Page 472 OFF and then ON again. A Multistart Error will occur if a TORQUE CONTROL command is sent while the PCU's Receiving Command Flag is already ON, so include an AND of the Receiving Command Flag OFF in the execution condition for Torque Control execution (i.e.
- Page 473 MECHATROLINK communications with the servo locked (i.e., after establishing a connection). In this example, a deceleration stop or emergency stop is performed on the Servo Drive registered as axis 1 using the DECELERATION STOP Bit or EMERGENCY STOP Bit in the Axis 1 Operating Output Memory Area.
- Page 474 In this programming example, jogging is executed for the Servo Drive regis- tered at axis 1 when the Jog Bit turns ON in the Axis Operating Output Mem- ory Area. The Axis Operating Output/Input Memory Areas are based on the settings of the Common Parameter Area, as shown below.
- Page 475 Designation Bit in the Axis Operating Output Memory Area. Therefore, the command for the jogging condition is sent via the Work Area bit W206.00. The output circuit of Work Area bit W206.00 is also provided with a self-hold- ing circuit that operates according to the Receiving Command Flag and Busy Flag to enable the JOG command to be received correctly at the PCU.
-
Page 476: Application Examples
INI to RUN status. After the initial settings are made, the PCU is restarted. The transferred and saved parameters are enabled and H0.00 is turned ON (Set) at the same time so that the initial settings are not made again. - Page 477 This sample program writes the following Common Parameters and Axis Parameters (initial settings). Common Parameters Scan List: Registers Servo Drives to axes 1 and 2 (station numbers 1 and Beginning word of Axis Operating Output Memory Area: CIO 0000 Beginning word of Axis Operating Input Memory Area: CIO 1000...
- Page 478 40 words (Common Parameters) + 20 words × Number of axes (Axis Parameters). Conversely, when only axis 1 is being used, set the number of write words to 60 words and prepare only EM words E0_00000 to E0_00059 from the table above.
- Page 479 When the initial PCU settings have been made, W304.03 is turned ON for one cycle. Also, W303.03 will be turned ON when MECHATROLINK communications have started and all axes (axes 1 and 2 in this case) are communicating nor- mally.
- Page 480 Section 11-3 Application Examples Sample Ladder Program Program name: Initial Settings Section name: Initial Settings [OP1] A200.15 H0.00 000000 [OP2] (021) (000000) Number of words to write P_First_Cycle_ &80 Execute Task Initial 1506 Initial Task Settings Execution Switch Flag [OP1]...
- Page 481 Unit Data Save Received W302.02 1515.14 W302.03 000009 (000042) Waiting for Unit Data Transferring Flag Data Save Received Unit Data Save Normal End W302.04 1515.12 1515.14 W302.05 000010 (000045) Unit Error Flag Data Transferring Flag Waiting for Unit Data Save End Unit Data Save Error End W302.02...
- Page 482 This application example is normally executed after the initial PCU settings application shown in 11-3-1 Initial PCU Settings. The Servo Parameters to be transferred are set in the CPU Unit's EM Area as a parameter list. When reading Servo Parameters, the parameter data read from the Servo Drive is stored in the specified EM words based on this parameter list.
- Page 483 Axis 1 Servo Parameter words: D10500 to D10503 Axis 2 Servo Parameter words: D10600 to D10603 These words are used to store the data required for a single Servo Parameter transfer, including the Servo Parameter number, parameter size, and transfer data (2 words).
- Page 484 Different transfer functions cannot be performed at the same time on a single axis. If bits 00 to 02 are all OFF or more than one bit is ON, the transfer func- tion will not be executed for that axis.
- Page 485 4-5 Servo Parameter Area are included even if the parameters are not being used. When the two-word end code (0000 0000) at the end of the parameter list is included, a total of 256 words (including unused words) are used, from E1_00000 to E1_00257.
- Page 486 1, except for the different I/O words. To prevent duplica- tions, be sure to change the axis 1 output words (CIO 0000 to CIO 0024) to the corresponding axis 2 output words (CIO 0025 to CIO 0049) and change the axis 1 input words (CIO 1000 to CIO 1024) to the corresponding axis 2 input words (CIO 1025 to CIO 1049).
- Page 487 First Word of Parameter List (560) (000005) [OP2] E1_0 Servo Parameter Batch Transfer Start [OP1] MOVR First Word of Axis 1 Servo Parameters (560) [OP2] E1_1000 [OP1] MOVR First Word of Axis 2 Servo Parameters (560) [OP2] E1_2000 [OP1] W500.01 H10.00...
- Page 488 Stop Parameter Transfer W500.05 (300) D10501 [OP1] [OP2] Axis 1 Transfer Parameter Size [OP1] W500.03 000006 Axis 1 Transfer Parameter Number (021) (000045) [OP2] Execute Servo D10500 Axis 1 Servo Parameter Number Parameter Transfer [OP1] Axis 1 Transfer Parameter Size...
- Page 489 Section 11-3 Application Examples [OP1] W500.03 000007 Axis 2 Transfer Parameter Number (021) (000068) [OP2] Execute D10600 Axis 2 Servo Parameter Number Servo Parameter Transfer [OP1] Axis 2 Transfer Parameter Size (021) [OP2] D10601 Axis 2 Parameter Size [OP1] MOVL...
- Page 490 Continue Servo All Axes Stop Servo Parameter Transfer End Parameter Transfer Transfer W500.03 Execute Servo Parameter Transfer W400: Write Axis 1 Servo Parameter 000016 (000148) W400.00 1522.00 1000.12 1000.14 1.12 Axis 1 WRITE SERVO PARAMETER Start Axis 1 Axis 1...
- Page 491 (000173) Axis 1 Write Axis 1 Write Axis 1 Write Received Normal End Error End W400.04 Waiting for Axis 1 Write End W401: Read Axis 1 Servo Parameter 000022 (000178) W401.00 1522.00 1000.12 1000.14 1.13 Axis 1 READ SERVO PARAMETER...
- Page 492 Section 11-3 Application Examples W402: Save Axis 1 Servo Parameter 000028 (000208) Axis 1 SAVE SERVO W402.00 1522.00 1000.12 1000.14 1.14 PARAMETER Start Axis 1 Axis 1 Axis 1 Error Axis 1 Servo Save Communicating Parameter Transferring 1.14 W402.01 Execute Axis 1 Save...
- Page 493 (000263) Axis 2 Write Axis 2 Write Axis 2 Write Received Normal End Error End W410.04 Waiting for Axis 2 Write End W411: Read Axis 2 Servo Parameter 000040 (000268) 26.13 Axis 2 READ SERVO W411.00 1522.01 1025.12 1025.14 PARAMETER...
- Page 494 The Axis Operating Output/Input Memory Areas are based on the settings of the Common Parameter Area, as shown below. The application example in 11-3-1 Initial PCU Settings shows a sample program that can be used to make the following settings.
- Page 495 These Work Area bits are used to show the progress of function execution and the execution status. Holding Area (HR Area) H1.00 This bit is used as a switch to indicate whether the positioning command is ABSOLUTE MOVEMENT or RELATIVE MOVEMENT. Timer Area TIM0003 Used as a watchdog timer to monitor the positioning operation.
- Page 496 Function Explanation CIO 050000 Axis 1 Servo Lock/ Each time this bit is turned ON, it switches axis 1 between Servo Lock and Servo Unlock Switch Unlock. When the Servo Unlock is executed during speed control or torque control, the Servo Unlock is executed after executing an Emergency Stop.
- Page 497 This word contains the acceleration constant for positioning. Constant If CIO 0500.14 is ON when positioning is started, the contents of this word are written to the Servo Parameter to change the acceleration rate. Set in units of “×10,000 command units/s .”...
- Page 498 Section 11-3 Application Examples In this program, the unit conversion methods are switched at the start of axis operation. The speed monitoring units are converted (0.001% → command units/s) during speed control and the torque monitoring units are converted (0.001% →%) during torque control.
- Page 499 Application Examples Section 11-3 Sample Ladder Program Program name: Switching Control Mode Section name: Switching Control Mode Start Axis 1 Acceleration 500.01 500.14 W501.00 000000 Constant Setting (000000) Positioning Specify Axis 1 Start Switch Acceleration Constant Start Axis 1 Deceleration 500.15...
- Page 500 Application Examples Section 11-3 Axis 1 Servo Lock T0001 1001.03 W305.05 000006 Execution Timeout (000059) Servo Lock Axis 1 Servo ON Execution Watchdog Timer Position Control 000007 (000062) Execute Axis 1 W200.00 1000.00 1000.12 DIFU Movement Command (013) Axis 1 Error...
- Page 501 W204.00 1.01 1.15 1522.00 1000.15 1000.12 1001.03 0.15 000023 STOP (000170) Axis 1 Axis 1 Axis 1 Error Axis 1 Servo ON Flag Execute Axis 1 Axis 1 Axis 1 Communicating Stop Deceleration SERVO EMERGENCY Execution Stop UNLOCK STOP 0.15 Axis 1 DECELERATION STOP (Continued on next page.)
- Page 502 1522.00 1000.15 1000.12 1.15 000027 STOP (000191) Axis 1 Axis 1 Stop Axis 1 Error Axis 1 Servo ON Flag Execute Axis 1 Axis 1 SERVO Emergency Communicating Execution UNLOCK Stop 1.15 Axis 1 EMERGENCY STOP Axis 1 Emergency Stop 1.15...
- Page 503 Speed Control D1508 Command [OP1] MOVL [OP2] (498) &0 D1510 [OP1] W203.00 MOVL 000033 Axis 1 Torque Command Value (498) (000214) [OP2] Execute Axis 1 D1004 Axis 1 Torque Command Value Torque Control Command W203.02 Controlling Axis 1 Torque [OP1] W203.00...
- Page 504 Constant Transfer End Execute Axis 1 Execute Axis 1 Acceleration Execute Axis 1 Acceleration Con- Deceleration Constant Transfer stant Transfer Constant Transfer W400: Write Axis 1 Servo Parameter 000042 (000260) Axis 1 WRITE SERVO W400.00 1522.00 1000.12 1000.14 1.12 PARAMETER...
- Page 505 Axis 1 Write Received W400.02 1000.14 W400.03 000043 (000267) Waiting for Axis 1 Servo Parameter Axis 1 Write Transferring Received Axis 1 Write Normal End W400.04 1000.12 1000.14 W400.05 000044 (000270) Waiting for Axis Axis 1 Axis 1 Servo Parameter 1 Write End...
- Page 506 Section 11-3 Application Examples [OP1] W210.00 MOVL 000052 Axis 1 Monitor 1 (498) (000314) [OP2] Position Control 1010 Axis 1 Feedback Speed; Monitor (command units/s) D1020 [OP1] MOVL Axis 1 Monitor 2 (498) [OP2] 1012 Axis 1 Torque Command D1022 [OP1] W210.01...
-
Page 507: Troubleshooting
12-2 Troubleshooting Procedure ........ -
Page 508: Overview Of Pcu Errors
= CIO 1500 + (unit number × 25) b = Beginning word of Axis Operating Input Areas specified in Common Parameters + (Axis No. − 1) × 25 If an error occurs, the PCU operates according to the following table depend-... - Page 509 (1) If a warning occurs in a MECHATROLINK slave device, the Warning Flag will turn ON and operation will continue. (2) When a connection is released by the PCU, the Servo Drive will be put in the Servo OFF state.
- Page 510 Section 12-1 Overview of PCU Errors If two or more errors of the same priority level occur at the same time, the error status of the error that was detected first will be maintained (the error code for the error that was detected first will be held).
- Page 511 When a warning is detected and then the associated error occurs for the same axis, the Error Flag turns ON and the PCU performs error processing. The axis error code will be overwritten by the error code for the error that has occurred.
-
Page 512: Troubleshooting Procedure
= Beginning word of Axis Operating Output Areas specified in Common Parameters + (Axis No. −1) × 25 b = Beginning word of Axis Operating Input Areas specified in Common Parameters + (Axis No. −1) × 25 Note If an axis warning occurs (Warning Flag = 1), the PCUs’... -
Page 513: Led Error Indicators
Section 12-3 LED Error Indicators 12-3 LED Error Indicators The status of the LED indicators on the front of the PCU can be used to diag- nose the following errors. NCF71 RUN: The PCU is operating. ERC: An error has occurred in the PCU. - Page 514 PCU. The indicator displays shown in the above table indicate that data in the PCU is corrupted or the PCU's internal circuits have malfunction. Data may be corrupted if the PCU power is interrupted while data is being saved to the PCU's internal flash memory.
- Page 515 PCU parameters or an illegal operation has been attempted, such as multistart. This error will occur if a problem has occurred in the use of the PCU, which requires the PCU settings or user program to be corrected.
-
Page 516: Error Codes
PCU Error Flags and error codes. 12-4 Error Codes 12-4-1 Overview When an error occurs in the PCU, an Error Flag is turned ON and an error code is input in the Common Operating Memory Area or the Axis Operating Input Memory Areas. - Page 517 If an Axis Error Flag turns ON, error processing must be performed for the corresponding axis. Determine the cause of the error using the indicator display and error code, isolating the location of the error as either in the PCU or in the Servo Drive/ Machine. 12-4-2 List of Error Codes...
- Page 518 Unit to stop released has occurred. after decel- eration stop CPU Unit 000B The CPU Unit Make sure that the CPU Connec- watchdog system is not Unit and PCU are tion timer error operating cor- installed correctly, and released rectly.
- Page 519 PCU scan list, and then exe- operated scan list is not cute CONNECT again. for PCUs connected.
- Page 520 After executing ERROR PCU using RESET, transfer the cor- WRITE DATA. rect Common Parame- (See note.) ters setting. Note An error will occur if the scan list contains more than the maximum number of axes for the CS1W-NC271/NC471 or CJ1W-NC271/NC471.
- Page 521 After removing the to the alarm be performed cause preventing com- method correctly with munications, such as used when the corre- breaks or noise in the the Servo sponding axis. connection, execute Drive alarm CONNECT again. occurs. (The PCU executes DECELER- ATION STOP.)
- Page 522 An attempt After editing the ladder was made to program so that com- execute one of mand bits do not turn the following ON for a busy axis, exe- commands for cute the previously a busy axis. unsuccessful command again. ORIGIN...
- Page 523 Illegal Position 3060 An attempt Edit the position com- Decelera- data designa- was made to mand value to be within tion stop tion error execute REL- the positioning range ATIVE MOVE- and execute the com- MENT using a mand again.
- Page 524 Axis Parame- ter check in the Axis ters is set to the default error Parameters value (0). After executing during PCU ERROR RESET, transfer initialization. the correct Axis Parame- ter.
- Page 525 ERROR according or exceeded RESET, execute a to the during axis movement command to Servo movement. move the axis to a cor- Drive’s rect position within the specified software limit range. stop method for limit inputs. (The PCU executes...
- Page 526 STOP.) Note For PCUs with unit version 1.2 or earlier, driver main circuit OFF errors can be detected regardless of whether the axis is servo-locked. For PCUs with unit version 1.3 or later, driver main circuit OFF errors will be detected only when the axis is servo-locked and will not be detected when the axis is not servo- locked.
- Page 527 G5-series Servo Drives/G-series Servo Drives Error code: 4@@@ hex The numbers in the boxes of the error codes displayed for alarms are given as decimal numbers for the Servo Drives and as hexadecimal numbers for the Position Control Units.
- Page 528 With the R88D-WN@-ML2 W-series Servo Drives, more detailed informa- tion is provided for position deviation overflow alarms, as shown above, but only the upper two digits of the alarm code (40D0 hex) are displayed as the PCU’s error code for any of these alarms.
-
Page 529: Troubleshooting
12-5-1 Initial Troubleshooting The following troubleshooting flowchart is for errors that occur during initial checking. This flowchart can be used to determine whether the PCU is faulty and cannot be started. The Servo Drive cannot communicate. The Servomotor will not operate in response to commands. - Page 530 The following troubleshooting flowchart is for problems that occur after the PCU has been started (RUN indicator is lit). Use this flowchart to determine whether the error is a CPU Unit error, a set- ting or usage problem, or a MECHATROLINK communications error.
- Page 531 Troubleshooting Section 12-5 Check the Unit error code. Has the Memory Error (00F1) occurred? Check the Unit error code. Has the Is the ERM indicator lit? MLK Device Initialization Error (0030) occurred? Is the ERM indicator flashing? The limit input was...
- Page 532 12-5-3 Troubleshooting Communications Errors The following troubleshooting flowchart is for when MECHATROLINK commu- nications errors occur. Use this flowchart to determine the cause, such as whether the error is due to MECHATROLINK communications settings or installation. An error in MECHATROLINK communications has occurred.
- Page 533 Are the communications settings station number? for every MECHATROLINK slave station device set to 10 Mbps and 32 bytes? Do the station addresses of the MECHATROLINK slave station devices match the axis numbers registered in...
-
Page 534: Error Reset
Reset Unit common errors when the Unit Busy Flag for the Position Control Unit is OFF. If errors are reset when the Unit Busy Flag is ON, a multistart error (Unit error code: 0021) will occur and it will not be possible to reset Unit common errors. - Page 535 = Beginning word of Axis Operating Output Memory Areas specified in Common Parameters + (Axis No. − 1) × 25 b = Beginning word of Axis Operating Input Memory Areas specified in Common Parameters + (Axis No. − 1) × 25...
-
Page 536: Cpu Unit Error Display
12-6-3 Restarting the PCU For errors that cannot be cleared using ERROR RESET, remove the cause of the error and either cycle the power to the CPU Unit or restart the CPU Bus Unit to enable the PCU to recover from the error. -
Page 537: Maintenance And Inspection
13-4 Procedure for Replacing a PCU ........ -
Page 538: Inspection
These components may deteriorate faster, however, due to factors such as the operating environment. Therefore, routine inspection is required. The standard inspection schedule is once every six months to one year. More frequent inspections may be advisable depending on the operating environ- ment. -
Page 539: Handling Precautions
13-3 Handling Precautions • Turn OFF the power before replacing the PCU. • If a PCU is found to be faulty and is replaced, also check the new PCU to make sure that there are no errors. • When returning a faulty PCU for repair, make a detailed record of the PCU's malfunction and take it together with the PCU to your nearest OMRON office or sales representative. - Page 540 Bit to read the parameters saved in the Servo Drive to be replaced to the CPU Unit's DM Area first. Then save the DM Area data to a floppy disk or hard disk using, for example, CX-Programmer. After replacing the Servo Drive, transfer...
- Page 541 Manual (Cat. No. W394). Note The CPU Unit's simple backup function is used to backup or restore data for the entire CPU Unit's system at the same time. Changing the system configu- ration may prevent restoration of the PCU's data. To backup or restore data for a single PCU, use the PCU's backup function as described next.
- Page 542 Section 13-4 Procedure for Replacing a PCU The PCU data backed up using the PCU's backup function is stored in the Memory Card under the following filename. File name: UNIT@@.PRM (Note: The boxes indicate the PCU's unit number + 10 hex)
-
Page 543: A Performance Characteristics
Units used. Therefore, these values are for reference purposes only. Power Up Time When the PCU is powered up or restarted, the time required for the Unit to complete its initial processing and be ready to receive commands from the CPU Unit is 500 ms max. - Page 544 SRV_OUT Servo Drive operation (e.g., axis operation) The maximum time from the end refresh of the user program's cycle in which the command was sent until the command is actually received by the PCU is indicated as T OUT_REF (CPU cycle time or MECHATROLINK communications cycle, whichever is longer) + communications cycle ×...
- Page 545 The time for the Servo Drive status to reach the PCU via MECHATROLINK communications is indicated as MECHATROLINK transfer cycle × 1 The maximum time from the end refresh of the user program's cycle in which the command was sent until the command is actually received by the PCU is T...
- Page 546 Servo Drive starts operating according to the function corre- sponding to the input signal. The command response time is required for the status of the signal that was input to be reflected in the input area of the CPU Unit.
-
Page 547: B List Of Parameters
00B2 hex: HR Area 00B3 hex: AR Area 0082 hex: DM Area 0050 to 0059, 005A, 005B, 005C: EM Area (5@: @ = EM Bank No.) 1839 hex Beginning word of Axis Operating Output Memory Area: 0000 to 7FFF hex... - Page 548 List of Parameters Appendix B Axis Parameter Area Beginning word of Axis Parameter Area for Axis N: d = 1860 hex + (N − 1) × 14 hex (N = 1 to 16) PCU's internal address (hexadecimal) Data Axis Axis...
- Page 549 G5-series Servo Drive (R88D-KN@-ML2 with Built-in MECHATROLINK-II Communications) This shows a list of Servo Parameters that can be used by the Position Control Unit of a G5-series Servo Drive (R88D-KN@-ML2) with built-in MECHATROLINK-II communications. For details on each parameter, refer to the user’s manual of the respective G5-series Servo Drives.
- Page 550 Appendix B Relay area settings Set the servo parameter numbers in parentheses in the list for the Servo Parameter number Relay area (a+17) when transferring Servo Parameters. For example, when transferring the Error Counter Overflow Level, set "00E" for the Servo Parameter number...
- Page 551 (002) 0: Disabled 1: Emphasizes stability 2: Emphasizes positioning 3: If there is an unbalanced load on the vertical axis or the like. 4: When friction is large. 5: If there is an unbalanced load on the vertical axis or the like and friction is too large.
- Page 552 210/ 0.1ms 1 to 10000 Time Constant 1 (102) Speed Feedback Fil- The speed feedback filter 1 can be set to one of 6 val- 0 to 5 ter Time Constant 1 ues. (103) Torque Command Fil- Set the time constant for the torque filter 1.
- Page 553 Data eter eter setting range attribute size Gain Switching Delay Set the delay time for switching from gain 2 to gain 1. 0.1ms 0 to 10000 Time in Speed Con- (115) trol Gain Switching Level Set the gain switching level.
- Page 554 Damping Frequency Set the damping frequency 1. 0.1Hz 0 to 2000 (20E) The function is enabled if the set value is 10 (= 1 Hz) or greater. Damping Filter 1 Set- Finely adjust damping control function 1. 0.1Hz 0 to 1000...
- Page 555 Damping Frequency Set the damping frequency 4. 0.1Hz 0 to 2000 (214) The function is enabled if the set value is 10 (= 1 Hz) or greater. Damping Filter 4 Set- Finely adjust damping control function 4. 0.1Hz 0 to 1000...
- Page 556 Select the torque command and speed limit value. 0 to 1 tion (311) 0: Limit the speed by the limit set on the Speed Limit Value Setting (Pn321). 1: Limit the speed by the speed limit value (VLIM) via MECHATROLINK-II communications or by the value set by the Speed Limit Value Setting (Pn321).
- Page 557 0: Output range is -10 to 10 V 1: Output range is 0 to 10 V 2: Output range is 0 to 10 V (5 V as the center) Positioning Comple- Set the allowed number of pulses for the positioning...
- Page 558 Select the warning type for warning output 2. 0 to 13 Selection 2 (429) The relationships among the set values for this param- eter are the same as for Warning Output Selection 1 (Pn440). Set the allowable number of pulses for the second Positioning Comple- Com-...
- Page 559 OFF. (507) The settable values are the same as those on the Pn506. Undervoltage Alarm Select either to let the servo off or to stop the alarm 0 to 1 Selection when a main power alarm occurs. (508) 0: Bring the Servo-OFF state in accordance with the Pn507 setting.
- Page 560 3: 1.666 ms Position Setting Unit Select the setting units of Positioning Completion 0 to 1 Selection Range 1 and 2 (Pn431 and Pn442) and of the Error (514) Counter Overflow Level (Pn014). 0: Command unit 1: Encoder unit Torque Limit Selec-...
- Page 561 Torque Command Set offset torque to add to torque command. -100 to 100 Value Offset (607) Forward Direction Set the value to add to a torque command for forward -100 to 100 Torque Offset direction operation. (608) Reverse Direction Set the value to add to a torque command for reverse...
- Page 562 Default Display Select a data type to display on the 7-segment LED 0 to 32767 indicator on the front panel. (700) 0: Normal state 1: Mechanical angle 2: Electric angle 3: Cumulative count of MECHATROLINK-II communi-...
- Page 563 (80B) Linear Deceleration Set the deceleration for positioning. -32768 to Constant 32767 (80E) Position Command Set the time constant of FIR filter for the position com- 0.1ms 0 to 10000 FIR Filter Time Con- mand. (812) stant Final Distance for Sets the distance to travel after the latch signal input 0.1ms...
- Page 564 Pn000 Reserved Do not change. Pn001 Default Dis- Selects the data to be displayed on the 7-segment LED display on 0 to 4 Online play the front panel. Normal status ("--" Servo OFF, "00" Servo ON) Indicates the machine angle from 0 to FF hex.
- Page 565 0. Control Note Use with thi]s parameter set to 0. Program to stop immedi- ately if using a value other than 0. Set the Consecutive Communications Error Detection Count in COM_ERR (bit 8 to 11). The communications error (alarm code...
- Page 566 Pn007 Speed Selects the output to the Analog Speed Monitor (SP on the front 0 to 11 Online monitor panel). (SP) Selec- Note This monitor output has a delay due to filtering. The Oper-...
- Page 567 Sets the speed loop responsiveness. 1 to 30000 Online Flag for Gain (RT) If the Inertia Ratio (Pn020) is set correctly, this parameter is set to each axis the Servomotor response frequency. = 0). Increasing the gain increases the speed control responsiveness, but too much gain may cause oscillating.
- Page 568 Sets the operating mode for realtime autotuning. 0 to 7 Online Flag for Autotuning A setting of 3 or 6 will provide faster response to changes in inertia each axis Mode during operation. Operation, however, may be unstable depending = 0).
- Page 569 0 when disabled. when the Note When the Vibration Filter Selection (Pn024) is set to a axes are low-pass filter type (Pn024 = 3 to 5), the adaptive filter is stopped forcibly set to disabled (Pn023 = 0). (Busy Flag for Adaptive filter disabled.
- Page 570 This parameter is disabled when Vibration Filter 1 is dis- abled. • Normal type Setting range: 100 ≤ Pn02B + Pn02C ≤ Pn02B × 2 or 2000 • Low-pass type Setting range: 10 ≤ Pn02B + Pn02C ≤ Pn02B × 6 ×0.1...
- Page 571 Sets the judgment level to switch between Gain 1 and Gain 2 0 to 20000 Online Level Set- when the Gain Switch Setting (Pn031) is set to 3, 5, 6, 9, or 10. ting (RT) The unit for the setting depends on the condition set in the Gain Switch Setting (Pn031).
- Page 572 Reserved Do not change. Pn052 Reserved Do not change. −20000 to Pn053 Speed Limit 2 Sets the speed limit for torque control mode. (The value is an r/min Online Settings absolute value) 20000 can be changed This parameter is limited by the Overspeed Detection Level Set- when the ting (Pn073).
- Page 573 Online formity Sig- (VCMP) signal. nal Output Speed conformity is achieved when the absolute value of the dif- Width ference between the internal speed command (before acceleration and deceleration limits are applied) and the Servomotor speed is less than the set speed.
- Page 574 (stopped), the deceleration mode will not be activated even if the drive prohibit input is enabled. Note 3. When the parameter is set to 2 and an operation com- mand in the drive prohibited direction is received after stopping, a command warning (warning code 95h) will be issued.
- Page 575 Sets the overload detection level. The overload detection level will 0 to 500 Online Detection be set at 115% if this parameter is set to 0. Normally, use a setting Level Set- of 0, and set the level only when reducing the overload detection ting level.
- Page 576 Limit (Pn201) and Reverse Software Limit (Pn202). Note The response value for limit signals disabled by this set- ting will be set to 0. The response value for limit signals is also set to 0 when the Servomotor does not complete its return to origin.
- Page 577 Pn110 Origin Sets the operating speed for origin return from when the origin 1 to 32767 Online Return proximity signal is turned ON, to when it is turned OFF and the [com- Approach latch signal is detected. mand Speed 1...
- Page 578 If the Servomotor exceeds the limit, the network response status Limit units 1073741823 (PSOT) will turn ON (=1). Note Be sure to set the limits so that Forward Software Limit > Reverse Software Limit. Note PSOT is not turned ON when origin return is incomplete. −500000 −1073741823...
- Page 579 List of Parameters Appendix B R88D-WT@ W-series Servo Drive Equipped with JUSP-NS115 Function Selection Parameters Param- Parame- Param- Contents Default Unit Setting Enable Details eter No. ter name eter setting range setting Digit Name Set- Explanation size ting Pn000 Function...
- Page 580 Option command tion switch ing speed con- value 1 used as trol) torque limit input. Option command value 1 used as the torque feed for- ward input. Option command values 1 and 2 used as torque limit inputs according to...
- Page 581 Position Adjusts position loop responsiveness. 1 to Online loop gain 2000 Pn103 Inertia Sets using the ratio between the machine system 0 to Online ratio inertia and the Servomotor rotor inertia. 20000 Pn104 Speed Adjusts speed loop responsiveness (enabled by auto-...
- Page 582 Not used. (Do not change the setting.) Pn10C P control Sets level of torque command to switch from PI con- 0 to 800 Online switching trol to P control. (torque command) Pn10D P control...
-
Page 583: Tion
Pulses 16 to Offline divider rate Drive. /rota- 16384 tion Pn202 Electronic Sets the pulse rate for the command pulses and Ser- 1 to Offline gear ratio vomotor travel distance. 65535 0.01 ≤ G1/G2 ≤ 100 (numera- tor) Pn203 Electronic... - Page 584 Digit Name Set- Explanation size ting Pn205 Absolute Sets the limit to the rotation speed when using a Ser- 65535 Rota- 0 to Offline encoder vomotor with an absolute encoder. tions 65535 multi-turn limit set- ting...
-
Page 585: Ing Com
Reverse Reverse rotation output torque limit (rated torque 0 to 800 Online torque limit ratio). Pn404 Forward Output torque limit during input of forward rotation cur- 0 to 800 Online rotation rent limit (rated torque ratio). external current limit Pn405... -
Page 586: Ing Com
32767 overflow level ×10 Pn506 Brake tim- Sets the delay from the brake command to the Servo- 0 to 50 Online ing 1 motor turning OFF. Pn507 Brake Sets the rotation speed for outputting the brake com- r/min... - Page 587 Not used. (Do not change the Fixed setting.) setting: POT (forward Allocated to CN1, Offline Stan- drive prohibited pin 40: Valid for low dard input) signal input setting: input terminal Allocated to CN1, allocation pin 41: Valid for low input...
- Page 588 Offline Stan- nal selec- drive prohibited dard tion 2 input) signal setting: input terminal allocation Not used. (Do not change the Fixed setting.) setting: PCL (forward 0 to F Same as Pn50A.3 Offline Stan- rotation cur- dard rent limit) sig-...
- Page 589 Same as Pn50E.0 Offline Stan- nal selec- ing completed dard tion 3 2) signal output setting: terminal alloca- tion Not used. (Do not change the setting.) Not used. (Do not change the setting.) Not used. (Do not change the setting.)
- Page 590 Pn511 Input sig- DEC signal Allocated to CN1, Offline Stan- nal selec- input terminal pin 40: Valid for low dard tion 5 allocation input setting: Allocated to CN1, pin 41: Valid for low input Allocated to CN1, pin 42: Valid for low...
- Page 591 Not used. (Do not change the setting.) Not used. (Do not change the setting.) Pn51A Motor-load Sets the allowable range for the number of pulses for Pulse 0 to Online deviation fully-closed encoders and semi-closed encoders. 32767 over level Pn51B Not used.
- Page 592 Unit Setting Enable Details eter No. eter setting range setting size ×10 W From 0 Pn600 Regeneration resistor Setting for the regeneration resistance Online capacity load ratio monitoring calculations. (Varies by Unit.) Pn601 Not used. (Do not change the setting.)
- Page 593 Communica- 0 to F Detects a commu- Online tions error nications error count at single (A.E6) when the transmission number of errors specified by the set value + 2 have occurred continu- ously. Not used. (Do not change the setting.)
- Page 594 Setting range Enable Details eter No. name eter ting setting size Pn802 Not used. (Do not change the set- 0000 ting.) Pn803 Zero point width Sets the detection range Com- 0 to 250 Online for the Origin Stop Flag. mand unit −1,073,741,823 to...
- Page 595 1 to 65535 Online Settings deceleration eration speed for the command can be constant acceleration/decelera- changed units/s tion curve used in posi- when the tion control. axes are stopped (Busy Flag for each axis = 0). Pn80E Second-step lin- Sets the second-step ×10,000...
- Page 596 ×100 0 to 65535 Online Settings can point distance positioning speed used after the ori- com- be changed return gin input signal has been detected in an ori- mand when the approach gin search. units/s axes are speed 2 stopped...
- Page 597 List of Parameters Appendix B R88D-WN@-ML2 W-series Servo Drive with Built-in MECHATROLINK-II Communications Function Selection Parameters Param- Parame- Param- Contents Default Unit Setting Enable Details eter No. ter name eter setting range setting Digit Name Set- Explanation size ting Pn000...
- Page 598 Use option com- mand value 1 as the torque feed for- ward command value. Use option com- mand value 1 or 2 as the torque limit value, according to the forward and reverse torque lim- its that are speci- fied.
- Page 599 Set- Explanation size ting Pn006 Function 0 to 1 Analog moni- Servomotor rota- Online selection tor 1 (AM) sig- tion speed: 1 V/ applica- nal selection 1000 r/min tion Speed command: switches 6 1 V/1000 r/min Torque command: gravity compensa-...
- Page 600 Set- Explanation size ting Pn007 Function 0 to 1 Analog moni- Servomotor rota- Online selection tor 2 (NM) sig- tion speed: 1V/ applica- nal selection 1000 r/min tion Speed command: switches 7 1 V/1000 r/min Torque command: gravity compensa- tion torque (Pn422)
- Page 601 2 to 3 Not used. Not used. (Do not change the setting.) Pn10C P control Sets level of torque command to switch from PI con- 0 to 800 Online switching trol to P control. (torque command) Pn10D P control...
- Page 602 2 Pn135 Gain The time from when gain switching condition A is sat- 0 to Online switching isfied until switching from the No. 1 gain to the No. 2 65535 waiting gain begins. time 1 Pn136 Gain The time from when gain switching condition B is sat-...
- Page 603 Adjusts position deviation for predictive control. 0 to 300 Online control weighting ratio Pn1A0 Servo Adjusts the Servo rigidity for the No. 1 gain. 1 to 500 Online rigidity Pn1A1 Servo Adjusts the Servo rigidity for the No. 2 gain. 1 to 500 Online...
- Page 604 Digit Name Set- Explanation size ting ×0.01 Pn1A2 Speed Sets the filter time constant for No. 1 gain speed feed- 30 to Online feedback back. 3200 filter time constant ×0.01 Pn1A3 Speed Sets the filter time constant for No. 2 gain speed feed-...
- Page 605 /rota- 1073741824 tion −32767 to Pn214 Backlash Mechanical system backlash amount (the mechani- Com- Online compen- cal gap between the drive shaft and the shaft being mand 32767 sation driven) unit amount ×0.01 Pn215 Backlash Sets the backlash compensation time constant.
- Page 606 Sets rotation speed during jog operation (using Servo r/min 0 to Online Drive’s personal computer monitoring software) 10000 Pn305 Soft start Sets acceleration time during speed control soft start. 0 0 to Online accelera- 10000 tion time Pn306 Soft start Sets deceleration time during speed control soft start.
- Page 607 Name Set- Explanation size ting Pn400 Not used. (Do not change the setting.) ×0.01 Pn401 1st step Sets the filter time constant for internal torque com- 0 to Online 1st torque mands. 65535 command filter time constant Pn402 Forward Forward rotation output torque limit (rated torque...
- Page 608 Digit Name Set- Explanation size ting ×0.01 Pn412 1st step Sets the filter time constant for No. 2 gain internal 0 to Online 2nd torque torque commands. 65535 command filter time constant Pn413 Not used. (Do not change the setting.) Pn414 Not used.
- Page 609 Not used. (Do not change the setting.) POT (forward Allocated to CN1, Offline Stan- drive prohib- pin 13: Valid for low dard ited input) input setting: signal Input Allocated to CN1, terminal allo- pin 7: Valid for low cation...
- Page 610 Digit Name Set- Explanation size ting Pn50C Input sig- Not used. (Do not change the nal selec- setting.) tions 3 Not used. (Do not change the setting.) Not used. (Do not change the setting.) Not used. (Do not change the setting.)
- Page 611 (Do not change the setting.) Pn511 Input sig- DEC signal Allocated to CN1, Offline Stan- nal selec- input termi- pin 13: Valid for low dard tions 5 nal allocation input setting: Allocated to CN1, pin 7: Valid for low input Allocated to CN1,...
- Page 612 Pn515 Not used. (Do not change the setting.) 8888 Pn51B Not used. (Do not change the setting.) 1000 Pn51E Deviation Sets the detection level for the deviation counter 10 to 100 Online counter overflow warning. overflow warning level Pn520 Deviation...
- Page 613 Servo ON. overflow warning level at Servo-ON Pn529 Speed Sets the speed limit for when the Servo turns ON 10000 r/min 0 to 10000 Online limit level with position deviation accumulated. at Servo- Pn52A Not used.
- Page 614 (Do not change the setting.) Pn531 Program Sets the program JOG movement distance. 32768 Com- 1 to Online 1073741824 mand movement unit distance Pn533 Program Sets the program JOG operation movement speed. 500 r/min 1 to 10000 Online movement speed...
- Page 615 JOG operation. accelera- tion/decel- eration time Pn535 Program Sets the delay time from the program JOG opera- 0 to 10000 Online JOG wait- tion start input until operation starts. ing time Pn536 Number of Sets the number of repetitions of the program JOG...
- Page 616 (A. 96@). Ignores command warning (A. 95@) and communica- tions warning (A. 96@). Ignores setting warning (A. 94@), command warning (A. 95@), and com- munications warn- ing (A. 96@). Communica- 0 to F Detects communi- Online tions error cations errors count at single (A.E60) if they...
- Page 617 Pn80C Acceleration Sets the switching speed ×100 com- 0 to 65535 Online Settings can constant switch- for the step 1 and step 2 mand be changed ing speed acceleration when two- units/s when the step acceleration is exe- axes are cuted.
- Page 618 Pn80F Deceleration Sets the switching speed ×100 com- 0 to 65535 Online Settings can constant switch- for the step 1 and step 2 mand be changed ing speed deceleration when two- units/s when the step deceleration is exe- axes are cuted.
- Page 619 = 0). 1 to 3 Not used. (Do not change the setting.) Pn817 Zero Sets the origin search speed after the decel- ×100 0 to 65535 Online Settings can point eration limit switch signal turns ON. com- be changed...
- Page 620 Pn00A Filter set- 0000 0000 to Online Sets the filter time constants. tings 000F When using this parameter, turn ON bit 4 of SW2 on the SMARTSTEP Junior Servo Drive. Position Control Parameters Param- Parame- Param- Contents Default Unit...
- Page 621 Always invalid. Not used. (Do not change the setting.) Pn522 Position- Sets the width of the positioning completed range. Com- 0 to Online ing com- mand 1,073,7 pletion unit 41,824 range 1 Pn524...
- Page 622 0. reference ence Software limit check using refer- ence Not used. (Do not change the setting.) Pn803 Zero point Sets the origin position detection range. Com- 0 to 250 Online width mand unit...
-
Page 623: Range
(Busy Flag for each axis = −1,073, Pn814 Final travel Sets the distance from the external signal input posi- Com- Online Set- distance tion when external positioning is executed. mand 741,823 tings for exter- unit... - Page 624 (Busy Flag for each axis = −1,073, Pn819 Final travel Sets the distance from the latch signal input position Com- Online Set- distance to to the origin, for when origin search is executed. mand 741,823 tings return to...
-
Page 625: Not Used
Axes to connect Sets the following for the axes registered in the scan (See note.) list (bits 0 to 15 correspond to axes 1 to 16). 0: Start MECHATROLINK communications. 1: Do no start MECHATROLINK communications. n+3 to Not used (reserved... - Page 626 PCU is stored. n+14 Not used (reserved by the system). Note The REJOIN Bit and the Axes to Connect parameter are supported for unit version 2.0 or later. The allo- cated bit and word are not used for earlier unit versions.
- Page 627 0: PCU is not busy. 1: PCU is busy. Connection Status 0: MECHATROLINK communications stopped. Flag 1: MECHATROLINK communications executing. n+17 to Reserved by the sys- n+20 tem. n+21 Unit error code Shows the error code for the Unit common error that occurred.
- Page 628 1 to 16. to CPU tions status Axis 2 communica- The bits will turn ON if the corresponding axes regis- Unit) bits tions status tered in the scan list are communicating normally. 0: Communications for the corresponding axis have Axis 3 communica- stopped, or the axis not registered in scan list.
-
Page 629: Emergency
Appendix C Operation Area I/O Allocations Axis Operating Output Memory Area Allocations a = Beginning word of Axis Operating Output Memory Areas specified in Common Parameters + (Axis No. −1) × 25 Word Bits Category Name Function Output Direct oper- LINEAR INTERPO- : Starts setting linear interpolation. - Page 630 Linear interpolation: speed/ value 1 Interpolation acceleration time, Unit: ms torque con- (rightmost word) Speed control: trol data Torque limit/torque feed forward, Unit: % a+11 Option command Torque control: value 1 Speed limit, Unit: 0.001% (leftmost word) a+12 Option command...
- Page 631 Interpolation axis Specify the axes for linear interpolation for combina- polation designation for axis 1 tions of axes 1 to 4. Bits 00 to 03 correspond to axes data (See note 2.) 1 to 4. 0: Not an interpolation axis.
- Page 632 (See note 1.) Note (1) Allocated in Axis Operating Output Memory Areas for axis 1 and axis 5 for Position Control Unit Ver. 1.1 or later. These bits are not used in the Axis Operating Output Memory Areas for other axes.
- Page 633 Appendix C Operation Area I/O Allocations Axis Operating Input Memory Area Allocations b = Beginning word of Axis Operating Input Areas specified in Common Parameters + (Axis No. −1) × 25 Word Bits Category Name Function Input Axis Con- Receiving Com- 0: Command reception enabled.
-
Page 634: Mand
1: Servo Drive finished executing position control command and the position is within Positioning Completion Range 1. During speed control: Speed Conformity Flag 0: Speed does not match the speed designation for speed control. 1: Speed matches the speed designation for speed control. - Page 635 Operation Area I/O Allocations Word Bits Category Name Function Input External I/O Forward rotation limit Returns the status of I/O signals for each axis. (PCU status input 1: Signal valid to CPU 0: Signal invalid Reverse rotation limit Unit) input The external I/O status shows the enabled/disabled status of signals used for PCU control.
-
Page 636: Unit
Note (1) Allocated in Axis Operating Input Memory Areas for axis 1 and axis 5 for Position Control Unit Ver. 1.1 or later. These bits are not used in the Axis Operating Output Memory Areas for other axes. -
Page 637: D List Of Error Codes
Appendix D List of Error Codes PCU Common Errors Indicator status Category Error name Error code Errors at Not lit Not lit Not lit Not lit Not lit CPU Unit power interrup- Power Interruption powerup tion Unit system error Watchdog Timer Opera-... - Page 638 G5-series Servo Drives/G-series Servo Drives Error code: 4@@@ hex The numbers in the boxes of the error codes displayed for alarms are given as decimal numbers for the Servo Drives and as hexadecimal numbers for the Position Control Units. The same numbers are given in the boxes of the error codes displayed for warnings for the Servo Drives and...
- Page 639 The alarms that occur in the Servo Drive correspond to error codes that are detected by the PCU when a MECHATROLINK communications connection has been established, as shown in the following table.
- Page 640 Parameter destruction The EEPROM write verification data was corrupted when the data was read from the EEPROM at power-ON. 4026 Drive prohibition input error Forward and Reverse Drive Prohibit Inputs (NOT and POT) both became OPEN. 4028 Absolute encoder system...
- Page 641 External scale error The external scale detected a warning. warning 40A9 External scale com- An external scale communications error occurred 3 consec- munications warn- utive times. Note (1) All warnings are retained. After resolving the problem, clear the alarms and the warnings.
- Page 642 List of Error Codes Appendix D (2) When multiple warnings occur, the warning codes are displayed on the front panel in the order of their priority (shown above). The value read from the network is set. List of G-series Alarm Displays The Servo Drive has built-in protective functions.
- Page 643 Battery warning Voltage of absolute encoder battery has dropped below 3.2 V. A.93 4093 Fan lock warning The built-in cooling fan stopped, or rotated abnormally. Note (1) All warnings are retained. After resolving the problem, clear the alarms and the warnings.
- Page 644 List of Error Codes Appendix D (2) When multiple warnings occur, the warning codes are displayed on the front panel in the order of their priority (shown above). The value read from the network is set.
- Page 645 A.72@ 4072 Overload Operation continuing with output torque at 120% to 245% of the rated torque for a W-series Servo Drive or at 115% to 200% of the rated torque for a SMARTSTEP Junior Servo Drive. A.73@ 4073 Dynamic brake overload The rotary energy has exceeded the dynamic brake resistor capacity during dynamic brake operation.
- Page 646 MECHATROLINK communications command aborted during incomplete execution. A.F1@ (See 40F1 Missing phase detected Main circuit power supply phase is missing, or the wire is burnt note 5.) out. A.F5 (See 40F5 Motor current error The current to the Servomotor is too small for the torque com- note 2.)
- Page 647 (2) If a Parameter Setting Warning or MECHATROLINK-II Command Warning occurs in the Servo Drive, a data setting error (axis error code: 3099 hex) will occur at the PCU, and the active axis in which the error occurred will decelerate to a stop.
- Page 648 List of Error Codes Appendix D...
- Page 649 PCUs are classified as CS/CJ-series CPU Bus Units. Make sure that the PCU's unit number is not already used by another CPU Bus Unit and that the area allocated to the PCU in the PLC is not occupied by another...
- Page 650 Appendix E Changing to CS1W/CJ1W-NC271/471/F71 from CS1W/CJ1W-NC113/133/213/233/413/433 PCU Parameters and Operating Data The functions and classification of the PCU's parameters and operating data are shown in the following table. CS1W/CJ1W-NC113/133/213/233/413/433 CS1W/CJ1W-NC271/471/F71 Item Setting Item Setting Common Parame- Used to allocate the Operating Data...
- Page 651 Axis Parameter Area To use data in the CS1W/CJ1W-NC271/471/F71 that was set as Axis Parameters in the earlier PCUs, the data must be converted either to corresponding settings in the Axis Parameter Area and Servo Parameter Area, or assigned in the Axis Operating Output Memory Area as command values used as operating data.
- Page 652 12 to 15 Servo Parameter Pn10F (Origin Return Mode Settings), however, must be set at the same time to the same setting as for this parameter. (For details, refer to 8-2-3 Data Set- tings Required for Origin Search.) 0006...
- Page 653 10-7 Backlash Com- pensation.) 0011 Backlash compensation speed (right- Backlash compensation is executed most word) by adding it to the amount of move- ment for positioning, so these param- 0012 Backlash compensation speed (leftmost eter settings are not supported. word)
- Page 654 Positioning monitor time A positioning monitor is not provided, so this parameter setting is not avail- able. Refer to the programming examples and set a timing monitor in the user program. (Refer to 11-2-6 Positioning (Absolute Movement or Relative Movement).) 0019...
- Page 655 This parameter setting is the same. tion 12 to 15 Servo Parameter Pn816 (zero point return direction), however, must be set at the same time to the same set- ting as for this parameter. (For details, refer to 8-2-3 Data Settings Required for Origin Search.)
- Page 656 0007 Maximum speed (leftmost word) The maximum speed is clamped at approximately 110% when a speed command is sent for a value that is equal or higher than the Servo Drive's (Servomotor's) maximum speed. 0008 Initial speed (rightmost word) An initial speed setting is not pro- vided.
- Page 657 Servo Parame- Pn80A The acceleration used for origin most word) ter Area Pn80B searches is the same as that used in Pn80C other positioning operations and is 0015 Origin search acceleration time (leftmost set according to the combination of word) settings in Servo Parameters Pn80A, Pn80B, and Pn80C.
-
Page 658: Com
Operating Memory Area words for CS1W/CJ1W-NC113/133/213/233/413/433 PCUs are shown in the follow- ing table as those for the X axis of the CS1W/CJ1W-NC113 PCU, and the beginning word n is calculated using the following equation. n = 2000 + (unit number × 10) The Operating Memory Area words for CS1W/CJ1W-NC271/471/F71 PCUs are calculated for each axis using the following equation. - Page 659 Output Com- The function of this bit is the same. (CPU mands for Direction designation The function of this bit is the same for Unit to special JOG direction. The rotation direction PCU) functions cannot be designated for interrupt feed- ing.
- Page 660 Flag This bit is used as a Warning Flag. Error Flag The function of this bit is the same for errors that occur in individual axes. The error flags for Unit common errors are allocated as Unit Error Flags in the Common Operating Memory Area.
- Page 661 The origin input status is provided either in bit 05 of this word (b+3) when phase Z input signal is set or in bits 06 to 08 of this word when the external latch signal is set, according to the selected signal.
- Page 662 Operating Data Area words for CS1W/CJ1W-NC113/133/213/233/413/433 PCUs are shown in the following table for the X axis of the CS1W/CJ1W-NC113 PCU. The beginning word “I” is allocated in either the Special I/O Unit Area or a user-specified DM/EM Area using settings in the Common Parameters.
- Page 663 PCUs, but they are set in the Servo Parameters (using Servo Parameter transfer functions) of the CS1W/CJ1W-NC271/471/F71. CS1W/CJ1W-NC113/133/213/233/413/433 The time from the initial speed until the maximum speed is reached is set in the following axis parameters. Origin search acceleration time (ms) Origin search deceleration time (ms)
-
Page 664: Unit
Appendix E Changing to CS1W/CJ1W-NC271/471/F71 from CS1W/CJ1W-NC113/133/213/233/413/433 CS1W/CJ1W-NC271/471/F71 The rate of increase or decrease in speed within a specified time unit is set in the following Servo Parameters. Type Parameter Parameter name Unit Setting range Parameter Default size setting Acceler-... - Page 665 The setting unit for the Zero Point Return Approach Speed 1 parameter is 100 command units/s. Therefore, to set the command unit to pulses, the set value for earlier PCUs must be multiplied by 1/100 to obtain the set value required for CS1W/CJ1W-NC271/471/F71 PCUs.
- Page 666 Origin Established and No Origin Status The No Origin Flag in both earlier PCUs and the CS1W/CJ1W-NC271/471/F71 indicates whether the origin has been established or not. The differences in the conditions whereby the No Origin Flag turns ON or OFF are as follows:...
- Page 667 Acceleration time (ms) Deceleration time (ms) For each parameter, the data that has been set in the Operating Data Area is enabled when the direct opera- tion (ABSOLUTE MOVEMENT or RELATIVE MOVEMENT) is started. CS1W/CJ1W-NC271/471/F71 The rate of increase or decrease in speed within a specified time unit is set in the following Servo Parameters.
- Page 668 Pn80F (deceleration constant switching speed) = 0 Changing Target Position and Changing Target Speed The target position and target speed can be changed during axis operation in the same way for both earlier PCUs and the CS1W/CJ1W-NC271/471/F71 PCU by using the following operation.
- Page 669 Data Transfer In earlier PCUs, all the parameters set by the PCU are in the Unit, and data is transferred using the PCU's data transfer functions (data transfer bit or IOWR instruction). In CS1W/CJ1W-NC271/471/F71 PCUs, however, data is classified into three types: Common Parameters, Axis Parameters, and Servo Parameters.
- Page 670 Appendix E Changing to CS1W/CJ1W-NC271/471/F71 from CS1W/CJ1W-NC113/133/213/233/413/433 • Common Parameters and Axis Parameters These parameters are transferred to the PCU using the data transfer bits (WRITE DATA, READ DATA, and SAVE DATA) in the Common Operating Memory Area. • Servo Parameters...
- Page 671 Axis Operating Output Memory Areas of axis 2 (for the combination of axes 1 to 4) or axis 6 (for the combination of axes 5 to 8).
- Page 672 If the deviation in feedback present positions between axes 1 and 2 or axes 5 and 6 exceeds the allowed devi- ation that is set in the parameters for each axis, both axes 1 and 2 or both axes 5 and 6 will be decelerated to a stop.
- Page 673 1 and 2 or axes 5 and 6 if detecting interaxial devia- tion is to be enabled (i.e., if the interaxial deviation is set to a positive number). Also, if either axis 1 or 2 or either axis 5 or 6 will be used for linear interpolation, set the allowed interaxial deviation of each axis to 0 (i.e.,...
-
Page 674: F Additional Functions For The Cj1W-Ncf71-Ma
Appendix F Additional Functions for the CJ1W-NCF71-MA... -
Page 675: Index
Index Axis Operating Input Memory Area 77, 228, 230, 232, 235 allocations 95, 195, 605 absolute encoder beginning word 98 operating procedure 327 designation 18, 98 origin 8, 326 monitoring 213 origin position offset 332 overview 194 overview 326 Servo Parameter Transferring Flag 23... - Page 676 Control I/O Connector 43, 47, 50, 61 Common Operating Input Memory Area control I/O signals 49 allocations 599 input Common Operating Memory Area 18, 77, 221, 223, 225, +24 VDC control power supply 49 248, 249, 251, 256 external latch inputs 49 allocated words 33...
- Page 677 95, 198, 286 EC Directives xxviii Forward Software Limit Flag 95, 197, 211 electromagnetic fields xxv function selection parameters 81, 133, 151, 551, 569, 592 EMC Directives xxviii emergency stop 8, 10 emergency stop 414 sample program 445...
- Page 678 19 MECHATROLINK-II Application Module 34 write source area 19 PCU errors 486 write source word 19 I/O parameters 82, 139, 162, 557, 580, 592 I/O signals 40 control 49 MECHATROLINK 12 MECHATROLINK standard settings 266, 268 communications 12...
- Page 679 94, 187 origin input signal selection 102 Position Completed Flag/Speed Conformity Flag 95 origin proximity input 95, 198 position control 2, 4, 7, 8, 9, 272 control units 273 origin return 8, 319 parameters 81, 137, 158, 555, 577...
- Page 680 CPU Unit 516 during interrupt feeding 354 external input 518 upper/lower limits 276 reflecting Servo Drive status changes in CPU Unit 517 present position preset 5, 8, 317 Restart Bit 21 data settings 317 restarting 21...
- Page 681 Positioning Proximity Flag 206, 210 setting switch 34 Reverse Software Limit Flag 206, 211 Speed Conformity Flag 206, 207 status parameters 82, 139, 162, 175, 557, 580, 592 Speed Limit Status Flag 206, 210 Stop Execution Flag 95, 196, 205...
- Page 682 Index stop functions 5, 7, 8 timing chart 382 deceleration stop 412 Torque Limit Status Flag 95, 197, 210 emergency stop 414 Transfer 512 overview 412 transfer cycle 100, 243 timing chart 415 setting 245 system configuration 3 Transfer Cycle Setting Error 255...
- Page 683 Index Control I/O Connector 43, 47, 50 warning displays 619 W-series Servomotor 16 Zero Speed Flag 197 Zone Data 10 zone range 9...
- Page 684 Index...
-
Page 685: Revision History
Revision History A manual revision code appears as a suffix to the catalog number on the front cover of the manual. Cat. No. W426-E1-10 Revision code The following table outlines the changes made to the manual during each revision. Page numbers refer to the previous version. - Page 686 Revision History...
- Page 687 OMRON (CHINA) CO., LTD. OMRON ASIA PACIFIC PTE. LTD. In the interest of product improvement, Room 2211, Bank of China Tower, No. 438A Alexandra Road # 05-05/08 (Lobby 2), specifications are subject to change without notice. 200 Yin Cheng Zhong Road, Alexandra Technopark,...
Need help?
Do you have a question about the CJ1W-NC271 - 12-2009 and is the answer not in the manual?
Questions and answers