
Related Manuals for Holman 48320


Summary of Contents for Holman 48320
- Page 1 Assembly Guide 48320-48420-48520 Holman Rancho Cordova, CA 95742 800-343-7486 InstallationSupport@Holman.com 20230413R4 DATE: ________________...
-
Page 2: Table Of Contents
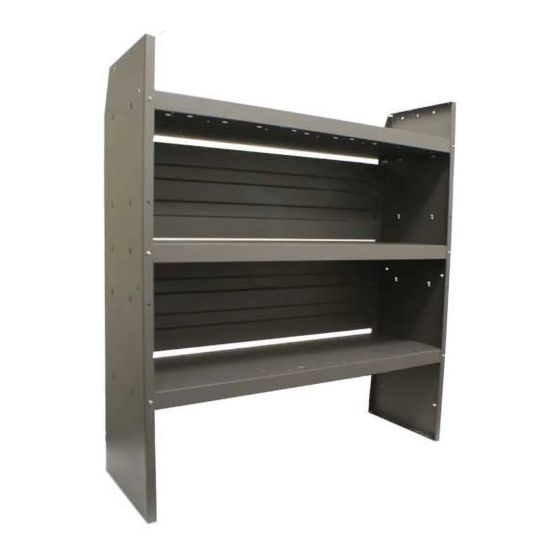
7/16” Socket and Wrench #2 Phillips Screwdriver Before You Begin Read all instructions prior to assembling or installing any Holman product. Instructions shown using a 46”H x 42”W Shelf. Instructions are the same for both 32”W and 52”W shelf units. -
Page 3: Parts List
Instructions – 48320-48420-48520 Parts List Hardware For Technical Support Call: 800-343-7486, Monday-Friday, 7AM - 4 PM (PST). Page 2... -
Page 4: Step 1 - Install Bottom Shelf
Instructions – 48320-48420-48520 Step 1 – Install Bottom Shelf Decide which option you want for each shelf before attaching it to the side panels. Shelves can be assembled with flanges pointing up to retain shelf contents, or flanges pointing down to allow the installation of drawer cabinets. -
Page 5: Step 2 - Install Middle Shelf
Instructions – 48320-48420-48520 NOTE: Image on the left reflects most applications. The image on the right shows the bottom shelf for a Ram ProMaster. Typical Installation ProMaster Installation Step 2 – Install Middle Shelf NOTE: There are multiple mounting locations for the middle shelf. Be sure to choose location prior to assembly. -
Page 6: Step 3 - Install Top Shelf
Instructions – 48320-48420-48520 Step 3 – Install Top Shelf Repeat Step 2 for top shelf as shown. This shelf is shown with the flanges up, since this is the most common configuration for this shelf. Step 4 – Install Left Side Panel ... -
Page 7: Step 5 - Install Gusset
Instructions – 48320-48420-48520 Step 5 – Install Gusset In the corner of the bottom shelf, install support gusset. Be sure to have the flange on the gusset towards the inside of the shelf. Slide gusset between shelf side and the shelf panel installed in step 1. - Page 8 Instructions – 48320-48420-48520 When installing the rear panels to the shelf assemblies, be sure the single lip flange is facing away from the shelf. If the rear panel is installed incorrectly, it may cause a rattle noise. ALIGN AND SQUARE SHELF.
Need help?
Do you have a question about the 48320 and is the answer not in the manual?
Questions and answers