
Subscribe to Our Youtube Channel
Related Manuals for UWE AGS-II


Summary of Contents for UWE AGS-II
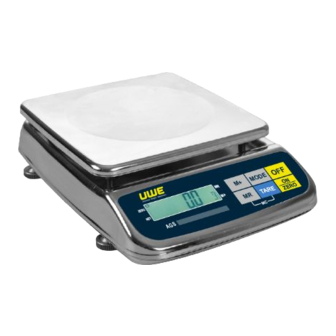
- Page 1 AGS-II OPERATION MANUAL PLEASE READ THIS MANUAL VERY CAREFULLY BEFORE OPERATING UNIVERSAL WEIGHT ELECTRONICS | UWE-EUROPE.COM...
-
Page 2: Table Of Contents
Information Before First Use Getting Started with Your Scale Product Specifications KEYBOARD LAYOUT AND DESCRIPTION Panel & Symbol Description Measurement unit: Keyboard Instructions Select weight units Tare Setting How to cancel the tare value Disabling the Auto Tare Function Accumulation Function (M+) Storing Weighing Results into Memory: Memory Recall Mode: Clearing All Accumulated Results:... -
Page 3: Information Before First Use
Information Before First Use Thank you for purchasing a UWE product, please read this manual carefully before starting to use it. The product packaging should contain the following items: ● AGS-II scale x 1 Round Scale Tray and Windshield accessory (only included with AGSII-300/600) x 1 Or, Square Scale Tray (VGS-1500~30K) ●... -
Page 4: Getting Started With Your Scale
Getting Started with Your Scale... - Page 5 Leveling and Windshield (AGSII-300/600) Installation...
-
Page 6: Product Specifications
Then, attach the windshield to finish setting up the VGS scale. Product Specifications The AGS-II Digital Weighing Scale supports multiple units of measurement for weights below 3kg and has OIML approval (( n≤3000,6000, 3000 x2(Dual-Interval). It offers high precision 30,000 (60,000) divisions, with other division numbers that can also be set. -
Page 7: Keyboard Layout And Description
Dual AGSII-3000 1500/3000 g 0.5/1 g 0.1 g 220 x 220 Interval Dual AGSII-6000 3000/6000 g 1/2 g 0.2 g 220 x 220 Interval Dual AGSII-15K 6/16 kg 0.002/0.005 kg 0.5 g 220 x 220 Interval Dual AGSII-30K 15/30 kg 0.005 /0.010 kg 0.001 kg 220 x 220... -
Page 8: Panel & Symbol Description
Panel & Symbol Description The table below describes the symbols and indicators on the AGS-II Digital Weighing Scale: Symbol/Indicator Description ZERO Indicates that the current measurement state is at the 'true zero point'. Indicates that the current display value is the net weight value (for example, the container weight has been deducted). - Page 9 For settings related to the IR Sensor, refer to the internal setting menu IR Sensor F51. This will guide you on sensor activation and setting. Measurement unit: Check & Measurement Conversion Supported for Hold Symbol Unit Factor (in grams) >3 kg models Function kilo-gram 1000 g...
-
Page 10: Keyboard
TL﹒t TROY TAEL 37.4290016 g TAEL(HK、 TL﹒C 37.799375 g Singapore) TOLA(INDIA) 11.6638038 g DRAM 1.7718451 g Note: ● "Supported for >3 kg models" indicates if the weighing unit supports models weighing more than 3 kg. ● "Check & Hold Function" signifies if this weighing unit supports the Check & Hold function. -
Page 11: Instructions
In the parameter setting mode, this key allows you to move up or increase the numerical position by 1. This key is used to submit the weighing result and save it (accumulate into the internal memory) when the accumulation function is enabled (F11=on). -
Page 12: How To Cancel The Tare Value
Tare Mode Description Press [TARE] after placing a load to reset the display to zero Manual Tare (tr.oFF) (Net weight). NET indicator shows net weight value. Automatically tares the first stable weight placed on the scale. If First Auto Tare (tr.on) "auto print"... -
Page 13: Accumulation Function (M+)
Accumulation Function (M+) Before you begin, remember the Accumulation Function can only be activated when the F11/ACC is ON. Ensure that the unit of measurement is consistent throughout. Clear accumulated values after unit conversion. The accumulation function can accommodate up to 999 entries or a total accumulated value of 999,999. -
Page 14: Check Weighing Function
Step Operation Display/Indicator Make sure the scale is at zero Displays "0" If a container is present, press [TARE] to Displays "0" eliminate its weight Choose 'PCS' as your unit of measurement by Unit of measurement shows pressing [MODE] "PCS" Initiate the sampling mode by long pressing Displays "S---"... - Page 15 Activation/Deactivation Step Display Notes Hold MODE (⇧) until display shows "CHK?". To activate, press TARE (↵). CHK? To deactivate, either press ZERO (⇨) or allow the system to time out after 8 seconds. If activated, the display shows "PrEV". Press TARE (↵) to use previous settings, or press ZERO (⇨) to set PrEV new values.
-
Page 16: Percentage Weighing
bb-Lo Beeps when the result is below the lower limit. Important Notes ● Measurement Units: Check Weighing can be used in g, kg, lb. PCS ● Minimum Activation: 20d in weighing mode, 2pcs in counting mode. ● Limit Validation: Lower limit must be less than the upper limit. Percentage Weighing Use the percentage mode to measure the weight of a reference item, then display the weight of the test item as a percentage of the reference item's weight. -
Page 17: Internal Setting Function
Internal Setting Function The table below lists the internal functions available, some of which are only authorized for technical personnel. Do not attempt to disassemble any certified scales or any sealed structures Display Function Setting Access (Note 1) Password or Legal F0 * Zero tracking parameter setting (0.25/0.5/1.0/2.0d) restrictions... - Page 18 1. Firmware version and display check 2. Brightness adjustment Open (uncontrolled) (darkest/dark/medium/bright / brightest) Specification setting (for trade/ maximum weighing + Password or division value/calibration) hardware lock control Auto shutdown setting (ALL.on or wait minutes) Open (uncontrolled) Measurement unit menu (on/OFF + kg/lb/g….) Open (uncontrolled) Digital filter parameter selection (anti-shock intensity Open (uncontrolled)
- Page 19 Display refresh rate [dSp. 0 /1/2/3/5/ 9 ] Password control Password or Legal Stable Condition Selection restrictions Password or Legal F33* Key Stability Control restrictions Zero near residual weight zeroing range [ 0 /1/2/3/5 d Password or Legal F35* restrictions Password or Legal F36* Weight value drift compensation [0.0~2.0d]...
-
Page 20: Function Definitions And Parameter Settings
Function Definitions and Parameter Settings Step Operation Display/Indicator Power on sequence Power on the device by pressing the [ON/OFF] key. starts Before the countdown ends, press the [TARE] key to Displays "F1" or "F0" enter internal settings mode. Use [▲] key to go to next option or [▼] key to go back The next or previous to previous option. - Page 21 The default setting is medium brightness. All display symbols will light up (backlight included for LCD type) and alternate with the program version code (for example: 1.xy). Adjust the ⇧ display brightness using the key. There are five brightness levels to choose from to achieve optimal display visibility.
- Page 22 F8 Configuring the RS-232 Connection Action Options Description Enter RS-232 Press [TARE] when F8 is This opens the menu for external device Configuration displayed. selection. Choose PC (Computers) / TSC The type of device you're connecting to. Use [▲]/[▼] to select and [TARE] to External (Label Printers) / SH-24 Device...
- Page 23 In this setting, use the [M+/MCr⇦] button to transmit a single data set. To send the total accumulated weight, first press the [MR] button, then press the [M+/MCr⇦] button. This action will send the total weight and simultaneously clear the weight from memory. WEIGHT (kg) Remarks 100.02 H...
- Page 24 Press [MC] to print total (only when F11 is set to Total 9876.10 ACC-on) When real-time clock function (F17) is enabled: When the real-time clock function is enabled (set as 'rtC.on'), the date and time values will be included in the RS-232 data stream: Format Set to Ser1.x: 2022/07/25 10:30:21 ST, NT,...
- Page 25 This setting allows the device to automatically set the indication to zero when the instrument is switched on and before it is ready for use. Menu Path: [F10. IZS] -> [In.=OFF/10/20/30/50/100] The scale sets its zero point at startup based on its calibration. If the load exceeds the allowable range, it won't zero and will display 'Err.4'.
- Page 26 Locks when the The weight weight variation is Default: 5d Lock.d value locks less than ± xd; (Lock in when the weight Unlocks when Small scale applications Range: range) change is within more than ± xd; 1~9d a certain range Locks again when less than ±...
- Page 27 Step Code Step Instruction Additional Information Start of the password setting Press the [TARE] button to enter F16.Pin process this setting. Old password [O.Pin] Use the [▲] or [▼] key to increase appears for 1~2 seconds, O.Pin then flashing display [ 0 ]. or decrease the old password value, This is a prompt for you to then press [TARE].
- Page 28 Activating Real-Time Clock (RTC): Toggle RTC on or off by choosing between [rtC.on] or [rtC.oFF] in [F17.dAt]. If [rtC.on] is selected, the time will be included in the output data. Time Setting: Set the time in a 24-hour format (hh:mm:ss). When [12:30:30] appears on the display, use the [▲...
- Page 29 This setting decides whether operations (ZERO, TARE, M+, Print) need a stable condition (defined in F32) to be executed. ● kEy.St.y: Operations can be performed only when the weight is stable. ● kEy.St.n: Operations can be performed regardless of weight stability (not available when TYPE=Legal).
-
Page 30: Maintenance And Care Guidelines
Steps: 1. Find and select 'F100' in the menu. 2. Confirm the reset by pressing [TARE]. 3. To cancel, press [▼] or power off the device. 4. Save current settings by pressing and holding [ZERO]. Maintenance and Care Guidelines ● Do not attempt to open or repair the scale yourself; seek assistance from qualified technicians.
Need help?
Do you have a question about the AGS-II and is the answer not in the manual?
Questions and answers