
Subscribe to Our Youtube Channel
Related Manuals for UWE APM-II


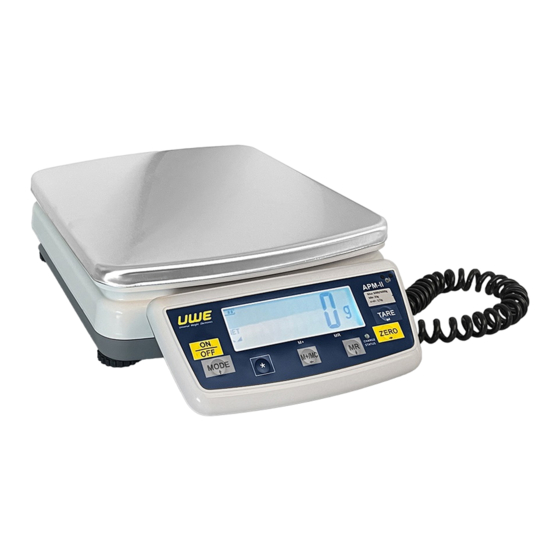
Summary of Contents for UWE APM-II
- Page 1 APM-II OPERATION MANUAL PLEASE READ THIS MANUAL VERY CAREFULLY BEFORE OPERATING UNIVERSAL WEIGHT ELECTRONICS | UWE-EUROPE.COM...
-
Page 2: Table Of Contents
Information Before First Use Product Specifications KEYBOARD LAYOUT AND DESCRIPTION Keyboard Instructions Select weight units Tare Setting How to cancel the tare value Disabling the Auto Tare Function Accumulation Function (M+) Storing Weighing Results into Memory: Memory Recall Mode: Clearing All Accumulated Results: Deleting a Specific Accumulated Entry: Counting Mode Check Weighing Function... -
Page 3: Information Before First Use
Information Before First Use Thank you for purchasing a UWE product, please read this manual carefully before starting to use it. The product packaging should contain the following items: Your product package should contain the following items: ● APM-II scale x 1 ●... - Page 4 Construction: Compact size with durable and robust construction ● Additional Features: The APM-II models come with a removable indicator and offer dual-interval measurement with a large weighing pan of 280 x 330mm. They are ideal for high-capacity weighing needs and we also accept customized models with higher precision.
-
Page 5: Keyboard Layout And Description
KEYBOARD LAYOUT AND DESCRIPTION Symbol/Indicator Description ZERO Indicates that the current measurement state is at the 'true zero point'. Indicates that the current display value is the net weight value (for example, the container weight has been deducted). No dedicated symbol, when the result is in an unstable state, it is indicated by (Stable) flashing the measurement unit symbol. -
Page 6: Keyboard
Keyboard Function Press this button to turn on the scale. If you want to turn off the scale, ON/OFF press and hold this button for more than 0.5 seconds. Use this key to reset the display value to zero, but make sure you're within the specified zero range. -
Page 7: Instructions
Instructions Place this scale on a solid flat surface, make sure that the environment has no strong ● wind/vibration/radio interference. Adjust the four adjustment feet according to the status of the bubble level, make sure to ● adjust to a horizontal position Make sure that the weighing pan is empty, turn on the machine and wait for the numbers ●... -
Page 8: How To Cancel The Tare Value
Automatically tares the first stable weight placed on the scale. Package Tare Auto tare activates when check weighing function is enabled and (tr.Pack) the measured item falls within the acceptable weight range. How to cancel the tare value Action Manual Tare Mode Auto Tare Mode Step 1: Clear the Remove all items from the scale... -
Page 9: Storing Weighing Results Into Memory
Storing Weighing Results into Memory: Place your load on the scale. Wait for the "stable" indicator ◣◢ to appear on the display. Press the [M+/MC] button. Your weight result is now stored in the memory. A ▼ symbol will appear, and the screen will briefly show the total number of entries (t=xxx) and the total accumulated value. -
Page 10: Check Weighing Function
Input the quantity of pieces in your sample batch. Increase the quantity with [MODE⇧], The input quantity is displayed decrease with [MR⇩], and shift to the next digit with [ZERO⇨] Put the sample batch on the scale 'OK' indicator lights up Confirm the setting and leave the sampling The display shows the quantity mode by pressing [TARE]... -
Page 11: Percentage Weighing
Setting Limits Step Display Action Use ZERO (⇨) to move the flashing digit and MODE (⇧) to increase the value. Confirm with TARE (↵). Follow the same process as in Step 2. Setting Alarm Mode Step Display Action Display shows "bEEP" briefly, then changes to "bb-no". Use MODE (⇧) or MR (⇩) to choose the alarm mode. -
Page 12: Rs-232 Connection (D-Sub 9 Pin Female Connector)
Step Operation Display/Indicator Ensure the scale is zeroed "0" Press [TARE] to eliminate the weight of "0" the container if present Select 'Pct' as your unit of measurement "Pct" by pressing [MODE] Hold down [ZERO⇨] to initiate 100% "S=100" sampling mode Place the reference item (representing 'OK' lights up 100%) on the scale... - Page 13 Internal Setting Function The table below lists the internal functions available, some of which are only authorized for technical personnel. Do not attempt to disassemble any certified scales or any sealed structures Display Function Setting Access (Note 1) Password or Legal F0 * Zero tracking parameter setting (0.25/0.5/1.0/2.0d) restrictions...
- Page 14 UART1: Peripheral equipment menu and output mode/data format selection for serial communication Open (uncontrolled) connection. Tare mode menu: Open (uncontrolled) manual/automatic/continuous/packaging Password or Legal F10* Startup zeroing range: (In.=OFF/10/20/30) restrictions Open accumulation function? (Accumulation key is Open (uncontrolled) only used as print key) Hold function setting: OFF/ Lock.H(auto)/ Lock.d Password or Legal (1~9d)/Lock.W(±0.1 ~±20.0%(display value))
-
Page 15: Function Definitions And Parameter Settings
IR SENSOR Setting & Distance selection! Password control Password or F100 Reset to factory settings hardware lock control When F3.TYPE is set to LEGAL, access to several functions, including F0, F10, F12, and F32 to F36, will be restricted and they will not appear in the main menu. Function F19 will remain active under these conditions. - Page 16 Confirm your selection by pressing the [TARE] key to The next option is proceed to the next option. displayed After setting all desired options, save them by Displays "SAVE" pressing the [►] key. Confirm and save your changes by pressing the Settings saved or [TARE] key.
- Page 17 Definition: This allows users to switch between or choose appropriate measurement units using the [MODE] key during weighing sessions. To enable or disable a measurement unit, navigate to [Unit] -> [on or oFF] F6. Digital Filter: This digital filter is designed to mitigate the effects of weight oscillation. Definition: Depending on the level of environmental disturbance, choose an appropriate anti- disturbance coefficient to ensure the display value is timely and stable.
- Page 18 Determines how data is sent from the Conti. / Conti.S / Auto. / scale to the device. Use [▲]/[▼] to select Transmission Manu / CMd. Type and [TARE] to confirm. The structure of the data being transmitted. SER1.0 ….SER1.4 / Set Data Use [▲]/[▼] to select and [TARE] to SER2.0…SER2.4...
- Page 19 Press [MR] then [M+/MC] to send the Total 9876.10 total weight and clear the weight from memory AUTO: Automatic Transmission Modes Format Set to Ser1.x: In this automatic mode, the data will be transmitted once the weighing result is stable. Please note that the accumulated total value cannot be printed in this format.
- Page 20 WEIGHT (g) 100.02 99.01 Total 199.03 F9: Auto/Continuous Tare This setting allows you to enable or disable the automatic or continuous taring of the first weight after the display stabilizes. Menu Path: [F9] -> [tr.oFF] / [tr.on] / [tr.Cnt] / [tr.PACK] The total tare value should not exceed the maximum weight capacity Settings Functionality...
- Page 21 In.= These settings work similarly to 'In.= 20', but with the respective 10/30/50/100 percentages. F11. Accumulation Functionality The M+ button combines the accumulation and print functions by default, performing both simultaneously. This can be changed by setting [ACC.oFF] to disable the accumulation functionality, turning M+ into a dedicated PRINT key.
- Page 22 weighing (Digital Filter) to Filt.0 or process is Filt.1) displayed Notes: ● For animal weighing, it is recommended to set F6 (Digital Filter) to Filt6 and F32 stability control to 2~3d. ● It is advised to turn off the F9-AutoTare function when using the F12 automatic HOLD function.
- Page 23 If you want to change the Here, you decide if you want to password, press [TARE] YYYY proceed with the password change otherwise press [⇦] to exit Use the [▲] or [▼] key to increase Enter new password (up to 6 digits) using number keys, or decrease the new password then press [TARE]...
- Page 24 [▲ or ▼] to change the value, [►] to 4. Set Time e.g., [12:30:30] Set time move Remember, use the [TARE] key to confirm your settings in each step. F30. Display Update Rate: Choose the speed at which the weight value is refreshed on the display. ●...
-
Page 25: Maintenance And Care Guidelines
Settings: Set the drift range to trigger compensation (0.0/0.25/0.5/1.0/2.0d). F38. Power-Saving Backlight Settings ● Define the amount of time (in seconds) before the backlight turns off after stabilization, helping save energy. ● Options: bl.oFF ->on -> bL.5 -> bL.10 -> bL.20 ●...
Need help?
Do you have a question about the APM-II and is the answer not in the manual?
Questions and answers