Table of Contents
Advertisement
Quick Links
Purelink USB32-E100 User Manual V1.0
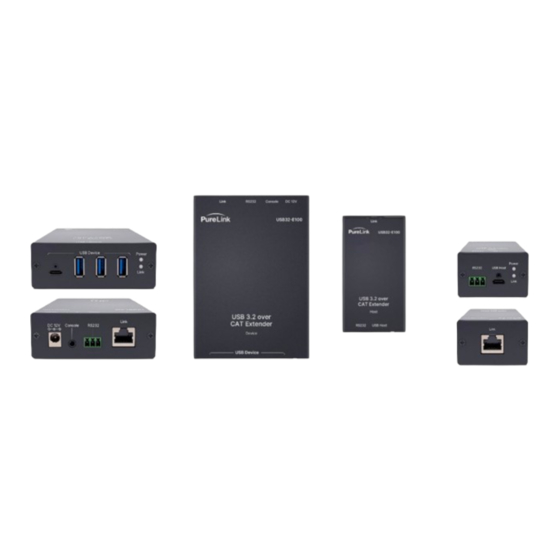
USB32-E100
USB 3.2 100 Meter Extender Over CAT
USER MANUAL
PureLink™
220-10 State Route 208
Fair Lawn, NJ 07410 USA
Tel: +1.201.488.3232
Fax: +1.201.621.6118
E-mail:
sales@purelinkav.com
For order support, please contact your local dealer.
For technical support, please contact us at support@purelinkav.com.
1
Advertisement
Table of Contents

Related Manuals for PureLink USB32-E100


Summary of Contents for PureLink USB32-E100
- Page 1 Purelink USB32-E100 User Manual V1.0 USB32-E100 USB 3.2 100 Meter Extender Over CAT USER MANUAL PureLink™ 220-10 State Route 208 Fair Lawn, NJ 07410 USA Tel: +1.201.488.3232 Fax: +1.201.621.6118 E-mail: sales@purelinkav.com For order support, please contact your local dealer. For technical support, please contact us at support@purelinkav.com.
-
Page 2: Table Of Contents
Purelink USB32-E100 User Manual V1.0 Contents Introduc�on ..............................3 Features ..............................3 Specifica�ons ............................3 Opera�on Controls and Func�ons ........................ 4 Transmiter ..............................4 Receiver ..............................5 LED Indicators ............................5 RS-232 Pin Define ............................6 Installa�on..............................6 Wall Installa�on ............................7 DIN-Rail Installa�on .......................... -
Page 3: Introduc�On
PureLink’s USB32-E100 USB-C 3.2 Gen 1 provides up to 100 meters of reliable extension. Adding the USB32-E100 could not be simpler, connect the TX and RX with CAT6a cable or beter, apply power to the TX, add your USB devices, and that’s it! The USB32-E100 is a perfect extension solu�on for USB cameras, touch panels, as well as desktops, laptops, and more. -
Page 4: Opera�On Controls And Func�Ons
Purelink USB32-E100 User Manual V1.0 Opera�on Controls and Func�ons Transmiter Name Function Description To connect to receiver HDBaseT To connect to RS-232-command-controllable device RS-232 (**Needs terminal block to RS-232) To connect to USB3.2 Gen1 source USB Type-C Refer to LED Indicator... -
Page 5: Receiver
Purelink USB32-E100 User Manual V1.0 Receiver Name Function Description To plug in DC 12V power adapter DC Jack To update FW (needs 3.5mm jack cable to UART) Console To connect to RS232-command-controllable device RS-232 (needs Terminal Block to RS-232) To connect to transmitter HDBaseT To connect to USB device, USB3.2 Gen1 / 2.0 / 1.1 / 1.0... -
Page 6: Rs-232 Pin Define
Purelink USB32-E100 User Manual V1.0 RS-232 Pin Define Installa�on Step 1 Use machine screws to fix angle brackets on both sides of your product. Step 2 Use self-drilling screws to fix the product on a platform. -
Page 7: Wall Installa�On
Purelink USB32-E100 User Manual V1.0 Step 3 Move the product to get fixed and then lock the screws. Wall Installa�on Step 1 Same way as “Installed on a Platform”, but need to put screw plugs into the pilot hole before... -
Page 8: Din-Rail Installa�On
Purelink USB32-E100 User Manual V1.0 DIN-Rail Installa�on Step 1 Use machine screws to fix a DIN-rail mounting plat on the side of your product. Step 2 Install your product on a DIN-rail as following instruction. -
Page 9: Rack Installa�On
Purelink USB32-E100 User Manual V1.0 Rack Installa�on Step 1 Lock machine screws in the rack. Step 2 Put your products on the rack. Step 3 Push the products to the other side of the rack. - Page 10 Purelink USB32-E100 User Manual V1.0 Step 4 Install the rack in a cabinet.
-
Page 11: Warranty
TERMS & CONDITIONS PureLink shall repair or replace the Product if it develops a material fault during the period of warranty, on condition that i) the Product has only been subject to normal use in a domestic or commercial environment in a manner consistent with its... - Page 12 Most problems can be corrected over the phone through close cooperation between Customer and a PureLink technician. To better enable PureLink to address a warranty claim, please have the Product’s serial and model numbers. If PureLink, in its sole discretion, determines that an on-site visit or other remedial action is necessary, PureLink may send a representative to Customer’s site.
Need help?
Do you have a question about the USB32-E100 and is the answer not in the manual?
Questions and answers