
Related Manuals for Viking VFR-500


Summary of Contents for Viking VFR-500
- Page 1 VFR-500 Conventional Releasing Panel Installation, Operations & Programming Manual Manual #5403789–REV A 10/23...
-
Page 2: Table Of Contents
VFR-500 • 5403789 • REV A • 10/23 Table of Contents Section 1: Introduction ..........................1-1 How to Use this Manual .........................1-4 Common Terminology ..........................1-4 Section 2: Before You Start Installation ....................2-5 System Specifications ..........................2-5 Environmental Specifications .........................2-5 Model / Available Cabinet Colors ......................2-5 System Configurations / Appliances .......................2-5... - Page 3 Section 7: Appendices ........................... A-42 Appendix A: System Maintenance and Testing ................... A-42 Appendix B: Compatibility Table ......................B-43 Appendix C: Compatible Conventional Smoke Detectors & Bases Table ........C-44 Appendix D: Installation Notes......................D-46 Appendix E: Operating Instructions for VFR-500 Releasing Panel ..........E-48...
-
Page 4: Section 1: Introduction
This manual contains safety information that is important to know and understand. This information is provided for the safety of installers, operators, and users of the Viking releasing panel as well as equipment. To help recognize this information, observe the following symbols. - Page 5 High voltage electrocution hazard. Do not handle live AC wiring or work on the device while AC power is active. This manual is designed to help with the specification, installation, and programming of the VFR-500 Release Panel. It is imperative that this manual be completely read and understood before the installation or programming of the panel. Save this manual for future reference.
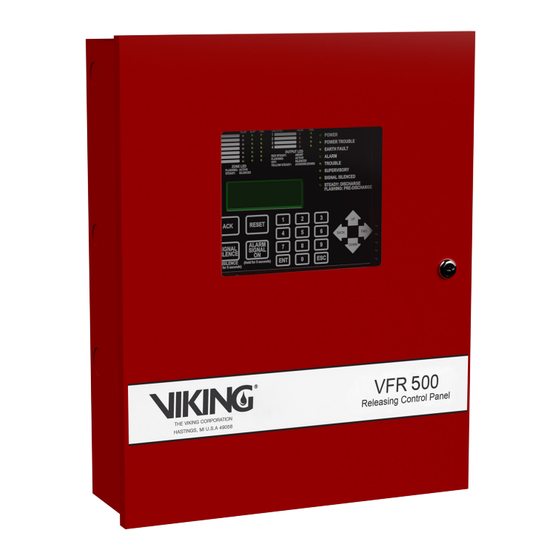
- Page 6 General Description The Model VFR-500 is a listed and approved, microprocessor based fire control/releasing panel. It is primarily designed for use as a releasing panel for pre-action and deluge, water based extinguishing systems or for agent extinguishing systems. The VFR-500 may also be used as a stand alone fire control panel.
-
Page 7: How To Use This Manual
How to Use this Manual Refer to this manual before contacting Technical Support. The information in this manual is the key to a successful installation and will assist you in understanding proper wire routing, system requirements, and other guidelines specific to the VFR-500 system. -
Page 8: Section 2: Before You Start Installation
VFR-500 • 5403789 • REV A • 10/23 Section 2: Before You Start Installation This section addresses information that will help you in completing a successful installation, such as the VFR-500 cabinet layout, specifications, and environmental considerations. System Specifications Cabinet Description... -
Page 9: Electrical Specifications
VFR-500 • 5403789 • REV A • 10/23 Electrical Specifications Please refer to the table below for electrical specifications: Table 3: System Panel Electrical Specifications Rating per Panel # Outputs Class Output Inputs – Class A* or B Outputs – Class A* or B P-Link –... - Page 10 VFR-500 • 5403789 • REV A • 10/23 Refer to table below for a breakout of the different wiring requirements shown by circuit type: Table 5: Main Board Circuit Wiring Types Wiring Type Type of Circuit Voltage Power AC Connection...
-
Page 11: Cabinet Dimensions
VFR-500 • 5403789 • REV A • 10/23 Cabinet Dimensions Figure 2. VFR-500 Cabinet Dimensions 14.78" 14.48" 4.63" 3.95" DEPTH LEFT SIDE RIGHT SIDE BOTTOM... -
Page 12: Cabinet Mounting Instructions
With the AC power still turned off at the circuit breaker panel, connect the AC line and neutral to terminal block TB1. Connect ground wire to the green ground screw on bracket. See all indicated locations on Fig. 4 VFR-500 Cabinet Wiring on page 2-10. -
Page 13: Cabinet Wiring Connections
VFR-500 • 5403789 • REV A • 10/23 Cabinet Wiring Connections Figure 4. VFR-500 Cabinet Wiring -- 2-10... -
Page 14: Wiring Connection Terminal Points
VFR-500 • 5403789 • REV A • 10/23 Wiring Connection Terminal Points Mounting Hardware 1 - Earth Ground 7 - NAC output circuits, power limited 2 - Ethernet Connection 8 - Relay Contacts to power limited 12- VFR-500 PCB Mounting Screws... - Page 15 Door holders will contribute to standby current draw when AC is present. 0.16A 0.10A Total current must not exceed power supply rating (3A on VFR-500). 12AH 0.29A 0.23A...
-
Page 16: Battery Connections
VFR-500 • 5403789 • REV A • 10/23 Main Supply Circuit The AC terminals are located in the upper left hand portion of the main board. The main board supervises the main AC power and provides indication that the AC power is absent. The terminals are rated at 120/240 VAC 50/60 Hz and are labeled "AC POWER"... -
Page 17: Section 3: Installation
VFR-500 • 5403789 • REV A • 10/23 Section 3: Installation This section covers how to install Input Circuits (IDCs), Notification Appliance Circuits (Outputs) and P-Link modules. Wiring requirements and configuration examples are included throughout this section. Please read this section carefully before installing detectors and accessories to insure proper installation. -
Page 18: Output Circuits Installation
Output Circuits Installation There are four (4) Output circuits provided on the VFR-500, each rated 3.0 amps continuous at 24VDC. The Output circuits may be configured for Class A or Class B. Class A wiring requires a Class A expansion board (CA-4064). Outputs may be programmed to provide steady (constant) voltage, a cadence pattern, releasing service or synchronized strobes. -
Page 19: Auxiliary Power
VFR-500 • 5403789 • REV A • 10/23 Figure 9. Class A Output Wiring Example (Requires the CA-4064 Expansion Board) OUTPUT 1 OUTPUT 2 NAC 1 NAC 2 CA-4064 Class A Card Notification Appliance DWG #602-5B Auxiliary Power The Auxiliary Power is a Class B 24 VDC special application output rated at a maximum of 1.0 Amp. The auxiliary power may be programmed as continuous or resettable 24VDC power. -
Page 20: Class A Expander Installation (Ca-4064)
VFR-500 • 5403789 • REV A • 10/23 Class A Expander Installation (CA-4064) Class A wiring configurations require the use of the CA-4064 expander board. Once the card is installed, the CA-4064 provides the return terminals for Outputs and P-Link devices. Refer to the figures below for examples of installing and wiring a Class A expander card. - Page 21 VFR-500 • 5403789 • REV A • 10/23 Figure 13. Example of Installing and Wiring a Class A Expander Card CA-4064 CLASS A MODULE DWG #638-6 #6-32 HEX NUT, SEMS 4 PLCS MAIN PCA BOARD NOT SHOWN FOR CLARITY Figure 14. Installed Class A Card...
-
Page 22: Vfr-500 Main Pca
VFR-500 • 5403789 • REV A • 10/23 Figure 15. Example of CA-4064 Module Installed Behind Main PCA VFR-500 Main WTRFL OUTPUT OUTPUT OUTPUT OUTPUT TROUBLE ALARM SUPV RELEASE CA-4064 Class A Expander Figure 16. Example of Output Wiring for CA-4064 and Class A P-Link Wiring... -
Page 23: Configuration Characteristics
VFR-500 • 5403789 • REV A • 10/23 P-Link Modules P-Links modules such as the IDC-6, remote annunciators, and relay expansion boards (RLY-5) are connected to the main control panel utilizing the four-wire P-Link bus for power and communication. This panel supports a maximum of thirty-one (31) P-Link modules, which can be connected using a Class B or Class A wiring (examples are provided throughout this topic). - Page 24 VFR-500 • 5403789 • REV A • 10/23 Figure 17. P-Link Device Class B, Wiring Example To the next device Panel Expansion Connection Device P-LINK Expansion Device DWG #602-11A Figure 18. P-Link Device Class A Wiring Example (Requires CA-4064) CA-4064...
-
Page 25: Addressing P-Link Modules
VFR-500 • 5403789 • REV A • 10/23 Addressing P-Link Modules P-Link modules' addresses are set by changing the dip switches located on each device. P-Link Addresses Every P-Link device has a five position dip switch which is used to program the device address ranging from one (1) to thirty-one (31). -
Page 26: Module Installation
VFR-500 • 5403789 • REV A • 10/23 Module Installation Initiating Device Circuit Module - IDC-6 The panel supports up to four (4) IDC-6 modules. The IDC-6 is controlled over the 4 wire P-Link connection. The IDC-6 mounts in the panel cabinet (up to two (2)) as shown below. It also can be mounted in the AE-2, AE-8 or AE-14 accessory cabinets.. -
Page 27: Setting Address
VFR-500 • 5403789 • REV A • 10/23 Setting Address The IDC-6’s address is set by dip switch S1 (as shown below). The address must be set in the range of one to thirty-one (1–31) to be recognized by the panel. (Refer to the "P-Link Addresses" table shown earlier in this section for DIP switch programming.) Figure 20. - Page 28 VFR-500 • 5403789 • REV A • 10/23 Figure 22. Example of IDC-6 Class B Wiring Potter Part #3005013 5.1 K EOL Normally Open Contact or Smoke Detector INPUT 2 INPUT 5 INPUT 6 INPUT 1 INPUT 3 INPUT 4 Input Circuit Class B Notes: 1.
- Page 29 VFR-500 • 5403789 • REV A • 10/23 Figure 24. Class A P-Link and IDC Power Wiring 3-26...
-
Page 30: Remote Annunciators Installation
VFR-500 • 5403789 • REV A • 10/23 Remote Annunciators Installation Up to 31 RA-4410G3 annunciators can be connected to the VFR-500. The RA-4410G3 provides the same user interface including the same LED and LCD display and keypad as the main panel. -
Page 31: Led Annunciator Installation (Led-4410G3)
VFR-500 • 5403789 • REV A • 10/23 LED Annunciator Installation (LED-4410G3) The panel supports up to ten (10) LED-4410G3 Annunciators.The LED-4410G3 displays alarm, supervisory, and trouble conditions for up to16 zones per annunciator. They also provide Local Silence and Lamp Test functionality. Blank zone labels are provided for use with the LED annunciators to label each zone name or identifier. - Page 32 VFR-500 • 5403789 • REV A • 10/23 Setting Addresses The LED-4410G3 address is set by dip switch S1. The address must be set in the range of one to thirty-one (1–31) to be recognized by the panel. (Refer to the "P-Link Addresses" table) Figure 28.
-
Page 33: Relay Board Installation (Rly-5)
VFR-500 • 5403789 • REV A • 10/23 Relay Board Installation (RLY-5) The panel supports up to thirty-one (31) RLY-5 (Relay Board) modules. Each RLY-5 provides 5 programmable output relays, which can be individually mapped to any zone. The RLY-5 is controlled over the 4-wire P-Link connection. The RLY-5 mounts in a mounting bracket as shown below, and then installed into the panel cabinet, or in either of theAE-2, AE-8 or AE-14 accessory cabinets. -
Page 34: Section 4: Operation
VFR-500 • 5403789 • REV A • 10/23 Section 4: Operation This section provides an overview of the control panel’s basic operations, which includes the status LEDs, function pushbuttons, and a Control Panel Menu Tree quick reference sheet. Control Panel Basic Operation The control panel is comprised of a four (4) line x 20-character LCD display panel, arrow keys, push button function keys, status LEDS, and the numeric keypad. - Page 35 VFR-500 • 5403789 • REV A • 10/23 Menu Navigation Keys The arrow keys allow you to scroll or move through the control panel menus. The Ent and Esc keys may also be used to navigate through menus; they are located on the numeric keypad. The table shown below provides a summary of the navigation keys.
- Page 36 VFR-500 • 5403789 • REV A • 10/23 Status LEDs The control panel’s LEDs communicate system conditions by illuminating and/or flashing the applicable green, red or amber indicators. These are described in the table below. Figure 35. Control Panel System Status LEDs...
- Page 37 VFR-500 • 5403789 • REV A • 10/23 Figure 36. Control Panel Zone / Output Status LED Table 10: System Status LEDs LED Type LED Color/Action Description Flashing Amber Fault condition present Steady Amber Fault condition acknowledged Flashing Amber Supervisory condition present...
-
Page 38: Section 5: Programming Options
VFR-500 • 5403789 • REV A • 10/23 Section 5: Programming Options The control panel can be configured using the on-board keypad or PC based programming tool. The panel stores the site specific configuration data in non-volatile memory. NOTICE TO USERS, INSTALLERS, AUTHORITIES HAVING JURISDICTION, AND OTHER INVOLVED PARTIES This product incorporates field-programmable software. - Page 39 VFR-500 • 5403789 • REV A • 10/23 Topic Feature or Option Permitted Possible Settings Setting(s) Comment in UL Permitted (Y/N) in UL864 / S527 Zone Restore Delay 0-300 Sec Full range allowed Delay to reactivate devices that turn off...
- Page 40 VFR-500 • 5403789 • REV A • 10/23 Topic Feature or Option Permitted Possible Settings Setting(s) Comment in UL Permitted (Y/N) in UL864 / S527 Abort has no affect after second alarm is received Mode 1-IRI: by the panel. Abort must be activated before...
- Page 41 VFR-500 • 5403789 • REV A • 10/23 Topic Feature or Option Permitted Possible Settings Setting(s) Comment in UL Permitted (Y/N) in UL864 / S527 Releasing Pre-Release Timer - 0-30 Seconds Full Range Length of time of pre- Manual Station...
- Page 42 VFR-500 • 5403789 • REV A • 10/23 Menu Tree Main Menu 2=Enable/ 3=Set Date/ 1=View History 4=Walk Test Disable Time 5=System Tools 6=Programming 7=Data Transfer 8=Panel Setup 1=Ethernet Tools 1=Program Number 1=Remote Access 1=System Setup 2=Erase History 2=Predischarge 2=Email History...
-
Page 43: Section 6: Communication Options
VFR-500 • 5403789 • REV A • 10/23 Section 6: Communication Options Connection Drawing for Central Station and Remote Station Operation of VFR-500 to Listed Commercial Fire Off Premise Communicator VFR-500 CONNECTION PFC-4410G3 CONNECTION Note 1 RLY-5 RLY-5 Note 2... - Page 44 Commercial fire off premise communicator shall have its own primary and secondary power sources or may be connected to VFR-500’s continuous Auxiliary Power if voltage and current ratings are compatible. Refer to Figure 10 for connections and voltage / current compatibility.
-
Page 45: Section 7: Appendices
VFR-500 • 5403789 • REV A • 10/23 Section 7: Appendices Appendix A: System Maintenance and Testing CAUTION Testing the panel or associated devices may result in a discharge of the suppression system. All necessary precautions shall be taken to prevent an unwanted activation of the suppression system. -
Page 46: Appendix B: Compatibility Table
VFR-500 • 5403789 • REV A • 10/23 Appendix B: Compatibility Table This section provides a listing of all Output appliances, two-wire (2-wire) smoke detectors, and remote annunciator device compatibilities. Table 11: Device Compatibilities Module/Device Compatibilities Output Appliances Refer to Potter document “5403592 Output Compatibility Document”. -
Page 47: Appendix C: Compatible Conventional Smoke Detectors & Bases Table
VFR-500 • 5403789 • REV A • 10/23 Appendix C: Compatible Conventional Smoke Detectors & Bases Table Compatibility List ID A Table 12: Smoke Detector & Bases Compatibilities Detector Model Identifier Base Model Identifier SYSTEM SENSOR (Brk) (Max. No. Of Detectors Per Zone Is 20) - Page 48 VFR-500 • 5403789 • REV A • 10/23 HOCHIKI (Max. No. Of Detectors Per Zone Is 25) SOC-24V* HD-3 HSB-221 HB-54 NS6-221 HB-4 NS4-221 HB-4 NS6-220 HB-3 SOC-24VN* HD-3 HSB-221 HB-54 NS6-221 HB-4 NS4-221 HB-4 NS6-22o HB-3 FENWAL (Max. No. Of Detectors Per Zone Is 25)
-
Page 49: Appendix D: Installation Notes
VFR-500 • 5403789 • REV A • 10/23 Appendix D: Installation Notes Circuit board assembly is mounted in the cabinet using six (6) fasteners as shown in the illustration below. D-46... - Page 50 VFR-500 • 5403789 • REV A • 10/23 D-47...
-
Page 51: Appendix E: Operating Instructions For Vfr-500 Releasing Panel
Take care not to activate the release circuit during testing. Test all initiating zones and notification circuits as described in the test procedure in the Viking VFR-500 manual #5403789. Test in accordance with NFPA 72 Inspection, Testing and Maintenance chapter (For Canada: ULC Standard CAN/ULC-S536) and any local requirements.
Need help?
Do you have a question about the VFR-500 and is the answer not in the manual?
Questions and answers