
Related Manuals for FLASHFORGE 3D PRINTER Adventurer 3 Pro 2


Summary of Contents for FLASHFORGE 3D PRINTER Adventurer 3 Pro 2
- Page 1 SZ16-ZN/EN-A01 Adventurer 3 Pro 2 This guide is only applicable to FLASHFORGE Adventurer 3 Pro 2 3D Printer...
-
Page 2: Table Of Contents
Content Preface Notice Terms Chapter 1: Adventurer 3 Pro 2 1.1 - Components Introduce 1.2 - Reference Chapter 2: Operating 2.1 - Unpacking 2.2 - Accessories 2.3 - Interface 2.3.1 - Build 2.3.2 - Tools 2.3.2.1 - Network 2.3.2.2 - Preheat 2.3.2.3 - Setting... -
Page 3: Preface
Flashforge Adventurer 3 Pro 2. Even if you are familiar with earlier Flashforge machines or 3D printing technology, we still recommend that please read this guide, as there is lots of important information about the Adventurer 3 Pro 2 for you to get a better 3D experience. -
Page 4: Chapter 1: Adventurer 3 Pro
Keep the printer out of children and untrained people’s reach. Electrical Safety Always use the printer with a properly grounded outlet. Do not refit Adventurer 3 Pro 2 plug. Do not use the printer in damp or wet locations. Do not expose the printer to burning sun. - Page 5 Work Environment Safety Temperature: RT 15-30 ℃; Moisture: 20%-70% Place Requirements The device must be placed in a dry and ventilated environment. The distances of the left, right and back side space should be at least 20cm, and the distance of the front side space should be at least 35cm. Device storage temperature: RT 0-40 ℃...
- Page 6 FCC Warning This device complies with part 15 of the FCC Rules. Operation is subject to the following two conditions: (1) This device may not cause harmful interference, and (2) this device must accept any interference received, including interference that may cause undesired operation. Changes or modifications not expressly approved by the party responsible for compliance could void the user’s authority to operate the equipment.
- Page 7 Terms Build Plate The surface on which the Adventurer 3 Pro 2 builds an object The black tape that covers Adventurer 3 Pro 2’s build plate so Build Tape that object can stick to the build plate well The three dimensional amount of space that an object Build Volume will use once it is completed.
-
Page 8: Components Introduce
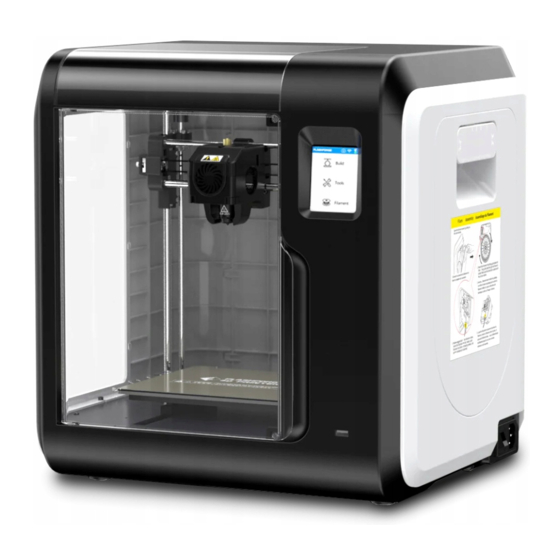
Chapter 1: Adventurer 3 Pro 2 1.1 Components Introduce 1. Filament guide tube 2. Filament guide tube joint 3. Extruder base 4. Cooling Fan 5. Removable nozzle 6. Extruder cables 7. Clip 8. Led light 9. Air guide 10. Front door 11. -
Page 9: Reference
1.2 Reference Name Adventurer 3 Pro 2 Number of Extruder 1, Removable Print Technology Fused Filament Fabrication [FFF] Screen Size 2.8”color IPS Touch Screen Build Volume 150*150*150 mm Layer Resolution 0.1-0.4 mm Build Accuracy ± 0.2 mm Positioning Accuracy Z-axis 0.0025mm; XY-axis 0.011 mm Filament Diameter 1.75 mm [±... -
Page 10: Chapter 2: Operating
Chapter 2: Operating 1.1 Unpacking 1. Open the box. 2. Take out the wrapping paper box on the top. 3. Be careful! Filament and power cable 4. Take out the printer from the box. are all placed inside the wrapping paper box. - Page 11 5. Plug the power cable into the input on the back and turn on the power switch, the touch screen is turned on. Power Switch X: 20.00 Y: 45.00 Z: 36.00 Status Language Move Camera Calibration Homing Filament Check 6. Click [Tools]-[Setting] in turn to enter page like this, turn to page two, click [Move]. Click the upper arrow in the moving page to make the extruder raises for removing the paper box on the bottom easier.
-
Page 12: Accessories
2.2 Accessories 3D Printer Filament Power Cable After-sales service card Quick Start Guide 0.6-265 Nozzle Screwdriver Unclogging Pin Tool Allen Wrench Grease Leveling Card PEI Flexible Build Plate Glue Stick... -
Page 13: Interface
2.3 Interface Menus Introduction Note: The interface layout may change whenever there is an upgrade of firmware. The functions below are only for demonstration purposes. 2.3.1 Build Read the print file from: The local memory card The USB stick The Cloud Back: back to upper interface 1. - Page 14 File details: Including file picture, time needed, filament needed. Build: To begin printing the file. Copy: To copy the files to the local memory card from the USB stick. Delete: To delete the print file. Print interface Cancel: To cancel the print job. Pause/Resume: To suspend or resume the print job.
-
Page 15: Tools
2.3.2 Tools Network: To connect the printer to your PC or the Internet. Preheat: To preheat the extruder and build plate. Setting: To implement relevant function setups. About: Information about the printer. 2.3.2.1 Network Wi-Fi ON/OFF: To turn on/off the Wi-Fi connection. Wi-Fi connection: To connect your printer with your PC via a stable Wi-Fi signal. - Page 16 Hot spot To set your printer as a WLAN hots pot. Turn on/off the WLAN hot spot. Hots pot setting: To set the hots pot name and password. Input hots pot name with numbers, characters and symbols. Tap to save the name and password. Ethernet Connection To connect your printer with your PC via Ethernet cable.
- Page 17 Cloud Connection 1. Turn on the Wi-Fi or Ethernet connection, connect the printer to Internet successfully. 2. Tap [Tools] - Tap [Network] - Tap [Cloud] on the printer. 3. Turn on the Cloud Connection function. 4. Register your cloud account and set your setting on https://cloud.sz3dp.com with the registration code on printer’s touch screen, or register your cloud account on http://polar3d.com to set your polar3d account and pin code.
-
Page 18: Preheat
2.3.2.2 Preheat setting ON/OFF: Turn ON/OFF the extruder or platform preheat. symbol, you could set preheat temperature. Long press symbol, set preheat temperature rapidly. Extruder/Platform preheat interface /265 /265 ℃ ℃ /100℃ It contains actual temperature, target temperature and heating progress. Extruder highest preheat temperature: 265 ℃... -
Page 19: Setting
2.3.2.3 Setting Network Preheat Status Language Move Camera Setting About Calibration Homing Filament Check Buzzer Factory Reset NozzleCheck AutoCalibration Update Extruder Setting interface Status Language Calibration Homing Move Camera Filament Check Buzzer Factory Reset Update Extruder Nozzle Check Auto Calibration... - Page 20 Status It displays the real-time Status Language coordinates of X-axis, Y-axis, Z-axis and the real-time temperature of extruder Calibration Home and platform. Language Status Language Calibration Home Choose the target language. Calibration Click the arrow to adjust the nozzle so that it just touches the platform Z axis Status...
- Page 21 Calibration: Extruder Calibration: Click on [calibration] to start pre-calibration. The first point to calibrate the initial distance between the extruder and the platform [see z-axis deviation value]. Click on the up and down arrows to adjust the Z-axis deviation value. You can also feel if there is slight resistance by pulling A4 paper or leveling card between them to decide the appropriate distance.
- Page 22 Camera: Turn on or turn off the camera. Move Camera Filament Check More details about Camera, please check Chapter 2.5. Filament check: To turn on/off the filament check, notice will pop out when filament is used up Move Camera Move Camera or suspended when the check is turned on.
-
Page 23: About
2.3.2.4 About Machine Type: Firmware Version: Wi-Fi Mac Adventurer 3 Pro 2 v1.03-1.1 02:00:00:00:11:66 Serial No.: Build Volume: 123456 150x150x150 Register Code: Usage counter:... -
Page 24: Filament
2.3.3 Filament Load /265℃ /265℃ /265℃ Change Preheat completed. Heating extruder... Press OK when new color appears Begin loading. Manual Cancel Load The extruder is heated up to the target temperature. After heat completed, insert the filament into the extruder at an upright angle until some resistance is sensed [as the filament is pushed through the feeding wheel]. -
Page 25: Print
2.4 Print Plug the power cable into the input on the right side and turn on the power switch, the touch screen is turned on. Power Switch 2.4.1 Load Filament 1. Open the filament cover, insert the filament into the filament intake, push filament into the feeding wheel until some resistance is sensed. - Page 26 Load Build /265℃ Change Tools Heating extruder... Manual Filament Cancel 2. Tap [Filament] - Tap [Load] - After load completed - Tap [OK] /265℃ /265℃ Preheat completed. Press OK when new color appears Begin loading. 3. Load completed when you see filament come out of extruder, Tap [OK]. Put the spool of filament on the spool holder, close the filament cover.
-
Page 27: Model File Transfer
2.4.2 Model File Transfer After generating the Gcode file, you can transfer it to your printer with different network methods. If use USB stick to print, please insert your USB stick with target .g/.gx file to your printer, there will be no need to set new network. Method 1: Wi-Fi Connection Network... - Page 28 4. In the pop up dialog box, the connection mode selects Automatic Scan or fill in the IP port column with the IP address of the printer. Query IP address clicking [Tools] - [About], turn to next page, you can see the IP address.
- Page 29 6. After the software slicing is completed, click [Send to printer]. Then the printer starts preparatory work such as preheating, and automatically starts printing after it is ready.
- Page 30 Method 2: Cloud Connection FlashCloud Network Preheat Wi-Fi Hot spot PolarCloud Setting About Cloud Ethernet FlashCloud PolarCloud Account: Printer Name: Flashforge PIN: Registration Code: ABCDEF Save Use the cloud connection to process printing operation. * The use of Flashforge cloud is in 2.4.3.1 section.
- Page 31 2.4.3 Print 6.62 GB Build Not Available Tools No Job Filament 1. Tap [Build], choose the file path: Printer internal memory, USB stick, Cloud. Ship-PLA.gx 20mm_Box- PLA.gx 2. Choose the model file, tap on its right to start printing; or tap model picture or model name to enter detail page, tap to start printing.
-
Page 32: Print
2.4.3.1 FlashCloud Print Login E-mail Password FlashCloud: Cloud.sz3dp.com Remember Password 1. Register your account on Flashforge cloud: Login After activate your account through your Forgot password Register email box, login in Flashforge cloud with your account. FlashCloud The current printer is empty. Please add a printer. Home My Printer Add printer... - Page 33 The current printer is empty. Please add a printer. Home My Printer Add printer Name Register code Type State My Printer Flashforge ABCDEF Adventurer 3 Pro 2 Idle My Model My Job Model Library 4. Add printer completed. FlashCloud Home User 2023.3.2 My Printer...
-
Page 34: Polarcoloud Print
FlashCloud Home Flashforge My Printer Time Remaining My Model My Job Model Library 21℃/0℃ 21℃/0℃ Closed Nomal Start Cancel 2.4.3.2 PolarCloud Print 1. Register Polar cloud account. Log in http://polar3D.com to register the account. 2. Query Polar cloud PIN code. [1]. - Page 35 3. Connect the Adventurer 3 Pro 2 to the Internet. Choose the appropriate network connection mode in the communication interface to connect the network [see the 2.3.2.1 section of the connection method]. 4. Connect the Adventurer 3 Pro 2 to the Polar cloud. PolarCloud Polar cloud switch Account: Enter the cloud connection interface [click tools >...
- Page 36 6. Click [MY OBJECTS], then click [UPLOAD] to upload the model. 7. Drag and drop the model files that need to be uploaded to the box area or click the box area to select the upload model, then click [UPLOAD] to upload.
- Page 37 8. Click [PRINT]. 9. Click [START], the printer starts the cloud task downloading, and starts printing when the download is finished.
-
Page 38: Model Remove
2.4.4 Model Remove As showed in picture, grasp the handles on both sides of the platform directly with both hands, and pull outwards to remove the build platform. When printing completed, extruder and build plate may still hot, Notices please start operating after cooling down! Please use the back side of the build plate when printing with PETG. -
Page 39: Replace Filament
2.4.5 Replace Filament Load /265℃ Heating extruder... Change Cancel 1. Tap [Filament] - Tap [Change], extruder will start preheating. 2. Pull out the filament as the picture 3. Insert new filament into the filament intake showed above. and push the filament into the feeding wheel until resistance is sensed. -
Page 40: The Guide Of Using Camera
2.5 The Guide of Using Camera Camera User Manual The use of Adventurer 3 Pro 2's camera is introduced as follows. Build Network Preheat Move Camera Tools Setting About Filament Check Filament 1. Tap [Tools] - [Settings] on the second page - [Camera], the user can click the [Camera] button to open it. -
Page 41: Flashcloud Camera Use
Login 2.5.1 The use of Flashforge cloud camera E-mail 1. Login Flashforge cloud website and register an account. After the mailbox Password activation, you can login and use the Flashforge cloud. Remember Password Flashforge cloud website: Login http://cloud.sz3dp.com Forgot password Register FlashCloud The current printer is empty. - Page 42 Add printer Name Register code Type State My Printer Flashforge XXXXXX Adventurer 3 Pro 2 Offline My Model My Job Model Library 4. Add succeed. ad3 pro 2 5. Click the camera icon pointed by the arrow. ad3 pro 2...
-
Page 43: Polarcloud Camera Use
2.5.2 PolarCloud camera use 1. Register Polar cloud account Emter www.polar3D.com website to register account. 2. Find Polar cloud pin code. [1]. After registering Polar cloud and log in Polar cloud website, click the upper right arrow, click [Settings]. Location Biography Website URL http://www.example.com/profile... - Page 44 3. Connect Adventurer 3 Pro 2 to the Internet. Choose the proper connecting way in the Network interface [the connecting way consults pagexx]. 4. Connect Adventurer 3 Pro 2 to the Polar cloud PolarCloud Polar cloud switch Account: Enter the cloud connection interface [click Tools- Network-...
-
Page 45: The Switching Can Be Controlled Through The Cloud
2.5.3 The switching can be controlled through the Cloud 1. Connect to Polar Cloud The user can turn on or turn off the camera through Polar Cloud. Click Tools-> Communication -> Cloud Connect -> Polar Cloud, enter the settings page of Polar Cloud, click the input boxes of account number and PIN, enter the account number and PIN, click the ‘Start’... - Page 46 Location Biography Website URL http://www.example.com/profile Email + ADD Email PIN Code XXXX [2]. Find PIN Code on the bottom of the page, the display numbers is PIN code. 2. Open or close the camera though the cloud. [1]. After switching on the camera function, click camera image on the front page to enter the interface like this, click the COMMANDS button pointed by the arrow.
-
Page 47: Error Handling
Notices a. If Polar cloud is in an intranet [that is, the printer and PC connect to the same router], the video is shown, and the state of printing can be displayed in real time. If Polar cloud is in an extra-net, the pictures are shown [in case of printing, a picture is sent per 20s; in case of not working, a picture is sent per 60s]. -
Page 48: Chapter 3: Q&A
Chapter 3: Q&A Q1. How to solve if the nozzle is clogged? Method 1: Tap [Preheat], heat up the extruder to 240℃, after heating completed, press the air tube joint and pull out the filament guide tube. Check to see whether the filament is bended or filament tip is not smooth, cut filament tip smooth and flat, install the guide tube and filament back, Tap [Load] . - Page 49 Q10. Is Adventurer 3 Pro 2 compatible with all kinds of AC power input ? Adventurer 3 Pro 2 is equipped with a built-in 24V/6.5A power supplier, suitable for 110V-240V input voltage. Q11. Is Adventurer 3 Pro 2 capable to be turned off automatically after printing job is finished ?
- Page 50 Do the printer Calibration again or do the Homing again, then print again to check result. Q21. You cannot find printing files when you use USB driver. USB driver file is not corrected. Adventurer 3 Pro 2 only supports FAT32 file system, please format USB driver into FAT32 file system.
-
Page 51: Chapter 4: Supports And Service
FlashForge team is on standby and ready to help you with any challenges you may have with your Adventurer 3 Pro 2. If the issues or questions are not covered in this User Guide, you can seek for solutions on our official website or contact us via telephone. - Page 52 Follow us Zhejiang Flashforge 3D Technology Co., Ltd. Address: No.518 XianYuan Road, Jinhua City, Zhejiang Province, China Service Hotline: +86 579 82273989 support@flashforge.com...
Need help?
Do you have a question about the Adventurer 3 Pro 2 and is the answer not in the manual?
Questions and answers