Advertisement
Quick Links
Advertisement

Subscribe to Our Youtube Channel
Related Manuals for WATSON Tonic Single Sided Workbench


Summary of Contents for WATSON Tonic Single Sided Workbench
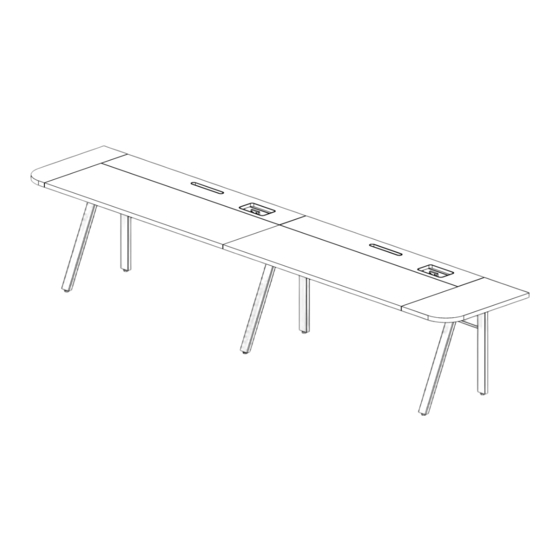
- Page 1 ASSEMBLY Tonic Single Sided Workbench V.23.1 10/2023 360.394.1300 watsonfurniture.com...
-
Page 2: Important Safety Instructions
This product is for use on a nominal 120-V circuit. Make sure that the product is connected to an outlet having the same configuration as the plug. No adapter should be used with this product. 2 TONIC SINGLE SIDED WORKBENCH ASSEMBLY INSTRUCTIONS... - Page 3 Screw (125285) (117011) Wing Nut INFILL CLIP Floor Anchor Tite Joint (888101) (486915) (480136) (0002294) DATA MANAGER CLIPS BLANK DATA PORT Z-CLIP (0000003) (0001367) (0000158) FLOOR ANCHOR BRACKET BENCH END BRACKET (504608-CP) (504608-CP) 3 TONIC SINGLE SIDED WORKBENCH ASSEMBLY INSTRUCTIONS...
- Page 4 END COVER (RIGHT SHOWN) INFEED JUMPER CABLE RACEWAY RAIL TOP SUPPORT RAIL END SEGMENT (RIGHT SHOWN) WORK SURFACE POWER RACEWAY REAR RACEWAY RAIL LEFT LEG ASSEMBLY MID LEG ASSEMBLY RIGHT LEG ASSEMBLY INFILL 4 TONIC SINGLE SIDED WORKBENCH ASSEMBLY INSTRUCTIONS...
- Page 5 Driver Bit Driver Bit Driver Bit Driver Bit Additional tools such as a 90 Degree Bit and an 18” Extension are helpful for some steps *No torque or ball bits should be used 5 TONIC SINGLE SIDED WORKBENCH ASSEMBLY INSTRUCTIONS...
- Page 6 When assembling 2 or more segments position the remaining Leg Assemblies and loosely attach the additional top support rails. Use left legs on the left, right legs on the right, and mid legs in-between. M6 1.00 x 12mm Screw (125285) 6 TONIC SINGLE SIDED WORKBENCH ASSEMBLY INSTRUCTIONS...
- Page 7 Raceway Rail Loosely attach raceway rail with 4 screws (125285) per rail. Loosely attach rear raceway rail with 4 nuts (117011) per rail. M6 1.00 x 12mm 8-32 Nut Screw (125285) (125285) 7 TONIC SINGLE SIDED WORKBENCH ASSEMBLY INSTRUCTIONS...
- Page 8 Attach Anchors (Hardwired Tables Only) Attach bench end bracket to left and right leg assemblies with 2 screws (125285). Floor Anchor (480136) 8 TONIC SINGLE SIDED WORKBENCH ASSEMBLY INSTRUCTIONS...
- Page 9 Screw (125285) Attach End Cover (Aisle and Extension Ends Only) (b) Attach end covers (if included) to legs with 3 wingnuts (888101) per end cover. Hand Tighten and avoid over tightening). Wing Nut (888101) 9 TONIC SINGLE SIDED WORKBENCH ASSEMBLY INSTRUCTIONS...
- Page 10 End Bracket (Extension Ends Only) Insert End Bracket into end of top support rails. 10 TONIC SINGLE SIDED WORKBENCH ASSEMBLY INSTRUCTIONS...
- Page 11 Align and fasten end segment to right leg assembly with 3 screws (0001247). Fasten Extension End segment to End Bracket with 2 screws (0001247) per bracket (Extension End Only). M6 1.00 x 12mm Screw (0002147) 11 TONIC SINGLE SIDED WORKBENCH ASSEMBLY INSTRUCTIONS...
- Page 12 Repeat step 7b until all work surfaces are attached. Attach the final end segment (Step 6) to the final work surface with a Tite Joint. M6 1.00 x 12mm Tite Joint Screw (0002147) (0002294) 12 TONIC SINGLE SIDED WORKBENCH ASSEMBLY INSTRUCTIONS...
- Page 13 Repeat step 8 working your way down the workbench table segments from the previous table segment. Repeat step 6 to attach the final end segment with 1” screws (0002147). (b) Completely secure splice plates to surfaces with 1” screws (0002147). M6 1.00 x 12mm Screw (0002147) 13 TONIC SINGLE SIDED WORKBENCH ASSEMBLY INSTRUCTIONS...
- Page 14 (121406). Note: Power bricks should always be on the right side for 2 duplexes per user. (b) Push data manager clips (0000003) into provided holes in top of power raceway. 8-32 x ¼" Screw Lock Washer DATA MANAGER CLIPS (121535) (121406) (0000003) 14 TONIC SINGLE SIDED WORKBENCH ASSEMBLY INSTRUCTIONS...
- Page 15 Ground the jumper cable to the power raceway with the provided screws (121538) and washers (121406). Check each connection by slowly pulling on each cable after making a connection. Lock Washer 8-32 x ¼" Thread Cutting Screw (121406) (121538) 15 TONIC SINGLE SIDED WORKBENCH ASSEMBLY INSTRUCTIONS...
- Page 16 DO NOT USE THE 1” LONG SCREWS THAT ARE USED TO SECURE THE PRIMARY DESK SURFACES #8 X 3/4” WOOD SCREW INFILL CLIP Z-CLIP (122810) (486915) (0000158) #10 X 1” WOOD SCREW (0002147) 16 TONIC SINGLE SIDED WORKBENCH ASSEMBLY INSTRUCTIONS...
- Page 17 Slide the Z-clips into the rear raceway rail then drop the clips through the holes on the Raceway Rails. Slightly turn all clips from underneath to secure Infill component in place. 17 TONIC SINGLE SIDED WORKBENCH ASSEMBLY INSTRUCTIONS...
- Page 18 Secure Data Cables Cable Slats go underneath the Power Raceway to keep data cables from hanging below the raceway. To install, rotate in between raceway rails until the fit is snug and secure CABLE SLAT 18 TONIC SINGLE SIDED WORKBENCH ASSEMBLY INSTRUCTIONS...
Need help?
Do you have a question about the Tonic Single Sided Workbench and is the answer not in the manual?
Questions and answers