Advertisement
Quick Links
Advertisement

Related Manuals for WATSON Tonic Single Sided Acrylic Screens


Summary of Contents for WATSON Tonic Single Sided Acrylic Screens
- Page 1 ASSEMBLY Tonic Single Sided Acrylic Screens V.23.1 10/2023 360.394.1300 watsonfurniture.com...
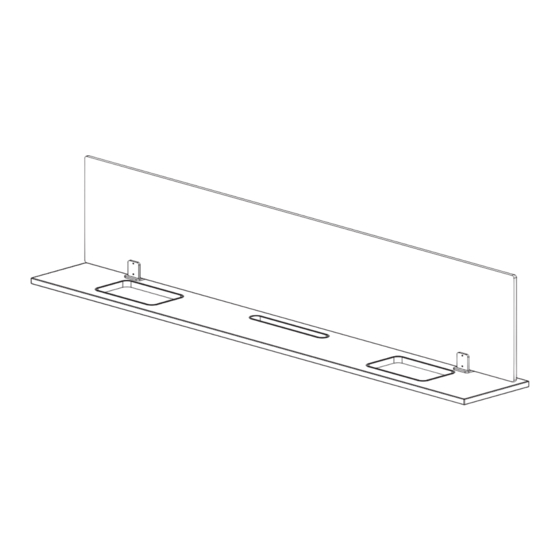
- Page 2 SCREW (0001612) Tonic Single Sided Acrylic Screen Components ACRYLIC SCREEN INFILL BASE ACRYLIC PANEL BRACKET Tools Electric Drill P2 Phillips 4mm Hex Drill/ 5/16” Hex Drill/ Driver Bit Driver Bit Driver Bit 2 TONIC SINGLE SIDED ACRYLIC SCREENS ASSEMBLY INSTRUCTIONS...
- Page 3 Drive supplied z-clips on all predefined pilot holes with #8 x 3/4” screws (122810) as shown below. DO NOT USE THE 1” LONG SCREWS THAT ARE USED TO SECURE THE PRIMARY DESK SURFACES INFILL CLIP #8 X 3/4” WOOD Z-CLIP (0000158) (486915) SCREW (122810) 3 TONIC SINGLE SIDED ACRYLIC SCREENS ASSEMBLY INSTRUCTIONS...
-
Page 4: Attach Brackets
Connect the Acrylic Screen Brackets to the Infill Panel with the provided screws (124755). Ensure that the brackets are in line with each other and parallel to the edge of the Infill. 5/16-18 X 3/4” SCREW (124755) 4 TONIC SINGLE SIDED ACRYLIC SCREENS ASSEMBLY INSTRUCTIONS... - Page 5 Slide the Acrylic Screen into the brackets. Center the screen in relation to the Infill Panel and attach 4 or 8 set screws (0001612) depending on the width and number of brackets. M4X0.7 X 5 SET SCREW (0001612) 5 TONIC SINGLE SIDED ACRYLIC SCREENS ASSEMBLY INSTRUCTIONS...
Need help?
Do you have a question about the Tonic Single Sided Acrylic Screens and is the answer not in the manual?
Questions and answers