Table of Contents
Advertisement
Quick Links
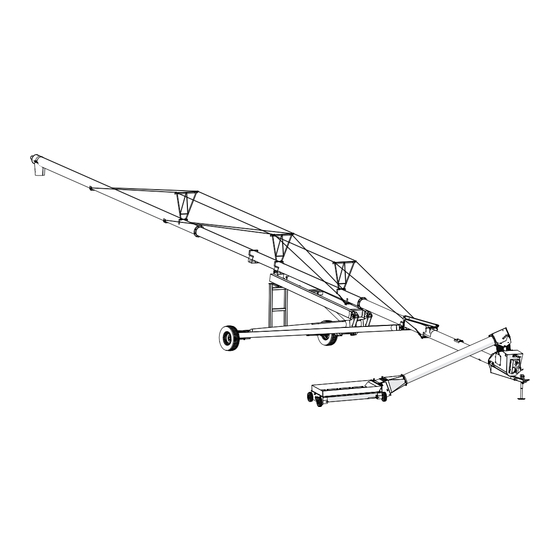
X100
Swing-Away Grain Auger
Operator's Manual
This manual applies to:
X100-63, X100-73, X100-83
Original Instructions
Read this manual before using product. Failure to
follow instructions and safety precautions can
result in serious injury, death, or property
damage. Keep manual for future reference.
Part Number: 31073 R0
Revised: November 2018
Advertisement
Table of Contents

Related Manuals for AGI WHEATHEART X100


Summary of Contents for AGI WHEATHEART X100
- Page 1 X100 Swing-Away Grain Auger Operator’s Manual This manual applies to: X100-63, X100-73, X100-83 Original Instructions Read this manual before using product. Failure to Part Number: 31073 R0 follow instructions and safety precautions can Revised: November 2018 result in serious injury, death, or property damage.
- Page 2 We strongly recommend that all personnel associated with this equipment be trained in the correct operational and safety procedures required for this product. This product has been designed and constructed according to general engineering standards, other local regulations may apply and must be followed by the operator. Use the sign-off sheet below to record initial and periodic reviews of this manual with all such personnel.
-
Page 3: Table Of Contents
X100 – SWING-AWAY GRAIN AUGER CONTENTS 1. Introduction ............................5 1.1 Serial Number Location......................5 1.2 Intended Use ..........................5 1.2.1 Misuse ........................6 2. Safety............................... 7 2.1 Safety Alert Symbol and Signal Words..................7 2.2 General Product Safety ......................7 2.3 Rotating Flighting Safety ...................... - Page 4 X100 – SWING-AWAY GRAIN AUGER 6.3.1 PTO Operation — Forward and Reverse Modes ............. 44 6.4 Safety Discharge Door ......................45 6.5 Emergency Shutdown ......................45 6.6 Restarting with a Full Tube ..................... 46 6.7 Bin Level Indicators ......................... 46 6.8 Use of Grain Spreaders ......................
-
Page 5: Introduction
1. INTRODUCTION 1. Introduction Thank you for purchasing a Wheatheart X100. This equipment will allow safe and efficient operation when you read and follow all of the instructions contained in this manual. With proper care, your auger will provide you with many years of trouble-free operation. -
Page 6: Misuse
1. INTRODUCTION X100 – SWING-AWAY GRAIN AUGER operation and maintenance as specified by the manufacturer, also constitute essential elements of the intended use. The auger should be operated, maintained, serviced, and repaired only by persons who are familiar with its particular characteristics and who are acquainted with the relevant safety procedures. -
Page 7: Safety
X100 – SWING-AWAY GRAIN AUGER 2. SAFETY 2. Safety 2.1. Safety Alert Symbol and Signal Words This safety alert symbol indicates important safety messages in this manual. When you see this symbol, be alert to the possibility of injury or death, carefully read the message that follows, and inform others. -
Page 8: Rotating Flighting Safety
2. SAFETY X100 – SWING-AWAY GRAIN AUGER 2.3. Rotating Flighting Safety • KEEP AWAY from rotating flighting. • DO NOT remove or modify flighting guards, doors, or covers. Keep in good working order. Have replaced if damaged. • DO NOT operate the auger without all guards, doors, and covers in place. -
Page 9: Work Area Safety
X100 – SWING-AWAY GRAIN AUGER 2. SAFETY 2.7. Work Area Safety • Have another trained person nearby who can shut down the auger in case of accident. • The work area should be kept clear of bystanders. • Keep the work area clean and free of debris. Figure 1. -
Page 10: Guards Safety
2. SAFETY X100 – SWING-AWAY GRAIN AUGER 2.8. Guards Safety • Keep guards in place and do not operate unless all guards are in place. • Do not walk on, step on, or damage guards. • Lock out power before removing a guard. •... -
Page 11: Drives And Lockout Safety
X100 – SWING-AWAY GRAIN AUGER 2. SAFETY • Check with local authorities regarding transport on public roads. Obey all applicable laws and regulations. • Always travel at a safe speed, never exceeding 20 mph (32 km/h). • Reduce speed on rough surfaces. •... -
Page 12: Hydraulic Power Safety
2. SAFETY X100 – SWING-AWAY GRAIN AUGER 2.12.2 Hydraulic Power Safety Power Source • Refer to the rules and regulations applicable to the power source operating your hydraulic drive. • Do not connect or disconnect hydraulic lines while system is under pressure. -
Page 13: Tire Safety
X100 – SWING-AWAY GRAIN AUGER 2. SAFETY 2.13. Tire Safety Failure to follow proper procedures when mounting a tire on a wheel or rim can produce an explosion that may result in serious injury or death. • DO NOT attempt to mount a tire unless you have the proper equipment and experience to do the job. -
Page 14: Safety Equipment
2. SAFETY X100 – SWING-AWAY GRAIN AUGER Steel-Toe Boots • Wear steel-toe boots to protect feet from falling debris. Work Gloves • Wear work gloves to protect your hands from sharp and rough edges. Dust Mask • Wear a dust mask to prevent breathing potentially harmful dust. 2.15. -
Page 15: Safety Decal Locations And Details
X100 – SWING-AWAY GRAIN AUGER 2. SAFETY 2.16.2 Safety Decal Locations and Details Replicas of the safety decals that are attached to the auger and their messages are shown in the figure(s) that follow. Safe operation and use of the auger requires that you familiarize yourself with the various safety decals and the areas or particular functions that the decals apply to, as well as the safety precautions that must be taken to avoid serious injury, death, or damage. - Page 16 2. SAFETY X100 – SWING-AWAY GRAIN AUGER Figure 4. Auger Tube and Hopper Safety Decals 20813 20804* 20811 17113 20816 20807 Figure 5. Boot Safety Decals 20816 20807 17113 19960 17107 20813 17094 20818 20804 20803 17531 31073 R0...
- Page 17 X100 – SWING-AWAY GRAIN AUGER 2. SAFETY Figure 6. Roll-Over / Transport Safety Decal 31073 R0...
- Page 18 2. SAFETY X100 – SWING-AWAY GRAIN AUGER Table 1. Safety Decals Part Number Description 20813 DANGER ROTATING FLIGHTING HAZARD To prevent death or serious injury: • KEEP AWAY from rotating auger flighting. • DO NOT remove or modify auger flighting guards, doors, or covers.
- Page 19 X100 – SWING-AWAY GRAIN AUGER 2. SAFETY Table 1 Safety Decals (continued) Part Number Description 17094 DANGER ROTATING FLIGHTING INSIDE To prevent serious injury or death, do not operate auger unless swing- hopper is securely attached to boot. 20816 DANGER ELECTROCUTION HAZARD To prevent death or serious injury: •...
- Page 20 2. SAFETY X100 – SWING-AWAY GRAIN AUGER Table 1 Safety Decals (continued) Part Number Description 20804 WARNING ENTANGLEMENT HAZARD To prevent serious injury or death: • Keep body, hair, and clothing away from rotating pulleys, belts, chains, and sprockets. • Do not operate with any guard removed or modified.
- Page 21 X100 – SWING-AWAY GRAIN AUGER 2. SAFETY Table 1 Safety Decals (continued) Part Number Description 20811 WARNING UPENDING HAZARD To prevent death or serious injury: • Anchor intake end and/or support discharge end to prevent upending. • Intake end must always have downward weight. Do not release until attached to tow bar or resting on ground.
- Page 22 2. SAFETY X100 – SWING-AWAY GRAIN AUGER Table 1 Safety Decals (continued) Part Number Description 20807 WARNING To prevent serious injury or death: • Read and understand the manual before assembling, operating, or maintaining the equipment. • Only trained personnel may assemble, operate, or maintain the equipment.
- Page 23 X100 – SWING-AWAY GRAIN AUGER 2. SAFETY Table 1 Safety Decals (continued) Part Number Description 20812 (only included WARNING on augers 83' and ROLLOVER / TRANSPORT longer) HAZARD To prevent serious injury or death: • Fully extend axles before raising tube. •...
- Page 24 2. SAFETY X100 – SWING-AWAY GRAIN AUGER Table 1 Safety Decals (continued) Part Number Description 17531 NOTICE To prevent damage during auger- to-tractor hookup: • Follow dimensions above for correct auger-to-tractor hookup. • Auger must be on level ground and in full down position when measuring.
-
Page 25: Features
X100 – SWING-AWAY GRAIN AUGER 3. FEATURES 3. Features This section covers the main features of the auger. Figure 7. Grain Transfer Boot Features Item Description Item Description Overflow Panel Clean-Out Hatch Swing Arm Spout Head Hitch Jack Spout Head Service Cover Hitch Manual Winch (Hopper) PTO Driveline... - Page 26 3. FEATURES X100 – SWING-AWAY GRAIN AUGER Figure 8. Grain Hopper Features Item Description Item Description Main Auger Tube Maintenance Hatch Boot Hopper Spout Head Flights and Flight Guarding Swing Tube 31073 R0...
-
Page 27: Transport
X100 – SWING-AWAY GRAIN AUGER 4. TRANSPORT 4. Transport Before continuing, ensure you have completely read and understood this manual’s Safety section, in addition to the safety information in the section(s) below. 4.1. Transport Safety • Check with local authorities regarding transport on public roads. -
Page 28: Transport Preparation
4. TRANSPORT X100 – SWING-AWAY GRAIN AUGER 4.2. Transport Preparation 1. It is not recommended that the auger be transported faster than 20 mph (32 km/h). Table 2 references the acceptable transport speed as per the ratio of tractor weight versus auger weight. See Specifications for auger weights. - Page 29 X100 – SWING-AWAY GRAIN AUGER 4. TRANSPORT 10. Use caution when transporting the auger over rolling terrain. In severe dips, the intake end may contact the ground. Refer to Section 9. – Specifications on page 63 for auger weight and hitch pin information. Figure 9.
-
Page 30: Placement
5. PLACEMENT X100 – SWING-AWAY GRAIN AUGER 5. Placement Before continuing, ensure you have completely read and understood this manual’s Safety section, in addition to the safety information in the section(s) below. 5.1. Placement Safety • The auger is not insulated, keep away from overhead power lines. Electrocution can occur without direct contact. - Page 31 X100 – SWING-AWAY GRAIN AUGER 5. PLACEMENT 8. Move the auger into working position slowly. Do not unhitch and attempt to move the auger by hand. 9. Back the auger up to the storage facility while it is in its lowered configuration. 10.
-
Page 32: Raising And Lowering
5. PLACEMENT X100 – SWING-AWAY GRAIN AUGER Figure 11. Auger Placement (Direct PTO Drive) 5.2.1 Raising and Lowering The intake hopper must be off the ground when raising and lowering the auger. Before using the hydraulic lift cylinder: • The hydraulic cylinders are shipped without oil and must be charged with oil before operating the first time. See the Appendix section for charging instructions. -
Page 33: Extendable Axle Positioning
X100 – SWING-AWAY GRAIN AUGER 5. PLACEMENT Raising 1. Before connecting the hydraulic hose, wipe the hose coupler clean. Dirt in the hydraulic system can damage the cylinder o-rings and can cause leakage and failure of the system. 2. Connect the hydraulic hoses, ensure the connections are tight. Visually check for leaks, binding, flattening, kinks, or wear. -
Page 34: Auger-To-Tractor Hookup
5. PLACEMENT X100 – SWING-AWAY GRAIN AUGER 2. Using the jack supplied, insert it into one of the jack stubs located on one end of the axle. Jack must be secured to jack stub using pin (attached to jack). 3. Raise one side at a time. Raise until the tire clears the ground. 4. - Page 35 X100 – SWING-AWAY GRAIN AUGER 5. PLACEMENT Figure 13. Hitching the Auger to a Tractor Measurements Between Drawbar and Driveline Since the auger and tractor become an integral unit during transport, placement, and operation, the configuration and measurements between the tractor drawbar and the tractor PTO driveline are very important.
-
Page 36: Raising And Lowering The Intake Hopper
5. PLACEMENT X100 – SWING-AWAY GRAIN AUGER Figure 14. Measurements Between Drawbar and PTO Driveline Measurement Problem Solution If (A) is less than 14” (35.6 cm) (C) The PTO driveline will bottom out Pull out or lengthen the tractor will be less than the recommended when auger is in raised position, drawbar as needed to make (C) 34- causing damage to the PTO... -
Page 37: Swing-Away Hydraulic Winch Operation
X100 – SWING-AWAY GRAIN AUGER 5. PLACEMENT Do not operate auger with intake hopper in transport position. This will damage the u- joint. Important The hopper intake must face the main auger when in transport, see Figure 4. Ensure swing-away is empty before raising or lowering. 5. -
Page 38: Grain Hopper Positioning
5. PLACEMENT X100 – SWING-AWAY GRAIN AUGER 5.6. Grain Hopper Positioning The low-profile grain hopper is designed to be rolled into position to receive grain for transfer through the boot to the auger discharge spout. Ground clearance can be adjusted by raising or lowering the position of the hopper wheel axles. - Page 39 X100 – SWING-AWAY GRAIN AUGER 5. PLACEMENT Figure 17. Electrical Cables If these electrical cables are not hooked up properly the electric controller will be damaged. Important If the Electric Power Swing will need to be moved from one tractor to another on a regular basis, 200 Amp booster-style cable clamps can be installed at the owner’s own risk and expense.
-
Page 40: Positioning The Tractor For Right Angle Drive Operation
5. PLACEMENT X100 – SWING-AWAY GRAIN AUGER Figure 18. Power Swing Receiver Box For Receiver Box Operation: 1. Using the direction switch, move the switch in the desired direction of travel (either F1 or F2). 2. Once finished moving the hopper, release the switch to stop operation (it should return to the neutral position). - Page 41 X100 – SWING-AWAY GRAIN AUGER 5. PLACEMENT 3. Remove the safety chain and hitch pin, then move the tractor. 4. Attach the support leg as shown in Figure 20, and secure with a pin and hairclip. 5. Place a board under the support leg if needed, then lower the hitch jack until the auger’s intake weight is supported with the support leg.
- Page 42 5. PLACEMENT X100 – SWING-AWAY GRAIN AUGER Figure 20. Right Angle Drive Support Leg Working (left) and Storage Positions (right) 31073 R0...
-
Page 43: Operation
X100 – SWING-AWAY GRAIN AUGER 6. OPERATION 6. Operation Before continuing, ensure you have completely read and understood this manual’s Safety section, in addition to the safety information in the section(s) below. 6.1. Operation Safety • Keep away from rotating and moving parts, including the auger flighting, drive components, shafts, and bearings. -
Page 44: Operation - Pto Drive
6. OPERATION X100 – SWING-AWAY GRAIN AUGER 10. Stop the auger when it is empty of grain and lockout power, lower fully. Important After the initial start-up and inspection, the auger should be shut down and visually inspected (see Maintenance Section) after approximately ten hours of operation. 6.3. -
Page 45: Safety Discharge Door
X100 – SWING-AWAY GRAIN AUGER 6. OPERATION To Operate in Reverse Mode: 1. Insert the stub spline on the PTO driveline into the reverse spline coupler, see Figure 21, making certain it is securely locked into place. 2. Remove the cleanout cover before operating in reverse mode. 3. -
Page 46: Restarting With A Full Tube
6. OPERATION X100 – SWING-AWAY GRAIN AUGER 2. Stop the flow of material (if applicable). 3. Ensure the machine components come to a stop before inspecting. 4. Correct the emergency situation before resuming work. 6.6. Restarting with a Full Tube When the auger is shut down inadvertently or due to an emergency, the tube may still be filled with grain. -
Page 47: Operating The Auger With Fertilizer
X100 – SWING-AWAY GRAIN AUGER 6. OPERATION 5. Disconnect the PTO driveline, and raise the intake hopper off the ground. 6. Move the auger away from the bin, and ensure that there is nothing under the auger that would make contact when the auger tube is lowered. - Page 48 6. OPERATION X100 – SWING-AWAY GRAIN AUGER 3. Inspect unit for damage and note any repairs required. Order replacement parts from your dealer. 4. Check tire pressure and inflate according to tire side-wall recommendations. 31073 R0...
-
Page 49: Maintenance
X100 – SWING-AWAY GRAIN AUGER 7. MAINTENANCE 7. Maintenance Before continuing, ensure you have completely read and understood this manual’s Safety section, in addition to the safety information in the section(s) below. 7.1. Maintenance Safety • Keep components in good condition. Follow the maintenance procedures. -
Page 50: Visually Inspect The Equipment
7. MAINTENANCE X100 – SWING-AWAY GRAIN AUGER Section 7.10.1 – Check the Gearbox Oil on page 57 Section 7.12 – Check Speed Reducer Gearbox Oil Level on page 57 Annually: Section 7.15 – Clean and Wash the Equipment on page 58 2–3 Years: Section 7.11 –... -
Page 51: Lubricate The Equipment
X100 – SWING-AWAY GRAIN AUGER 7. MAINTENANCE 7.4. Lubricate the Equipment Your equipment can operate at top efficiency only if clean fluids and lubricants are used. Use clean containers to handle all fluids and lubricants. Store them in an area protected from dust, moisture, and other contaminants. - Page 52 7. MAINTENANCE X100 – SWING-AWAY GRAIN AUGER Figure 23. Hopper Grease Points Figure 24. Upper Flighting Bearing Grease Point 31073 R0...
-
Page 53: Inspect Hydraulic Hoses And Fittings
X100 – SWING-AWAY GRAIN AUGER 7. MAINTENANCE Figure 25. Boot Grease Points 7.5. Inspect Hydraulic Hoses and Fittings When equipped: 1. Pressurize the system. 2. Using a piece of cardboard or wood, run it along the length of the hose and around all fittings. Escaping hydraulic fluid under pressure will cause serious injury if it penetrates the skin surface. -
Page 54: Inspect And Service The Hydraulic Winch And Lift Cable
7. MAINTENANCE X100 – SWING-AWAY GRAIN AUGER 3. Oil cable pulleys as needed. See Figure 26 4. Keep a film of grease on the gears. Occasionally oil the bushings, drum shaft, and ratchet. 5. Do not get oil or grease on brake discs. 6. -
Page 55: Service The Swing Tube Coupler Chain
X100 – SWING-AWAY GRAIN AUGER 7. MAINTENANCE To Replace the Lift Cable: 1. Unwind the winch drum until the cable is slack and remove the cable clamps. 2. Free the cable from the winch and pulleys. 3. Remove the cable clamps that secure the hook in place. 4. -
Page 56: Check The Gearbox Oil
7. MAINTENANCE X100 – SWING-AWAY GRAIN AUGER Note If the chain can’t be tightened enough, remove a link from the chain. If the chain will not fit with one link removed, add a half link to the chain and replace. Figure 28. -
Page 57: Check The Gearbox Oil
X100 – SWING-AWAY GRAIN AUGER 7. MAINTENANCE 2. Note the level and the condition of the oil. Maintain oil level at half full (center of cross shaft) with 90W or equivalent gear oil, adding as necessary or drain and refill if condition is poor. 3. -
Page 58: Change The Speed Reducer Gearbox Oil
7. MAINTENANCE X100 – SWING-AWAY GRAIN AUGER 7.13. Change the Speed Reducer Gearbox Oil Note The speed reducer gearbox should be level when changing oil. 1. Place a pan under the drain plug located on the bottom of the speed reducer gearbox. 2. -
Page 59: Check/Adjust The Truss Cables
X100 – SWING-AWAY GRAIN AUGER 7. MAINTENANCE Figure 30. Diagonal Pattern for 4-bolt and 6-bolt Tires 7.17. Check/Adjust the Truss Cables When equipped with Truss Cables: Check the Truss Cables: Check tube for straightness, no slack in the cables, and a just noticeable upward deflection of the discharge end. During operation, it is normal that for the tube to deflect downward. - Page 60 7. MAINTENANCE X100 – SWING-AWAY GRAIN AUGER • The discharge end is deflected sightly upwards. • The tube is straight side-to-side. Table 4. Truss Cable Adjustment Item Description Cable Clamp Truss Cable Cable Return Bracket Cable Eyebolt Eyebolt Nuts Eyebolt Anchor Cable Truss Figure 31.
-
Page 61: Troubleshooting
X100 – SWING-AWAY GRAIN AUGER 8. TROUBLESHOOTING 8. Troubleshooting Before continuing, ensure you have completely read and understood this manual’s Safety section, in addition to the safety information in the section(s) below. Shut down and lock out all power sources before diagnosing any of the causes or attempting any of the solutions below. - Page 62 8. TROUBLESHOOTING X100 – SWING-AWAY GRAIN AUGER Obstruction in the auger tube. Identify and remove obstruction. Auger flighting is noisy. Flighting shaft bolts are loose Tighten or replace bolts. or damaged. Flighting shaft is bent. Repair or replace flighting shaft. Flighting is damaged.
-
Page 63: Specifications
X100 – SWING-AWAY GRAIN AUGER 9. SPECIFICATIONS 9. Specifications Table 5. Specification 100-63 100-73 100-83 CAPACITY Unloading Rate 6600 Bu/Hr DIMENSIONS Tube Size 10” (25.4 cm) Transport Length 64’ 10”(19.76 m) 75’(22.86 m) 85’ 1”(25.93 m) 132” - 180” (3.35 m - 132”... -
Page 64: Appendix
10. APPENDIX X100 – SWING-AWAY GRAIN AUGER 10. Appendix 10.1. Power Swing Remote Transmitter Instructions Figure 32 shows the controls and indicators for the power swing remote and receiver. Figure 32. Remote Transmitter and Receiver Controls and Indicators TRANSMITTER HOPPER MOVE (↑-↓) RECEIVER SET LED... -
Page 65: Programming Receivers
X100 – SWING-AWAY GRAIN AUGER 10. APPENDIX The transmitter automatically transmits a STOP signal after 30 minutes; this de-activates the receiver and the transmitter keypad. The remote transmitter that comes with each power swing is normally factory programmed to function with the power swing receiver. Refer to specific instructions for programming additional or replacement remotes according to the serial number of the power swing receiver. - Page 66 10. APPENDIX X100 – SWING-AWAY GRAIN AUGER TO REGISTER A FOURTH REMOTE TRANSMITTER: 1. Switch OFF the receiver. Important Steps 2 and 3 must be done within 10 seconds of each other. The FAULT LED on the receiver flashes for the duration of the registration window. 2.
-
Page 67: Wheatheart Limited Warranty
X100 – SWING-AWAY GRAIN AUGER 11. WHEATHEART LIMITED WARRANTY 11. Wheatheart Limited Warranty Wheatheart warrants to the buyer that the new machinery is free from defects in material and workmanship. This warranty is only effective for any new machinery that has not been altered, changed, repaired, or treated since its delivery to the buyer, other than by Wheatheart or its authorized dealers or employees, and does not apply to accessories, attachments, tools, or parts sold or operated with the new machinery if they have not been manufactured by Wheatheart. - Page 68 P.O. Box 39 Rosenort, Manitoba, R0G 1W0 Canada Phone: (866) 467-7207 (Canada & USA) or (204) 746–2396 Fax: (866) 768-4852 Website: www.wheatheart.com Email: sales@wheatheart.com ©Ag Growth International Inc. 2018 Printed in Canada...
Need help?
Do you have a question about the WHEATHEART X100 and is the answer not in the manual?
Questions and answers