Table of Contents
Advertisement
Quick Links
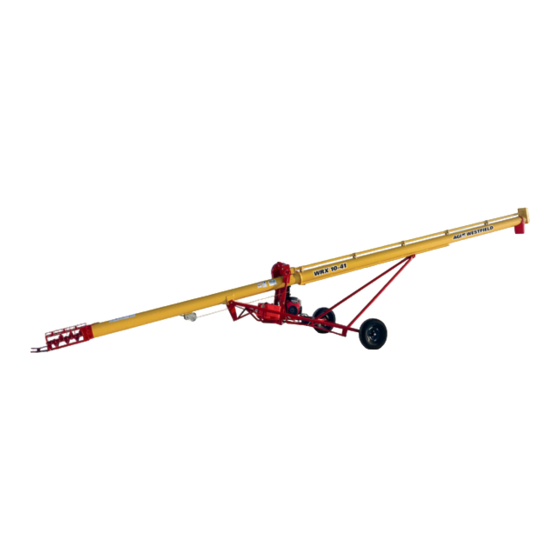
WRX Series
Portable Grain Auger
Operator's Manual
This manual applies to:
Westfield, AGI, Hutchinson, Mayrath
8-31, 8-36, 8-41, 8-46, 8-51, 8-56, 8-61, 8-71, 8-76
10-31, 10-36, 10-41, 10-51, 10-61, 10-71
Read this manual before using product. Failure to
follow instructions and safety precautions can
result in serious injury, death, or property
damage. Keep manual for future reference.
LOOKING FOR PARTS?
Check out our online
Parts Catalog!
Part Number: 31060 R3
Revised: January 2022
Original Instructions
Advertisement
Table of Contents

Related Manuals for AGI WRX Series


Summary of Contents for AGI WRX Series
- Page 1 WRX Series Portable Grain Auger Operator’s Manual This manual applies to: Westfield, AGI, Hutchinson, Mayrath 8-31, 8-36, 8-41, 8-46, 8-51, 8-56, 8-61, 8-71, 8-76 10-31, 10-36, 10-41, 10-51, 10-61, 10-71 LOOKING FOR PARTS? Check out our online Parts Catalog! Read this manual before using product. Failure to...
- Page 2 This product has been designed and manufactured to meet general engineering standards. Other local regulations may apply and must be followed by the operator. All personnel must be trained in the correct operational and safety procedures for this product. Use the sign-off sheet below to record initial and periodic reviews of this manual with all personnel.
-
Page 3: Table Of Contents
WRX SERIES – PORTABLE GRAIN AUGER CONTENTS 1. Introduction ............................5 1.1 Serial Number Location......................5 1.2 Intended Use ..........................6 1.2.1 Misuse ........................6 2. Safety............................... 7 2.1 Safety Alert Symbol and Signal Words..................7 2.2 General Safety Information....................... 7 2.3 Rotating Flighting Safety ...................... - Page 4 WRX SERIES – PORTABLE GRAIN AUGER 6.4 Operation - Gas Engine Models ....................36 6.5 Operation - PTO Drive ......................36 6.6 Operation - Hydraulic Motor Models ..................37 6.7 Emergency Shutdown ......................38 6.8 Restarting with a Full Tube ..................... 38 6.9 Bin Level Indicators .........................
-
Page 5: Introduction
Keep this manual handy for frequent reference and to review with new personnel. A sign-off form is provided on the inside front cover for your convenience. If any information in this manual is not understood or if you need additional information, please contact AGI or your representative for assistance. -
Page 6: Intended Use
1. INTRODUCTION WRX SERIES – PORTABLE GRAIN AUGER 1.2. Intended Use The auger is intended for use as listed below and described throughout this manual. Use in any other way is considered contrary to the intended use and is not covered by the warranty. -
Page 7: Safety
WRX SERIES – PORTABLE GRAIN AUGER 2. SAFETY 2. Safety 2.1. Safety Alert Symbol and Signal Words This safety alert symbol indicates important safety messages in this manual. When you see this symbol, be alert to the possibility of injury or death, carefully read the message that follows, and inform others. -
Page 8: Rotating Flighting Safety
2. SAFETY WRX SERIES – PORTABLE GRAIN AUGER 2.3. Rotating Flighting Safety • KEEP AWAY from rotating flighting. • DO NOT remove or modify flighting guards, doors, or covers. Keep in good working order. Have replaced if damaged. • DO NOT operate the auger without all guards, doors, and covers in place. -
Page 9: Work Area Safety
WRX SERIES – PORTABLE GRAIN AUGER 2. SAFETY 2.7. Work Area Safety • Have another trained person nearby who can shut down the auger in case of accident. • Do not allow any unauthorized persons in the work area. • Keep the work area clean and free of debris. -
Page 10: Guards Safety
2. SAFETY WRX SERIES – PORTABLE GRAIN AUGER 2.8. Guards Safety • Keep guards in place. Do not operate with guard removed. • Do not walk on, step on, or damage guards. • Lock out power before removing a guard. -
Page 11: Hydraulic Winch Safety
WRX SERIES – PORTABLE GRAIN AUGER 2. SAFETY 2.11. Hydraulic Winch Safety When Equipped: • Keep away from rotating cable drum and winch cable. Do not touch or grab cable while winch is being operated or use hands to guide the cable. -
Page 12: Drives And Lockout Safety
2. SAFETY WRX SERIES – PORTABLE GRAIN AUGER 2.14. Drives and Lockout Safety Inspect the power source(s) before using and know how to shut down in an emergency. Whenever you service or adjust your equipment, make sure you shut down the power source and unplug or remove the key (as applicable) to prevent inadvertent start-up and hazardous energy release. -
Page 13: Electric Motor Safety
WRX SERIES – PORTABLE GRAIN AUGER 2. SAFETY 2.14.2 Electric Motor Safety Power Source • Electric motors and controls shall be installed and serviced by a qualified electrician and must meet all local codes and standards. • Use a magnetic starter to protect the electric motor. -
Page 14: Hydraulic Power Safety
2. SAFETY WRX SERIES – PORTABLE GRAIN AUGER 2.14.4 Hydraulic Power Safety Power Source • Refer to the rules and regulations applicable to the power source operating your hydraulic drive. • Do not connect or disconnect hydraulic lines while system is under pressure. -
Page 15: Tire Safety
WRX SERIES – PORTABLE GRAIN AUGER 2. SAFETY 2.15. Tire Safety Failure to follow proper procedures when mounting a tire on a wheel or rim can produce an explosion that may result in serious injury or death. • DO NOT attempt to mount a tire unless you have the proper equipment and experience to do the job. -
Page 16: Personal Protective Equipment
2. SAFETY WRX SERIES – PORTABLE GRAIN AUGER 2.17. Personal Protective Equipment The following Personal Protective Equipment (PPE) should be worn when operating or maintaining the equipment. Safety Glasses • Wear safety glasses at all times to protect eyes from debris. -
Page 17: Safety Equipment
WRX SERIES – PORTABLE GRAIN AUGER 2. SAFETY 2.18. Safety Equipment The following safety equipment should be kept on site. Fire Extinguisher • Provide a fire extinguisher for use in case of an accident. Store in a highly visible and accessible place. - Page 18 2. SAFETY WRX SERIES – PORTABLE GRAIN AUGER Figure 2. Safety Decal Locations for Basic Auger 19960 17109 20807 17113 20813 20817 20811 Figure 3. Safety Decal Locations for EMD Option 20804 20803 31060 R3...
- Page 19 WRX SERIES – PORTABLE GRAIN AUGER 2. SAFETY Figure 4. Safety Decal Locations for MD Option 20804 20803 Figure 5. Safety Decal Locations for PTO-SD Option 20819 Figure 6. Safety Decal Locations for PTO-BD Option 20803 20804 20804 20818 20803...
- Page 20 2. SAFETY WRX SERIES – PORTABLE GRAIN AUGER Figure 7. Safety Decal Locations for Hydraulic Drive Option 20806 Figure 8. Safety Decal Locations for Hydraulic Winch Option 20810 20806 31060 R3...
- Page 21 WRX SERIES – PORTABLE GRAIN AUGER 2. SAFETY Table 1. Safety Decals Part Number Description 20813 DANGER ROTATING FLIGHTING HAZARD To prevent death or serious injury: • KEEP AWAY from rotating auger flighting. • DO NOT remove or modify auger flighting guards, doors, or covers.
- Page 22 2. SAFETY WRX SERIES – PORTABLE GRAIN AUGER Table 1 Safety Decals (continued) Part Number Description 20819 DANGER ROTATING PTO DRIVELINE To prevent serious injury or death: • Keep body, hair, and clothing away from rotating PTO driveline. • Do not operate equipment unless all driveline, tractor, and equipment shields are in place and in good working order.
- Page 23 WRX SERIES – PORTABLE GRAIN AUGER 2. SAFETY Table 1 Safety Decals (continued) Part Number Description 20817 DANGER ELECTROCUTION HAZARD To prevent death or serious injury: • When operating or moving, keep equipment away from overhead power lines and devices.
- Page 24 2. SAFETY WRX SERIES – PORTABLE GRAIN AUGER Table 1 Safety Decals (continued) Part Number Description 20804 WARNING ENTANGLEMENT HAZARD To prevent serious injury or death: • Keep body, hair, and clothing away from rotating pulleys, belts, chains, and sprockets.
- Page 25 WRX SERIES – PORTABLE GRAIN AUGER 2. SAFETY Table 1 Safety Decals (continued) Part Number Description 20807 WARNING To prevent serious injury or death: • Read and understand the manual before assembling, operating, or maintaining the equipment. • Only trained personnel may assemble, operate, or maintain the equipment.
- Page 26 2. SAFETY WRX SERIES – PORTABLE GRAIN AUGER Table 1 Safety Decals (continued) Part Number Description 20811 WARNING UPENDING HAZARD To prevent death or serious injury: • Anchor intake end and/or support discharge end to prevent upending. • Intake end must always have downward weight.
- Page 27 WRX SERIES – PORTABLE GRAIN AUGER 2. SAFETY Table 1 Safety Decals (continued) Part Number Description 17109 CAUTION For proper raising and lowering of equipment: • After lowering equipment, always tighten brake lock by turning winch handle clockwise at least two clicks.
-
Page 28: Features
3. FEATURES WRX SERIES – PORTABLE GRAIN AUGER 3. Features Read this section to familiarize yourself with the basic component names and functions of the auger. Item Description Item Description Discharge & Upper Chain Drive Manual Winch Shaft Guarding Manual Holder Intake &... -
Page 29: Transport
WRX SERIES – PORTABLE GRAIN AUGER 4. TRANSPORT 4. Transport Before continuing, ensure you have completely read and understood this manual’s Safety section, in addition to the safety information in the section(s) below. 4.1. Transport Safety • Check with local authorities regarding transport on public roads. -
Page 30: Transport Preparation
4. TRANSPORT WRX SERIES – PORTABLE GRAIN AUGER 4.2. Transport Preparation 1. It is not recommended that the auger be transported faster than 20 mph (32 km/h). Table 2 references the acceptable transport speed as per the ratio of tractor weight versus auger weight. See Specifications (Section 9. -
Page 31: Enclosed Hopper
WRX SERIES – PORTABLE GRAIN AUGER 4. TRANSPORT Figure 9. Typical Safety Chain and Hitch Connection 4.3.1 Enclosed Hopper When Equipped: Attach both hooks to the loops on the hopper and cross the chain underneath the tow bar to prevent the auger from digging into the road surface or upsetting (should a breakaway occur). Replace the safety chain if one or more links or end fittings are stretched, broken, damaged, or deformed. -
Page 32: Placement
5. PLACEMENT WRX SERIES – PORTABLE GRAIN AUGER 5. Placement Before continuing, ensure you have completely read and understood this manual’s Safety section, in addition to the safety information in the section(s) below. 5.1. Placement Safety • The auger is not insulated, keep away from overhead power lines. Electrocution can occur without direct contact. -
Page 33: Hand Winch Operation
WRX SERIES – PORTABLE GRAIN AUGER 5. PLACEMENT Figure 10. Typical Grain Auger Placement for Filling Bins KEEP AWAY! OVERHEAD WIRES wheel chocks Under Hopper Bottom Bins 1. Position the intake hopper between the hopper bin vertical legs. 2. Move auger into place. Do not allow auger or components to contact grain bin. -
Page 34: Hydraulic Winch Operation
5. PLACEMENT WRX SERIES – PORTABLE GRAIN AUGER 5.4. Hydraulic Winch Operation When equipped with a hydraulic winch: Before using the hydraulic winch, ensure that: • the cable anchor on the winch drum is tight. • all cable clamps are secure. -
Page 35: Operation
WRX SERIES – PORTABLE GRAIN AUGER 6. OPERATION 6. Operation Before continuing, ensure you have completely read and understood this manual’s Safety section, in addition to the safety information in the section(s) below. 6.1. Operation Safety • Keep away from rotating and moving parts, including the auger/mixer flighting, drive components, shafts, and bearings. -
Page 36: Operation - Electric Motor Models
6. OPERATION WRX SERIES – PORTABLE GRAIN AUGER 6.3. Operation - Electric Motor Models When equipped with an Electric Motor: 1. Turn the electric motor on. 2. Run until the auger is empty. 3. Turn off motor and lock out power source. -
Page 37: Operation - Hydraulic Motor Models
WRX SERIES – PORTABLE GRAIN AUGER 6. OPERATION 6. If everything is operating normally, start running grain through the auger and increase the tractor PTO to the specified full speed to produce the required flow. 7. To shut down, reduce the speed to low idle and lock out the PTO. -
Page 38: Emergency Shutdown
6. OPERATION WRX SERIES – PORTABLE GRAIN AUGER 6.7. Emergency Shutdown In an emergency situation: 1. Stop or shut down the power source immediately and lock out all power. 2. Stop the flow of material (if applicable). 3. Ensure the machine components come to a stop before inspecting. -
Page 39: Shutdown
WRX SERIES – PORTABLE GRAIN AUGER 6. OPERATION 6.11. Shutdown When operation has been completed: 1. Once the auger is clear of grain, lock out the power source. 2. Lower the auger fully. See Raising and Lowering instructions. 3. Clean out any remaining grain from the auger with a vacuum or sweep out. -
Page 40: Maintenance
7. MAINTENANCE WRX SERIES – PORTABLE GRAIN AUGER 7. Maintenance Before continuing, ensure you have completely read and understood this manual’s Safety section, in addition to the safety information in the section(s) below. 7.1. Maintenance Safety • Keep components in good condition. Follow the maintenance procedures. -
Page 41: Visually Inspect The Equipment
WRX SERIES – PORTABLE GRAIN AUGER 7. MAINTENANCE Section 7.10 – Grease the Intake Bushing and Upper Drive Chain on page 44 Annually: Section 7.6 – Apply Oil to the Motor Mount on page 43 Section 7.11 – Clean and Wash the Equipment on page 45 Section 7.7 –... -
Page 42: Inspect Hydraulic Hoses And Fittings
7. MAINTENANCE WRX SERIES – PORTABLE GRAIN AUGER 7.4. Inspect Hydraulic Hoses and Fittings When equipped: 1. Pressurize the system. 2. Using a piece of cardboard or wood, run it along the length of the hose and around all fittings. -
Page 43: Apply Oil To The Motor Mount
WRX SERIES – PORTABLE GRAIN AUGER 7. MAINTENANCE Figure 12. Typical PTO Driveline Grease Points (European) 7.6. Apply Oil to the Motor Mount When equipped: Lightly oil motor mount pipes and the belt release eccentric for greater ease in disengaging the drive. -
Page 44: Adjust The Upper Drive Chain
7. MAINTENANCE WRX SERIES – PORTABLE GRAIN AUGER 7.9. Adjust the Upper Drive Chain Note Improper adjustment of the drive chain will result in premature wear. 1. Loosen the bolts and remove the cover plate. 2. Check upper drive chain for tightness. Chain should have maximum deflection of 1/8" from factory. -
Page 45: Clean And Wash The Equipment
WRX SERIES – PORTABLE GRAIN AUGER 7. MAINTENANCE 1. Fill enclosed upper drive housing to plug level with grease. See Section 9. – Specifications on page 53 grease quantity. 2. Lubricate the intake bushing zerk. Check Section 9. – Specifications on page 53 for lubricating grease type information. -
Page 46: Align The Drive Belts
7. MAINTENANCE WRX SERIES – PORTABLE GRAIN AUGER 2. Tighten or loosen the drive belts (or idler pulley when equipped) to achieve the proper tension. Important The drive belt should be just tight enough to not slip on the drive pulley when operating. If the belt is too loose, it will slip, possibly causing a squeaking sound and slowing the belt down. -
Page 47: Inspect And Service The Hand Winch And Lift Cable
WRX SERIES – PORTABLE GRAIN AUGER 7. MAINTENANCE Figure 16. Diagonal Pattern for 4-bolt and 6-bolt Tires 7.16. Inspect and Service the Hand Winch and Lift Cable When equipped: Place auger in fully lowered position with cable slack. 1. Inspect the cable for damage such as fraying, kinking, or unwinding. Replace if damaged (see below). -
Page 48: Inspect And Service The Hydraulic Winch And Lift Cable
7. MAINTENANCE WRX SERIES – PORTABLE GRAIN AUGER 7.17. Inspect and Service the Hydraulic Winch and Lift Cable When equipped: Place auger in fully lowered position with cable slack. 1. Inspect the cable for damage such as fraying, kinking, or unwinding. Replace if damaged (see below). -
Page 49: Troubleshooting
WRX SERIES – PORTABLE GRAIN AUGER 8. TROUBLESHOOTING 8. Troubleshooting Before continuing, ensure you have completely read and understood this manual’s Safety section, in addition to the safety information in the section(s) below. Shut down and lock out all power sources before diagnosing any of the causes or attempting any of the solutions below. - Page 50 8. TROUBLESHOOTING WRX SERIES – PORTABLE GRAIN AUGER stubs by rolling across flat concrete section. Straighten stub or replace as necessary. Take care not to bend flighting when reinstalling. Obstruction in auger tube. Visually inspect for cloth or trash wrapped around flighting, or buildup of gum from oily crops such as flax or canola.
- Page 51 WRX SERIES – PORTABLE GRAIN AUGER 8. TROUBLESHOOTING Low gear oil level. Inspect the gearbox, replace if damaged or add oil if not damaged. Upper chain drive loose. Tighten the chain as required. Incorrect shear bolt type. Replace with correct part number.
- Page 52 8. TROUBLESHOOTING WRX SERIES – PORTABLE GRAIN AUGER Drive Cause Problem Solution Drive belts jumping off Motor misaligned. Ensure drive and driven pulleys are pulleys. correctly aligned. Belts mismatched. Check Specifications section for correct belt sizes and only replace in pairs.
-
Page 53: Specifications
WRX SERIES – PORTABLE GRAIN AUGER 9. SPECIFICATIONS 9. Specifications Specification 8–31 8–36 8–41 8" (203 mm) Tube Size CAPACITIES Up to 3000 Bu/Hr Unloading Rate (106 m³/Hr) TRANSPORT DIMENSIONS 32'7" 36'5" 42'5" Length (9.93 m) (11.10 m) (12.93 m) 6'5"... - Page 54 9. SPECIFICATIONS WRX SERIES – PORTABLE GRAIN AUGER Specification 8–46 8–51 8–56 8–61 8–71 8–76 8" (203 mm) Tube Size CAPACITIES Up to 3000 Bu/Hr Unloading Rate (106 m³/Hr) TRANSPORT DIMENSIONS 46'8" 52'2" 56'10" 62'2" 72'0" 76'10" Length (14.2 m) (15.9 m)
- Page 55 WRX SERIES – PORTABLE GRAIN AUGER 9. SPECIFICATIONS Specification 10–31 10–36 10–41 10–51 10–61 10–71 10" (254 mm) Tube Size CAPACITIES Up to 4800 Bu/Hr Unloading Rate (169 m³/Hr) TRANSPORT DIMENSIONS 32'7" 36'5" 42'5" 52'2" 62'2" 72'0" Length (9.93 m) (11.10 m)
-
Page 56: Appendix
10. APPENDIX WRX SERIES – PORTABLE GRAIN AUGER 10. Appendix 10.1. Bolt Torque Table 3 gives the correct torque values for various hardware. Tighten all bolts to the torque specified, unless otherwise noted. Check tightness periodically, using Table 3 as a guide. Replace the hardware with the same strength bolt, contact Westfield if you are unsure. -
Page 57: Installing The Emd On The Right-Hand Side
WRX SERIES – PORTABLE GRAIN AUGER 10. APPENDIX 10.2. Installing the EMD on the Right-Hand side If the motor drive is required on the right-hand side of the auger, the EMD will need to be disassembled and then reassembled with the following parts rotated: •... - Page 58 10. APPENDIX WRX SERIES – PORTABLE GRAIN AUGER Installing the Gearbox Gearbox Assembly Bolt, #10 x 3/4" Locknut, #10 Woodruff Key, 1/4" x 1" Bolt, 7/16" x 1" Set Screw, 3/8" x 3/8" Locknut, 7/16" Bolt, 1/2" x 1" Chain Coupler Guard Assembly Lock Washer, 1/2"...
- Page 59 WRX SERIES – PORTABLE GRAIN AUGER 10. APPENDIX Installing the EMD Mount Assembly EMD Mount Assembly Bolt, 7/16" x 1" Bolt, 1/2" x 1" Locknut, 7/16" Slide Bracket Lock Washer, 1/2" 31060 R3...
- Page 60 10. APPENDIX WRX SERIES – PORTABLE GRAIN AUGER Installing the Backplate Mount Back Plate Slide Mount Bracket Bolt, 3/8" x 3/4" Back Plate Mount Whiznut, 3/8" Reversible Back Plate Mount Locknut, 7/16" Bolt, 7/16" x 1" Installing the Electric Motor Electric Motor Flat Washer, 3/8"...
-
Page 61: Installing The Pto-Bd On The Left-Hand Side
WRX SERIES – PORTABLE GRAIN AUGER 10. APPENDIX 10.3. Installing the PTO-BD on the Left-Hand side To change the auger from a right-hand drive to a left-hand drive, take the following steps: 1. Support the discharge end of the auger using a front-end loader and a sling or chain, or a block-and-tackle. - Page 62 10. APPENDIX WRX SERIES – PORTABLE GRAIN AUGER INTAKE END 8" Pulley Axle Belt-Guide Bracket Jackshaft Assembly 2" Support Tube 1-3/4" Support Tube Driveshield 15" Pulley Driveline Pulley Guards Transport Saddle 31060 R3...
-
Page 63: Agi Limited Warranty
11. AGI Limited Warranty This warranty relates to AGI Augers (the “Product”) sold by AGI, (referred to herein as the “Seller”) and applies only to the first user of the Product (meaning a purchaser directly from the Seller or from an authorized dealer or distributor of the Product, referred to herein as the “Buyer”). - Page 64 AGI is a leading provider of equipment solutions for agriculture bulk commodities including seed, fertilizer, grain, and feed systems with a growing platform in providing equipment and solutions for food processing facilities. AGI has manufacturing facilities in Canada, the United States, the United Kingdom, Brazil, South Africa, India and Italy and distributes its products globally.
Need help?
Do you have a question about the WRX Series and is the answer not in the manual?
Questions and answers