Table of Contents
Advertisement
Quick Links
X² & HX² 13" Series
Swing-Away Grain Auger
Operator's Manual
This manual applies to:
AGI Westfield X² 13-74, 13-84, 13-94
AGI X² 13-74, 13-84, 13-94
AGI Hutchinson HX² 13-74, 13-84, 13-94
AGI Mayrath HX² 13-74, 13-84, 13-94
Read this manual before using product. Failure to
follow instructions and safety precautions can
result in serious injury, death, or property
damage. Keep manual for future reference.
LOOKING FOR PARTS?
Check out our online
Parts Catalog!
Part Number: 31177 R1
Revised: June 2024
Original Instructions
Advertisement
Chapters
Table of Contents

Related Manuals for AGI X2 Series


Summary of Contents for AGI X2 Series
- Page 1 X² & HX² 13" Series Swing-Away Grain Auger Operator’s Manual This manual applies to: AGI Westfield X² 13-74, 13-84, 13-94 AGI X² 13-74, 13-84, 13-94 AGI Hutchinson HX² 13-74, 13-84, 13-94 AGI Mayrath HX² 13-74, 13-84, 13-94 LOOKING FOR PARTS?
- Page 2 This product has been designed and manufactured to meet general engineering standards. Other local regulations may apply and must be followed by the operator. All personnel must be trained in the correct operational and safety procedures for this product. Use the sign-off sheet below to record initial and periodic reviews of this manual with all personnel.
-
Page 3: Table Of Contents
X² & HX² 13" SERIES – SWING-AWAY GRAIN AUGER CONTENTS 1. Introduction ............................6 1.1 Serial Number Location......................6 1.2 Intended Use ..........................7 1.2.1 Misuse ........................7 2. Safety............................... 8 2.1 Safety Alert Symbol and Signal Words..................8 2.2 General Safety Information....................... 8 2.3 Rotating Flighting Safety ...................... - Page 4 X² & HX² 13" SERIES – SWING-AWAY GRAIN AUGER 5.8.1 Electric Power Swing Operation ................52 5.8.2 Hydraulic Power Swing Operation ................54 5.9 Positioning the Tractor for Right Angle Drive Operation ............55 6. Operation .............................. 58 6.1 Operation Safety ........................58 6.2 X-Tend Operator Controls .......................
- Page 5 7.28 Inspect the Retroreflective Strips ..................93 8. Troubleshooting............................ 96 9. Specifications ............................99 10. Appendix ............................101 10.1 Power Swing Remote Transmitter Instructions ..............101 10.2 Programming Receivers ...................... 102 10.3 Open/Closed-Center Valve Conversion................104 11. AGI Limited Warranty........................105 31177 R1...
-
Page 6: Introduction
Keep this manual handy for frequent reference and to review with new personnel. A sign-off form is provided on the inside front cover for your convenience. If any information in this manual is not understood or if you need additional information, please contact AGI or your representative for assistance. -
Page 7: Intended Use
1. INTRODUCTION X² & HX² 13" SERIES – SWING-AWAY GRAIN AUGER 1.2. Intended Use The auger is intended for use as listed below and described throughout this manual. Use in any other way is considered contrary to the intended use and is not covered by the warranty. Intended use for the auger •... -
Page 8: Safety
2. SAFETY X² & HX² 13" SERIES – SWING-AWAY GRAIN AUGER 2. Safety 2.1. Safety Alert Symbol and Signal Words This safety alert symbol indicates important safety messages in this manual. When you see this symbol, be alert to the possibility of injury or death, carefully read the message that follows, and inform others. -
Page 9: Rotating Flighting Safety
2. SAFETY X² & HX² 13" SERIES – SWING-AWAY GRAIN AUGER 2.3. Rotating Flighting Safety • KEEP AWAY from rotating flighting. • DO NOT remove or modify flighting guards, doors, or covers. Keep in good working order. Have replaced if damaged. •... -
Page 10: Work Area Safety
2. SAFETY X² & HX² 13" SERIES – SWING-AWAY GRAIN AUGER 2.7. Work Area Safety • Have another trained person nearby who can shut down the auger in case of accident. • Do not allow any unauthorized persons in the work area. •... -
Page 11: Guards Safety
2. SAFETY X² & HX² 13" SERIES – SWING-AWAY GRAIN AUGER 2.8. Guards Safety • Keep guards in place. Do not operate with guard removed. • Do not walk on, step on, or damage guards. • Lock out power before removing a guard. •... -
Page 12: Hydraulic Winch Safety
2. SAFETY X² & HX² 13" SERIES – SWING-AWAY GRAIN AUGER 2.11. Hydraulic Winch Safety When Equipped: • Keep away from rotating cable drum and winch cable. Do not touch or grab cable while winch is being operated or use hands to guide the cable. •... -
Page 13: Drives And Lockout Safety
2. SAFETY X² & HX² 13" SERIES – SWING-AWAY GRAIN AUGER 2.14. Drives and Lockout Safety Inspect the power source(s) before using and know how to shut down in an emergency. Whenever you service or adjust your equipment, make sure you shut down the power source and unplug or remove the key (as applicable) to prevent inadvertent start-up and hazardous energy release. -
Page 14: Hydraulic Power Safety
2. SAFETY X² & HX² 13" SERIES – SWING-AWAY GRAIN AUGER 2.14.2 Hydraulic Power Safety Power Source • Refer to the rules and regulations applicable to the power source operating the hydraulic system. • Do not connect or disconnect hydraulic lines while system is under pressure. -
Page 15: Tire Safety
2. SAFETY X² & HX² 13" SERIES – SWING-AWAY GRAIN AUGER 2.15. Tire Safety Failure to follow proper procedures when mounting a tire on a wheel or rim can produce an explosion that may result in serious injury or death. •... -
Page 16: Safety Equipment
2. SAFETY X² & HX² 13" SERIES – SWING-AWAY GRAIN AUGER Steel-Toe Boots • Wear steel-toe boots to protect feet from falling debris. Work Gloves • Wear work gloves to protect your hands from sharp and rough edges. Dust Mask •... -
Page 17: Decal Installation/Replacement
2. SAFETY X² & HX² 13" SERIES – SWING-AWAY GRAIN AUGER 2.18.1 Decal Installation/Replacement 1. Decal area must be clean and dry, with a temperature above 50°F (10°C). 2. Decide on the exact position before you remove the backing paper. 3. - Page 18 2. SAFETY X² & HX² 13" SERIES – SWING-AWAY GRAIN AUGER Figure 3. X-Tend Safety Decal Locations (Optional) 20804 20803 22950 22950 22948 22949 20805 22952 22957 20813 20804 20803 20804 31177 R1...
- Page 19 2. SAFETY X² & HX² 13" SERIES – SWING-AWAY GRAIN AUGER Figure 4. Hydraulic Landing Gear Power Swing Safety Decal Locations (Optional) 20806 31177 R1...
- Page 20 2. SAFETY X² & HX² 13" SERIES – SWING-AWAY GRAIN AUGER Table 1. Safety Decals Part Number Description 20813 DANGER ROTATING FLIGHTING HAZARD To prevent death or serious injury: • KEEP AWAY from rotating auger flighting. • DO NOT remove or modify auger flighting guards, doors, or covers.
-
Page 21: Electrocution Hazard
2. SAFETY X² & HX² 13" SERIES – SWING-AWAY GRAIN AUGER Table 1 Safety Decals (continued) Part Number Description 20816 DANGER ELECTROCUTION HAZARD To prevent death or serious injury: • When operating or moving, keep equipment away from overhead power lines and devices. •... - Page 22 2. SAFETY X² & HX² 13" SERIES – SWING-AWAY GRAIN AUGER Table 1 Safety Decals (continued) Part Number Description 20803 WARNING MISSING GUARD HAZARD To prevent serious injury or death, shut off power and reattach guard before operating machine. 20804 WARNING ENTANGLEMENT HAZARD To prevent serious injury or death:...
- Page 23 2. SAFETY X² & HX² 13" SERIES – SWING-AWAY GRAIN AUGER Table 1 Safety Decals (continued) Part Number Description 20806 WARNING HIGH PRESSURE FLUID HAZARD Hydraulic fluid can cause serious injury if it penetrates the skin. If it does, see a doctor immediately.
- Page 24 2. SAFETY X² & HX² 13" SERIES – SWING-AWAY GRAIN AUGER Table 1 Safety Decals (continued) Part Number Description 20807 WARNING To prevent serious injury or death: • Read and understand the manual before assembling, operating, or maintaining the equipment. •...
- Page 25 2. SAFETY X² & HX² 13" SERIES – SWING-AWAY GRAIN AUGER Table 1 Safety Decals (continued) Part Number Description 20811 WARNING UPENDING HAZARD To prevent death or serious injury: • Anchor intake end and/or support discharge end to prevent upending. •...
- Page 26 2. SAFETY X² & HX² 13" SERIES – SWING-AWAY GRAIN AUGER Table 1 Safety Decals (continued) Part Number Description 20805 WARNING HIGH PRESSURE FLUID HAZARD Hydraulic fluid can cause serious injury if it Hydraulic fluid can cause serious injury if it penetrates the skin.
- Page 27 2. SAFETY X² & HX² 13" SERIES – SWING-AWAY GRAIN AUGER Table 1 Safety Decals (continued) Part Number Description 22950 WARNING Moving Parts will cause severe injury. KEEP AWAY ROTATING SHAFT Keep hair and loose clothing away 17107 CAUTION To prevent personal injury or damage to equipment, close valve in lift cylinder hydraulic line after raising equipment into position.
- Page 28 2. SAFETY X² & HX² 13" SERIES – SWING-AWAY GRAIN AUGER Table 1 Safety Decals (continued) Part Number Description 22957 CAUTION 1. SHUT OFF PTO when retracting or extending swing to or from its fully retracted position. 2. Engaging spline shaft with PTO running will damage the machine.
- Page 29 2. SAFETY X² & HX² 13" SERIES – SWING-AWAY GRAIN AUGER Table 1 Safety Decals (continued) Part Number Description 18859 NOTICE Disconnect PTO driveline from tractor before moving equipment. If attached, driveline will bottom out, severely damaging the CV u-joint and lower flight shaft.
- Page 30 2. SAFETY X² & HX² 13" SERIES – SWING-AWAY GRAIN AUGER Table 1 Safety Decals (continued) Part Number Description 22948 NOTICE DO NOT operate the PTO when retracted past this point. Failure to follow could result in equipment damage. 22949 NOTICE DO NOT operate the PTO when retracted past this point.
-
Page 31: Features
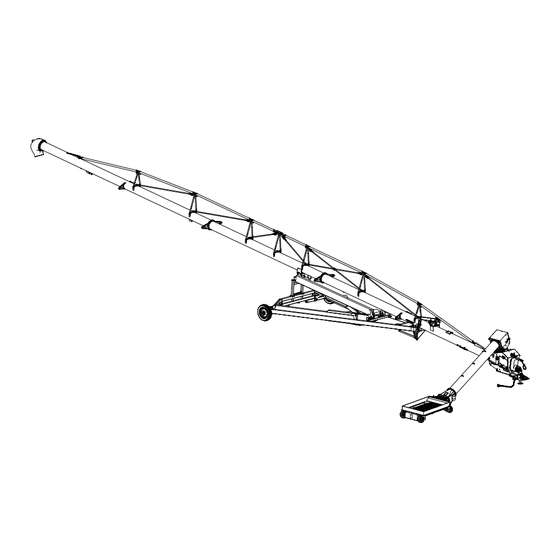
3. FEATURES X² & HX² 13" SERIES – SWING-AWAY GRAIN AUGER 3. Features 74' Model Features discharge spout boot truss tower swing cable adjustment hydraulic cylinders lift arm 31177 R1... - Page 32 3. FEATURES X² & HX² 13" SERIES – SWING-AWAY GRAIN AUGER 84'/94' Model Features discharge spout boot truss tower swing truss adjustment cable adjustment side truss hydraulic cylinders lift arm 31177 R1...
- Page 33 3. FEATURES X² & HX² 13" SERIES – SWING-AWAY GRAIN AUGER Swing Features spout head service cover swing tube maintenance hatch hopper flights and flight guarding overflow panel Grain Transfer Boot Features hitch jack hitch PTO holder ball valve hose holder clean-out hatch side access panel manual winch (hopper)
- Page 34 3. FEATURES X² & HX² 13" SERIES – SWING-AWAY GRAIN AUGER X-Tend Features hopper wheel drive assembly swing ring positioning controls swing auger 31177 R1...
-
Page 35: Transport
4. TRANSPORT X² & HX² 13" SERIES – SWING-AWAY GRAIN AUGER 4. Transport When transporting, follow all safety precautions and use a proper tow vehicle to help ensure safe transport of the auger. 4.1. Transport Safety • Check with local authorities regarding transport on public roads. -
Page 36: Transport Preparation
4. TRANSPORT X² & HX² 13" SERIES – SWING-AWAY GRAIN AUGER 4.2. Transport Preparation • Do not tow faster than 20 mph (32 km/h). Table 2 references the acceptable transport speed as per the ratio of tractor weight versus auger weight. See Specifications (Section 9. - Page 37 4. TRANSPORT X² & HX² 13" SERIES – SWING-AWAY GRAIN AUGER Figure 5. Safety Chain and Hitch Connection Figure 6. Augers with 10' Swing Tube Assembly in Transport Position (Standard) safety chain and hook winch cable and hook Figure 7. Augers with 15' Swing Tube Assembly in Transport Position (Optional) safety chain and hook winch cable and hook 31177 R1...
-
Page 38: Position The X-Tend For Transport
4. TRANSPORT X² & HX² 13" SERIES – SWING-AWAY GRAIN AUGER 4.4. Position the X-Tend for Transport 1. Fully extend the X-Tend tube. 2. Make the hopper as flat as possible to avoid interference with the frame before lifting the hopper into transport, as shown in Figure 8 on page 3. - Page 39 4. TRANSPORT X² & HX² 13" SERIES – SWING-AWAY GRAIN AUGER Figure 9. Attach the Cable All other models 74 Model Figure 10. Transport Position and Chain Attach 74 Model All other models 31177 R1...
-
Page 40: Auger Steer Transport Position
4. TRANSPORT X² & HX² 13" SERIES – SWING-AWAY GRAIN AUGER 4.5. Auger Steer Transport Position 1. Fully retract the steer axle assemblies. See Section 5.4 – Extendable Axle Positioning with an Auger Steer Kit on page 2. Lock the steer axle assemblies using the steer axle lock pins. Failure to lock the steer axle assemblies can cause the auger to steer to one side during transport, potentially causing an accident. -
Page 41: Placement
5. PLACEMENT X² & HX² 13" SERIES – SWING-AWAY GRAIN AUGER 5. Placement 5.1. Placement Safety • The auger is not insulated, keep away from overhead power lines. Electrocution can occur without direct contact. • Place the auger on reasonably level ground before operating. The auger could topple if ground is too uneven. - Page 42 5. PLACEMENT X² & HX² 13" SERIES – SWING-AWAY GRAIN AUGER 11. Back the auger up to the storage facility while it is in its lowered configuration. 12. Raise the auger so it clears the storage facility. See Raising and Lowering. 13.
-
Page 43: Raising And Lowering The Auger
5. PLACEMENT X² & HX² 13" SERIES – SWING-AWAY GRAIN AUGER 5.2.1 Raising and Lowering the auger The intake hopper must be off the ground when raising and lowering the auger. Before using the hydraulic lift cylinder: • Check that the hydraulic hoses are free from leaks, binding, flattening, kinks, or wear. Raising 1. -
Page 44: Extendable Axle Positioning
5. PLACEMENT X² & HX² 13" SERIES – SWING-AWAY GRAIN AUGER 5.3. Extendable Axle Positioning When equipped with extendable axles: Important Do not raise the auger unless the axles are in the extended position. Do not transport the auger unless the axles are in the retracted position. - Page 45 5. PLACEMENT X² & HX² 13" SERIES – SWING-AWAY GRAIN AUGER auger axle pin, 1" x 3-3/4" steer axle grip clip cylinder steer axle assembly lynch pin 5. Using the jack supplied, insert it into one of the jack stubs located on one end of the axle. The jack must be secured to a jack stub using the pin (attached to the jack).
- Page 46 5. PLACEMENT X² & HX² 13" SERIES – SWING-AWAY GRAIN AUGER auger axle steer axle assembly hairpin jack operating position (extended) jack pin transport position (retracted) 13. Remove the pins that are holding the steer axle links to the steer axle center. 14.
-
Page 47: Hitch Adjustment
5. PLACEMENT X² & HX² 13" SERIES – SWING-AWAY GRAIN AUGER steer axle center lynch pin steer axle link operating position (extended) steer axle end link transport position (retracted) 16. Pivot the steer axle towards the auger axle. 17. Re-install the steer axle to the steer axle assembly. 18. -
Page 48: Auger-To-Tractor Hookup
5. PLACEMENT X² & HX² 13" SERIES – SWING-AWAY GRAIN AUGER Figure 14. Hitch in Operating Position (Typical) Note The second hole is used for piling applications or when auger is near transport position. 5.6. Auger-to-Tractor Hookup The auger must be correctly connected to the tractor for all operations, including transport, raising, placement, and augering grain. - Page 49 5. PLACEMENT X² & HX² 13" SERIES – SWING-AWAY GRAIN AUGER Measurements Between Drawbar and PTO Driveline 14" (35.6 cm) 6"–10" (15.2 cm–25.4 cm) 41" (104.14 cm) Note Measurements must be taken with auger on level ground and in full down position. Raise tractor drawbar if necessary to maintain (B) dimension of 6"–10"...
-
Page 50: Raising And Lowering The Intake Hopper
5. PLACEMENT X² & HX² 13" SERIES – SWING-AWAY GRAIN AUGER 5.7. Raising and Lowering the Intake Hopper This section applies to the low-profile intake hopper. For specific X-Tend information, see Section 4.4 – Position the X-Tend for Transport on page 1. -
Page 51: Swing-Away Hand Winch Operation
5. PLACEMENT X² & HX² 13" SERIES – SWING-AWAY GRAIN AUGER 5.7.1 Swing-Away Hand Winch Operation When equipped with a Hand Winch: Before using the hand winch, ensure that: • the cable anchor on the winch drum is tight. • all cable clamps are secure. •... -
Page 52: Electric Power Swing Operation
5. PLACEMENT X² & HX² 13" SERIES – SWING-AWAY GRAIN AUGER The grain hopper must be lifted and secured for transport using the hopper lift arm, hydraulic winch, and safety chain and hook. The hopper lift arm can be reconfigured for lifting on either side of the auger. 5.8.1 Electric Power Swing Operation The Electric Power Swing is an optional component for some auger models. - Page 53 5. PLACEMENT X² & HX² 13" SERIES – SWING-AWAY GRAIN AUGER Figure 16. Power Swing Receiver Box receiver box direction switch power switch For Receiver Box Operation: 1. Using the direction switch, move the switch in the desired direction of travel (either F1 or F2). 2.
-
Page 54: Hydraulic Power Swing Operation
5. PLACEMENT X² & HX² 13" SERIES – SWING-AWAY GRAIN AUGER 2. Push the yellow directional buttons (marked with arrows) located below the ON/OFF buttons in the direction you want the hopper to move (Figure 17). 3. If this does not work: a. -
Page 55: Positioning The Tractor For Right Angle Drive Operation
5. PLACEMENT X² & HX² 13" SERIES – SWING-AWAY GRAIN AUGER Figure 18. Control Valve Lever Functions LIFT/LOWER HOPPER MOVE HOPPER LEFT/RIGHT 5.9. Positioning the Tractor for Right Angle Drive Operation Before setting up for right angle drive operation, the auger must first be positioned at the bin with a tractor with the auger wheels securely chocked, and the ball valve for lifting must be closed. - Page 56 5. PLACEMENT X² & HX² 13" SERIES – SWING-AWAY GRAIN AUGER 8. Do not exceed the maximum PTO operating length of 80" (2.03 m) or a maximum angularity of 15° from the ideal 90° drive angle. Figure 19. Tractor Position for Right Angle PTO Drive (Left Side Drive Configuration) Chock Wheels Chock Wheels...
- Page 57 5. PLACEMENT X² & HX² 13" SERIES – SWING-AWAY GRAIN AUGER Figure 20. Right Angle Drive Support Leg (Working Position) jack flat washer, 1" support leg cotter pin, 1/4" x 1-3/4" Figure 21. Right Angle Drive Support Leg (Storage Position) 31177 R1...
-
Page 58: Operation
6. OPERATION X² & HX² 13" SERIES – SWING-AWAY GRAIN AUGER 6. Operation For optimal operation, follow these safety precautions, checklists, and instructions. 6.1. Operation Safety • Keep away from rotating and moving parts, including the flighting, drive components, shafts, and bearings. - Page 59 6. OPERATION X² & HX² 13" SERIES – SWING-AWAY GRAIN AUGER Figure 22. X-Tend Operator Controls TIP-UP SWING Patents: CA 2,683,843; US 7,946,416; Other Patents Pending 31177 R1...
-
Page 60: Start-Up And Break-In
6. OPERATION X² & HX² 13" SERIES – SWING-AWAY GRAIN AUGER 6.3. Start-up and Break-in Check the following during the first hours of operation. 1. Check that the auger intake and discharge areas are free of obstructions. Foreign objects can damage the auger. Remove any obstructions from the intake and discharge areas before operating the auger. -
Page 61: Pto Speed Reducer
6. OPERATION X² & HX² 13" SERIES – SWING-AWAY GRAIN AUGER 6. Start tractor engine at low idle, slowly engage the PTO with the tractor idling to prevent unneeded stress on the drive components and shear bolts. 7. If everything is operating normally, start running grain through the auger and increase the tractor PTO to the specified full speed to produce the required flow. - Page 62 6. OPERATION X² & HX² 13" SERIES – SWING-AWAY GRAIN AUGER Excessive back pressure will cause extensive damage to the auger which is not covered by warranty. Forward and Reverse PTO Positions (540 RPM PTO Reverser) Forward and Reverse PTO Positions (1000 RPM PTO Speed Reducer) forward position cleanout door reverse position...
-
Page 63: X-Tend Operation
6. OPERATION X² & HX² 13" SERIES – SWING-AWAY GRAIN AUGER 6.5. X-Tend Operation 1. Lower the X-Tend from the transport position, tilt the end of the hopper up so that the weight is on the powerswing tires and place it in the unloading position, roughly perpendicular to the auger. Note In regular configurations, it should not be possible to contact the tractor cab by retracting the X-Tend, however use caution as this can happen when using a right angle PTO drive to operate your... -
Page 64: Safety Discharge Door
6. OPERATION X² & HX² 13" SERIES – SWING-AWAY GRAIN AUGER steer axle steer axle lock pin steer axle assembly hairpin 6.7. Safety Discharge Door The auger is equipped with a safety discharge door which will allow grain to overflow out of the swing-away discharge spout and prevent the main auger tube from plugging. -
Page 65: Restarting With A Full Tube
6. OPERATION X² & HX² 13" SERIES – SWING-AWAY GRAIN AUGER 6.9. Restarting with a Full Tube When the auger is shut down inadvertently or due to an emergency, the tube may still be filled with grain. 1. With the power source locked out, remove as much of the grain as possible from the tube and intake using a shop vacuum or other tool. -
Page 66: Shutdown
6. OPERATION X² & HX² 13" SERIES – SWING-AWAY GRAIN AUGER 6.12. Shutdown When operation has been completed: 1. Once auger is clear of grain, lock out the power source. 2. Clean out any remaining grain from the auger with a vacuum or sweep out. 3. - Page 67 6. OPERATION X² & HX² 13" SERIES – SWING-AWAY GRAIN AUGER Power Swing When Equipped: 1. Raise wheels to full up position. 2. Clean out axle assembly and lubricate chains with a light coating of oil. 3. Inspect unit for damage and note any repairs required. Order replacement parts from your dealer. 4.
-
Page 68: Maintenance
• After maintenance is complete, replace all guards, service doors, and/or covers. • Use only genuine AGI replacement parts or equivalent. Use of unauthorized parts will void warranty. If in doubt, contact AGI or your local dealer. Before attempting maintenance of any kind: •... - Page 69 7. MAINTENANCE X² & HX² 13" SERIES – SWING-AWAY GRAIN AUGER Daily: Section 7.3 – Visually Inspect the Equipment on page 70 Section 7.4 – Lubricate the Equipment on page 70 Section 7.28 – Inspect the Retroreflective Strips on page 93 Weekly: Section 7.6.1 –...
-
Page 70: Visually Inspect The Equipment
7. MAINTENANCE X² & HX² 13" SERIES – SWING-AWAY GRAIN AUGER When equipped: Section 7.25 – Check/Adjust the Truss Cables (74' Models) on page 90 When equipped: Section 7.26 – Check/Adjust the Side Truss (84/94 Models) on page 91 7.3. Visually Inspect the Equipment Lock out power before inspecting. -
Page 71: Grease Points
7. MAINTENANCE X² & HX² 13" SERIES – SWING-AWAY GRAIN AUGER 7.4.1 Grease Points Apply grease to: • 1 at the upper flighting bearing • 6 on the intake hopper—1 bushing, 2 at the U-joint, 1 at the hopper bearing, and 2 at the ends of the hopper flights •... - Page 72 7. MAINTENANCE X² & HX² 13" SERIES – SWING-AWAY GRAIN AUGER Figure 25. Boot Grease Points Figure 26. Typical PTO Driveline Grease Points 31177 R1...
-
Page 73: Lubricate The Upper Bearing
7. MAINTENANCE X² & HX² 13" SERIES – SWING-AWAY GRAIN AUGER Figure 27. Auger Steer (Optional) Grease Points 7.5. Lubricate the Upper Bearing 1. Ensure the swing hopper is secured in transport position. 2. Chock the auger wheels. 3. Unhook the tractor from the auger. 4. -
Page 74: Grease And Lubricate The X-Tend
7. MAINTENANCE X² & HX² 13" SERIES – SWING-AWAY GRAIN AUGER Assembly Note: Scan the QR code to watch a video on how to grease the upper bearing. • Use SAE multi-purpose high-temperature grease with extreme pressure (EP) performance. dust cap lock nut, 1-1/2"... -
Page 75: Semi-Annual Service For The X-Tend
7. MAINTENANCE X² & HX² 13" SERIES – SWING-AWAY GRAIN AUGER Figure 28. X-Tend Grease and Lubrication Points 7.6.2 Semi-Annual Service for the X-Tend Complete the following maintenance semi-annually. • Oil hopper drive chain with a light coat of oil. •... -
Page 76: Annual Service For The X-Tend
7. MAINTENANCE X² & HX² 13" SERIES – SWING-AWAY GRAIN AUGER 7.6.3 Annual Service for the X-Tend • Grease hopper bearings (1 shot) — (3 locations) • Grease the hopper flight support bushings — (2 locations) • Grease the transition flight support bushings — (2 locations) •... -
Page 77: Inspect And Service The Hand Winch And Lift Cable
7. MAINTENANCE X² & HX² 13" SERIES – SWING-AWAY GRAIN AUGER 7.8. Inspect and Service the Hand Winch and Lift Cable When equipped: Place the hopper in fully lowered position with cable slack. 1. Inspect the cable for damage such as fraying, kinking, or unwinding. Replace if damaged (see below). 2. -
Page 78: Service The Pulleys
7. MAINTENANCE X² & HX² 13" SERIES – SWING-AWAY GRAIN AUGER 7.10. Service the Pulleys • Ensure the cable is slack before servicing the winch. • Check to make sure cable clamps are secure. • Oil cable pulleys as needed. Figure 31. -
Page 79: Service The Gearbox Coupling Shaft
7. MAINTENANCE X² & HX² 13" SERIES – SWING-AWAY GRAIN AUGER 7.12. Service the Gearbox Coupling Shaft 1. Remove any accumulated debris with a cloth or a soft wire brush. 2. Inspect the gearbox coupling shaft and u-joints for wear and damage. Figure 33. -
Page 80: Check Upper And Lower Gearbox Oil Levels
7. MAINTENANCE X² & HX² 13" SERIES – SWING-AWAY GRAIN AUGER Figure 34. Boot Chain Drive 4. Tighten or loosen the adjustment nut on the side to set the chain slack for the hopper. Note If the chain can’t be tightened enough, remove a link from the chain. If the chain will not fit with one link removed, add a half link to the chain and replace. -
Page 81: Change The Gearbox Oil
7. MAINTENANCE X² & HX² 13" SERIES – SWING-AWAY GRAIN AUGER 1. Remove the oil filler plug located on the side of the gearbox. 2. Insert an improvised dipstick (rolled paper or plastic tie) into the oil filler hole to determine the oil level. 3. -
Page 82: Change The Speed Reducer Gearbox Oil
7. MAINTENANCE X² & HX² 13" SERIES – SWING-AWAY GRAIN AUGER 7.17. Change the Speed Reducer Gearbox Oil Note The speed reducer gearbox should be level when changing oil. 1. Place a pan under the drain plug located on the bottom of the speed reducer gearbox. 2. -
Page 83: Check X-Tend Chain Tension
7. MAINTENANCE X² & HX² 13" SERIES – SWING-AWAY GRAIN AUGER 7.19. Check X-Tend Chain Tension Complete the following maintenance weekly. Figure 37. X-Tend Chain Tension Check Points Adjusting the Hopper Drive Chain Tension Adjust the hopper drive chain tension following the procedure below. 1. - Page 84 7. MAINTENANCE X² & HX² 13" SERIES – SWING-AWAY GRAIN AUGER tensioner bolt bearing tensioner bolt nut bearing nut 31177 R1...
- Page 85 7. MAINTENANCE X² & HX² 13" SERIES – SWING-AWAY GRAIN AUGER Adjusting the Wheel Drive Chain Tension Adjust the wheel drive chain following the procedure below. 1. Remove the guard and check the chain tension. The chain should have approximately 1/2" slack in the middle.
-
Page 86: Inspect The X-Tend Spline Shaft And Tube
7. MAINTENANCE X² & HX² 13" SERIES – SWING-AWAY GRAIN AUGER Swing Auger Chain Tension Adjust the swing auger chain drive following the procedure below. 1. Remove the chain box access cover. 2. Loosen the nut on the end of the chain tensioner roller and move the idler sprocket toward the chain until the chain has approximately 1/2"... -
Page 87: Align The X-Tend Spline Shaft
7. MAINTENANCE X² & HX² 13" SERIES – SWING-AWAY GRAIN AUGER 7.21. Align the X-Tend Spline Shaft 1. Retract the X-Tend enough so the end of the male spline shaft becomes visible. 2. Loosen the nuts on both lower bearings of the chain tensioner box. 3. -
Page 88: Clean And Wash The Equipment
7. MAINTENANCE X² & HX² 13" SERIES – SWING-AWAY GRAIN AUGER 6. Tighten the lower bearing inside nuts. 7. Extend and retract the system to ensure that the spline shaft is now aligned properly. 7.22. Clean and Wash the Equipment 1. -
Page 89: Repack The Wheel Bearings With Grease
7. MAINTENANCE X² & HX² 13" SERIES – SWING-AWAY GRAIN AUGER mesh guard flat washer, 1/4" mesh strap lock nut, 1/4" bolt, 1/4" x 3/4" 7.24. Repack the Wheel Bearings with Grease 1. Block wheels and ensure unit is stable. 2. -
Page 90: Check/Adjust The Truss Cables (74' Models)
7. MAINTENANCE X² & HX² 13" SERIES – SWING-AWAY GRAIN AUGER 7.25. Check/Adjust the Truss Cables (74' Models) When equipped with Truss Cables: Check the Truss Cables: Check tube for straightness, no slack in the cables, and a just noticeable upward deflection of the discharge end. During operation, it is normal that for the tube to deflect downward. -
Page 91: Check/Adjust The Side Truss (84/94 Models)
7. MAINTENANCE X² & HX² 13" SERIES – SWING-AWAY GRAIN AUGER Typical Cable Truss Assembly (74' Models Only) cable clamp eyebolt nuts truss cable eyebolt anchor cable return bracket cable truss cable eyebolt turnbuckle 7.26. Check/Adjust the Side Truss (84/94 Models) When equipped with Truss Cables: Check the Side Truss Cables and Steel Trussing: Check tube for straightness, with no slack in the cables. -
Page 92: Power Swing Remote Transmitter
7. MAINTENANCE X² & HX² 13" SERIES – SWING-AWAY GRAIN AUGER 5. Tighten cable eyebolts evenly on both sides (use eyebolt nuts to tighten eyebolts) until the discharge end appears straight. • The tube should not deflect to the left or right if tightened evenly. 6. -
Page 93: Inspect The Retroreflective Strips
7. MAINTENANCE X² & HX² 13" SERIES – SWING-AWAY GRAIN AUGER 7.28. Inspect the Retroreflective Strips Replace missing or damaged retroreflective strips. Spout Optional Work/Transport Light Kits 2" (5.1 cm) Hopper Lower Arms 22708 22709 22707 74' Models: 20" (50.8 cm) 84' Models: 35"... - Page 94 7. MAINTENANCE X² & HX² 13" SERIES – SWING-AWAY GRAIN AUGER Upper Tube Middle Tube (74' Model) Middle Tube (84' Model) Middle Tube (94' Model) Lower Tube (74' Model) Lower Tube (84' Model) Lower Tube (94' Model) 31177 R1...
- Page 95 7. MAINTENANCE X² & HX² 13" SERIES – SWING-AWAY GRAIN AUGER Axle yellow retroreflective strip red retroreflective strip 31177 R1...
-
Page 96: Troubleshooting
The following section covers some causes and solutions to some of the problems that may be encountered. If there is a problem that is difficult to solve, even after having read through this section, please contact your representative or AGI. Have this manual and the serial number available. X-Tend Cause... - Page 97 8. TROUBLESHOOTING X² & HX² 13" SERIES – SWING-AWAY GRAIN AUGER Problem Cause Solution The coupler bolt below the Replace the bolt. non-rotating section is broken or missing. Bearing is seized. Identify the bearing and replace. A chain is broken. Identify the chain and repair or replace.
- Page 98 8. TROUBLESHOOTING X² & HX² 13" SERIES – SWING-AWAY GRAIN AUGER Problem Cause Solution Auger movement is Identify and clear the obstruction. obstructed. The auger will not stay Leak in auger hydraulic Lower auger to transport position and in the elevated cylinder, fittings, or hose.
-
Page 99: Specifications
9. SPECIFICATIONS X² & HX² 13" SERIES – SWING-AWAY GRAIN AUGER 9. Specifications Table 3. X2/HX2 13 Specifications Specification 13-74 13-84 13-94 13" (33.0 cm) Tube Size CAPACITIES Unloading Rate 8700-9600 Bu/Hr TRANSPORT DIMENSIONS Length 75' 8" (23.1 m) 85' 8" (26.1 m) 95' 8"... - Page 100 9. SPECIFICATIONS X² & HX² 13" SERIES – SWING-AWAY GRAIN AUGER Table 4. X-Tend Specifications Specification X-Tend 13 Tractor Hydraulic Flow Adjust to 8 GPM Tractor PTO Speed 540/1000 rpm Hopper Height 12" Hopper Length 50" Hopper Width 36" Total Swing Weight 1500 lbs Weight on Lift Arm 800 lbs...
-
Page 101: Appendix
10. APPENDIX X² & HX² 13" SERIES – SWING-AWAY GRAIN AUGER 10. Appendix 10.1. Power Swing Remote Transmitter Instructions Figure 39 shows the controls and indicators for the power swing remote and receiver. Figure 39. Remote Transmitter and Receiver Controls and Indicators TRANSMITTER HOPPER MOVE (↑-↓) -
Page 102: Programming Receivers
10. APPENDIX X² & HX² 13" SERIES – SWING-AWAY GRAIN AUGER The transmitter automatically transmits a STOP signal after 30 minutes; this de-activates the receiver and the transmitter keypad. The remote transmitter that comes with each power swing is normally factory programmed to function with the power swing receiver. - Page 103 10. APPENDIX X² & HX² 13" SERIES – SWING-AWAY GRAIN AUGER TO REGISTER A FOURTH REMOTE TRANSMITTER: 1. Switch OFF the receiver. Important Steps 2 and 3 must be done within 10 seconds of each other. The FAULT LED on the receiver flashes for the duration of the registration window.
-
Page 104: Open/Closed-Center Valve Conversion
10.3. Open/Closed-Center Valve Conversion Note The standard configuration for the control valve is closed-center. The closed-center plug is pre-installed when delivered from AGI. The control valve can be converted from the closed-center to the open-center configuration by removing the conversion plug. -
Page 105: Agi Limited Warranty
11. AGI Limited Warranty This warranty relates to AGI Augers (the “Product”) sold by AGI, (referred to herein as the “Seller”) and applies only to the first user of the Product (meaning a purchaser directly from the Seller or from an authorized dealer or distributor of the Product, referred to herein as the “Buyer”). - Page 106 AGI is a leading provider of equipment solutions for agriculture bulk commodities including seed, fertilizer, grain, and feed systems with a growing platform in providing equipment and solutions for food processing facilities. AGI has manufacturing facilities in Canada, the United States, the United Kingdom, Brazil, South Africa, India and Italy and distributes its products globally.
Need help?
Do you have a question about the X2 Series and is the answer not in the manual?
Questions and answers