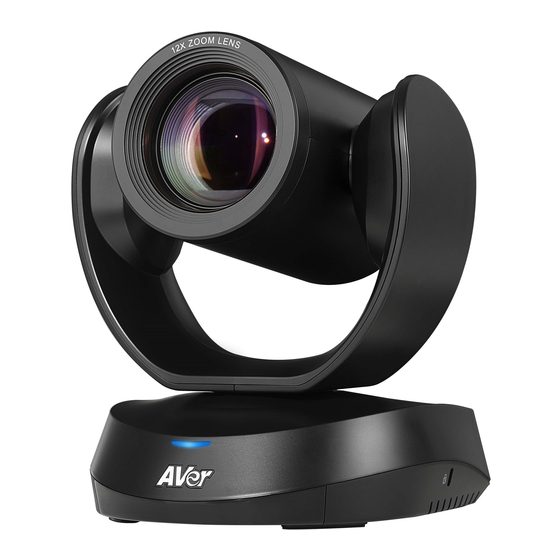
AVer CAM520 Pro3 User Manual
Hide thumbs
Also See for CAM520 Pro3:
- User manual (68 pages) ,
- Quick start manual (88 pages) ,
- Quick start manual
Table of Contents
Advertisement
Quick Links
Advertisement
Table of Contents

Related Manuals for AVer CAM520 Pro3


Summary of Contents for AVer CAM520 Pro3
- Page 1 CAM520 Pro3 — — User Manual Firmware 9602.14...
- Page 2 Warning Hold the bottom of the camera with both hands to carry the camera. Whether the camera is connected to power or not, do not grab any part of the lens or the lens holder to carry the camera or adjust pan and tilt. ...
- Page 3 Warning This is a class A product. In a domestic environment this product may cause radio interference in which case the user may be required to take adequate measures. Caution Risk of explosion if battery is replaced by an incorrect type. Dispose of used batteries according to the instructions.
- Page 4 © 2024 AVer Information Inc. All rights reserved. | January 22, 2024 All rights of this object belong to AVer Information Inc. Reproduced or transmitted in any form or by any means without the prior written permission of AVer Information Inc. is prohibited. All information or...
- Page 5 Tel: +81 (0) 3 5989 0290 テクニカル・サポート: https://jp.aver.com/technical-support Vietnam Branch Office Công ty TNHH AVer Information (Việt Nam) Tầng 5, 596 Nguyễn Đình Chiểu, P.3, Quận 3, Thành phố Hồ Chí Minh 700000, Việt Nam TEL: +84 (0)28 22 539 21...
-
Page 6: Table Of Contents
Wall Mount Installation ....................14 Ceiling Mount Installation ....................17 Secure the Cables ......................19 Get Started ........................20 Make a Video Call ......................20 Web Interface ........................21 Access the Web Interface ....................21 AVer IP Finder ......................21 PTZApp 2 ........................22... - Page 7 Open and Quit PTZApp 2 ....................34 USB Devices ......................... 35 Overview of the USB Devices page ................35 Overview of the Camera Card .................. 36 Overview of the Floating Live View ................37 Virtual Stream ........................ 38 EZLive ..........................39 Use AVer EZLive ......................39...
-
Page 8: Overview
Overview Package Contents Camera Power Adapter & Power Remote Control USB 2.0 Type-B to Plug* Type-A Cable (5m) Mini Din 9 to Mini Din 8 M4 x 8mm 1/4"-20 L=7.5mm Wall Mount RS-232 Adapter Cable Wall Mount Screw Tripod Screw (x2) Bracket (x2) (x2) Drill Template... -
Page 9: Warning
Pan and Tilt Angle... -
Page 10: Parts Info
Parts Info 4 5 6 7 1. Status LED 3. HDMI Port 8. Kensington Lock 2. IR Sensor 4. USB 3.1 Type B Port 5. RS-232 In/Out Port 6. DC Power Jack 7. PoE Port* *Power over Ethernet (PoE), compatible with IEEE 802.3AT. Please use CAT 5e FTP cable (not included). -
Page 11: Remote Control
Remote Control Name Function No selection is required by default to operate the 1. Camera Select camera. Camera Binding is turned off by default and all three selections can operate the camera. To specify a number, go to Setting > Camera Binding on the web interface or in PTZ App2. -
Page 12: Shortcuts
14. Brightness + Increase the brightness. 15. Hang Up End the call. Shortcuts Press and Hold for 2 sec Turn wide dynamic range (WDR) on or off. for 2 sec Turn SmartFrame on or off. for 2 sec Turn RTMP streaming on or off when RTSP and RTMP are turned for 2 sec Enter sleep mode. -
Page 13: Connection
Connection Device Connection Use the included USB cable. The USB 3.1 port is compatible with USB 2.0. Maximum resolution/fps for USB 2.0 and USB 3.1 ports: USB 2.0 USB 3.1 HDMI M-JPEG M-JPEG - 640x480 or less, - 1080p/60fps - Up to - 1080p/60fps - 1080p/60fps... -
Page 14: Power Connection
Power Connection Connect the included power adapter and power cord to a wall outlet. Or connect a CAT 5e FTP cable (not included) to the PoE Switch or Ethernet. PoE port is compatible with IEEE 802.3at. When streaming over IP, use a CAT 5e FTP cable (not included) for a smooth video. -
Page 15: Rs-232 Connection
RS-232 Connection RS-232 Port Pin Definition Function Mini DIN9 I/O Type Signal Description PIN # VISCA IN Output Data Terminal Ready Input Data Set Ready Output Transmit Data Input Receiver Data VISCA OUT Output Data Terminal Ready Input Data Set Ready Output Transmit Data Input... -
Page 16: Computer/Keyboard Controller And Camera Connection
Computer/Keyboard Controller and Camera Connection Direct Connection If users do not use AVer RS-232 adapter cable, please refer to the pin connection shown below. Mini DIN 9 to DB9 cable Camera controller Mini DIN9 Camera Camera controller, PC 1. DTR (IN) 6. - Page 17 Use the supplied RS-232 mini DIN 9 to mini DIN 8 cable Mini DIN8 Camera controller, PC Camera 1. DCD 6. GND (IN) 2. RXD 3. TXD (IN) 3. TXD 5. RXD (IN) 4. DTR 2. DSR (IN) ...
- Page 18 * Mini DIN 8 to D-Sub 9 (DB9) cable is an optional item. ** RS-232 mini DIN 9 to mini DIN 8 Cable Pin Definition Mini DIN 8 Pin Definition...
-
Page 19: Camera Cascade Connection
Camera Cascade Connection Direct Connection If users do not use AVer RS-232 adapter cable, please refer to the pin connection shown below for cascading cameras. Total can connect up to 7 cameras. Mini DIN9 Mini DIN9 Camera 1 Camera 2 1. - Page 20 Connect camera with AVer mini DIN 9 to mini DIN 8 adapter cable. Connect the mini DIN 8 female side to male mini DIN 8 Visca cable (Users have to buy it in the market) and then connect AVer mini DIN 9 to mini DIN 8 adapter cable again to connect to next camera.
-
Page 21: Installation
Installation Wall Mount Installation 1. Use the drilling paper included in the package to drill the holes in the wall where the user wants to mount the camera. 46.00[1.81] Ø 5.50[Ø 0.22] 51.00[2.01] P/N: 303AU340-AGR 2. Use the screws (not included) to secure the L-mount bracket on the wall. - Page 22 3. Then, assemble the L-mount brackets with screws (included in package). M4 x8mm (x2) Screw size: 4. After assembling the L-mount brackets, use the screws (not included) to secure the lower part of L-mount brackets on the wall. Screw For Cement wall: M4 x20mm self-tapping screws (x2) + Plastic conical anchor For Wooden wall: M4 x20mm self-tapping screws (x2)
- Page 23 5. Pass the cables through the hole on the L-mount bracket and connect the cables to corresponding connection ports. 6. Use the remaining screws (included in package) to secure the camera on the L-mount bracket. 1/4”-20 L=7.5mm (x2) Screw:...
-
Page 24: Ceiling Mount Installation
Ceiling Mount Installation Install the provided screw underneath the camera but do not tighten. 2. Turn the camera to right side. Pass cables through A or B hole first. Connect cables with camera. - Page 25 4. Turn the camera to face the front side. Install the second screw and tighten both screws. Find suitable screws to fix the camera mount to the ceiling.
-
Page 26: Secure The Cables
Secure the Cables Plug in your USB cable or RS-232 cable and tighten the cable screw to secure. -
Page 27: Get Started
Get Started Make a Video Call The CAM520 Pro3 is a plug-n-play camera. 1. Connect your CAM520 Pro3 to a computer using the included USB cable. ® 2. Open your video conferencing software such as Microsoft Teams, Skype and Zoom. -
Page 28: Web Interface
5. Enter the default password aver4321. 6. Select DHCP. 7. Click Apply. AVer IP Finder will seach for devices again and your camera’s IP address will change. 8. Double-click on your device row to access the web interface. 9. For first-time login, enter the default password aver4321. You’ll be prompted to set up a new account and password. -
Page 29: Ptzapp 2
PTZApp 2 1. Download and install PTZApp 2 to your computer from AVer Download Center. (https://www.aver.com/download-center). 2. Make sure your camera and computer are connected to the same network. 3. Double-click the PTZApp 2 icon to open PTZApp 2 in your browser. -
Page 30: Ptz Control
PTZ Control Overview of PTZ Control 1. Presets 0-9 7. Log Out Log out of your account and close the web 2. Preset Function Buttons interface. Save, load and clear a preset. 8. Live View 3. Add Available Presets There are 10 available presets 0-9 by default. 9. -
Page 31: Save, Load And Clear A Preset
Save, Load and Clear a Preset To save a preset: 1. Use the pan, tilt and zoom controls to position your camera. 2. Select Set, then a preset number to save that position. 3. Select Yes when prompted. A thumbnail of your preset will appear. Add and Delete Available Presets (Presets 10-127) There are 10 available presets 0-9 by default. -
Page 32: Setting
Setting... - Page 33 When Save Preset is turned off, you won’t be able to save presets using the remote control, web interface, hotkeys or VISCA commands. Integration Booster for AVer Turn on to improve compatibility with AVer MT300 Matrix Tracking MT300 Box and reduce latency by lowering bit rate.
- Page 34 Image Item Description Image Flip Flip the image vertically. Image Mirror Flip the image horizontally. Turn wide dynamic range (WDR) on or off. Flicker Decrease on IFP / Monitor Turn Flicker Decrease on IFP / Monitor on or off. Frequency Select a frequency.
-
Page 35: Overview Of The Floating Live View
Overview of the Floating Live View The floating live views opens automatically in the Setting tab. To open the floating live view again after closing, click on the video recorder icon on top of Setting, Video Format, Network and System tabs. 1. -
Page 36: Tracking Mode
Tracking Mode Frames manually using the SmartFrame button Manual Frame to frame entire group on screen once. Frames entire group on screen automatically. If no Auto Frame one is in view, the camera will default to preset 0. The camera auto frames every time a subject enters or leaves the screen. -
Page 37: Video Format
Video Format Item Description H.264 Profile Select a profile for streaming live. IP Stream Resolution Select a resolution for streaming over IP. Frame Rate Select a frame rate. Bit Rate Select a bit rate. To live stream on Facebook, we recommend a bit rate under 4Mbps. RTSP and RTMP Item Description... -
Page 38: Network
Network Item Description Hostname Click the pencil icon to edit a hostname. Use upper and lowercase letters and numbers. Static IP, DHCP Set up static IP or DHCP. If Static IP is selected, enter your network settings to set up a static IP connection and click Confirm. -
Page 39: System
System Item Description Language Select a language for the web interface. Update your camera’s firmware. Firmware Update Auto Update: Checks and updates online. Manual Update: Update the firmware using a file offline. Note: The camera will reboot and the connection will be lost. Please wait a few minutes and keep the power cable connected. - Page 40 If you forgot your password, use PTZApp 2 to reset the web interface password to the default aver4321. SSL Certificate Upload an SSL certificate. Date Format Select a date format. Time Format Select a time format. Time Correction Mode Select a time correction mode.
-
Page 41: Ptzapp 2
1. Double-click the PTZApp 2 icon to open PTZApp 2 in your browser. 2. Connect your AVer camera to your computer with a USB cable. When PTZApp 2 detects a USB-connected camera, a camera card will appear under USB Devices. -
Page 42: Usb Devices
Change the PTZApp 2 interface language to English, Chinese or Japanese. Hotkey Control Turn hotkey on or off. PTZApp Update View PTZApp 2 version or check for updates. Usage Data Opt-in or opt-out of providing anonymous usage data. EZManager Pair Pair with EZManager to manage all your USB-connected AVer cameras. -
Page 43: Overview Of The Camera Card
Overview of the Camera Card 1. Name Click the pencil icon to name your camera. 2. Information Click the triangle icon to view camera information such as firmware version. Click again to exit. 3. Live View Click the video recorder icon to open a floating live view. 4. -
Page 44: Overview Of The Floating Live View
Overview of the Floating Live View 1. Live View 2. Directional Pad and Zoom 3. Pan-Tilt Reset Reset the pan-tilt position to the center. 4. IP Address 5. Head Count and Video Transmission Duration Click the head count icon to display head count and the duration of your video transmission. Click the icon again to hide the information. -
Page 45: Virtual Stream
3. Go to Virtual Stream > click Start on your camera card. 4. Enter the RTSP password when prompted, if any. 5. Open your video conferencing software. Choose AVer USB VCam as the video source, not your camera model name. -
Page 46: Ezlive
EZLive Please go to http://www.aver.com/download-center to download the AVer EZLive software. After downloading, double-click on the file and follow the on-screen instructions to complete the installation. Use AVer EZLive During a video call, EZLive can help user to do: (1) Camera ePTZ (2) Volume control for the speaker connected (3) Capture camera’s still images...
Need help?
Do you have a question about the CAM520 Pro3 and is the answer not in the manual?
Questions and answers