Table of Contents
Advertisement
Quick Links
Advertisement
Table of Contents

Related Manuals for AVer PTC500+


Summary of Contents for AVer PTC500+
- Page 1 PTC500+ / PTC115+ User Manual...
- Page 2 The information contained in this documentation is subject to change without notice. In no event will AVer Information Inc. be liable for direct, indirect, special, incidental, or consequential damages arising out of the use or inability to use this product or documentation, even if advised of the...
- Page 3 © 2022 AVer Information Inc. All rights reserved. All rights of this object belong to AVer Information Inc. Reproduced or transmitted in any form or by any means without the prior written permission of AVer Information Inc. is prohibited. All information or specifications are subject to change without prior notice.
- Page 4 Tel: +81 (0) 3 5989 0290 テクニカル・サポート: VCInfo.JP@aver.com Vietnam Branch Office Công ty TNHH AVer Information (Việt Nam) Tầng 5, 596 Nguyễn Đình Chiểu, P.3, Quận 3, Thành phố Hồ Chí Minh 700000, Việt Nam Tel: +84 (0)28 22 539 211...
-
Page 5: Table Of Contents
Stage and Segment Mode ................7 WEB SETUP ......................8 Make a Connection to PTC500+ / PTC115+ via Browser ........ 8 Make a Connection to PTC500+ / PTC115+ via AVer IPCam Utility ....10 PTZ Camera ....................11 PTZ Camera ....................13 Video and Audio Setting ................. - Page 6 Setup Shielded Zone .................. 25 Setup Target Tracking Body ................ 26 Setup Multi-people Detection ..............27 Segment Mode ....................28 Setup Effective Zone .................. 28 Setup Shielded Zone .................. 31 Setup Target Tracking Body ................ 32 Preset Setup ....................33 Advanced Setting ....................
- Page 7 Language ....................50 Profile ......................50 Factory Default ................... 51 Information ....................51 Display ......................52 Latency Reduction ..................52 Hot Key ....................... 53 FAQ ........................54 S232 COMMAND TABLE ..................55 Visca Command Table ................55 Pelco-P Command Table ................60 Pelco-D Command Table ................
-
Page 8: Introduction
INTRODUCTION AVer PTC500+ / PTC115+ is a professional tracking camera which can be wide area, stage or segment mode depended on user’s subject target. The PTC500+ / PTC115+ use body motion and image analysis algorithm to tracking target; the target subject no need to wear any signal transmit device. The PTC500+ / PTC115+ can communicate with recording system through RS232, RS485 or network interface. -
Page 9: Product Overview
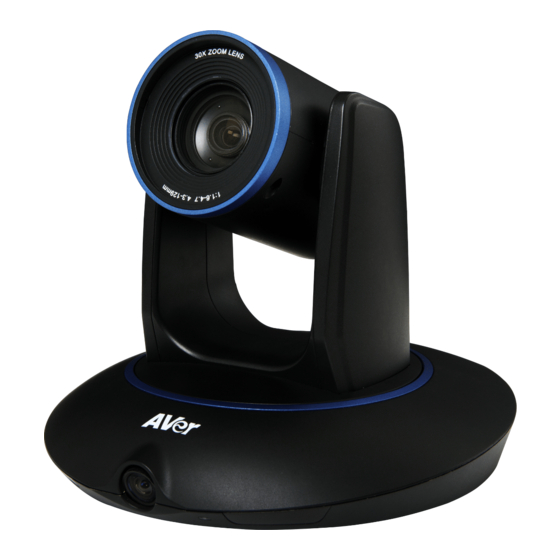
Product Overview 8 9 10 1. PTZ camera 6. 3G-SDI port* 2. Panoramic camera 7. HDMI port 3. Power indicator 8. Audio in port ** 4. PoE+ (IEEE 802.3at) 9. RS-232 port 5. USB port (PTZ view) 10. Power jack *3G-SDI: No audio out **Audio input level: 1Vrms(max.) Dimension... -
Page 10: Remote Control
Remote Control 1. Camera select [Note] Only channel No.1 is available. Before you use remote, please press channel 1 first. 2. Enter 3. Camera direction control 4. White balance 5. OSD menu 6. Back light control 7. Zoom in/out 8. Exposure compensation 9. -
Page 11: Connections
CONNECTIONS Device Connections RJ-45 cable (PoE+) Power Adaptor Multi Media Management System coaxial Audio (PoE+ Switch or PoE+ Injector) cable cable USB cable Power RS-232 to cord D-Sub 9 cable Desktop Recording System HDMI cable Control System Projector Power Outlet Audio Mixer... -
Page 12: Rs232 Pin Definition
RS232 Pin Definition DIN6 TO DP9 Cable DIN6 I/O Type Description PIN No. PIN No. Output Input Not Connect Output Input... -
Page 13: Mode Introduction
MODE INTRODUCTION Wide Area Mode Application This mode is suitable for teacher or lecturer tracking in normal classroom. The algorithm is based on face detection. Regardless of the target close to or away from PTC500+ / PTC115+, the tracking camera will automatically zoom in/out to maintain the appropriate size and proportion. -
Page 14: Stage And Segment Mode
Stage and Segment Mode Application It’s suitable for complicate environment. It’s the remedy for teacher mode. Due to absolute motion tracking, PTC500+ / PTC115+ will not be affected by the color of wood furniture or the high bright contrast. ... -
Page 15: Web Setup
WEB SETUP Make a Connection to PTC500+ / PTC115+ via Browser 1. Find the IP address of PTC500+ / PTC115+: call out OSD menu of PTC500+ / PTC115+. Use ▲ and ▼ buttons on the remote control to go to “Information” to find the IP address information. Open the browser on your PC and enter the IP address of PTC500+ / PTC115+. - Page 16 Enter the password of PTC500+ / PTC115+ to login. The default password is “admin”. After login, User should see the main interface of PTC500+ / PTC115+.
-
Page 17: Make A Connection To Ptc500+ / Ptc115+ Via Aver Ipcam Utility
Make a Connection to PTC500+ / PTC115+ via AVer IPCam Utility [Note] The PTC500+ / PTC115+ FW version 0.0.1000.08 and above supports IPCam Utiltiy application. To find the IP address of your cameras, you can execute the IPCam Utility installer. Follow the below steps to find the IP address of camera. -
Page 18: Ptz Camera
PTZ Camera Exposure Mode: Full Auto: The camera automatically determines the shutter speed and the aperture while you can change other settings manually. Shutter Priority: You can manually change the shutter speed while the aperture is automatically determined by the camera. - Page 19 camera will constantly focus on the presenter as he/she walks around, which might cause a blurry image. Power up ACT: Select a preset point for the camera to navigate to after the camera is turned on.
-
Page 20: Ptz Camera
PTZ Camera General Contrast: You can adjust the value of contrast. Saturation: You can adjust the value of saturation. Sharpness: You can switch between Off, Low, Middle, and High. Noise Reduction: You can switch between Off, Low, Middle, and High. ... -
Page 21: Video And Audio Setting
Video and Audio Setting [Video Output] Click Select either the PTZ camera or the Panoramic camera as the image source and select a combination of resolution and frame rate for the chosen camera. Select Save. [Audio Input] Audio Line in Format: As the default streaming format, AAC provides better sound quality for streaming. - Page 22 [Streaming Mode] Mode 1 Select either a PTZ or Panoramic camera for streaming. As there is only one camera, you can enjoy better video quality. PTZ camera Resolution/fps: Choose a combination among 1080P/60, 1080P/30, 720P/30, and 480P/30. Bps (Bits per second): Choose a bitrate among 6M, 4M, or 2M. Panoramic Camera ...
- Page 23 Network Setting DHCP enable: You can toggle it on and the camera will be assigned with an IP address automatically. You can toggle it off to manually enter IP address, Netmask, Gateway, and DNS. Click Apply. RTMP Server (PTZ): Enter Server URL and Stream Key. Select Connect. ...
- Page 24 Enable Tracking Function Turn on and off the tracking function. Select > Tracking setting > Tracking on.
-
Page 25: Setup Object Viewing Dimension
Setup Object Viewing Dimension Set the size of tracking object on the screen. Aim the intersection of blue line can get best curacy of tracking. The illustration shows the minimum request. Set the person proportion more than the illustration. If target proportion is smaller than the photo, it may cause the tracking failure. 1920 1080 To set the object size for tracking select... -
Page 26: Tracking Mode Instruction
Tracking Mode Instruction View the each tracking mode’s brief instruction, feature, and use environment. > Tracking Setting > Tracking Mode Select to view tracking mode instruction. -
Page 27: Wide Area Mode
Wide Area Mode The PTC500+ / PTC115+ will start tracking when object enter the priority zone and the face of object is detected. Setup Priority Zone If PTC500+ / PTC115+ detects motions in the defined zone and PTC500+ / PTC115+ will be triggered to track. -
Page 28: Setup Shielded Zone
Setup Shielded Zone Define the area that user doesn’t want camera to track. The shield zone should be within the active zone. 8 shield zones can be set. [Note] The screen of shielded zone setting is based on panoramic camera view. 1. -
Page 29: Setup Multi-Presenter Detection
Setup Multi-presenter Detection Define the area as a multiple presenter detection area. The camera will move to preset 2 position and stop tracking the original object until the multi-presenter detection mode is stop. [Note] The screen of effect zone setting is based on panoramic camera view. 1. - Page 30 4. Time delay before returning to "Preset 2": Set the time to move the camera to preset 2 position after multi-people detect is activated. 5. Time delay before returning to single presenter tracking: Set the time period to back to tracking after multi-people detection is stop.
-
Page 31: Stage Mode
Stage Mode The PTC500+ / PTC115+ will start tracking when there is an object moving in effective zone. Setup Effective Zone If PTC500+ / PTC115+ detects motions in the defined zone and PTC500+ / PTC115+ will be triggered to track. If tracking zone doesn’t setup, then, all the panoramic view will be the default active zone. [Note] The screen of effective zone setting is based on panoramic camera view. -
Page 32: Setup Shielded Zone
Setup Shielded Zone Define the area that user doesn’t want camera to track. The shield zone should be within the active zone. 8 shield zones can be set. [Note] The screen of shield zone setting is based on panoramic camera view. 1. -
Page 33: Setup Target Tracking Body
Setup Target Tracking Body Define the width of tracking target. 1 target zone can be set. [Note] The screen of target tracking body is based on panoramic camera view. 1. Select > Tracking setting > Stage > Select target tracking body. 2. -
Page 34: Setup Multi-People Detection
Setup Multi-people Detection When multiple people detection is activated, the camera will move to preset 2 position and stop tracking the original object until the multi-people detection mode is stop. 1. Select > Tracking setting > Stage > Multi-people detection. 2. -
Page 35: Segment Mode
Segment Mode The PTC500+ / PTC115+ will start tracking when object is moving between the blocks. Setup Effective Zone If PTC500+ / PTC115+ detects motions in the defined zone and PTC500+ / PTC115+ will be triggered to track. If effective zone doesn’t setup, then, all the panoramic view will be the default active zone. The effective zone can be defined from 2 to 4 blocks. - Page 36 3. Select the tracking zone blocks – 2, 3, or 4 blocks. At least 2 blocks must be set. Make an overlap area between blocks to avoid the Click on the edge (left & camera move frequently at right) to adjust block size. junction point.
- Page 37 4. Click “Next” to set the position of tracking zone. Click preset button and use ▲,▼,,, Zoom +/- to adjust to the desire position. When each time preset position is set, click “Save” to save the settings. 5. Click “Finish” to complete the settings. When each time preset position is set, click “Save”...
-
Page 38: Setup Shielded Zone
Setup Shielded Zone Define the area that user doesn’t want camera to track. The shield zone should be within the active zone. 8 shield zones can be set. [Note] The screen of shield zone setting is based on panoramic camera view. 1. -
Page 39: Setup Target Tracking Body
Setup Target Tracking Body Define the width of tracking target. 1 target zone can be set. [Note] The screen of target tracking body is based on panoramic camera view. 1. Select > Tracking setting > Segment > Select target tracking body. 2. -
Page 40: Preset Setup
Preset Setup Define the specific location to view when select preset number (1~255). When PTC500+ / PTC115+ lose tracking, it will back to the preset 1 position. 1. Open the browser and enter the IP address of PTC500+ / PTC115+ to login to PTC500+ / PTC115+. 2. -
Page 41: Advanced Setting
Advanced Setting RS232 format protocol: Select VISCA, Pelco D, or Pelco P. ADDR: Select a number from the drop-down list. Baud Rate: Select 2400, 4800, 9600, or 115200. Visca Over-IP: You can toggle between on and off states. Select Save to finish camera configuration. -
Page 42: Profile Setting
Profile Setting You can save different camera configuration for different scenarios. Profile Name: Name the camera setting. Save to Profile: Select a number out of 1 to 5 for the camera setting you just named. Load other Setting: You can load any one of the 5 profiles for camera setting. Click Save to finish setting. -
Page 43: System Setting
[Firmware] Upgrade firmware 1. Download the newest firmware from http://www.aver.com/download-center 2. Connect to camera through browser. 3. Select System > Firmware > Upgrade firmware > Upgrade. 4. Select the firmware and select “Upload” button. 5. After updating, refresh the browser. -
Page 44: Using Rtsp Connect To Camera
Using RTSP connect to Camera Use RTSP player connecting to camera; please enter the following RTSP URL in your application such as VLC, PotPlayer, or QuickTime. PTZ camera: rtsp:// IP address of camera:554/live_st1 For example: rtsp://192.168.1.1:554/live_st1 Panoramic camera: rtsp://IP address of camera:8554/live_st2 For example: rtsp://192.168.1.1:8554/live_st2... -
Page 45: Osd Setup
OSD SETUP Before You Begin Make sure all connections are connected successfully before using the PTC500+ / PTC115+. Connections error will cause no image showing or no reaction. (For more information, please refer to Device Connections.) Turn off the OSD menu before you proceed to control the camera. For the First Time Use Trigger OSD Menu Press... -
Page 46: Setup Ip Address
Setup IP Address Setup IP address of PTC500+ / PTC115+. There are two ways to setup IP address of PTC500+ / PTC115+. Please follow the steps below to setup the IP address. Static IP Address Assign a fix IP address for PTC500+ / PTC115+. 1. - Page 47 3. Use ▲ and ▼ buttons go to “Information” to check the IP address information.
-
Page 48: Osd Tree Map
OSD Tree Map Main Tracking Camera > Video Format > Preset > Advanced Setting > Language > Profile > Factory Default > Information > Display > Tracking User can enable or disable auto-tracking. PTC500+ / PTC115+ will not track on object automatically when the feature is disabled. ... -
Page 49: Camera
Camera In the section, users can change camera ID, network setting and adjust parameter of camera settings. Tracking Camera > Camera ID > Video Format > DHCP > Advanced Setting > Static IP > Preset > PTZ Camera > Language >... -
Page 50: Dhcp
DHCP To enable DHCP, select Camera > DHCP. Tracking Camera > Camera ID > Video Format > DHCP > DHCP10.1.0.1 Advanced Setting > Static IP > Preset > PTZ Camera > Language > Profile > Factory Default > Information > Display >... -
Page 51: Ptz Camera
PTZ Camera To adjust the parameters of PTZ camera, select Camera >PTZ Camera. Tracking Camera > Camera ID > Video Format > DHCP > Advanced Setting > Static IP > Preset > PTZ Camera > Language > Camera Mode Full Auto >... - Page 52 Camera Mode There are 4 modes of camera mode, you can select one from Camera > PTZ Camera > Camera Mode. Camera Mode Full Auto > Full Auto > Slow Shutter Full Auto > Shutter Priority > Maximum Gain 24dB Shutter Priority >...
- Page 53 White Balance To adjust white balance value, select Camera > PTZ Camera > White Balance. Camera Mode Full Auto > Full Auto > Shutter Priority > Iris Priority > Manual > White Balance > Mode Auto Shading Correction > Auto Pan/Tile Speed One Push Zoom Speed...
-
Page 54: Video Format
Shading Correction To adjust shading correction, select Camera > PTZ Camera > Shading Correction (The option is for the screen corner shadow fixing.) Camera Mode Full Auto > Full Auto > Shutter Priority > Iris Priority > Manual > White Balance >... - Page 55 PIP Mode Select picture-in-picture(PIP) mode. To turn off the PIP mode, select mode 0. Tracking Camera > Video Format > 3G-SDI1/HDMI Auto Advanced Setting > 3G-SDI2 Auto Preset > Language > Profile > Factory Default > Information >...
-
Page 56: Advanced Setting
Advanced Setting To adjust RS232 protocol, address and baud rate, select Advance Setting from OSD menu. Tracking Camera > Video Format > Advanced Setting > RS232 Protocol VISCA > Preset Address(ADDRD) Language > Baud Rate 9600 Profile > VISCA-over-IP Factory Default >... -
Page 57: Language
Language To change language, go to OSD menu > Language. Tracking Camera > Video Format > Advanced Setting > Preset > Language > English Profile > 繁體中文 Factory Default > 簡体中文 Information > 日本語 Display > Deutsch Francais Espanol 한국어 Vietnamese Profile PTC500+ / PTC115+ allows you to save 5 profiles. -
Page 58: Factory Default
Factory Default To reset the PTC500+ / PTC115+ to default setting, go to OSD menu > Factory Default > Yes and press enter button. Tracking Camera > Video Format > Advanced Setting > Preset > Language > Profile > Factory Default >... -
Page 59: Display
Display Enable/disable status message display on screen. Go to OSD menu > Display. Tracking Camera > Video Format > Advanced Setting > Preset > Language > Profile > Factory Default > Information > Status OSD Display > Latency Reduction [Note] If you select On for Status OSD, you will see the OSD menu on the HDMI screen. Select Off for the OSD menu before you proceed to control the camera. -
Page 60: Hot Key
When the hot key takes effect, you will see “tracking on” or “tracking off” on the right bottom side. Enable/Disable AVer Logo Press six times(666666) When the hot key takes effect, you will see “AVer” logo on the right bottom side. Show the tracking indicator Press seven times(7777777) When the hot key takes effect, you will see the tracking indicator on the target face. -
Page 61: Faq
1. How to define the zoom level of tracking target? It’s determined by Setup Object Viewing Dimension. You should stand on the assigned location as a proportional scale and zoom in/out to the proportion that you want. The following tracking will based on this proportion. -
Page 62: S232 Command Table
S232 Command Table Visca Command Table Command Set Command Command Packet Comments IF_Clear 8x 01 00 01 FF x = Cam address IF_Clear(broadcast) 88 01 00 01 FF 8x 01 04 00 02 FF *RS-232 supported, UDP not CAM_Power supported 8x 01 04 00 03 FF Stop 8x 01 04 07 00 FF... - Page 63 Down 8x 01 04 04 03 FF Full Auto 8x 01 04 39 00 FF Automatic Exposure mode Manual 8x 01 04 39 03 FF Manual Control mode Shutter Priority Automatic Exposure Shutter Priority 8x 01 04 39 0A FF CAM_AE mode Iris Priority Automatic Exposure...
- Page 64 Down 8x 01 06 01 VV WW 03 02 FF WW= tilt speed: 0x00~0x0F Left 8x 01 06 01 VV WW 01 03 FF Right 8x 01 06 01 VV WW 02 03 FF UpLeft 8x 01 06 01 VV WW 01 01 FF UpRight 8x 01 06 01 VV WW 02 01 FF DownLeft...
- Page 65 Inquiry Command Command Packet Reply Packet Comments y0 50 02 FF CAM_PowerInq 8x 09 04 00 FF y0 50 03 FF y0 50 00 FF Auto CAM_WBModeInq 8x 09 04 35 FF y0 50 05 FF Manual CAM_RGainInq 8x 09 04 43 FF y0 50 00 00 0p 0q FF pq: R Gain CAM_BGainInq...
- Page 66 has been operated pp:01 - FF y0 50 02 FF Auto Focus CAM_FocusModeInq 8x 09 04 38 FF y0 50 03 FF Manual Focus CAM_FocusPosInq 8x 09 04 48 FF y0 50 0p 0q 0r 0s FF pqrs: Focus Position y0 50 02 FF CAM_Tracking status Inq 8x 09 36 69 02 FF y0 50 03 FF...
-
Page 67: Pelco-P Command Table
Pelco-P Command Table PAN AND TILT COMMAND P/T bit(byte4.0) = 0 byte 1 byte 2 byte 3 byte 4 byte 5 byte 6 byte 7 byte 8 func ADDR data1 data2 data3 data4 checksum data 0xA0 0~7F cmd 1 cmd 2 Pan speed Tilt speed 0xAF 1~7 XOR... -
Page 68: Pelco-D Command Table
Pelco-D Command Table PAN AND TILT COMMAND P/T bit(byte4.0) = 0 byte 1 byte 2 byte 3 byte 4 byte 5 byte 6 byte 7 func SYNC ADDR cmd 1 cmd 2 data1 data2 checksum data 0xFF 1~80 cmd 1 cmd 2 Pan speed Tilt speed 2~6 SUM... -
Page 69: Visca-Over-Ip Settings
Visca-over-IP Settings... -
Page 70: Cgi Command Table
CGI Command Table CGI List for Video Transmission CGI item name Command Parameter Name Parameter value Description Get MJPEG stream http://ip/livestream/livestream?action=get 640x360 Get RTSP stream rtsp://ip/live_st1 GET JPEG /webui?StartStreaming=ActionPTZ /webui?SaveImage=Mod_cram_ptz1.jpg Mod_cram_ptz1.jpg ~ Mod_cram_ptz4.jpg /Mod_cram_ptz1.jpg CGI List for Camera Control CGI item name Command Parameter Name Parameter value...
Need help?
Do you have a question about the PTC500+ and is the answer not in the manual?
Questions and answers