AVer CAM130 User Manual
Hide thumbs
Also See for CAM130:
- Quick start manual (95 pages) ,
- User manual (46 pages) ,
- Quick start manual (63 pages)
Table of Contents
Advertisement
Quick Links
Advertisement
Table of Contents

Related Manuals for AVer CAM130


Summary of Contents for AVer CAM130
- Page 1 CAM130 User Manual...
- Page 2 © 2021 AVer Information Inc. All rights reserved. All rights of this object belong to AVer Information Inc. Reproduced or transmitted in any form or by any means without the prior written permission of AVer Information Inc. is prohibited. All information or...
- Page 3 NOTICE SPECIFICATIONS ARE SUBJECT TO CHANGE WITHOUT PRIOR NOTICE. THE INFORMATION CONTAINED HEREIN IS TO BE CONSIDERED FOR REFERENCE ONLY. WARNING To reduce risk of fire or electric shock, do not expose this appliance to rain or moisture. Warranty will be void if any unauthorized modifications are done to the product. ...
- Page 4 Global: https://aver.com/technical-support USA: https://averusa.force.com/support/s/contactsupport European Headquarters: https://www.avereurope.com/technical-support/ Contact Information Global European Headquarters AVer Information Inc. AVer Information Europe B.V. AVer Information Inc. https://www.aver.com https://www.avereurope.com https://www.averusa.com 8F, No.157, Da-An Rd., Westblaak 140, 3012KM, 668 Mission Ct., Tucheng Dist., Rotterdam, Netherlands Fremont, CA 94539...
-
Page 5: Table Of Contents
Contents Package Contents ....................1 Optional Accessories ..................1 Product Introduction ....................2 Overview ......................2 LED Indicator ....................2 How to Control Fill Light ..................3 Control Fill Light ..................3 Control Fill Light via Remote Control ............3 Remote Control (Optional) ................... - Page 6 Use PTZApp 2 with USB Devices ..............12 Select the Preset Position ................20 Camera Settings .................... 20 Tracking Mode ..................21 Home Position ..................23 Sleep Position ..................24 Sleep Timer ................... 25 On Screen Menu ................... 24 Camera Binding ..................25 Save Preset ...................
- Page 7 Allow Remote Access ................32 System Settings .................... 32 I/O Port ....................32 Firmware Update ................... 33 Factory Default ..................34 Trouble Shooting ................... 35 Information ..................... 36 EZLive ........................38 Use AVer EZLive ................... 38...
-
Page 8: Package Contents
Package Contents Power Adapter & CAM130 Unit & Power Adapter USB 3.1 Type-C to Power Cord*(請刪除此 Lens Cover (for USB 2.0) Type-A Cable (1.8m) 項目) QR Code Card Tripod Screw * The power cord will vary depending on the standard power outlet of the country where it is sold. -
Page 9: Product Introduction
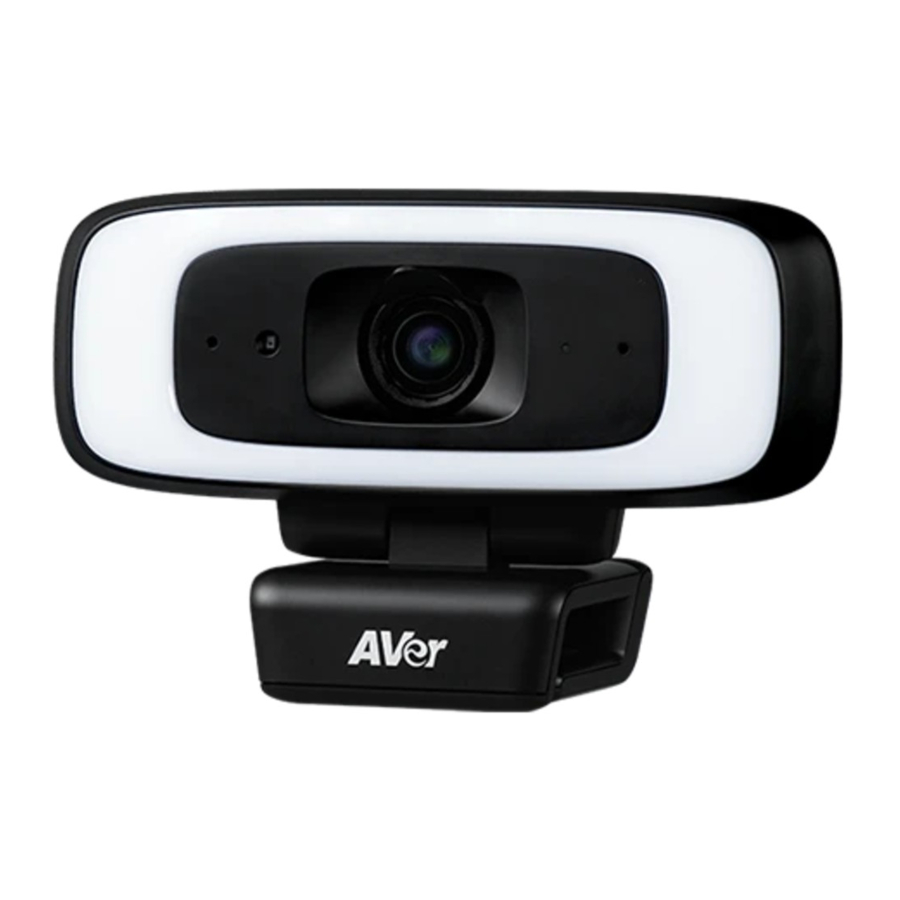
Product Introduction Overview Fill Light Kensington Lock Microphones USB 3.1 Type-C Port Color Sensor (10) DC 5V Power Jack Lens (11) Color Temperature Button Lens Cover (12) TV Clip LED Indicator (13) Tripod Screw Hole Light Level Button LED Indicator Power on: Blink blue once Start-up: Solid red Sleep mode: Solid orange... -
Page 10: How To Control Fill Light
Please turn off fill light before you unplug the power adapter while USB video streaming is on to avoid system shut down. Power adapter will be required to support fill light function only when connecting CAM130 to PC USB2.0 port. -
Page 11: Remote Control (Optional)
Remote Control (Optional) Name Function 1. SmartFrame One-click automatic FOV adjustment to fit all participants. Press for 1 second to switch the SmartFrame function among Manual Framing/Auto Framing/Preset Framing modes. A message (as figures shown) will display on the screen to indicate the mode. [Notes] ... - Page 12 Function Name Use the directional button on the remote to control the direction of 5. Camera Directional Control the camera. Press the directional button to move the camera or press and hold for continuous pan or tilt. Press it to show the current AI function on screen such as Auto 6.
-
Page 13: Installation
Install the CAM130 on top of TV or on a tripod. Connect CAM130 to PC with provided USB cable. If you like to use type-C connector on newer PC, connect your adapter to USB cable, and then connect type-C side of adapter to PC. - Page 14 Connect the power adapter to the CAM130; power indicator will light Install PTZApp 2 on laptop or PC that is connected with CAM130. The app can be used to adjust and setup the parameters of the camera (refer to the section of PTZApp 2).
-
Page 15: Whiteboard Mount Installation (Optional)
[Note] There are 2 SKUs of whiteboard mounts: SKU1 is for 3~6ft white board width. SKU2 is for 6~12ft white board width. Mount the stand on the wall. Install CAM130 on camera base. 3. Pass the USB cable and/or power cord through the tube and connect the USB cable and/or power cord to corresponding connection ports/power jack. - Page 16 Lock the tube on the stand. Close the plastic box. 6. Adjust the camera to desired position.
-
Page 17: Desk Stand Installation (Optional)
Desk Stand Installation (Optional) Install CAM130 to the tripod screw on the universal joint. 2. Adjust the camera to desired position. -
Page 18: Operating The Camera
Wirecast, XSplit, etc.) on your PC or laptop. Set the CAM130 camera as the primary camera for your video application (refer to your video application user guide). You can now make your call. [Note] The CAM130 is a plug-and-play conference camera. The system requires no special drivers, but we do recommend installing the PTZApp 2 for a better user experience. -
Page 19: Ptzapp 2
PTZApp 2 In PTZApp 2, user can change the IP address setting of CAM130, configure the parameters of the camera, set up AI tracking functions and some advanced image settings, pan, tilt, and zoom the camera. Install PTZApp 2 Please go to https://www.aver.com/download-center... - Page 20 Language: Select desired language and click the check icon to confirm the selection. Hotkey Control: User can control the camera by using keyboard. This is a general list for all Aver USB Cameras. Backlight control equals to WDR function in CAM130.
- Page 21 Software Version: Get current PTZApp 2’s version number and do auto update here. Information: Click the drop-down triangle icon to review the information of camera. To minimize the information, click the triangle or the bottom area of the information icon. Camera: Click the camera icon to view the camera live view.
- Page 23 Full Screen: PTZApp 2 can switch to full screen mode. Click “ ” icon and video screen will switch to full screen mode. In full screen mode, user can use direction panel to control camera direction. Click “ ” icon to go back to normal screen view. The resolution of full screen mode is 1080p.
- Page 24 People Count and Stream Interval: Click the icon to show people count number and stream time interval. Click the icon to hide the stream interval. Control Panel: To control the camera direction, zoom in and out, and to enable/disable the “Smart Framing”...
- Page 25 Setting: Click “Setting” button to setup parameters of the camera and speakerphone. Click arrow icon to leave the Setting page.
- Page 26 Set up the Preset User can set 10 preset positions. In live screen, click the preset number (0~9). Use ▲ , ▼ , , and zoom in/out buttons to adjust the camera screen view to desired position. Select “Set Preset” button to save the preset. The system will capture the preset screen view and display in preset number frame.
-
Page 27: Select The Preset Position
Select the Preset Position Preset positions need to be set. Select the preset. The live screen will move to the preset screen view. Camera Settings The video icon is to turn on camera live view while doing any settings. Live screen preview Press the icon to show people count number. -
Page 28: Tracking Mode
Tracking Mode Select Setting > Camera > Tracking Mode > Off, Manual Frame, Auto Frame, or Preset Framing. 圖片錯誤 少了 preset framing.已經換圖如下 Off: Tracking mode is disabled. Manual Frame: User one-click SmartFrame button and camera will adjust view angle to fit all participants in screen for once. - Page 29 If more than 2 presets areas are touched by 2 persons, camera will go to preset 1. The priority is preset 1>preset2> preset 3….>preset 9 Overlap beginning & end of each zone [Note] CAM130 frames people in masks or any facial profile up to meters away!
-
Page 30: Home Position
Framing Speed Select Setting > Camera > Framing Speed > Slow Speed, Middle Speed, or High Speed (default). When in auto framing or preset framing mode, camera will automatically frame people if they stand still without moving for 1~5 seconds. ... -
Page 31: Sleep Position
On Screen Menu Enable/disable on screen display status information. For instance, when it is at auto frame mode, it will appear “Auto framing” on the bottom of the screen. If you don’t want to see the words, please select Off. Select Setting >... -
Page 32: Sleep Timer
Sleep Position 無此功能需刪除 Sleep Timer 無此功能需刪除 Camera Binding 無此功能需刪除 Fill Light Select Setting > Camera > Fill Light > Intelligent Lighting or Manual Lighting. Image Settings Field of View 請換圖 Two kinds of view angle to select for different types of rooms. Select Setting >... -
Page 33: Image Flip
Image Flip If the CAM130 is installed in the upside down position, please enable the "Flip". Select Setting > Image > Image Flip > Off or On. Image Mirror To mirror the camera image. Select Setting > Image > Image Mirror > Off or On. -
Page 35: True Wdr
True WDR In back light environment, enable WDR to improve the brightness of image. Select Setting > Image > True WDR > Off or On. The frame rate will be limited to 30fps while WDR is on. If user enables this function in a normal light condition, the image will become over exposure and encounter image blur. -
Page 36: White Balance
White Balance Select the white balance setting for various light conditions or color temperature. Select Setting > Image > White Balance > Auto or Manual. Noise Reduction To reduce the noise from the signal. Select Setting > Image > Noise Reduction > Off, Low, Middle, or High. -
Page 37: Brightness
Brightness Adjust the value of brightness. Select Setting > Image > Brightness > 1 ~ 9. Sharpness Adjust the value of sharpness. Select Setting > Image > Sharpness > Off, Low, Middle, or High. -
Page 38: Saturation
Saturation Adjust the value of saturation. Select Setting > Image > Saturation > 1 ~ 9. Low Light Compensation Select Setting > Image > Low Light Compensation > Off or On. Please notice that the frame rate will drop to 10~15 fps. -
Page 39: Allow Remote Access
Allow Remote Access Select Setting > Allow Remote Access > Off or ON. System Settings I/O Port (需刪除... -
Page 40: Firmware Update
Update the camera’s firmware. Select System > FW Update > Auto Update or Manual Update. Auto Update: The system will check firmware version from AVer server and request to update. Manual Update: To update the firmware from specific location. -
Page 41: Factory Default
Factory Default Reset the camera back to factory default setting. Select System > Factory Default > Reset. User can choose to keep current IP address or back to default. Select Continue to reset back to factory default. [Note] When factory default is activated, the password of Webpage login will not be set to default. For security concerns, to reset password of webpage access, please download PTZApp 2 to reset it. -
Page 42: Trouble Shooting
Trouble Shooting Output log to save in local PC. Select System > Trouble Shooting > Start. Select Output. -
Page 43: Information
Information Display the information of Model Name, Firmware Version, Serial Number, IP Address, and MAC Address. Select System > Information. Audio Settings Microphone Enable/disable microphone function. The default setting is off. Select Audio > Microphone > Off or On. While changing the microphone status, the system requires 20 sec to reboot. 9. - Page 44 Icon 的圖不對.請更換 If you can’t launch PTZApp 2 right after installation, please also check here and see if it is already minimized. Right –click the icon and choose Restore.
-
Page 45: Ezlive
EZLive Please go to http://www.aver.com/download-center to download the AVer EZLive software. After downloading, double-click on the file and follow the on-screen instructions to complete the installation. Use AVer EZLive During a video call, EZLive can help user to do: (1) Camera ePTZ (2) Volume control for the speaker connected (3) Capture camera’s still images...
Need help?
Do you have a question about the CAM130 and is the answer not in the manual?
Questions and answers