Table of Contents
Advertisement
Quick Links
DIRECT DRIVE PACKAGE
This Instruction only contains direct drive package information. It is imperative to have in complement the
compressor one and also all the others relatives to the accessories, also the parts list before installing
the equipment.
The EC Certificate of Conformity (paper version) is systematically attached to the equipment when shipped.
DDIC packages (except the compressor : see compressor Instructions) are covered 24 months by warranty within the limits mentioned
in our General Sales Conditions. In case of a use other than that mentioned in the Instructions manual, and without preliminary agreement
of MOUVEX, warranty will be canceled.
Warranty extension with oil BSC3 : See Instructions 1401AL00 MX12 § W
Z.I. La Plaine des Isles - F 89000 AUXERRE - FRANCE
Tel. : +33 (0)3.86.49.86.30 - Fax : +33 (0)3.86.49.87.17
contact.mouvex@psgdover.com - www.mouvex.com
MX12 DDIC
(Direct-Drive, Inter-Cooled)
EC CERTIFICATE OF CONFORMITY :
WARRANTY :
INSTRUCTIONS 1401-AP00 e
Section
Effective
Replaces
MAINTENANCE
.
ARRANTY
Your distributor :
1401
February 2024
New
Original instructions
INSTALLATION
OPERATION
SAFETY
STORAGE
Advertisement
Table of Contents

Related Manuals for Dover PSG mouvex MX12


Summary of Contents for Dover PSG mouvex MX12
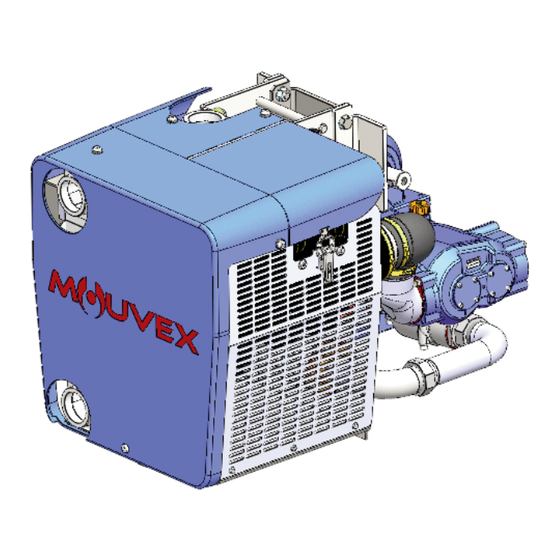
- Page 1 INSTRUCTIONS 1401-AP00 e Section 1401 Effective February 2024 Replaces Original instructions MX12 DDIC DIRECT DRIVE PACKAGE (Direct-Drive, Inter-Cooled) INSTALLATION OPERATION MAINTENANCE SAFETY STORAGE This Instruction only contains direct drive package information. It is imperative to have in complement the compressor one and also all the others relatives to the accessories, also the parts list before installing the equipment.
-
Page 2: Table Of Contents
MOUVEX TRUCK SCREW COMPRESSOR SAFETY, STORAGE, INSTALLATION, OPERATION AND MAINTENANCE INSTRUCTIONS MODEL : PACKAGE DDIC MX12 TABLE OF CONTENTS Page Definition of safety symbols 1. INSTALLATION ....... . . 4 1.1 Mounting location . - Page 3 SAFETY DATA WARNING IT IS IMPERATIVE TO APPLY THE TRUCK PARKING BRAKE AND TO BLOCK THE WHEELS BEFORE ANY INTERVENTION DUE TO RISKS OF SERIOUS BODILY INJURIES OR PRO- PERTY DAMAGE. Hazardous machinery can cause severe personal injury or property damage. SAFETY CHECK LIST WARNING 1.
-
Page 4: Installation
P ROT E C T I O N E L E M E N T S The package is designed in accordance with the machinery directive 2006/42/EC and its application standard NF EN 1012-1. The components and assemblies are protected by the elements listed below : •... - Page 5 1. INSTALLATION (continued) Curve number and corresponding speed in rpm Version ① ② ③ ④ ⑤ 1006 1151 1296 1439 1034 1208 1382 1556 1727 1150 1343 1536 1730 1920 1377 1608 1840 2072 2300 MX12-20R à 1920 rpm : curve ⑤ at 1 bar => 75°C according to chart .
- Page 6 1. INSTALLATION (continued) Chart B : Impact of the distance from an obstacle to repression (G) on the exchanger discharge temperature Compared to the 10 cm clearance, the 30 cm clearance allows the exchanger discharge temperature to be reduced by 15°C for this application.
- Page 7 1. INSTALLATION (continued) Chart C : Impact of the ambient temperature on the exchanger discharge temperature At 30°C ambient, the temperature must be corrected by +15°C. Consequently, for this unloading under these conditions, the tem- perature at the discharge of the exchanger will be approximately : 75 (according to chart A) -15 (according to chart B)+15 (according to chart C) + 5°C (correction) = 80°C.
-
Page 8: Mounting Procedure
1. INSTALLATION (continued) 1.2.3 Presence of side skirts on the truck When the DDIC MX12 package must be installed on a truck with side skirts, it must be installed without cover and with the side deflector installed to the left of the pac- kage. -
Page 9: At Succion
1. INSTALLATION (continued) 1.4 At succion • Bring the package to the truck and screw in the brackets using 6 M14 screws (nominal tightening torque 168 N.m). It must be installed in such a way that the temperature • Remove the pallet and package of the air sucked in is equivalent to 5°C either side of •... -
Page 10: Check Relief / Safety Valve
1. INSTALLATION (continued) 1.5 Check relief / Safety valve 1.6 Drive DDIC packages include a safety valve and a check 1.6.1 Speed range valve. In order to comply with the machine directive, the rota- The valve was adjusted prior to delivery. This adjustment ting parts of the compressor package (shafts, torque is leaded. -
Page 11: Electric Circuit
1. INSTALLATION (continued) 1.6.3 Installation of channelling DDIC packages incorporate a compressor gradient of 4° in relation to the horizontal. This gradient allows the Channelling connected to the package must be desi- recovery of the most recent PTO angles on current gned in accordance with regulations to prevent prematu- trucks. -
Page 12: Instrumentation
1. INSTALLATION (continued) 1.7.2 Connection procedure 1.8 Instrumentation Warning : The current source must be cut before any The package is supplied with an inlet filter clogging indi- intervention in the electrical circuit to prevent any damage cator. to equipment or physical injury. Any use of the compressor package when the indicator The power supply for the package must be protected with is showing excessive clogging will cause damage to... -
Page 13: Maintenance
3. MAINTENANCE 3.1 Maintenance schedules See the compressor instructions for the mainte- nance programme. 3.2 Air filter replacement procedure Check weekly the clogging indicator. When it turns red, replace the filter cartridge. Before installing a new cartridge, clean the internal part of the filter housing with a clean damp cloth. -
Page 14: Drive Train Inspection
3. M A I N T E NA N C E (continued) 3.3.2 Fitting the new cartridge CAUTION • Clean the cartridge sealing area with a cloth, All openings must be closed when the compressor is in use. • Put the new cartridge back in place, •... -
Page 15: Warranty
4. WARRANTY 4.1 Warranty claims 4.2 12-months warranty extension with BSC3 The following part are considered as wear part : • Inlet filter cartridge The 12-months warranty extension with BSC3 oil option • Compressor oil increases the warranty for the screw compressor to 36 months : No failure connected with wear part damage will be accepted under warranty conditions. -
Page 16: Troubleshooting
5. TROUBLESHOOTING CAUTION : OBSERVE ALL SAFETY WARNINGS CONTAINED IN THIS MANUAL. 6. STORAGE CONDITIONS 6.1 Compressor 6.2 BSC oil The equipment must be systematically stored in an area In its unopened original container in a dry, frost-free and sheltered from bad weather. light-free place. -
Page 17: Compressors Form Information
8. COMPRESSORS FORM INFORMATION Before any material return, it is required to get an authorization from MOUVEX. COMPRESSORS FORM After Sales Department INFORMATION Z.I. La Plaine des Isles - 2 rue des Caillottes - 89000 AUXERRE - FRANCE +33 3 86 49 87 25 - sav.mouvex@psgdover.com In order to treat correctly the warranty claims, please first complete this information form. -
Page 18: Overall Dimensions
9. OVERALL DIMENSIONS MX12 DDIC - with cover (without side skirts version) NT 1401-AP00 02 24 Package DDIC MX12 e 18/19... - Page 19 9. OVERALL DIMENSIONS (continued) MX12 DDIC - without cover + deflector (with side skirts version) NT 1401-AP00 02 24 Package DDIC MX12 e 19/19...
Need help?
Do you have a question about the PSG mouvex MX12 and is the answer not in the manual?
Questions and answers