Table of Contents
Advertisement
Quick Links
Advertisement
Table of Contents

Related Manuals for Dover markem-imaje 2200


Summary of Contents for Dover markem-imaje 2200
- Page 1 Instruction manual 2200 with accessory Pallet Printer overview - Interface overview Starting/shutting down the printer Selecting and printing a job Replacing consumables - Adjustments Maintenance Troubleshooting Technical Specifications - Information...
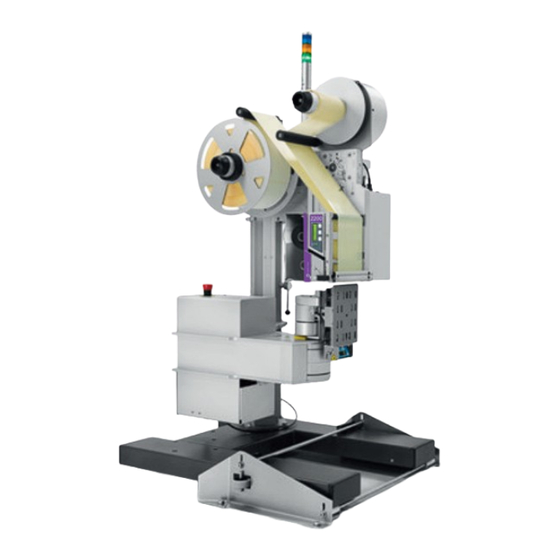
- Page 2 System 2200 Pallet overview pallet applicator Print Engine Module Label Handling Module Applicator Module a Emergency Stop b Start Pause d Reset e Stop Status Beacon (optional) Stand 6a Stand Base (optional) 6b Docking Station (optional) Barcode Reader (optional) Manufacturer’s plate Instruction manual...
- Page 3 System 2200 Pallet overview 1 Control Box 2 Pneumatic Box 3 Applicator Arms 4 Applicator Pad 5 Barcode Reader (optional) 6 4 Fans 7 Compressed Air Inlet 8 Compressed Air Handle Instruction manual...
- Page 4 System 2200 Pallet overview 1 Ribbon supply spindle 8 Print head 2 Ribbon rewind spindle 9 Blow bar Status screen, LEDs and 3 Label roll guide control buttons * 4 Label supply spindle 11 Label path 5 Label compensator arm 12 Print head lever Backing paper compensator 13 Ink ribbon compartment...
- Page 5 Connections Terminal strip 110-240 VAC 50-60 Hz connector with P13 P21 ground connection. Power switch P15 Beacon Electrical power supply P16 LVDS Relay outputs P17 Pre Trig photocell LHM (communication) P18 Input Main Trig photocell P10 Opto input P19 Input Return Sensor photocell P11 Port Série 1 (RJ45) P20 Applicator connection P12 USB port...
-
Page 6: User Interface
User Interface Print button Start button Status screen Beacon (same meanings as the LEDs, No. 6) LEDs: Green: System is ready Orange and green: System is ready and warning is present Orange: printer stopped, available (waiting for data) or paused Blue: System error Blue, orange and green: test pattern test mode Instruction manual... - Page 7 CoLOS Create Pro (optional) CoLOS® Create Professional is a particularly functional graphic design software that allows you to easily create and manage complex labels and codes. CoLOS® Create Professional allows you to: • define the location and format of information to be printed, including default or fixed information, using image templates, •...
- Page 8 CoLOS Create Pro (optional) Supported fields and styles: - barcodes (1D & 2D) - Dates (BBE) and Shift Codes - line fields - Merged text - box fields - Calculated text - logo fields - Math text - fixed text - Printer setting text - user entry text - Variable text (information...
-
Page 9: Daily Startup And Shutdown
Daily startup and shutdown ■ Starting up ≈ 10 seconds Ready for label data ■ Shutting down ≈ 3 seconds Instruction manual... -
Page 10: Printing A Job
Printing a job Pause printing - On printer Stop printing (a) pallet applicator Press (b) to reset system again Instruction manual... -
Page 11: Loading Labels
Loading labels ■ Outside wound roll 1.5 m (5 ft) Instruction manual... -
Page 12: Loading The Ribbon
Loading the ribbon Instruction manual... - Page 13 Adjustments ■ Test pattern The test pattern displays the printer configuration and must resemble the example. Feed a continuous roll of paper in the printer before running a test pattern. 1 - Turn off the printer for approx. 15 seconds. 2 - Turn the printer back on while pressing the Print key.
- Page 14 Positioning of labels Taut Stretched Instruction manual...
- Page 15 Adjusting the outfeed ■ Adjusting ■ Adjusting the outfeed the air flow plate d = 0.4 mm ( ) and //. Instruction manual...
- Page 16 Ribbon adjustment Instruction manual...
- Page 17 Adjusting the printing ■ Adjusting the pressure ■ Adjusting the position ZZZYYYXXX 2 mm Instruction manual...
-
Page 18: Cleaning The Print Head
Cleaning the print head THIS SIDE DOWN 13mm Printhead Cleaning Film DATAMAX® Instruction manual... -
Page 19: Replacing The Printhead
Replacing the print head Instruction manual... - Page 20 Changing the print roll Make sure that the roll properly locks in place clic when reassembling. Instruction manual...
-
Page 21: Changing The Feed Roll
Changing the feed roll Make sure that the roll clic properly locks in place when reassembling. Instruction manual... -
Page 22: Troubleshooting
Troubleshooting Alarm condition. Acknowledge alarm (if error/warning corrected) Information message Meaning 01 - Ready The system is ready and the trigger is enabled (on-line). Send through a label to be printed to make the system 02 - Available ready (online). Press the Start button to make the system enters Ready 03 - Paused mode. - Page 23 Troubleshooting Error message What to do 40 - Apply Delay too Raise the application time in the Setup menu. It short should be longer than the print time. 42 - Barcode error The barcode reader needs to be adjusted or the print quality needs to be improved.
-
Page 24: Technical Specifications
Technical specifications ■ Standard specifications Print methods Thermal transfer or direct thermal transfer Clock Real-time Counters 10 individual programmable counters Graphic display Printer status in different languages ■ Print resolutions 200 dpi (8 dots per mm) or 300 dpi (12 dots per mm) ■... - Page 25 Technical specifications ■ Programming language Communication printable ASCII characters File management macros and graphics Field rotation 0°, 90°, 180°, 270° ■ Operating characteristics - Environment Operating temperature +5°C to + 45°C range Humidity 20% to 85% non-condensing (using Markem-Imaje brand media) - Power requirements 100–240 VAC;...
- Page 26 Technical specifications ■ Communication interface High-speed RS232 300–115,200 bps 10/100 Fast Ethernet, The following protocols are supported: TELNET, FTP, HTTP, LPD (Line Printer Daemon) and RAW RAW TCP printing used for transparent communication between a client and a print device. The TCP port is 9100 by default. RAW TCP is the default print protocol for most print devices.
- Page 27 Technical specifications ■ Fonts, graphics and symbologies - Fonts Standard fonts 10 smooth scalable fonts (Univers Medium, Bold, Condensed, Condensed Bold, CG Times, Italic, Bold, Bold Italic, Letter Gothic, Bold, Coronet, etc.) TrueType download Field rotation 0°, 90°, 180°, 270° - Graphic features Supports the most BMP, WMF, PCX, PNG, ICO, GIF, TIFF, JPEG...
- Page 28 Technical specifications ■ Dimensions (stand adjustable with docking station) Right handed version. Given the many assembly possibilities, please contact Markem- Imaje to obtain additional dimension drawings. Instruction manual...
- Page 29 Information S/N: Serial number Consumables For printing and coding equipment. Photos and illustrations are not contractually binding. This document was originally written in French. The French text of this document shall alone be authentic and shall prevail in the event of a dispute. Markem-Imaje reserves the right to modify the specifications of its products without prior notice.
- Page 30 Markem-Imaje Industries 9, rue Gaspard Monge 26500 BOURG-LES-VALENCE France tel 33 (0)4 75 75 55 00 A43703-CB 03/2019 www.markem-imaje.com...
Need help?
Do you have a question about the markem-imaje 2200 and is the answer not in the manual?
Questions and answers
Hello Support, I thank you for this opportunity. So my applicator 2200 would not release the label all the way to the stamp pad even though i have done auto reset on the Adjust head lift sensor and auto on the automatic mps settings. please find attached images
The Dover Markem-Imaje 2200 applicator may not be releasing the label completely to the stamp pad due to the "label support" pulling the label in too much during application. This creates a "dome" effect, causing the end of the label to hit the box before full transfer. To fix this, reduce the label support pressure by half a turn at a time.
This answer is automatically generated