Table of Contents
Troubleshooting

Related Manuals for NETGEAR S3600 Series


Summary of Contents for NETGEAR S3600 Series
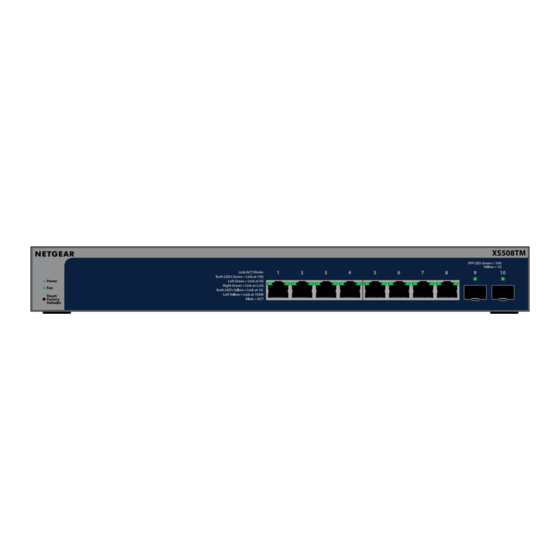
- Page 1 User Manual S3600 Series 8-Port or 16-Port 10G/Multi-Gigabit Ethernet Smart Switch with 2 SFP+ Ports Models: XS508TM XS516TM NETGEAR, Inc. February 2024 350 E. Plumeria Drive 202-12646-02 San Jose, CA 95134, USA...
- Page 2 S3600 Series 8- or 16-Port 10G/Multi-Gigabit Ethernet Smart Switch with 2 SFP+ Ports Support and Community Visit netgear.com/support to get your questions answered and access the latest downloads. You can also check out our NETGEAR Community for helpful advice at community.netgear.com.
- Page 3 S3600 Series 8- or 16-Port 10G/Multi-Gigabit Ethernet Smart Switch with 2 SFP+ Ports Revision History Publication Part Publish Date Comments Number We have added the following appendixes with hardware installation 202-12646-02 February 2024 information: • Hardware Introduction on page 596 •...
-
Page 4: Table Of Contents
Access the switch on-network and connected to the Internet..25 Use a Windows-based computer to access the switch on-network and connected to the Internet............ 26 Use the NETGEAR Insight app to discover the IP address of the switch..................... 27 Use the NETGEAR Switch Discovery Tool to discover the switch when it is connected to the Internet.......... - Page 5 S3600 Series 8- or 16-Port 10G/Multi-Gigabit Ethernet Smart Switch with 2 SFP+ Ports Configure ports using the Device View......... 46 Access the NETGEAR support website.......... 47 Access the user manual online............48 Chapter 2 Configure Switch System Settings Dashboard..................51 Display port utilization and port connections......
- Page 6 S3600 Series 8- or 16-Port 10G/Multi-Gigabit Ethernet Smart Switch with 2 SFP+ Ports Display dynamic DHCP snooping bindings......88 Manage switch discovery protocols..........89 LLDP and LLDP-MED settings for the switch......... 90 Configure the LLDP and LLDP-MED settings......91 Display the LLDP-MED network policy for an interface... 92 Display the LLDP local device information........
- Page 7 S3600 Series 8- or 16-Port 10G/Multi-Gigabit Ethernet Smart Switch with 2 SFP+ Ports Display or clear the DHCP server bindings......129 Display DHCP server statistics..........130 DHCP relay..................131 Configure the global DHCP relay server settings....132 Add the DHCP relay function to an existing routing VLAN... 133 Remove the DHCP relay function from a routing VLAN..
- Page 8 S3600 Series 8- or 16-Port 10G/Multi-Gigabit Ethernet Smart Switch with 2 SFP+ Ports Configure a voice VLAN............173 Auto-VLANs ..................175 Configure the OUI-based properties........175 Configure the OUI-based interface settings......177 Manage the OUI table............... 178 Add an OUI................179 Remove an OUI..............
- Page 9 S3600 Series 8- or 16-Port 10G/Multi-Gigabit Ethernet Smart Switch with 2 SFP+ Ports Green Ethernet settings..............214 Configure the global green Ethernet settings....... 214 Configure green Ethernet interface settings......215 Configure the port settings............216 Link aggregation groups............... 219 Configure a LAG................. 219 Configure the port members for a LAG........
- Page 10 S3600 Series 8- or 16-Port 10G/Multi-Gigabit Ethernet Smart Switch with 2 SFP+ Ports Display IGMP snooping statics and VLANs......265 Configure the IGMP snooping settings for an interface..266 Configure IGMP snooping for a VLAN........268 Configure an IGMP multicast router interface......270 Configure an IGMP multicast router VLAN......
- Page 11 S3600 Series 8- or 16-Port 10G/Multi-Gigabit Ethernet Smart Switch with 2 SFP+ Ports Configure IPv6 routing for a VLAN.......... 310 Add prefix settings for an IPv6 routing VLAN......313 Change prefix settings for an IPv6 routing VLAN....315 Remove prefix settings for an IPv6 routing VLAN....316 Display the IPv6 statistics............
- Page 12 S3600 Series 8- or 16-Port 10G/Multi-Gigabit Ethernet Smart Switch with 2 SFP+ Ports Configure the DiffServ mode and display the entries in the DiffServ private MIB tables............359 Configure a DiffServ class............360 Add and configure a DiffServ class........361 Change the criteria for an existing DiffServ class....
- Page 13 S3600 Series 8- or 16-Port 10G/Multi-Gigabit Ethernet Smart Switch with 2 SFP+ Ports Change a rule for the access profile........404 Deactivate the access profile............ 405 Remove a rule from the access profile........406 Remove the access profile............407 Port authentication................. 407 Configure the global 802.1X authentication settings...
- Page 14 S3600 Series 8- or 16-Port 10G/Multi-Gigabit Ethernet Smart Switch with 2 SFP+ Ports Change the match criteria for a MAC ACL rule...... 456 Remove a rule from a MAC ACL..........457 MAC ACL bindings................. 458 Configure a MAC ACL interface binding........ 458 Display or delete MAC ACL bindings........
- Page 15 S3600 Series 8- or 16-Port 10G/Multi-Gigabit Ethernet Smart Switch with 2 SFP+ Ports Syslog and log server host settings......... 517 Configure the syslog settings..........517 Add a syslog server............... 518 Change the settings for a syslog server......520 Delete the settings for a syslog server........ 521 Trap log..................
- Page 16 S3600 Series 8- or 16-Port 10G/Multi-Gigabit Ethernet Smart Switch with 2 SFP+ Ports Enable the secure diagnostic mode........561 You cannot log in to the switch..........562 Appendix A Configuration Examples Virtual Local Area Networks (VLANs)........... 564 VLAN example configuration........... 565 Access control lists (ACLs).............
- Page 17 S3600 Series 8- or 16-Port 10G/Multi-Gigabit Ethernet Smart Switch with 2 SFP+ Ports Appendix D Applications Connect equipment in a business environment......610 Appendix E Installation Step 1: Prepare the site..............612 Step 2: Protect against electrostatic discharge......613 Step 3: Unpack the switch............. 613 Step 4: Mount or place the switch..........
-
Page 18: Chapter 1 Get Started
This user manual describes how you can use the device user interface (UI) to configure and operate the following NETGEAR switches: • Model XS508TM: S3600 Series 8-Port 10G/Multi-Gigabit Ethernet Smart Switch with 2 SFP+ Ports • Model XS516TM: S3600 Series 16-Port 10G/Multi-Gigabit Ethernet Smart Switch... - Page 19 NOTE: Firmware updates with new features and bug fixes are made available from time to time at netgear.com/support/download/. Some products can regularly check the site and download new firmware, or you can check for and download new firmware manually. If the features or behavior of your product does not match what is described in this guide, you might need to update your firmware.
-
Page 20: Available Publications And Online Help
• NETGEAR Insight Cloud Portal and Insight app: If you set the management mode of the switch to NETGEAR Insight Mobile App and Insight Cloud Portal, you can use the following applications to manage the switch remotely:... - Page 21 S3600 Series 8- or 16-Port 10G/Multi-Gigabit Ethernet Smart Switch with 2 SFP+ Ports ○ Insight Cloud Portal: As an Insight Premium or Insight Pro user, you can use the Insight Cloud Portal to set up the switch in the network; perform remote setup;...
-
Page 22: Manage The Switch By Using The Device Ui
S3600 Series 8- or 16-Port 10G/Multi-Gigabit Ethernet Smart Switch with 2 SFP+ Ports Manage the switch by using the device UI This manual describes how to use the device UI to manage and monitor the switch. For information about how you can manage and monitor the switch with the Insight Cloud Portal and Insight app, visit netgear.com/business/services/insight. -
Page 23: Interface Naming Conventions
S3600 Series 8- or 16-Port 10G/Multi-Gigabit Ethernet Smart Switch with 2 SFP+ Ports Table 2. Invalid characters for user-defined fields Invalid characters for user-defined fields < > Interface naming conventions The switch supports physical and logical interfaces. Interfaces are identified by their type and the interface number. -
Page 24: Context-Sensitive Help
S3600 Series 8- or 16-Port 10G/Multi-Gigabit Ethernet Smart Switch with 2 SFP+ Ports Context-sensitive help When you log in to the switch, every page contains a link to the online help that contains information to assist in configuring and managing the switch. The online help pages are context sensitive. -
Page 25: Access The Switch On-Network And Connected To The Internet
• NETGEAR Insight Cloud Portal and Insight app: You can change the management mode of the switch so that you can use the NETGEAR Insight Cloud Portal and Insight app to manage the switch remotely. For more information, see Change the management mode of the switch on page 41. -
Page 26: Use A Windows-Based Computer To Access The Switch On-Network And Connected To The Internet
S3600 Series 8- or 16-Port 10G/Multi-Gigabit Ethernet Smart Switch with 2 SFP+ Ports Use a Windows-based computer to access the switch on-network and connected to the Internet For the following procedure, the network must provide Internet access. To use a Windows-based computer to determine the switch IP address and access the switch on-network and connected to the Internet: 1. -
Page 27: Use The Netgear Insight App To Discover The Ip Address Of The Switch
Internet, the NETGEAR Insight app lets you discover the switch in your network. Using the NETGEAR Insight app to discover the IP address of the switch in your network is not the same as managing the switch with the Insight app or the Insight Cloud Portal. -
Page 28: Use The Netgear Switch Discovery Tool To Discover The Switch When It Is Connected To The Internet
Insight and add the switch to an Insight network location. To use the NETGEAR Insight app to discover the IP address of the switch in your network when the switch is connected to the Internet: 1. - Page 29 S3600 Series 8- or 16-Port 10G/Multi-Gigabit Ethernet Smart Switch with 2 SFP+ Ports Depending on the computer that you are using, download either the Mac version or the version for a Windows-based computer. 2. Temporarily disable the firewall, Internet security, antivirus programs, or all of these on the computer that you use to configure the switch.
-
Page 30: Use Other Options To Discover The Switch Ip Address
S3600 Series 8- or 16-Port 10G/Multi-Gigabit Ethernet Smart Switch with 2 SFP+ Ports switch to activate your warranty, but if you do not activate your warranty within 30 days of purchase, your warranty entitlement might be affected. If you do not activate your warranty, the registration options page continues to display when you log in. -
Page 31: Access The Switch On-Network When You Know The Switch Ip Address
S3600 Series 8- or 16-Port 10G/Multi-Gigabit Ethernet Smart Switch with 2 SFP+ Ports Access the switch on-network when you know the switch IP address If the switch is on-network and you know the switch IP address, you can access the device For the following procedure, the network must provide Internet access. -
Page 32: Access The Switch Off-Network And Not Connected To The Internet
S3600 Series 8- or 16-Port 10G/Multi-Gigabit Ethernet Smart Switch with 2 SFP+ Ports device admin password, the Change Default Password page displays, requiring you to customize the device admin password for greater security. ○ Insight network password: If you previously logged in to the device UI, you... - Page 33 S3600 Series 8- or 16-Port 10G/Multi-Gigabit Ethernet Smart Switch with 2 SFP+ Ports 4. Open a web browser, and enter http://192.168.0.239. This is the default IP address of the switch. If you already disabled the DHCP client and assigned a static IP address to the switch, enter the static IP address of the switch.
-
Page 34: Credentials For The Device Ui
You can register the switch on-network and online to activate your warranty by entering your NETGEAR account credentials (see Register and access the switch on-network with your NETGEAR account on page 35). If you do not have a NETGEAR account, you can create one. -
Page 35: Register The Switch
(Managed through NETGEAR Insight.) 1. This situation occurs if you temporarily change the management mode of the switch from NETGEAR Insight Mobile App and Insight Cloud Portal back to Direct Connect Web Browser Interface. Register the switch You can register the switch online or offline to activate your warranty, after which you are no longer prompted to activate your warranty when you log in: •... -
Page 36: Register The Switch With Your Netgear Account And Get A Registration Key For Offline Access
S3600 Series 8- or 16-Port 10G/Multi-Gigabit Ethernet Smart Switch with 2 SFP+ Ports If you do not have a free NETGEAR account, you can create one during the registration process. To register and access the switch on-network over the device UI with your NETGEAR account: 1. -
Page 37: Access The Switch With A Registration Key
S3600 Series 8- or 16-Port 10G/Multi-Gigabit Ethernet Smart Switch with 2 SFP+ Ports key, you are no longer prompted to activate your warranty. Instead, the Device Admin Password page displays. You can visit my.netgear.com, log in to your NETGEAR account, register the switch using its serial number, and get a registration key. -
Page 38: Access The Switch Off-Network And Enter The Registration Key Before You Log In
S3600 Series 8- or 16-Port 10G/Multi-Gigabit Ethernet Smart Switch with 2 SFP+ Ports Access the switch off-network and enter the registration key before you log in For information about getting a registration key, see Register the switch with your NETGEAR account and get a registration key for offline access on page 36. -
Page 39: Access The Switch On-Network And Enter The Registration Key After You Log In
S3600 Series 8- or 16-Port 10G/Multi-Gigabit Ethernet Smart Switch with 2 SFP+ Ports Access the switch on-network and enter the registration key after you log in For information about getting a registration key, see Register the switch with your NETGEAR account and get a registration key for offline access on page 36. -
Page 40: Change The Language Of The Device Ui
S3600 Series 8- or 16-Port 10G/Multi-Gigabit Ethernet Smart Switch with 2 SFP+ Ports After successful registration, the Maintenance > Registration Key menu option and Registration Key page are hidden in the device UI. Change the language of the device You can set the language of the device UI to a specific one. -
Page 41: Change The Management Mode Of The Switch
S3600 Series 8- or 16-Port 10G/Multi-Gigabit Ethernet Smart Switch with 2 SFP+ Ports Change the management mode of the switch By default, the management mode on the switch is Directly Connect to Web Browser Interface (which is the same as the device UI). You can also change the management mode to NETGEAR Insight Mobile App and Insight Cloud Portal. -
Page 42: Change The Management Mode To Netgear Insight Mobile App And Insight Cloud Portal
S3600 Series 8- or 16-Port 10G/Multi-Gigabit Ethernet Smart Switch with 2 SFP+ Ports ○ The NETGEAR Insight Mobile App and Insight Cloud Portal management mode is disabled and the current Insight-manageable device settings are saved to the cloud server. ○ Any changes that you make using the Directly Connect to Web Browser Interface management mode are not saved to the cloud server. -
Page 43: Change The Management Mode Back To Directly Connect To Web-Browser Interface
S3600 Series 8- or 16-Port 10G/Multi-Gigabit Ethernet Smart Switch with 2 SFP+ Ports A confirmation pop-up window displays. 7. Click the OK button. The System Information page display again. 8. Click the Apply button. An alert pop-up window displays. 9. Click the OK button. - Page 44 S3600 Series 8- or 16-Port 10G/Multi-Gigabit Ethernet Smart Switch with 2 SFP+ Ports If you do not know the IP address of the switch, see Access the switch on-network and connected to the Internet on page 25 or Access the switch off-network and not connected to the Internet on page 32.
- Page 45 S3600 Series 8- or 16-Port 10G/Multi-Gigabit Ethernet Smart Switch with 2 SFP+ Ports A pop-up window displays. d. Navigate to a location on your computer and save the file. The file transfer begins. The page displays information about the file transfer progress.
-
Page 46: Configure Ports Using The Device View
S3600 Series 8- or 16-Port 10G/Multi-Gigabit Ethernet Smart Switch with 2 SFP+ Ports The file transfer begins. The page displays information about the progress of the file transfer. The switch applies the configuration automatically. 14. Reboot the switch by doing the following: a. -
Page 47: Access The Netgear Support Website
S3600 Series 8- or 16-Port 10G/Multi-Gigabit Ethernet Smart Switch with 2 SFP+ Ports • Enter your device admin password. • If you previously managed the switch through the Insight Cloud Portal or Insight app, enter the Insight network password for the last Insight network location. -
Page 48: Access The User Manual Online
6. In the Support section, click the link. The NETGEAR support website opens. Access the user manual online The user manual (the manual that you are now reading) is available from the NETGEAR download center at netgear.com/support/download/. To access the user manual online from the device UI: 1. - Page 49 S3600 Series 8- or 16-Port 10G/Multi-Gigabit Ethernet Smart Switch with 2 SFP+ Ports The NETGEAR Download Center website opens. 7. Enter the model number of the switch and select the model from the menu. The page displays the documentation that is available for your model, including the user manual.
-
Page 50: Chapter 2 Configure Switch System Settings
Configure Switch System Settings This chapter covers the following topics: • Dashboard • Display information about switch hardware components and firmware • IP network settings for management access • Time and NTP settings • Domain Name System • Manage switch discovery protocols •... -
Page 51: Dashboard
S3600 Series 8- or 16-Port 10G/Multi-Gigabit Ethernet Smart Switch with 2 SFP+ Ports Dashboard The information that is displayed on the dashboard is mostly self-explanatory. Display port utilization and port connections The Dashboard displays port utilization and port connections. To display port utilization and port connections: 1. -
Page 52: Display Vlan Membership
S3600 Series 8- or 16-Port 10G/Multi-Gigabit Ethernet Smart Switch with 2 SFP+ Ports The following table describes information about the port connections in the Device View section. Field Description Connected The port is connected to a device that is powered up. -
Page 53: Display Switch Device Details
S3600 Series 8- or 16-Port 10G/Multi-Gigabit Ethernet Smart Switch with 2 SFP+ Ports For information about the credentials, see Credentials for the device UI on page 34. 4. Click the Login button. The Dashboard page displays. The VLAN Membership section displays the number of member interfaces for each configured VLAN. -
Page 54: Display Information About Switch Hardware Components And Firmware
S3600 Series 8- or 16-Port 10G/Multi-Gigabit Ethernet Smart Switch with 2 SFP+ Ports Field Description The system name that you configured, if any. For more information, see Configure Name and display general switch system information and NETGEAR Insight Cloud application information on page 54. - Page 55 S3600 Series 8- or 16-Port 10G/Multi-Gigabit Ethernet Smart Switch with 2 SFP+ Ports If you set the management mode of the switch at least once to NETGEAR Insight Mobile App and Insight Cloud Portal, the NETGEAR Insight Cloud application information displays on the page.
-
Page 56: Display The Power Supply Information
S3600 Series 8- or 16-Port 10G/Multi-Gigabit Ethernet Smart Switch with 2 SFP+ Ports Table 5. NETGEAR Insight Cloud application information Field Description App Name The application name App Status The application status, which can be one of the following: • Operational: The cloud server is reachable, the switch is registered with the cloud, and the switch is added to a user account. -
Page 57: Display The Boot And Software Version
S3600 Series 8- or 16-Port 10G/Multi-Gigabit Ethernet Smart Switch with 2 SFP+ Ports If you do not know the IP address of the switch, see Access the switch on-network and connected to the Internet on page 25 or Access the switch off-network and not connected to the Internet on page 32. -
Page 58: Display The Temperature Sensor Information
S3600 Series 8- or 16-Port 10G/Multi-Gigabit Ethernet Smart Switch with 2 SFP+ Ports If you do not know the IP address of the switch, see Access the switch on-network and connected to the Internet on page 25 or Access the switch off-network and not connected to the Internet on page 32. -
Page 59: Display The Status Of The Fans
S3600 Series 8- or 16-Port 10G/Multi-Gigabit Ethernet Smart Switch with 2 SFP+ Ports If you do not know the IP address of the switch, see Access the switch on-network and connected to the Internet on page 25 or Access the switch off-network and not connected to the Internet on page 32. - Page 60 S3600 Series 8- or 16-Port 10G/Multi-Gigabit Ethernet Smart Switch with 2 SFP+ Ports You can use a WiFi or wired connection to connect your computer to the network, or connect directly to a switch that is off-network using an Ethernet cable.
-
Page 61: Ip Network Settings For Management Access
S3600 Series 8- or 16-Port 10G/Multi-Gigabit Ethernet Smart Switch with 2 SFP+ Ports IP network settings for management access You can configure network information for the device UI, which is the logical interface used for in-band connectivity with the switch through any of the switch’s front-panel ports. -
Page 62: Change The Management Vlan
S3600 Series 8- or 16-Port 10G/Multi-Gigabit Ethernet Smart Switch with 2 SFP+ Ports • Static IP Address: You must manually configure the IP address, subnet mask, and default gateway. Enter this information in the fields below the radio buttons. • Dynamic IP Address (BOOT): The switch must obtain the IP address through a BootP server. - Page 63 S3600 Series 8- or 16-Port 10G/Multi-Gigabit Ethernet Smart Switch with 2 SFP+ Ports • Only one management VLAN can be active at a time. • If you change the management VLAN, connectivity through the existing management VLAN is lost. • You might need to reconnect the computer that you use to access the switch to another port that is a member of the new management VLAN.
-
Page 64: Configure An Ipv6 Management Interface Through Autoconfiguration Or A Dhcpv6 Server
S3600 Series 8- or 16-Port 10G/Multi-Gigabit Ethernet Smart Switch with 2 SFP+ Ports Configure an IPv6 management interface through autoconfiguration or a DHCPv6 server You can restrict IPv6 management to one specific interface. You can use any of the interfaces as an IPv6 management interface and configure the IPv6 address through autoconfiguration or a DHCPv6 server. -
Page 65: Manage A Static Ipv6 Address For The Ipv6 Management Interface
S3600 Series 8- or 16-Port 10G/Multi-Gigabit Ethernet Smart Switch with 2 SFP+ Ports 7. Click the IPv6 Address Auto Configuration Mode toggle to allow the switch to autoconfigure its IPv6 address: • The toggle is gray and positioned to the left: IPv6 address autoconfiguration is disabled. - Page 66 S3600 Series 8- or 16-Port 10G/Multi-Gigabit Ethernet Smart Switch with 2 SFP+ Ports To add, change, or remove an IPv6 address for the IPv6 management interface: 1. Connect your computer to the same network as the switch. You can use a WiFi or wired connection to connect your computer to the network, or connect directly to a switch that is off-network using an Ethernet cable.
-
Page 67: Display Ipv6 Network Interface Neighbors
S3600 Series 8- or 16-Port 10G/Multi-Gigabit Ethernet Smart Switch with 2 SFP+ Ports The Edit IPv6 Network Interface Configuration pop-up window displays. c. Change the settings as needed. d. Click the Save button. Your settings saved. 8. To remove an IPv6 address, do the following: a. -
Page 68: Time And Ntp Settings
S3600 Series 8- or 16-Port 10G/Multi-Gigabit Ethernet Smart Switch with 2 SFP+ Ports The IPv6 Network Interface Neighbor table displays the following view-only fields. Table 11. IPv6 network interface neighbor information Field Description IPv6 Address The IPv6 address of the neighboring device... - Page 69 S3600 Series 8- or 16-Port 10G/Multi-Gigabit Ethernet Smart Switch with 2 SFP+ Ports If you do not know the IP address of the switch, see Access the switch on-network and connected to the Internet on page 25 or Access the switch off-network and not connected to the Internet on page 32.
-
Page 70: Set The Time Manually
S3600 Series 8- or 16-Port 10G/Multi-Gigabit Ethernet Smart Switch with 2 SFP+ Ports • The toggle is gray and positioned to the left: An NTP packet from an NTP server is not authenticated. • The toggle is purple and positioned to the right: An NTP packet from an NTP server is authenticated. - Page 71 S3600 Series 8- or 16-Port 10G/Multi-Gigabit Ethernet Smart Switch with 2 SFP+ Ports You can use a WiFi or wired connection to connect your computer to the network, or connect directly to a switch that is off-network using an Ethernet cable.
-
Page 72: Display The Global Ntp Status And Packet Information
S3600 Series 8- or 16-Port 10G/Multi-Gigabit Ethernet Smart Switch with 2 SFP+ Ports Your settings are saved. The Date and Time fields are unmasked. 12. In the Date field, type the current date in months, days, and years (MM/DD/YYYY). 13. In the Time field, type the current time in hours, minutes, and seconds (HH/MM/SS). - Page 73 S3600 Series 8- or 16-Port 10G/Multi-Gigabit Ethernet Smart Switch with 2 SFP+ Ports • Enter your device admin password. • If you previously managed the switch through the Insight Cloud Portal or Insight app, enter the Insight network password for the last Insight network location.
-
Page 74: Configure Ntp Servers
S3600 Series 8- or 16-Port 10G/Multi-Gigabit Ethernet Smart Switch with 2 SFP+ Ports Configure NTP servers NTP assures accurate time synchronization for the network device clock, up to the millisecond. Time synchronization is performed by a network NTP server. The switch operates as an NTP client only and does not provide time services to other devices. - Page 75 S3600 Series 8- or 16-Port 10G/Multi-Gigabit Ethernet Smart Switch with 2 SFP+ Ports To add an NTP server: 1. Connect your computer to the same network as the switch. You can use a WiFi or wired connection to connect your computer to the network, or connect directly to a switch that is off-network using an Ethernet cable.
- Page 76 S3600 Series 8- or 16-Port 10G/Multi-Gigabit Ethernet Smart Switch with 2 SFP+ Ports The range is from 4 to 17. The default is 6. 11. In the Maximum Poll Interval field, specify the longest polling interval in powers of two seconds.
-
Page 77: Change The Settings For An Existing Ntp Server
S3600 Series 8- or 16-Port 10G/Multi-Gigabit Ethernet Smart Switch with 2 SFP+ Ports Table 13. NTP server status information (Continued) Field Description NTP Out Packets The number of NTP messages that the switch sent for the association NTP Protocol Error Packets... -
Page 78: Remove An Ntp Server
S3600 Series 8- or 16-Port 10G/Multi-Gigabit Ethernet Smart Switch with 2 SFP+ Ports For more information about the settings, see Add an NTP server on page 74. 9. Click the Save button. Your settings are saved. Remove an NTP server You can remove an NTP server that you no longer need. - Page 79 S3600 Series 8- or 16-Port 10G/Multi-Gigabit Ethernet Smart Switch with 2 SFP+ Ports temporarily advancing clocks during the summer months. Typically clocks are adjusted forward one or more hours near the start of spring and are adjusted backward in autumn.
- Page 80 S3600 Series 8- or 16-Port 10G/Multi-Gigabit Ethernet Smart Switch with 2 SFP+ Ports Configure the settings that are described in Step 8. • Nonrecurring: Daylight saving time settings are in effect only between the start date and end date of the specified year. With this option, the summer time settings do not repeat on an annual basis.
-
Page 81: Display The Daylight Saving Time Status
S3600 Series 8- or 16-Port 10G/Multi-Gigabit Ethernet Smart Switch with 2 SFP+ Ports Field Description Begins At These fields are used to configure the start values of the date and time. • Month: Configure the start month. • Date: Configure the start date. -
Page 82: Domain Name System
S3600 Series 8- or 16-Port 10G/Multi-Gigabit Ethernet Smart Switch with 2 SFP+ Ports • Enter your device admin password. • If you previously managed the switch through the Insight Cloud Portal or Insight app, enter the Insight network password for the last Insight network location. - Page 83 S3600 Series 8- or 16-Port 10G/Multi-Gigabit Ethernet Smart Switch with 2 SFP+ Ports You can use a WiFi or wired connection to connect your computer to the network, or connect directly to a switch that is off-network using an Ethernet cable.
-
Page 84: Remove A Dns Server
S3600 Series 8- or 16-Port 10G/Multi-Gigabit Ethernet Smart Switch with 2 SFP+ Ports The Add DNS Server Configuration pop-up window displays. b. In the DNS Server field, type an IPv4 or IPv6 address. c. Click the Save button. Your settings are saved and the DNS server is added The server is added to the table. -
Page 85: Map Host Names To Dns Server Ip Addresses And Display Dynamic Host Mappings
S3600 Series 8- or 16-Port 10G/Multi-Gigabit Ethernet Smart Switch with 2 SFP+ Ports The Dashboard page displays. 5. Select System > Management > DNS > DNS Configuration. The DNS Configuration page displays. 6. In the DNS Server Configuration table, select the check box for the DNS server. -
Page 86: Change An Entry In The Static Dns Host Mapping Table
S3600 Series 8- or 16-Port 10G/Multi-Gigabit Ethernet Smart Switch with 2 SFP+ Ports 5. Select System > Management > DNS > Host Configuration. The Host Configuration page displays. 6. Click the Add New button. The Add DNS Host Configuration pop-up window displays. -
Page 87: Remove An Entry From The Static Dns Host Mapping Table
S3600 Series 8- or 16-Port 10G/Multi-Gigabit Ethernet Smart Switch with 2 SFP+ Ports 6. Select the check box for the entry. 7. Click the Edit button. The Edit Host Configuration pop-up window displays 8. Change the IPv4 or IPv6 address. -
Page 88: Display Dynamic Dhcp Snooping Bindings
S3600 Series 8- or 16-Port 10G/Multi-Gigabit Ethernet Smart Switch with 2 SFP+ Ports Display dynamic DHCP snooping bindings You can display the dynamic DHCP snooping bindings. To display the dynamic DHCP snooping bindings: 1. Connect your computer to the same network as the switch. -
Page 89: Manage Switch Discovery Protocols
S3600 Series 8- or 16-Port 10G/Multi-Gigabit Ethernet Smart Switch with 2 SFP+ Ports Table 16. Dynamic binding configuration information (Continued) Field Description IP Address The IP address assigned to the client by the DHCP server Lease Time The remaining IP address lease time for the client... -
Page 90: Lldp And Lldp-Med Settings For The Switch
S3600 Series 8- or 16-Port 10G/Multi-Gigabit Ethernet Smart Switch with 2 SFP+ Ports • Enter your device admin password. • If you previously managed the switch through the Insight Cloud Portal or Insight app, enter the Insight network password for the last Insight network location. -
Page 91: Configure The Lldp And Lldp-Med Settings
S3600 Series 8- or 16-Port 10G/Multi-Gigabit Ethernet Smart Switch with 2 SFP+ Ports LLDP is a one-way protocol without request and response sequences. Information is advertised by devices that are configured to transmit LLDP and is received and processed by devices that are configured to receive LLDP. -
Page 92: Display The Lldp-Med Network Policy For An Interface
S3600 Series 8- or 16-Port 10G/Multi-Gigabit Ethernet Smart Switch with 2 SFP+ Ports The LLDP Configuration page displays. 6. In the TLV Advertised Interval field, enter the interval in seconds at which the switch transmits LLDP frames. The range is from 5 to 32768 secs. The default is 30 seconds. - Page 93 S3600 Series 8- or 16-Port 10G/Multi-Gigabit Ethernet Smart Switch with 2 SFP+ Ports If you do not know the IP address of the switch, see Access the switch on-network and connected to the Internet on page 25 or Access the switch off-network and not connected to the Internet on page 32.
-
Page 94: Display The Lldp Local Device Information
S3600 Series 8- or 16-Port 10G/Multi-Gigabit Ethernet Smart Switch with 2 SFP+ Ports Table 17. LLDP-MED network policy information (Continued) Field Description VLAN Type The VLAN type that is transmitted (tagged or untagged) User Priority The user priority that is transmitted... - Page 95 S3600 Series 8- or 16-Port 10G/Multi-Gigabit Ethernet Smart Switch with 2 SFP+ Ports The following table describes the view-only fields on the page. Table 18. LLDP local device information Field Description Device Information Chassis ID Subtype The switch identifier is the MAC address of the switch (see the following...
-
Page 96: Display The Lldp Neighbor Information
S3600 Series 8- or 16-Port 10G/Multi-Gigabit Ethernet Smart Switch with 2 SFP+ Ports Table 19. Detailed LLDP local device information (Continued) Field Description Operational MAU Type The Medium Attachment Unit (MAU) type. The MAU performs physical layer functions, including digital data conversion from the Ethernet interface collision detection and bit injection into the network. - Page 97 S3600 Series 8- or 16-Port 10G/Multi-Gigabit Ethernet Smart Switch with 2 SFP+ Ports You can use a WiFi or wired connection to connect your computer to the network, or connect directly to a switch that is off-network using an Ethernet cable.
- Page 98 S3600 Series 8- or 16-Port 10G/Multi-Gigabit Ethernet Smart Switch with 2 SFP+ Ports The following table describes the view-only fields in the pop-up window. Table 21. Detailed LLDP neighbor information Field Description Port Details Local Port The local switch port that detects the neighbor information that is...
- Page 99 S3600 Series 8- or 16-Port 10G/Multi-Gigabit Ethernet Smart Switch with 2 SFP+ Ports Table 21. Detailed LLDP neighbor information (Continued) Field Description Operational MAU Type The Medium Attachment Unit (MAU) type. The MAU performs physical layer functions, including digital data conversion from the Ethernet interface collision detection and bit injection into the network.
-
Page 100: Simple Network Management Protocol
S3600 Series 8- or 16-Port 10G/Multi-Gigabit Ethernet Smart Switch with 2 SFP+ Ports Simple Network Management Protocol You can configure SNMP settings for SNMPv1, SNMPv2, and SNMPv3. The switch supports the configuration of SNMP groups and users that can manage traps that the SNMP agent generates. -
Page 101: Change An Existing Snmpv1 And Snmpv2 Community
S3600 Series 8- or 16-Port 10G/Multi-Gigabit Ethernet Smart Switch with 2 SFP+ Ports For information about the credentials, see Credentials for the device UI on page 34. 4. Click the Login button. The Dashboard page displays. 5. Select System > Protocols > SNMP > Community Configuration. -
Page 102: Delete An Snmpv1 And Snmpv2 Community
S3600 Series 8- or 16-Port 10G/Multi-Gigabit Ethernet Smart Switch with 2 SFP+ Ports You can use a WiFi or wired connection to connect your computer to the network, or connect directly to a switch that is off-network using an Ethernet cable. -
Page 103: Manage The Snmpv1 And Snmpv2 Trap Settings
S3600 Series 8- or 16-Port 10G/Multi-Gigabit Ethernet Smart Switch with 2 SFP+ Ports You can use a WiFi or wired connection to connect your computer to the network, or connect directly to a switch that is off-network using an Ethernet cable. - Page 104 S3600 Series 8- or 16-Port 10G/Multi-Gigabit Ethernet Smart Switch with 2 SFP+ Ports You can use a WiFi or wired connection to connect your computer to the network, or connect directly to a switch that is off-network using an Ethernet cable.
-
Page 105: Change An Snmpv1 Or Snmpv2 Trap Configuration For A Host
S3600 Series 8- or 16-Port 10G/Multi-Gigabit Ethernet Smart Switch with 2 SFP+ Ports Change an SNMPv1 or SNMPv2 trap configuration for a host You can change an existing SNMPv1 or SNMPv2 trap configuration for a host. To change an SNMPv1 or and SNMPv2 trap configuration for a host: 1. -
Page 106: Delete An Snmpv1 Or Snmpv2 Trap Configuration For A Host
S3600 Series 8- or 16-Port 10G/Multi-Gigabit Ethernet Smart Switch with 2 SFP+ Ports Delete an SNMPv1 or SNMPv2 trap configuration for a host You can delete an SNMPv1 or SNMPv2 trap configuration that you no longer need for a host. - Page 107 S3600 Series 8- or 16-Port 10G/Multi-Gigabit Ethernet Smart Switch with 2 SFP+ Ports You can use a WiFi or wired connection to connect your computer to the network, or connect directly to a switch that is off-network using an Ethernet cable.
-
Page 108: Display The Supported Mibs
S3600 Series 8- or 16-Port 10G/Multi-Gigabit Ethernet Smart Switch with 2 SFP+ Ports Display the supported MIBs To display the MIBs that are supported by the switch: 1. Connect your computer to the same network as the switch. You can use a WiFi or wired connection to connect your computer to the network, or connect directly to a switch that is off-network using an Ethernet cable. - Page 109 S3600 Series 8- or 16-Port 10G/Multi-Gigabit Ethernet Smart Switch with 2 SFP+ Ports To add an SNMPv3 user account: 1. Connect your computer to the same network as the switch. You can use a WiFi or wired connection to connect your computer to the network, or connect directly to a switch that is off-network using an Ethernet cable.
-
Page 110: Change An Snmpv3 User Account
S3600 Series 8- or 16-Port 10G/Multi-Gigabit Ethernet Smart Switch with 2 SFP+ Ports The password can be from 8 to 12 characters. 12. Click the Save button. Your settings are saved. The SNMPv3 user account is added. Change an SNMPv3 user account You can change an existing SMPv3 user account. -
Page 111: Delete An Snmpv3 User Account
S3600 Series 8- or 16-Port 10G/Multi-Gigabit Ethernet Smart Switch with 2 SFP+ Ports Your settings are saved. Delete an SNMPv3 user account You can delete an SMPv3 user account that you no longer need. To delete an SNMPv3 user account: 1. -
Page 112: Add An Snmpv3 Trap Configuration For A User
S3600 Series 8- or 16-Port 10G/Multi-Gigabit Ethernet Smart Switch with 2 SFP+ Ports Add an SNMPv3 trap configuration for a user You can add an SNMPv3 trap configuration for a user, enabling the user to receive SNMPv3 traps. To add an SNMPv3 trap configuration for a user: 1. -
Page 113: Change An Snmpv3 Trap Configuration For A User
S3600 Series 8- or 16-Port 10G/Multi-Gigabit Ethernet Smart Switch with 2 SFP+ Ports • Auth Priv: The user must use the assigned user name and authentication, and must use encryption. • Auth No Priv: The user must use the assigned user name and authentication, but encryption is not required. -
Page 114: Delete An Snmpv3 Trap Configuration For A User
S3600 Series 8- or 16-Port 10G/Multi-Gigabit Ethernet Smart Switch with 2 SFP+ Ports For more information about the settings, see Add an SNMPv3 trap configuration for a user on page 112. 9. Click the Save button. Your settings are saved. -
Page 115: Configure Http And Https Access Settings
S3600 Series 8- or 16-Port 10G/Multi-Gigabit Ethernet Smart Switch with 2 SFP+ Ports Configure HTTP and HTTPS access settings You can configure the HTTP and secure HTTP (HTTPS) access settings on the switch. If you access the switch device UI, HTTP is the default access method. -
Page 116: Browser Security Message With Https Access
S3600 Series 8- or 16-Port 10G/Multi-Gigabit Ethernet Smart Switch with 2 SFP+ Ports 7. Click the Allow HTTPS toggle to enable or disable HTTPS access: • The toggle is gray and positioned to the left: You cannot access the switch device UI from an HTTPS session over a web browser. -
Page 117: Ssh Management Access
S3600 Series 8- or 16-Port 10G/Multi-Gigabit Ethernet Smart Switch with 2 SFP+ Ports • Mozilla Firefox: Click the ADVANCED button. Then, click the Add Exception button. In the pop-up window that displays, click the Confirm Security Exception button. • Microsoft Edge: Select Details > Go on to the webpage. -
Page 118: Manage Rsa, Dsa, And Ecdsa Keys For Ssh Access
S3600 Series 8- or 16-Port 10G/Multi-Gigabit Ethernet Smart Switch with 2 SFP+ Ports The Dashboard page displays. 5. Select System > Protocols > SSH. The SSH page displays. 6. Click the Allow SSH toggle to enable or disable SSH access: •... - Page 119 S3600 Series 8- or 16-Port 10G/Multi-Gigabit Ethernet Smart Switch with 2 SFP+ Ports NOTE: To generate an SSH key file, SSH must be disabled (see Configure the SSH access settings on page 117). To generate an RSA, DSA, or ECDSA key: 1.
-
Page 120: Transfer An Existing Ssh Key From A Computer To The Switch
S3600 Series 8- or 16-Port 10G/Multi-Gigabit Ethernet Smart Switch with 2 SFP+ Ports Table 22. Host Key Status information Field Description Keys Present Displays which keys are present on the switch (if any): RSA, DSA, ECDSA, or None. Key Generation In Progress Displays which key is being generated (if any): RSA, DSA, ECDSA, or None. -
Page 121: Delete An Rsa, Dsa, Or Ecdsa Key
S3600 Series 8- or 16-Port 10G/Multi-Gigabit Ethernet Smart Switch with 2 SFP+ Ports 6. Click the Browse button and locate and select the file that you want to download to the switch. 7. Click the Apply button. The file transfer starts. A status message displays during the transfer and upon successful completion of the transfer. -
Page 122: Configure Inbound Telnet Settings
S3600 Series 8- or 16-Port 10G/Multi-Gigabit Ethernet Smart Switch with 2 SFP+ Ports • RSA key: In the RSA Keys Management section, select the Delete RSA Keys radio button. • DSA key: In the DSA Keys Management section, select the Delete DSA Keys radio button. -
Page 123: Dhcp Server
S3600 Series 8- or 16-Port 10G/Multi-Gigabit Ethernet Smart Switch with 2 SFP+ Ports • The toggle is gray and positioned to the left: You cannot access the switch from a Telnet session. This is the default setting. • The toggle is purple and positioned to the right: You can access the switch from a Telnet session 7. -
Page 124: Exclude Ip Addresses For The Dhcp Server
S3600 Series 8- or 16-Port 10G/Multi-Gigabit Ethernet Smart Switch with 2 SFP+ Ports 4. Click the Login button. The Dashboard page displays. 5. Select System > DHCP Services > DHCP Server > DHCP Server Configuration. The DHCP Server Configuration page displays. -
Page 125: Manage Dhcp Pools
S3600 Series 8- or 16-Port 10G/Multi-Gigabit Ethernet Smart Switch with 2 SFP+ Ports If you did not yet activate your warranty, the Register to activate your warranty page displays. For more information, see Register the switch on page 35. 3. Enter one of the following passwords: •... - Page 126 S3600 Series 8- or 16-Port 10G/Multi-Gigabit Ethernet Smart Switch with 2 SFP+ Ports You can use a WiFi or wired connection to connect your computer to the network, or connect directly to a switch that is off-network using an Ethernet cable.
- Page 127 S3600 Series 8- or 16-Port 10G/Multi-Gigabit Ethernet Smart Switch with 2 SFP+ Ports 9. From the Lease Time menu, select how the binding is leased: • Specified Duration: Configure the following settings: Day: The number of days of the lease period. The range is from 0 to 59. The ○...
-
Page 128: Change A Dhcp Pool
S3600 Series 8- or 16-Port 10G/Multi-Gigabit Ethernet Smart Switch with 2 SFP+ Ports Change a DHCP pool You can change an existing DHCP pool. To change a DHCP pool: 1. Connect your computer to the same network as the switch. -
Page 129: Display Or Clear The Dhcp Server Bindings
S3600 Series 8- or 16-Port 10G/Multi-Gigabit Ethernet Smart Switch with 2 SFP+ Ports To remove a DHCP pool or DHCP binding: 1. Connect your computer to the same network as the switch. You can use a WiFi or wired connection to connect your computer to the network, or connect directly to a switch that is off-network using an Ethernet cable. -
Page 130: Display Dhcp Server Statistics
S3600 Series 8- or 16-Port 10G/Multi-Gigabit Ethernet Smart Switch with 2 SFP+ Ports The Device Admin Password page displays. If you did not yet activate your warranty, the Register to activate your warranty page displays. For more information, see Register the switch on page 35. -
Page 131: Dhcp Relay
S3600 Series 8- or 16-Port 10G/Multi-Gigabit Ethernet Smart Switch with 2 SFP+ Ports If you do not know the IP address of the switch, see Access the switch on-network and connected to the Internet on page 25 or Access the switch off-network and not connected to the Internet on page 32. -
Page 132: Configure The Global Dhcp Relay Server Settings
S3600 Series 8- or 16-Port 10G/Multi-Gigabit Ethernet Smart Switch with 2 SFP+ Ports as a Layer 3 DHCP relay, or simply a DHCP relay, as opposed to a L2 DHCP relay, which is a different function (see DHCP Layer 2 relay on page 136). -
Page 133: Add The Dhcp Relay Function To An Existing Routing Vlan
S3600 Series 8- or 16-Port 10G/Multi-Gigabit Ethernet Smart Switch with 2 SFP+ Ports • The toggle is gray and positioned to the left: The circuit ID suboption of DHCP Option-82 is disabled for the switch. • The toggle is purple and positioned to the right: The circuit ID suboption of DHCP Option-82 is enabled for the switch. -
Page 134: Remove The Dhcp Relay Function From A Routing Vlan
S3600 Series 8- or 16-Port 10G/Multi-Gigabit Ethernet Smart Switch with 2 SFP+ Ports 6. In the DHCP Relay VLAN Interfaces section, select the check box for the routing VLAN. 7. Click the Edit button. The Edit DHCP Relay VLAN Interfaces pop-up window displays. -
Page 135: Display The Dhcp Relay Statistics
S3600 Series 8- or 16-Port 10G/Multi-Gigabit Ethernet Smart Switch with 2 SFP+ Ports • Enter your device admin password. • If you previously managed the switch through the Insight Cloud Portal or Insight app, enter the Insight network password for the last Insight network location. -
Page 136: Dhcp Layer 2 Relay
S3600 Series 8- or 16-Port 10G/Multi-Gigabit Ethernet Smart Switch with 2 SFP+ Ports For information about the credentials, see Credentials for the device UI on page 34. 4. Click the Login button. The Dashboard page displays. 5. Select System > DHCP Services > DHCP Relay > DHCP Relay Statistics. -
Page 137: Configure The Dhcp L2 Relay Vlan Settings
S3600 Series 8- or 16-Port 10G/Multi-Gigabit Ethernet Smart Switch with 2 SFP+ Ports You can use a WiFi or wired connection to connect your computer to the network, or connect directly to a switch that is off-network using an Ethernet cable. - Page 138 S3600 Series 8- or 16-Port 10G/Multi-Gigabit Ethernet Smart Switch with 2 SFP+ Ports You can use a WiFi or wired connection to connect your computer to the network, or connect directly to a switch that is off-network using an Ethernet cable.
-
Page 139: Configure A Dhcp L2 Relay Interface
S3600 Series 8- or 16-Port 10G/Multi-Gigabit Ethernet Smart Switch with 2 SFP+ Ports Configure a DHCP L2 relay interface You can enable a DHCP L2 relay on an interface. To configure DHCP L2 relay interface: 1. Connect your computer to the same network as the switch. -
Page 140: Display Or Clear The Dhcp L2 Relay Interface Statistics
S3600 Series 8- or 16-Port 10G/Multi-Gigabit Ethernet Smart Switch with 2 SFP+ Ports The Edit DHCP L2 Relay Configuration pop-up window displays. 9. From the Admin Mode menu, select the DHCP L2 relay mode for the interface: • Disabled: DHCP L2 relay is disabled for the interface. -
Page 141: Dhcp Snooping
S3600 Series 8- or 16-Port 10G/Multi-Gigabit Ethernet Smart Switch with 2 SFP+ Ports 5. Select System > DHCP Services > DHCP L2 Relay > DHCP L2 Relay Interface Statistics. The DHCP L2 Relay Interface Statistics page displays. 6. From the Filter By menu, select to display ports only (Ports), LAGs only (LAG), or both ports and LAGs (All). -
Page 142: Enable Dhcp Snooping For The Switch
S3600 Series 8- or 16-Port 10G/Multi-Gigabit Ethernet Smart Switch with 2 SFP+ Ports Enable DHCP snooping for the switch You can globally enable DHCP snooping for the switch. To globally enable DHCP snooping for the switch: 1. Connect your computer to the same network as the switch. -
Page 143: Enable Dhcp Snooping For A Vlan
S3600 Series 8- or 16-Port 10G/Multi-Gigabit Ethernet Smart Switch with 2 SFP+ Ports client hardware address match. If the addresses do not match, the switch drops the packet. 8. Click the Apply button. Your settings are saved. Enable DHCP snooping for a VLAN To enable DHCP snooping for a VLAN: 1. -
Page 144: Configure Dhcp Snooping Interface Settings
S3600 Series 8- or 16-Port 10G/Multi-Gigabit Ethernet Smart Switch with 2 SFP+ Ports • Disable: DHCP snooping is disabled for the VLAN. This is the default setting. • Enable: DHCP snooping is enabled for the VLAN. 9. Click the Save button. - Page 145 S3600 Series 8- or 16-Port 10G/Multi-Gigabit Ethernet Smart Switch with 2 SFP+ Ports • To configure a single interface, select the check box associated with the interface, or type the interface number (for example, xg5) in the Search field and click the Go button.
-
Page 146: Add A Static Dhcp Snooping Binding
S3600 Series 8- or 16-Port 10G/Multi-Gigabit Ethernet Smart Switch with 2 SFP+ Ports Add a static DHCP snooping binding You can add a static binding to the DHCP snooping bindings database. To add a static DHCP snooping binding: 1. Connect your computer to the same network as the switch. -
Page 147: Change A Static Dhcp Snooping Binding
S3600 Series 8- or 16-Port 10G/Multi-Gigabit Ethernet Smart Switch with 2 SFP+ Ports Change a static DHCP snooping binding You can change an existing static DHCP snooping. To change a static DHCP snooping binding: 1. Connect your computer to the same network as the switch. -
Page 148: Remove A Static Dhcp Snooping Binding
S3600 Series 8- or 16-Port 10G/Multi-Gigabit Ethernet Smart Switch with 2 SFP+ Ports Remove a static DHCP snooping binding You can remove a static binding from the DHCP snooping bindings database. To remove a static DHCP snooping binding: 1. Connect your computer to the same network as the switch. - Page 149 S3600 Series 8- or 16-Port 10G/Multi-Gigabit Ethernet Smart Switch with 2 SFP+ Ports You can use a WiFi or wired connection to connect your computer to the network, or connect directly to a switch that is off-network using an Ethernet cable.
-
Page 150: Configure Dhcp Snooping Persistent Settings
S3600 Series 8- or 16-Port 10G/Multi-Gigabit Ethernet Smart Switch with 2 SFP+ Ports Configure DHCP snooping persistent settings You can configure the persistent location of the DHCP snooping bindings database. The bindings database can be stored locally on the switch or on a remote device in the network. -
Page 151: Display The Dhcp Snooping Statistics
S3600 Series 8- or 16-Port 10G/Multi-Gigabit Ethernet Smart Switch with 2 SFP+ Ports 7. In the Write Delay field, specify the time that the switch must wait after writing binding information to persistent storage. The delay allows the switch to collect as many entries as possible (new and removed) before writing them to the persistent file. -
Page 152: Dhcpv6 Server
S3600 Series 8- or 16-Port 10G/Multi-Gigabit Ethernet Smart Switch with 2 SFP+ Ports The following table describes the DHCP snooping statistics. Table 28. DHCP Snooping Statistics information Field Description Interface The interface for which statistics are displayed MAC Verify Failures The number of DHCP messages that were dropped because the source MAC address and client hardware address did not match. -
Page 153: Manage Dhcpv6 Pools
S3600 Series 8- or 16-Port 10G/Multi-Gigabit Ethernet Smart Switch with 2 SFP+ Ports • Enter your device admin password. • If you previously managed the switch through the Insight Cloud Portal or Insight app, enter the Insight network password for the last Insight network location. -
Page 154: Change A Dhcpv6 Pool
S3600 Series 8- or 16-Port 10G/Multi-Gigabit Ethernet Smart Switch with 2 SFP+ Ports If you did not yet activate your warranty, the Register to activate your warranty page displays. For more information, see Register the switch on page 35. 3. Enter one of the following passwords: •... -
Page 155: Remove A Dhcpv6 Pool
S3600 Series 8- or 16-Port 10G/Multi-Gigabit Ethernet Smart Switch with 2 SFP+ Ports You can use a WiFi or wired connection to connect your computer to the network, or connect directly to a switch that is off-network using an Ethernet cable. -
Page 156: Display Or Clear The Dhcpv6 Server Bindings
S3600 Series 8- or 16-Port 10G/Multi-Gigabit Ethernet Smart Switch with 2 SFP+ Ports If you do not know the IP address of the switch, see Access the switch on-network and connected to the Internet on page 25 or Access the switch off-network and not connected to the Internet on page 32. -
Page 157: Display Dhcpv6 Server Statistics
S3600 Series 8- or 16-Port 10G/Multi-Gigabit Ethernet Smart Switch with 2 SFP+ Ports • Enter your device admin password. • If you previously managed the switch through the Insight Cloud Portal or Insight app, enter the Insight network password for the last Insight network location. -
Page 158: Dhcpv6 Relay
S3600 Series 8- or 16-Port 10G/Multi-Gigabit Ethernet Smart Switch with 2 SFP+ Ports • Enter your device admin password. • If you previously managed the switch through the Insight Cloud Portal or Insight app, enter the Insight network password for the last Insight network location. -
Page 159: Add A Dhcpv6 Relay Vlan Interface
S3600 Series 8- or 16-Port 10G/Multi-Gigabit Ethernet Smart Switch with 2 SFP+ Ports Add a DHCPv6 relay VLAN interface You can select a VLAN that is connected to a DHCPv6 server that is located in a different IPv6 subnet. This VLAN can function as a DHCPv6 relay. You can add multiple DHCPv6 relay VLAN interfaces. -
Page 160: Remove A Dhcpv6 Relay Vlan Interface
S3600 Series 8- or 16-Port 10G/Multi-Gigabit Ethernet Smart Switch with 2 SFP+ Ports The menu displays routing VLANs only. A relay interface is required when the relay address is a link-local or multicast address. 10. Click the Save button. Your settings are saved. -
Page 161: Display The Dhcpv6 Relay Statistics
S3600 Series 8- or 16-Port 10G/Multi-Gigabit Ethernet Smart Switch with 2 SFP+ Ports Display the DHCPv6 relay statistics You can display the DHCPv6 relay statistics. To display the DHCPv6 relay statistics: 1. Connect your computer to the same network as the switch. -
Page 162: Chapter 3 Manage Vlans
Manage VLANs This chapter covers the following topics: • Manage the VLAN configuration on the switch • Auto-VLANs • Configure a MAC-based VLAN • Configure a protocol-based VLAN group • Configure Generic Attribute Registration Protocol • Private VLANs • Protect ports NOTE: For more information about VLANs and a configuration example, see Virtual Local Area Networks (VLANs) on page 564. -
Page 163: Manage The Vlan Configuration On The Switch
S3600 Series 8- or 16-Port 10G/Multi-Gigabit Ethernet Smart Switch with 2 SFP+ Ports Manage the VLAN configuration on the switch You can add, change, and delete VLANs, or reset the entire VLAN configuration on the switch to defaults. About VLANs Adding virtual LAN (VLAN) support to a Layer 2 switch offers some of the benefits of both bridging and routing. -
Page 164: Add A Vlan
S3600 Series 8- or 16-Port 10G/Multi-Gigabit Ethernet Smart Switch with 2 SFP+ Ports By default, none of the four Auto VLANs include as members any interfaces or LAGs. Interfaces and LAGs are added automatically upon device detection. Add a VLAN You can add multiple VLANs to customize the switch for you network. -
Page 165: Configure Membership Interfaces For A Vlan
S3600 Series 8- or 16-Port 10G/Multi-Gigabit Ethernet Smart Switch with 2 SFP+ Ports Auto VLAN (see Configure the OUI-based properties on page 175), you can re-use the preconfigured VLAN ID. 8. In the VLAN Name field, type a name for the new VLAN. - Page 166 S3600 Series 8- or 16-Port 10G/Multi-Gigabit Ethernet Smart Switch with 2 SFP+ Ports 6. From the VLAN ID menu, select the VLAN ID. The following steps refer to the Port Membership section. 7. To add and configure or remove individual ports or LAGs, do the following: a.
-
Page 167: Change A Vlan
S3600 Series 8- or 16-Port 10G/Multi-Gigabit Ethernet Smart Switch with 2 SFP+ Ports • PVID: First click the Select All button and then the PVID button to assign the VLAN as the port VLAN ID (PVID) for all ports or LAGs. All ports or LAGs display a “P.”... -
Page 168: Delete One Or More Vlans
S3600 Series 8- or 16-Port 10G/Multi-Gigabit Ethernet Smart Switch with 2 SFP+ Ports If you did not yet activate your warranty, the Register to activate your warranty page displays. For more information, see Register the switch on page 35. 3. Enter one of the following passwords: •... -
Page 169: Reset The Entire Vlan Configuration To Default Setting
S3600 Series 8- or 16-Port 10G/Multi-Gigabit Ethernet Smart Switch with 2 SFP+ Ports If you did not yet activate your warranty, the Register to activate your warranty page displays. For more information, see Register the switch on page 35. 3. Enter one of the following passwords: •... -
Page 170: Change The Port Vlan Id (Pvid) Settings
S3600 Series 8- or 16-Port 10G/Multi-Gigabit Ethernet Smart Switch with 2 SFP+ Ports If you do not know the IP address of the switch, see Access the switch on-network and connected to the Internet on page 25 or Access the switch off-network and not connected to the Internet on page 32. - Page 171 S3600 Series 8- or 16-Port 10G/Multi-Gigabit Ethernet Smart Switch with 2 SFP+ Ports You can use a WiFi or wired connection to connect your computer to the network, or connect directly to a switch that is off-network using an Ethernet cable.
- Page 172 S3600 Series 8- or 16-Port 10G/Multi-Gigabit Ethernet Smart Switch with 2 SFP+ Ports VLAN IDs range from 1 to 4093. The default is 1. Use a hyphen (-) to specify a range or a comma (,) to separate VLAN IDs in a list. Spaces and zeros are not permitted.
-
Page 173: Configure A Voice Vlan
S3600 Series 8- or 16-Port 10G/Multi-Gigabit Ethernet Smart Switch with 2 SFP+ Ports Table 33. PVID configuration information (Continued) Field Description Untagged VLANs The ID or IDs of the untagged VLANs of which the interface is a member Tagged VLANs... - Page 174 S3600 Series 8- or 16-Port 10G/Multi-Gigabit Ethernet Smart Switch with 2 SFP+ Ports 5. Select Switching > VLAN > Voice VLAN Configuration. The Voice VLAN Configuration page displays. 6. In the Voice VLAN Global Admin section, click the Admin Mode toggle to enable the global voice VLAN mode on the switch.
-
Page 175: Auto-Vlans
S3600 Series 8- or 16-Port 10G/Multi-Gigabit Ethernet Smart Switch with 2 SFP+ Ports • Disabled: Voice traffic is allowed only an authorized voice VLAN interface, for which dot1x must be enabled (see Configure the 802.1X authentication settings for a port on page 410). - Page 176 S3600 Series 8- or 16-Port 10G/Multi-Gigabit Ethernet Smart Switch with 2 SFP+ Ports To configure the OUI-based properties for the Auto-VoIP VLAN, Auto-WiFi VLAN, or Auto-Camera VLAN: 1. Connect your computer to the same network as the switch. You can use a WiFi or wired connection to connect your computer to the network, or connect directly to a switch that is off-network using an Ethernet cable.
-
Page 177: Configure The Oui-Based Interface Settings
S3600 Series 8- or 16-Port 10G/Multi-Gigabit Ethernet Smart Switch with 2 SFP+ Ports ○ To change the default VLAN ID 4087 to another ID, type the ID in the Auto-Camera VLAN ID field. ○ In the associated OUI-Based priority field, enter a priority value from 0 (lowest priority) to 7 (highest priority). -
Page 178: Manage The Oui Table
S3600 Series 8- or 16-Port 10G/Multi-Gigabit Ethernet Smart Switch with 2 SFP+ Ports • To configure a single interface, select the check box associated with the interface, or type the interface number (for example, xg5) in the Search field and click the Go button. -
Page 179: Add An Oui
S3600 Series 8- or 16-Port 10G/Multi-Gigabit Ethernet Smart Switch with 2 SFP+ Ports • 00:12:43: CISCO2 • 00:0F:E2: H3C • 00:60:B9: NITSUKO • 00:D0:1E: PINTEL • 00:E0:75: VERILINK • 00:E0:BB: 3COM • 00:04:0D: AVAYA1 • 00:1B:4F: AVAYA2 • 00:04:13: SNOM You can add OUIs for VoIP phones, WiFi devices, and camera. -
Page 180: Remove An Oui
S3600 Series 8- or 16-Port 10G/Multi-Gigabit Ethernet Smart Switch with 2 SFP+ Ports The Dashboard page displays. 5. Select Switching > Auto-VLAN > OUI-based Auto-VLAN. The OUI-based Auto-VLAN page displays. 6. Scroll down to the OUI Table section. 7. Click the Add New button. -
Page 181: Configure The Global Protocol-Based Voip Prioritization And Class
S3600 Series 8- or 16-Port 10G/Multi-Gigabit Ethernet Smart Switch with 2 SFP+ Ports The OUI-based Auto-VLAN page displays. 6. Scroll down to the OUI Table section. 7. Select the check box for the OUI. You can select more than one check box. -
Page 182: Configure Voip Protocol-Based Interface Settings
S3600 Series 8- or 16-Port 10G/Multi-Gigabit Ethernet Smart Switch with 2 SFP+ Ports For information about the credentials, see Credentials for the device UI on page 34. 4. Click the Login button. The Dashboard page displays. 5. Select Switching > Auto-VLAN > Protocol-based VoIP. - Page 183 S3600 Series 8- or 16-Port 10G/Multi-Gigabit Ethernet Smart Switch with 2 SFP+ Ports If you do not know the IP address of the switch, see Access the switch on-network and connected to the Internet on page 25 or Access the switch off-network and not connected to the Internet on page 32.
-
Page 184: Display The Auto-Voip Status
S3600 Series 8- or 16-Port 10G/Multi-Gigabit Ethernet Smart Switch with 2 SFP+ Ports Display the Auto-VoIP status To display the Auto-VoIP status: 1. Connect your computer to the same network as the switch. You can use a WiFi or wired connection to connect your computer to the network, or connect directly to a switch that is off-network using an Ethernet cable. -
Page 185: Configure A Mac-Based Vlan
S3600 Series 8- or 16-Port 10G/Multi-Gigabit Ethernet Smart Switch with 2 SFP+ Ports Configure a MAC-based VLAN A MAC-based VLAN allows incoming untagged packets to be assigned to a VLAN and classifies traffic based on the source MAC address of the packet. -
Page 186: Delete A Mac-Based Vlan Configuration
S3600 Series 8- or 16-Port 10G/Multi-Gigabit Ethernet Smart Switch with 2 SFP+ Ports 5. Select Switching > VLAN > MAC-based VLAN. The MAC-based VLAN page displays. 6. Click the Add New button. The Add MAC-based VLAN Configuration pop-up window displays. -
Page 187: Configure A Protocol-Based Vlan Group
S3600 Series 8- or 16-Port 10G/Multi-Gigabit Ethernet Smart Switch with 2 SFP+ Ports Configure a protocol-based VLAN group You can use a protocol-based VLAN to define filtering criteria for untagged packets. By default, if you do not configure a port-based (IEEE 802.1Q) or protocol-based VLAN, untagged packets are assigned to VLAN 1. - Page 188 S3600 Series 8- or 16-Port 10G/Multi-Gigabit Ethernet Smart Switch with 2 SFP+ Ports • Enter your device admin password. • If you previously managed the switch through the Insight Cloud Portal or Insight app, enter the Insight network password for the last Insight network location.
-
Page 189: Configure Membership Interfaces For A Protocol-Based Vlan Group
S3600 Series 8- or 16-Port 10G/Multi-Gigabit Ethernet Smart Switch with 2 SFP+ Ports Configure membership interfaces for a protocol-based VLAN group For a protocol, an interface can belong to one protocol-based VLAN group only. If you already added an interface to a group for IP, you cannot add the interface to another group that also includes IP, but you can add it to a new group for IPX. -
Page 190: Change A Protocol-Based Vlan Group
S3600 Series 8- or 16-Port 10G/Multi-Gigabit Ethernet Smart Switch with 2 SFP+ Ports Click once to select a LAG. A selected LAG displays blue. Click again to deselect an already selected LAG. An excluded LAG displays blank. 9. Click the Apply button. -
Page 191: Delete A Protocol-Based Vlan Group
S3600 Series 8- or 16-Port 10G/Multi-Gigabit Ethernet Smart Switch with 2 SFP+ Ports For more information, see Add a protocol-based VLAN group on page 187. 9. Click the Save button. Your settings are saved. Delete a protocol-based VLAN group You can delete a protocol-based VLAN group that you no longer need. -
Page 192: Configure Generic Attribute Registration Protocol
S3600 Series 8- or 16-Port 10G/Multi-Gigabit Ethernet Smart Switch with 2 SFP+ Ports Configure Generic Attribute Registration Protocol Generic Attribute Registration Protocol (GARP) allows network devices to share information such as VLAN IDs and multicast group membership across a bridged LAN. -
Page 193: Configure Garp Interface Settings
S3600 Series 8- or 16-Port 10G/Multi-Gigabit Ethernet Smart Switch with 2 SFP+ Ports For information about the credentials, see Credentials for the device UI on page 34. 4. Click the Login button. The Dashboard page displays. 5. Select Switching > VLAN > GARP VLAN. - Page 194 S3600 Series 8- or 16-Port 10G/Multi-Gigabit Ethernet Smart Switch with 2 SFP+ Ports 5. Select Switching > VLAN > GARP VLAN. The GARP VLAN page displays. The following steps refer to the GARP Port Configuration section. 6. From the Filter By menu, select to display ports only (Ports), LAGs only (LAG), or both ports and LAGs (All).
-
Page 195: Private Vlans
S3600 Series 8- or 16-Port 10G/Multi-Gigabit Ethernet Smart Switch with 2 SFP+ Ports Private VLANs A private VLAN contains switch ports that cannot communicate with each other, but can access another network. These ports are called private ports. Each private VLAN contains one or more private ports and a single uplink port or uplink aggregation group. -
Page 196: Overview Of The Tasks For Private Vlan Configuration
S3600 Series 8- or 16-Port 10G/Multi-Gigabit Ethernet Smart Switch with 2 SFP+ Ports Overview of the tasks for private VLAN configuration To set up a private VLAN that allows for communication between switches in a network, perform the tasks that are described in the following sections: 1. - Page 197 S3600 Series 8- or 16-Port 10G/Multi-Gigabit Ethernet Smart Switch with 2 SFP+ Ports If you do not know the IP address of the switch, see Access the switch on-network and connected to the Internet on page 25 or Access the switch off-network and not connected to the Internet on page 32.
-
Page 198: Configure A Private Vlan Association With A Primary And Secondary Vlan
S3600 Series 8- or 16-Port 10G/Multi-Gigabit Ethernet Smart Switch with 2 SFP+ Ports Configure a private VLAN association with a primary and secondary VLAN You can configure a private VLAN by associating a single primary VLAN with one or more secondary VLANs. -
Page 199: Remove An Existing Private Vlan Association
S3600 Series 8- or 16-Port 10G/Multi-Gigabit Ethernet Smart Switch with 2 SFP+ Ports 9. In the Secondary VLANs field, type one or more secondary VLANs for the private VLAN. This selection sets secondary VLANs (isolated VLANs, community VLANs, or a combination of both) within the private VLAN. -
Page 200: Configure The Private Vlan Port Mode
S3600 Series 8- or 16-Port 10G/Multi-Gigabit Ethernet Smart Switch with 2 SFP+ Ports If you did not yet activate your warranty, the Register to activate your warranty page displays. For more information, see Register the switch on page 35. 3. Enter one of the following passwords: •... - Page 201 S3600 Series 8- or 16-Port 10G/Multi-Gigabit Ethernet Smart Switch with 2 SFP+ Ports • Enter your device admin password. • If you previously managed the switch through the Insight Cloud Portal or Insight app, enter the Insight network password for the last Insight network location.
-
Page 202: Private Vlan Host Interface: Assign The Interface To Primary And Secondary Vlans
S3600 Series 8- or 16-Port 10G/Multi-Gigabit Ethernet Smart Switch with 2 SFP+ Ports To configure a promiscuous port to be a member of specific VLANs, see Private VLAN promiscuous interface: Assign the interface to primary and secondary VLANs on page 204. -
Page 203: Private Vlan Host Interface: Remove The Interface From Primary And Secondary Vlans
S3600 Series 8- or 16-Port 10G/Multi-Gigabit Ethernet Smart Switch with 2 SFP+ Ports 7. Select one or more interfaces by taking one of the following actions: • To configure a single interface, select the check box associated with the interface, or type the interface number (for example, xg5) in the Search field and click the Go button. -
Page 204: Private Vlan Promiscuous Interface: Assign The Interface To Primary And Secondary Vlans
S3600 Series 8- or 16-Port 10G/Multi-Gigabit Ethernet Smart Switch with 2 SFP+ Ports If you did not yet activate your warranty, the Register to activate your warranty page displays. For more information, see Register the switch on page 35. 3. Enter one of the following passwords: •... - Page 205 S3600 Series 8- or 16-Port 10G/Multi-Gigabit Ethernet Smart Switch with 2 SFP+ Ports You can use a WiFi or wired connection to connect your computer to the network, or connect directly to a switch that is off-network using an Ethernet cable.
-
Page 206: Private Vlan Promiscuous Interface: Remove The Interface From Primary And Secondary Vlans
S3600 Series 8- or 16-Port 10G/Multi-Gigabit Ethernet Smart Switch with 2 SFP+ Ports 10. In the Promiscuous Secondary VLAN field, specify one or more secondary VLAN IDs. You can specify VLANs for which you configured the type as Isolated or Community, both of which are secondary VLAN types within a private VLAN (see Assign a private VLAN type to a VLAN on page 196). -
Page 207: Protect Ports
S3600 Series 8- or 16-Port 10G/Multi-Gigabit Ethernet Smart Switch with 2 SFP+ Ports If you did not yet activate your warranty, the Register to activate your warranty page displays. For more information, see Register the switch on page 35. 3. Enter one of the following passwords: •... - Page 208 S3600 Series 8- or 16-Port 10G/Multi-Gigabit Ethernet Smart Switch with 2 SFP+ Ports You can use a WiFi or wired connection to connect your computer to the network, or connect directly to a switch that is off-network using an Ethernet cable.
-
Page 209: Chapter 4 Configure Switching
Configure Switching This chapter covers the following topics: • LLDP and LLDP-MED settings for interfaces • Green Ethernet settings • Configure the port settings • Link aggregation groups • Spanning Tree Protocol • MAC address table • Dynamic ARP inspection... -
Page 210: Lldp And Lldp-Med Settings For Interfaces
S3600 Series 8- or 16-Port 10G/Multi-Gigabit Ethernet Smart Switch with 2 SFP+ Ports LLDP and LLDP-MED settings for interfaces This section describes the global Link Layer Discovery Protocol (LLDP) and LLDP-Media Endpoint Discovery (LLDP-MED) settings for interfaces. For information about the global LLDP and LLDP-MED settings, see LLDP and LLDP-MED settings for the switch on page LLDP, which is defined in IEEE 802.1AB, lets devices on a LAN advertise major capabilities... - Page 211 S3600 Series 8- or 16-Port 10G/Multi-Gigabit Ethernet Smart Switch with 2 SFP+ Ports The Device Admin Password page displays. If you did not yet activate your warranty, the Register to activate your warranty page displays. For more information, see Register the switch on page 35.
-
Page 212: Configure Lldp-Med Interface Settings
S3600 Series 8- or 16-Port 10G/Multi-Gigabit Ethernet Smart Switch with 2 SFP+ Ports • Disable: The interface does not advertise the management IP address. • Enable: The interface advertises the management IP address. This is the default setting. 11. From the System Description menu, select if the interface transmits the system description: •... - Page 213 S3600 Series 8- or 16-Port 10G/Multi-Gigabit Ethernet Smart Switch with 2 SFP+ Ports 3. Enter one of the following passwords: • Enter your device admin password. • If you previously managed the switch through the Insight Cloud Portal or Insight app, enter the Insight network password for the last Insight network location.
-
Page 214: Green Ethernet Settings
S3600 Series 8- or 16-Port 10G/Multi-Gigabit Ethernet Smart Switch with 2 SFP+ Ports • Disable: The interface does not transmit network policy TLVs. • Enable: The interface transmits network policy TLVs. This is the default setting. 12. Click the Save button. -
Page 215: Configure Green Ethernet Interface Settings
S3600 Series 8- or 16-Port 10G/Multi-Gigabit Ethernet Smart Switch with 2 SFP+ Ports • The toggle is gray and positioned to the left: Energy Efficient Ethernet (EEE) Mode is disabled. This is the default setting. • The toggle is purple and positioned to the right: EEE Mode is enabled. EEE combines the MAC address of a port with a family of physical layers that support operation in a low power mode. -
Page 216: Configure The Port Settings
S3600 Series 8- or 16-Port 10G/Multi-Gigabit Ethernet Smart Switch with 2 SFP+ Ports The following steps refer to the Green Ethernet Interface Configuration section. 6. Select one or more interfaces by taking one of the following actions: • To configure a single interface, select the check box associated with the interface, or type the interface number (for example, xg5) in the Search field and click the Go button. - Page 217 S3600 Series 8- or 16-Port 10G/Multi-Gigabit Ethernet Smart Switch with 2 SFP+ Ports If you do not know the IP address of the switch, see Access the switch on-network and connected to the Internet on page 25 or Access the switch off-network and not connected to the Internet on page 32.
- Page 218 S3600 Series 8- or 16-Port 10G/Multi-Gigabit Ethernet Smart Switch with 2 SFP+ Ports • Auto: The speed is set by the auto-negotiation process. This is the default setting. To let the port function at high speed, select Auto. • 100MB Half Duplex: The speed is limited to 100 Mbits/second at half duplex.
-
Page 219: Link Aggregation Groups
S3600 Series 8- or 16-Port 10G/Multi-Gigabit Ethernet Smart Switch with 2 SFP+ Ports Table 36. Port configuration information Field Description Port Type The possible values are: • Normal: The port is a normal port, that is, not a trunk member, mirrored port, or probe port. - Page 220 S3600 Series 8- or 16-Port 10G/Multi-Gigabit Ethernet Smart Switch with 2 SFP+ Ports You can use a WiFi or wired connection to connect your computer to the network, or connect directly to a switch that is off-network using an Ethernet cable.
- Page 221 S3600 Series 8- or 16-Port 10G/Multi-Gigabit Ethernet Smart Switch with 2 SFP+ Ports • Disable: The LAG is administratively disabled. When the LAG is disabled, no traffic flows, and LACPDUs are dropped, but the links that form the LAG are not released.
-
Page 222: Configure The Port Members For A Lag
S3600 Series 8- or 16-Port 10G/Multi-Gigabit Ethernet Smart Switch with 2 SFP+ Ports Table 37. LAG configuration information Field Description LAG ID The LAG ID (l1, l2, l3, and so on) Active Ports The ports that are members of the LAG... -
Page 223: Set The Lacp System Priority
S3600 Series 8- or 16-Port 10G/Multi-Gigabit Ethernet Smart Switch with 2 SFP+ Ports By default, the names are ch1, ch2, ch3, and so on. You can enter a name of up to 15 characters. 8. In the Ports table, click each port that you want to make a member of the LAG. -
Page 224: Set The Lacp Priority And Time-Out Period For A Port
S3600 Series 8- or 16-Port 10G/Multi-Gigabit Ethernet Smart Switch with 2 SFP+ Ports A higher value indicates a lower priority. You can change the value of the setting globally by setting a priority from 1 to 65535. The default priority is 32768. -
Page 225: Spanning Tree Protocol
S3600 Series 8- or 16-Port 10G/Multi-Gigabit Ethernet Smart Switch with 2 SFP+ Ports • To configure a single interface, select the check box associated with the interface, or type the interface number (for example, xg5) in the Search field and click the Go button. -
Page 226: Configure The Global Stp Settings And Display The Stp Status
S3600 Series 8- or 16-Port 10G/Multi-Gigabit Ethernet Smart Switch with 2 SFP+ Ports display the MST status on page 237 and Configure and display the interface settings for an MST instance on page 240. NOTE: For more information about MSTP and a configuration example, see Multiple Spanning Tree Protocol on page 587. - Page 227 S3600 Series 8- or 16-Port 10G/Multi-Gigabit Ethernet Smart Switch with 2 SFP+ Ports If you did not yet activate your warranty, the Register to activate your warranty page displays. For more information, see Register the switch on page 35. 3. Enter one of the following passwords: •...
-
Page 228: Configure The Cst Settings And Display The Mstp Status
S3600 Series 8- or 16-Port 10G/Multi-Gigabit Ethernet Smart Switch with 2 SFP+ Ports Table 38. STP configuration and status information Field Description Global Settings Configuration Digest Key The key that identifies the configuration currently being used STP Status Bridge Identifier The bridge identifier for the CST. - Page 229 S3600 Series 8- or 16-Port 10G/Multi-Gigabit Ethernet Smart Switch with 2 SFP+ Ports You can use a WiFi or wired connection to connect your computer to the network, or connect directly to a switch that is off-network using an Ethernet cable.
-
Page 230: Configure The Cst Interface Settings
S3600 Series 8- or 16-Port 10G/Multi-Gigabit Ethernet Smart Switch with 2 SFP+ Ports NOTE: The Bridge Hello Time (secs) field shows the fixed period in seconds that a root bridge waits between configuration messages. The fixed period is 2 seconds. - Page 231 S3600 Series 8- or 16-Port 10G/Multi-Gigabit Ethernet Smart Switch with 2 SFP+ Ports You can use a WiFi or wired connection to connect your computer to the network, or connect directly to a switch that is off-network using an Ethernet cable.
- Page 232 S3600 Series 8- or 16-Port 10G/Multi-Gigabit Ethernet Smart Switch with 2 SFP+ Ports • Disabled: The interface does not function as an edge port. This is the default setting. • Enabled: The interface functions as an edge port. 11. From the BPDU Forwarding menu, select if Bridge Protocol Data Unit (BPDU) forwarding is enabled for the interface: •...
-
Page 233: Display The Cst Interface Status
S3600 Series 8- or 16-Port 10G/Multi-Gigabit Ethernet Smart Switch with 2 SFP+ Ports Table 40. CST port configuration information Field Description Port State Indicates the current STP state of the interface. If enabled, the port state determines what forwarding action is taken on traffic. Possible port states are as follows: •... - Page 234 S3600 Series 8- or 16-Port 10G/Multi-Gigabit Ethernet Smart Switch with 2 SFP+ Ports • Enter your device admin password. • If you previously managed the switch through the Insight Cloud Portal or Insight app, enter the Insight network password for the last Insight network location.
-
Page 235: Display The Rapid Stp Interface Status
S3600 Series 8- or 16-Port 10G/Multi-Gigabit Ethernet Smart Switch with 2 SFP+ Ports Table 41. CST interface status information (Continued) Field Description CST Path Cost The path cost to the CST regional root Port Forwarding State Indicates the current STP state of the interface. If enabled, the port state determines what forwarding action is taken on traffic. - Page 236 S3600 Series 8- or 16-Port 10G/Multi-Gigabit Ethernet Smart Switch with 2 SFP+ Ports • Enter your device admin password. • If you previously managed the switch through the Insight Cloud Portal or Insight app, enter the Insight network password for the last Insight network location.
-
Page 237: Manage Mst Instances
S3600 Series 8- or 16-Port 10G/Multi-Gigabit Ethernet Smart Switch with 2 SFP+ Ports Manage MST instances You can add, change, or delete Multiple Spanning Tree (MST) instances on the switch. The MST instance consists of an ID, a priority value, and a VLAN ID. -
Page 238: Change An Mst Instance
S3600 Series 8- or 16-Port 10G/Multi-Gigabit Ethernet Smart Switch with 2 SFP+ Ports When switches or bridges are running STP, each is assigned a priority. After exchanging BPDUs, the switch with the lowest priority value becomes the root bridge. The bridge priority is a multiple of 4096. If you specify a priority that is not a multiple of 4096, the priority is automatically set to the next lowest priority that is a multiple of 4096. -
Page 239: Delete An Mst Instance
S3600 Series 8- or 16-Port 10G/Multi-Gigabit Ethernet Smart Switch with 2 SFP+ Ports The Device Admin Password page displays. If you did not yet activate your warranty, the Register to activate your warranty page displays. For more information, see Register the switch on page 35. -
Page 240: Configure And Display The Interface Settings For An Mst Instance
S3600 Series 8- or 16-Port 10G/Multi-Gigabit Ethernet Smart Switch with 2 SFP+ Ports 3. Enter one of the following passwords: • Enter your device admin password. • If you previously managed the switch through the Insight Cloud Portal or Insight app, enter the Insight network password for the last Insight network location. - Page 241 S3600 Series 8- or 16-Port 10G/Multi-Gigabit Ethernet Smart Switch with 2 SFP+ Ports The Dashboard page displays. 5. Select Switching > STP > MSTP > MST Port Configuration. The MST Port Configuration page displays. 6. From the Select MST menu, select an MST instance.
-
Page 242: Display The Stp Interface Statistics
S3600 Series 8- or 16-Port 10G/Multi-Gigabit Ethernet Smart Switch with 2 SFP+ Ports Table 44. MST interface configuration information Field Description Auto Calculated Port Path Cost Indicates if the path cost is automatically calculated (Enable) or not (Disable). If enabled, the path cost is calculated based on the link speed of the port if the configured value for Port Path Cost is zero. - Page 243 S3600 Series 8- or 16-Port 10G/Multi-Gigabit Ethernet Smart Switch with 2 SFP+ Ports To display the STP interface statistics: 1. Connect your computer to the same network as the switch. You can use a WiFi or wired connection to connect your computer to the network, or connect directly to a switch that is off-network using an Ethernet cable.
-
Page 244: Mac Address Table
S3600 Series 8- or 16-Port 10G/Multi-Gigabit Ethernet Smart Switch with 2 SFP+ Ports MAC address table You can view or configure the MAC address table. This table contains information about static and dynamic unicast entries for which the switch holds forwarding or filtering information. -
Page 245: View, Search, Or Clear The Mac Address Table
S3600 Series 8- or 16-Port 10G/Multi-Gigabit Ethernet Smart Switch with 2 SFP+ Ports The period is from 10 to 1000000 seconds. The default is 300 seconds. 7. Click the Apply button. Your settings are saved. View, search, or clear the MAC address table If you clear the MAC address entries in the MAC address table, only the dynamic entries are removed. -
Page 246: Add A Static Mac Address To The Mac Address Table
S3600 Series 8- or 16-Port 10G/Multi-Gigabit Ethernet Smart Switch with 2 SFP+ Ports If the address exists, that entry is displayed as the first entry followed by the remaining (higher) MAC addresses. An exact match is required. • Interface: In the Search field, enter the interface ID using the interface naming convention (for example, xg5). -
Page 247: Remove A Static Mac Address From The Mac Address Table
S3600 Series 8- or 16-Port 10G/Multi-Gigabit Ethernet Smart Switch with 2 SFP+ Ports The Device Admin Password page displays. If you did not yet activate your warranty, the Register to activate your warranty page displays. For more information, see Register the switch on page 35. -
Page 248: Dynamic Arp Inspection
S3600 Series 8- or 16-Port 10G/Multi-Gigabit Ethernet Smart Switch with 2 SFP+ Ports If you do not know the IP address of the switch, see Access the switch on-network and connected to the Internet on page 25 or Access the switch off-network and not connected to the Internet on page 32. -
Page 249: Configure The Global Dai Settings
S3600 Series 8- or 16-Port 10G/Multi-Gigabit Ethernet Smart Switch with 2 SFP+ Ports run DHCP snooping, or other switches in the network do not run dynamic ARP inspection. A static mapping associates an IP address to a MAC address on a VLAN. -
Page 250: Configure Dai Vlans
S3600 Series 8- or 16-Port 10G/Multi-Gigabit Ethernet Smart Switch with 2 SFP+ Ports 7. Click the Validate Destination MAC toggle to set the destination MAC validation mode for the switch: • The toggle is gray and positioned to the left: Destination MAC addresses are not validated. -
Page 251: Configure A Dai Interface
S3600 Series 8- or 16-Port 10G/Multi-Gigabit Ethernet Smart Switch with 2 SFP+ Ports 5. Select Switching > Dynamic ARP Inspection > DAI VLAN Configuration. The DAI VLAN Configuration page displays. 6. Select the check box for the VLAN. 7. Click the Edit button. - Page 252 S3600 Series 8- or 16-Port 10G/Multi-Gigabit Ethernet Smart Switch with 2 SFP+ Ports If you do not know the IP address of the switch, see Access the switch on-network and connected to the Internet on page 25 or Access the switch off-network and not connected to the Internet on page 32.
-
Page 253: Dai Acls
S3600 Series 8- or 16-Port 10G/Multi-Gigabit Ethernet Smart Switch with 2 SFP+ Ports 11. In the Burst Interval (secs) field, type the burst interval value for rate limiting on the interface. If you specify N/A, the burst interval is not effective. The range is from 1 to 15. The default is 1 second. -
Page 254: Configure A Rule For An Existing Dai Acl
S3600 Series 8- or 16-Port 10G/Multi-Gigabit Ethernet Smart Switch with 2 SFP+ Ports • Enter your device admin password. • If you previously managed the switch through the Insight Cloud Portal or Insight app, enter the Insight network password for the last Insight network location. -
Page 255: Remove A Rule From A Dai Acl
S3600 Series 8- or 16-Port 10G/Multi-Gigabit Ethernet Smart Switch with 2 SFP+ Ports • Enter your device admin password. • If you previously managed the switch through the Insight Cloud Portal or Insight app, enter the Insight network password for the last Insight network location. -
Page 256: Remove A Dai Access Control List
S3600 Series 8- or 16-Port 10G/Multi-Gigabit Ethernet Smart Switch with 2 SFP+ Ports You can use a WiFi or wired connection to connect your computer to the network, or connect directly to a switch that is off-network using an Ethernet cable. -
Page 257: Display The Dai Statistics
S3600 Series 8- or 16-Port 10G/Multi-Gigabit Ethernet Smart Switch with 2 SFP+ Ports If you do not know the IP address of the switch, see Access the switch on-network and connected to the Internet on page 25 or Access the switch off-network and not connected to the Internet on page 32. - Page 258 S3600 Series 8- or 16-Port 10G/Multi-Gigabit Ethernet Smart Switch with 2 SFP+ Ports • Enter your device admin password. • If you previously managed the switch through the Insight Cloud Portal or Insight app, enter the Insight network password for the last Insight network location.
-
Page 259: Chapter 5 Configure Multicast
Configure Multicast This chapter covers the following topics: • Display the entries in the multicast forwarding database • Display the multicast forwarding database statistics • Internet Group Management Protocol snooping • IGMP snooping querier overview • Multicast Listener Discovery snooping •... -
Page 260: Display The Entries In The Multicast Forwarding Database
S3600 Series 8- or 16-Port 10G/Multi-Gigabit Ethernet Smart Switch with 2 SFP+ Ports Display the entries in the multicast forwarding database The multicast forwarding database (MFDB) holds the port membership information for all active multicast address entries. The key for an entry consists of a combination of a VLAN ID and a MAC address. -
Page 261: Display The Multicast Forwarding Database Statistics
S3600 Series 8- or 16-Port 10G/Multi-Gigabit Ethernet Smart Switch with 2 SFP+ Ports Table 48. IGMP snooping information Field Description MAC Address The multicast MAC address for which you requested data VLAN ID The VLAN ID to which the multicast MAC address is related Component The component that is responsible for this entry in the MFDB. -
Page 262: Internet Group Management Protocol Snooping
S3600 Series 8- or 16-Port 10G/Multi-Gigabit Ethernet Smart Switch with 2 SFP+ Ports • Enter your device admin password. • If you previously managed the switch through the Insight Cloud Portal or Insight app, enter the Insight network password for the last Insight network location. -
Page 263: Enable Igmp Snooping And Configure Ip Header Validation
S3600 Series 8- or 16-Port 10G/Multi-Gigabit Ethernet Smart Switch with 2 SFP+ Ports packet is intended for only a small number of nodes. Packets are flooded into network segments where no node is receptive to the packet. While nodes rarely incur any... -
Page 264: Display Entries In The Igmp Snooping Table
S3600 Series 8- or 16-Port 10G/Multi-Gigabit Ethernet Smart Switch with 2 SFP+ Ports 6. Click the IGMP Snooping Status toggle to enable or disable IGMP snooping: • The toggle is gray and positioned to the left: IGMP snooping is disabled. This is the default setting. -
Page 265: Display Igmp Snooping Statics And Vlans
S3600 Series 8- or 16-Port 10G/Multi-Gigabit Ethernet Smart Switch with 2 SFP+ Ports The IGMP Snooping page displays. 6. To search for an entry in the IGMP snooping table, in the Search field, enter a MAC address, and click the Go button. -
Page 266: Configure The Igmp Snooping Settings For An Interface
S3600 Series 8- or 16-Port 10G/Multi-Gigabit Ethernet Smart Switch with 2 SFP+ Ports 3. Enter one of the following passwords: • Enter your device admin password. • If you previously managed the switch through the Insight Cloud Portal or Insight app, enter the Insight network password for the last Insight network location. - Page 267 S3600 Series 8- or 16-Port 10G/Multi-Gigabit Ethernet Smart Switch with 2 SFP+ Ports The Device Admin Password page displays. If you did not yet activate your warranty, the Register to activate your warranty page displays. For more information, see Register the switch on page 35.
-
Page 268: Configure Igmp Snooping For A Vlan
S3600 Series 8- or 16-Port 10G/Multi-Gigabit Ethernet Smart Switch with 2 SFP+ Ports The period must be 1 second or more but shorter than the period in the Host Timeout field. The default is 10 seconds. 12. In the MRouter Timeout field, type the period that the switch must wait to receive a query on the interface before it removes the interface from the list of interfaces with multicast routers attached. - Page 269 S3600 Series 8- or 16-Port 10G/Multi-Gigabit Ethernet Smart Switch with 2 SFP+ Ports 4. Click the Login button. The Dashboard page displays. 5. Select Switching > Multicast > IGMP Snooping > IGMP Snooping VLAN Configuration. The IGMP Snooping VLAN Configuration page displays.
-
Page 270: Configure An Igmp Multicast Router Interface
S3600 Series 8- or 16-Port 10G/Multi-Gigabit Ethernet Smart Switch with 2 SFP+ Ports 14. From the Query Mode menu, select to enable or disable the proxy querier for the VLAN: • Disable: Query Mode is disabled for the VLAN. This is the default setting. -
Page 271: Configure An Igmp Multicast Router Vlan
S3600 Series 8- or 16-Port 10G/Multi-Gigabit Ethernet Smart Switch with 2 SFP+ Ports • Enter your device admin password. • If you previously managed the switch through the Insight Cloud Portal or Insight app, enter the Insight network password for the last Insight network location. - Page 272 S3600 Series 8- or 16-Port 10G/Multi-Gigabit Ethernet Smart Switch with 2 SFP+ Ports To configure an IGMP multicast router VLAN: 1. Connect your computer to the same network as the switch. You can use a WiFi or wired connection to connect your computer to the network, or connect directly to a switch that is off-network using an Ethernet cable.
-
Page 273: Igmp Snooping Querier Overview
S3600 Series 8- or 16-Port 10G/Multi-Gigabit Ethernet Smart Switch with 2 SFP+ Ports IGMP snooping querier overview IGMP snooping requires that one central switch or router periodically query all end-devices on the network to announce their multicast memberships. This central device is the IGMP querier. -
Page 274: Add An Igmp Snooping Querier For A Vlan
S3600 Series 8- or 16-Port 10G/Multi-Gigabit Ethernet Smart Switch with 2 SFP+ Ports 5. Select Switching > Multicast > IGMP Snooping Querier > Querier Configuration. The Querier Configuration page displays. 6. Click the Querier Admin Mode toggle to enable or disable the IGMP snooping querier: •... -
Page 275: Change An Igmp Snooping Querier For A Vlan
S3600 Series 8- or 16-Port 10G/Multi-Gigabit Ethernet Smart Switch with 2 SFP+ Ports The Device Admin Password page displays. If you did not yet activate your warranty, the Register to activate your warranty page displays. For more information, see Register the switch on page 35. -
Page 276: Remove The Igmp Snooping Querier Settings From A Vlan
S3600 Series 8- or 16-Port 10G/Multi-Gigabit Ethernet Smart Switch with 2 SFP+ Ports You can use a WiFi or wired connection to connect your computer to the network, or connect directly to a switch that is off-network using an Ethernet cable. -
Page 277: Display The Status Of The Igmp Snooping Querier For All Vlans
S3600 Series 8- or 16-Port 10G/Multi-Gigabit Ethernet Smart Switch with 2 SFP+ Ports You can use a WiFi or wired connection to connect your computer to the network, or connect directly to a switch that is off-network using an Ethernet cable. - Page 278 S3600 Series 8- or 16-Port 10G/Multi-Gigabit Ethernet Smart Switch with 2 SFP+ Ports If you do not know the IP address of the switch, see Access the switch on-network and connected to the Internet on page 25 or Access the switch off-network and not connected to the Internet on page 32.
-
Page 279: Enable Igmp Snooping On The Auto-Video Vlan
S3600 Series 8- or 16-Port 10G/Multi-Gigabit Ethernet Smart Switch with 2 SFP+ Ports Table 52. IGMP snooping group information (Continued) Field Description Last Querier Version The IGMP protocol version of the last querier from which a query was snooped on... -
Page 280: Multicast Listener Discovery Snooping
S3600 Series 8- or 16-Port 10G/Multi-Gigabit Ethernet Smart Switch with 2 SFP+ Ports 6. Click the Auto-Video Status toggle to enable or disable IGMP snooping on the Auto-Video VLAN: • The toggle is gray and positioned to the left: IGMP snooping is disabled on the Auto-Video VLAN. - Page 281 S3600 Series 8- or 16-Port 10G/Multi-Gigabit Ethernet Smart Switch with 2 SFP+ Ports If you do not know the IP address of the switch, see Access the switch on-network and connected to the Internet on page 25 or Access the switch off-network and not connected to the Internet on page 32.
-
Page 282: Configure The Mld Snooping Settings For An Interface
S3600 Series 8- or 16-Port 10G/Multi-Gigabit Ethernet Smart Switch with 2 SFP+ Ports Configure the MLD snooping settings for an interface You can configure the MLD snooping settings for an interface. MLD snooping must be enabled both globally (on the switch) and on an interface for the interface to be able to snoop MLD packets to determine which segments should receive multicast packets directed to the group address. - Page 283 S3600 Series 8- or 16-Port 10G/Multi-Gigabit Ethernet Smart Switch with 2 SFP+ Ports • To configure a single interface, select the check box associated with the interface, or type the interface number (for example, xg5) in the Search field and click the Go button.
-
Page 284: Add Mld Snooping For A Vlan
S3600 Series 8- or 16-Port 10G/Multi-Gigabit Ethernet Smart Switch with 2 SFP+ Ports Add MLD snooping for a VLAN You can configure the settings for MLD snooping for a VLAN, which are then used to build forwarding lists for IPv6 multicast traffic. -
Page 285: Change The Mld Snooping Settings For A Vlan
S3600 Series 8- or 16-Port 10G/Multi-Gigabit Ethernet Smart Switch with 2 SFP+ Ports The range is from 2 to 3600 seconds. 10. In the Maximum Response Time field, type the period for the maximum response time of MLD snooping for the VLAN. -
Page 286: Remove The Mld Snooping Settings From A Vlan
S3600 Series 8- or 16-Port 10G/Multi-Gigabit Ethernet Smart Switch with 2 SFP+ Ports The Dashboard page displays. 5. Select Switching > Multicast > MLD Snooping > MLD VLAN Configuration. The MLD VLAN Configuration page displays. 6. Select the check box for the VLAN. -
Page 287: Configure An Mld Multicast Router Interface
S3600 Series 8- or 16-Port 10G/Multi-Gigabit Ethernet Smart Switch with 2 SFP+ Ports 5. Select Switching > Multicast > MLD Snooping > MLD VLAN Configuration. The MLD VLAN Configuration page displays. 6. Select the check box for the VLAN. 7. Click the Delete button. -
Page 288: Enable Or Disable Mld Multicast Router Mode For A Vlan
S3600 Series 8- or 16-Port 10G/Multi-Gigabit Ethernet Smart Switch with 2 SFP+ Ports The Multicast Router Configuration page displays. 6. From the Filter By menu, select to display ports only (Ports), LAGs only (LAG), or both ports and LAGs (All). -
Page 289: Mld Snooping Querier Overview
S3600 Series 8- or 16-Port 10G/Multi-Gigabit Ethernet Smart Switch with 2 SFP+ Ports If you do not know the IP address of the switch, see Access the switch on-network and connected to the Internet on page 25 or Access the switch off-network and not connected to the Internet on page 32. -
Page 290: Enable The Mld Snooping Querier And Configure The Global Settings
S3600 Series 8- or 16-Port 10G/Multi-Gigabit Ethernet Smart Switch with 2 SFP+ Ports switch updated with the current multicast group membership on a port-by-port basis. If the switch does not receive updated membership information in a timely fashion, it stops forwarding multicasts to the port where the end device is located. -
Page 291: Add An Mld Snooping Querier For A Vlan And Display The Status
S3600 Series 8- or 16-Port 10G/Multi-Gigabit Ethernet Smart Switch with 2 SFP+ Ports • The toggle is gray and positioned to the left: The MLD snooping querier is disabled. This is the default setting. • The toggle is purple and positioned to the right: The MLD snooping querier is enabled. - Page 292 S3600 Series 8- or 16-Port 10G/Multi-Gigabit Ethernet Smart Switch with 2 SFP+ Ports If you did not yet activate your warranty, the Register to activate your warranty page displays. For more information, see Register the switch on page 35. 3. Enter one of the following passwords: •...
-
Page 293: Change An Mld Snooping Querier For A Vlan
S3600 Series 8- or 16-Port 10G/Multi-Gigabit Ethernet Smart Switch with 2 SFP+ Ports Table 54. MLD snooping querier VLAN configuration information Field Description Operational State The operational state of the MLD snooping querier on a VLAN: • Querier: The snooping switch is the querier in the VLAN. The snooping switch sends out periodic queries with a time interval equal to the configured querier query interval. -
Page 294: Remove The Mld Snooping Querier Settings From A Vlan
S3600 Series 8- or 16-Port 10G/Multi-Gigabit Ethernet Smart Switch with 2 SFP+ Ports 3. Enter one of the following passwords: • Enter your device admin password. • If you previously managed the switch through the Insight Cloud Portal or Insight app, enter the Insight network password for the last Insight network location. -
Page 295: Multicast Vlan Registration
S3600 Series 8- or 16-Port 10G/Multi-Gigabit Ethernet Smart Switch with 2 SFP+ Ports 3. Enter one of the following passwords: • Enter your device admin password. • If you previously managed the switch through the Insight Cloud Portal or Insight app, enter the Insight network password for the last Insight network location. - Page 296 S3600 Series 8- or 16-Port 10G/Multi-Gigabit Ethernet Smart Switch with 2 SFP+ Ports To enable MVR and configure the global settings: 1. Connect your computer to the same network as the switch. You can use a WiFi or wired connection to connect your computer to the network, or connect directly to a switch that is off-network using an Ethernet cable.
-
Page 297: Add An Mvr Group
S3600 Series 8- or 16-Port 10G/Multi-Gigabit Ethernet Smart Switch with 2 SFP+ Ports 9. From the MVR Mode menu, select the MVR mode of operation: • Compatible: Blocks IGMP group membership reports on source ports. • Dynamic: Allows IGMP group membership reports on source ports. This is the default setting. -
Page 298: Remove An Mvr Group
S3600 Series 8- or 16-Port 10G/Multi-Gigabit Ethernet Smart Switch with 2 SFP+ Ports The Add MVR Group Configuration pop-up window displays. 7. In the MVR Group IP field, type the IP address for the MVR group. 8. In the Count field, type the number of contiguous MVR groups. -
Page 299: Configure An Mvr Interface
S3600 Series 8- or 16-Port 10G/Multi-Gigabit Ethernet Smart Switch with 2 SFP+ Ports For information about the credentials, see Credentials for the device UI on page 34. 4. Click the Login button. The Dashboard page displays. 5. Select Switching > MVR > MVR Group Configuration. -
Page 300: Configure The Members Of An Mvr Group
S3600 Series 8- or 16-Port 10G/Multi-Gigabit Ethernet Smart Switch with 2 SFP+ Ports • To configure a single interface, select the check box associated with the interface, or type the interface number (for example, xg5) in the Search field and click the Go button. -
Page 301: Display The Mvr Statistics
S3600 Series 8- or 16-Port 10G/Multi-Gigabit Ethernet Smart Switch with 2 SFP+ Ports To configure the members of an MVR group: 1. Connect your computer to the same network as the switch. You can use a WiFi or wired connection to connect your computer to the network, or connect directly to a switch that is off-network using an Ethernet cable. - Page 302 S3600 Series 8- or 16-Port 10G/Multi-Gigabit Ethernet Smart Switch with 2 SFP+ Ports You can use a WiFi or wired connection to connect your computer to the network, or connect directly to a switch that is off-network using an Ethernet cable.
-
Page 303: Chapter 6 Manage Routing
Manage Routing This chapter covers the following topics: • Routing concepts • IPv4 routing • IPv6 routing • Routing VLANs • Routing table, routes, and route preferences • Address Resolution Protocol... -
Page 304: Routing Concepts
S3600 Series 8- or 16-Port 10G/Multi-Gigabit Ethernet Smart Switch with 2 SFP+ Ports Routing concepts The switch supports IP routing. When a packet enters the switch, the switch checks the destination MAC address to determine if it matches any of the configured routing interfaces. -
Page 305: Display The Ipv4 Routing Statistics
S3600 Series 8- or 16-Port 10G/Multi-Gigabit Ethernet Smart Switch with 2 SFP+ Ports • Enter your device admin password. • If you previously managed the switch through the Insight Cloud Portal or Insight app, enter the Insight network password for the last Insight network location. - Page 306 S3600 Series 8- or 16-Port 10G/Multi-Gigabit Ethernet Smart Switch with 2 SFP+ Ports If you do not know the IP address of the switch, see Access the switch on-network and connected to the Internet on page 25 or Access the switch off-network and not connected to the Internet on page 32.
- Page 307 S3600 Series 8- or 16-Port 10G/Multi-Gigabit Ethernet Smart Switch with 2 SFP+ Ports Table 58. IP statistics information (Continued) Field Description IpInDiscards The number of input IP datagrams for which no problems were encountered to prevent their continued processing, but that were discarded (for lack of buffer space).
- Page 308 S3600 Series 8- or 16-Port 10G/Multi-Gigabit Ethernet Smart Switch with 2 SFP+ Ports Table 58. IP statistics information (Continued) Field Description IcmpInParmProbs The number of ICMP parameter problem messages received IcmpInSrcQuenchs The number of ICMP source quench messages received IcmpInRedirects...
-
Page 309: Ipv6 Routing
S3600 Series 8- or 16-Port 10G/Multi-Gigabit Ethernet Smart Switch with 2 SFP+ Ports IPv6 routing You can enable or disable the IPv6 routing mode, configure the global IPv6 routing settings, configure IPv6 routing VLANs, add IPv6 prefixes, add IPv6 static routes and route preferences, and view IPv6 routing statistics, routes, and neighbors. -
Page 310: Configure Ipv6 Routing For A Vlan
S3600 Series 8- or 16-Port 10G/Multi-Gigabit Ethernet Smart Switch with 2 SFP+ Ports • The toggle is gray and positioned to the left: IPv6 routing is disabled. This is the default setting. • The toggle is purple and positioned to the right: IPv6 routing is enabled. - Page 311 S3600 Series 8- or 16-Port 10G/Multi-Gigabit Ethernet Smart Switch with 2 SFP+ Ports 8. From the IPv6 Mode menu, select to enable or disable the IPv6 routing mode for the VLAN: • Disable: IPv6 routing is disabled for the VLAN. This is the default setting.
- Page 312 S3600 Series 8- or 16-Port 10G/Multi-Gigabit Ethernet Smart Switch with 2 SFP+ Ports 15. In the Adv Reachable Interval field, type the reachable interval that the VLAN transmits in router advertisements. The reachable interval is period during which a remote IPv6 device is considered reachable after receipt of a neighbor discovery confirmation message.
-
Page 313: Add Prefix Settings For An Ipv6 Routing Vlan
S3600 Series 8- or 16-Port 10G/Multi-Gigabit Ethernet Smart Switch with 2 SFP+ Ports The following table describes the view-only fields on the page. Table 59. IPv6 VLAN configuration information Field Description Operational Mode Indicates the operational mode of the routing VLAN (Enabled or... - Page 314 S3600 Series 8- or 16-Port 10G/Multi-Gigabit Ethernet Smart Switch with 2 SFP+ Ports The Add IPv6 Prefix Configuration pop-up window displays. 8. In the IPv6 Prefix field, type the IPv6 prefix for the routing VLAN. 9. In the Prefix Length field, type the IPv6 prefix length for the routing VLAN.
-
Page 315: Change Prefix Settings For An Ipv6 Routing Vlan
S3600 Series 8- or 16-Port 10G/Multi-Gigabit Ethernet Smart Switch with 2 SFP+ Ports Change prefix settings for an IPv6 routing VLAN You can add an IPv6 prefix and associated settings for an IPv6 routing VLAN. To add IPv6 prefix settings for an IPv6 routing VLAN: 1. -
Page 316: Remove Prefix Settings For An Ipv6 Routing Vlan
S3600 Series 8- or 16-Port 10G/Multi-Gigabit Ethernet Smart Switch with 2 SFP+ Ports Your settings are saved. Remove prefix settings for an IPv6 routing VLAN You can remove IPv6 prefix settings that you no longer need for an IPv6 routing VLAN. -
Page 317: Display The Ipv6 Statistics
S3600 Series 8- or 16-Port 10G/Multi-Gigabit Ethernet Smart Switch with 2 SFP+ Ports Display the IPv6 statistics You can display the IPv6 statics, which include ICMPv6 statistics. To display the IPv6 statistics: 1. Connect your computer to the same network as the switch. - Page 318 S3600 Series 8- or 16-Port 10G/Multi-Gigabit Ethernet Smart Switch with 2 SFP+ Ports Table 60. IPv6 statistics information (Continued) Field Description Ip6InNoRoutes The number of input datagrams discarded because no route could be found to transmit them to their destination...
- Page 319 S3600 Series 8- or 16-Port 10G/Multi-Gigabit Ethernet Smart Switch with 2 SFP+ Ports Table 60. IPv6 statistics information (Continued) Field Description Ip6ReasmReqds The number of IPv6 fragments received that needed to be reassembled. This counter is incremented at the interface to which these fragments were addressed, which might not be the input interface for some of the fragments.
- Page 320 S3600 Series 8- or 16-Port 10G/Multi-Gigabit Ethernet Smart Switch with 2 SFP+ Ports Table 60. IPv6 statistics information (Continued) Field Description Icmp6InErrors The number of ICMP messages received that included ICMP-specific errors (bad ICMP checksums, bad length, and so on) Icmp6OutMsgs The number of ICMP messages sent.
-
Page 321: Display And Search The Ipv6 Neighbor Table
S3600 Series 8- or 16-Port 10G/Multi-Gigabit Ethernet Smart Switch with 2 SFP+ Ports Table 60. IPv6 statistics information (Continued) Field Description Icmp6OutGroupMembQueries The number of ICMPv6 Group Membership Query messages sent Icmp6OutGroupMembResponses The number of ICMPv6 Group Membership Response messages sent... - Page 322 S3600 Series 8- or 16-Port 10G/Multi-Gigabit Ethernet Smart Switch with 2 SFP+ Ports The Device Admin Password page displays. If you did not yet activate your warranty, the Register to activate your warranty page displays. For more information, see Register the switch on page 35.
-
Page 323: Add A Static Ipv6 Route
S3600 Series 8- or 16-Port 10G/Multi-Gigabit Ethernet Smart Switch with 2 SFP+ Ports Table 61. IPv6 Advanced Neighbor Table (Continued) Field Description Neighbor State The state of the neighbor cache entry. Following are the states for dynamic entries in the IPv6 neighbor discovery cache: •... - Page 324 S3600 Series 8- or 16-Port 10G/Multi-Gigabit Ethernet Smart Switch with 2 SFP+ Ports • Enter your device admin password. • If you previously managed the switch through the Insight Cloud Portal or Insight app, enter the Insight network password for the last Insight network location.
-
Page 325: Change A Static Ipv6 Route
S3600 Series 8- or 16-Port 10G/Multi-Gigabit Ethernet Smart Switch with 2 SFP+ Ports Change a static IPv6 route You can change an existing static IPv6 route. To change a static IPv6 route: 1. Connect your computer to the same network as the switch. -
Page 326: Display The Ipv6 Route Table
S3600 Series 8- or 16-Port 10G/Multi-Gigabit Ethernet Smart Switch with 2 SFP+ Ports To delete a static IPv6 route: 1. Connect your computer to the same network as the switch. You can use a WiFi or wired connection to connect your computer to the network, or connect directly to a switch that is off-network using an Ethernet cable. - Page 327 S3600 Series 8- or 16-Port 10G/Multi-Gigabit Ethernet Smart Switch with 2 SFP+ Ports If you do not know the IP address of the switch, see Access the switch on-network and connected to the Internet on page 25 or Access the switch off-network and not connected to the Internet on page 32.
-
Page 328: Configure The Ipv6 Route Preference For The Switch
S3600 Series 8- or 16-Port 10G/Multi-Gigabit Ethernet Smart Switch with 2 SFP+ Ports Configure the IPv6 route preference for the switch You can configure the default preference for the switch, which is a value in the range from 1 to 255 and is independent of route metrics. Most routing protocols use a route metric to determine the shortest path known to the protocol, independent of any other protocol. -
Page 329: Routing Vlans
S3600 Series 8- or 16-Port 10G/Multi-Gigabit Ethernet Smart Switch with 2 SFP+ Ports Routing VLANs You can configure some interfaces to support VLANs and other interfaces to support routing. You can also configure the switch to allow traffic on a VLAN to be treated as if the VLAN were a router interface. - Page 330 S3600 Series 8- or 16-Port 10G/Multi-Gigabit Ethernet Smart Switch with 2 SFP+ Ports You can use a WiFi or wired connection to connect your computer to the network, or connect directly to a switch that is off-network using an Ethernet cable.
-
Page 331: Add Routing To An Existing Vlan And Display Routing Vlan Information
S3600 Series 8- or 16-Port 10G/Multi-Gigabit Ethernet Smart Switch with 2 SFP+ Ports • PVID: The VLAN is assigned as the PVID for the selected ports or LAGs. These ports or LAGs display a “P.” • Clear: The configuration is removed from the port or LAG. The port or LAG does not display a “U,”... - Page 332 S3600 Series 8- or 16-Port 10G/Multi-Gigabit Ethernet Smart Switch with 2 SFP+ Ports You can use a WiFi or wired connection to connect your computer to the network, or connect directly to a switch that is off-network using an Ethernet cable.
-
Page 333: Change An Existing Routing Vlan
S3600 Series 8- or 16-Port 10G/Multi-Gigabit Ethernet Smart Switch with 2 SFP+ Ports Table 63. VLAN routing configuration information (Continued) Field Description Subnet Mask The subnet mask that is associated with the routing VLAN Routing Mode Indicates if the routing mode is enabled or disabled for the routing... -
Page 334: Remove The Routing Function From A Vlan
S3600 Series 8- or 16-Port 10G/Multi-Gigabit Ethernet Smart Switch with 2 SFP+ Ports 8. In the IP Address field, change the IPv4 address for the routing VLAN as needed. 9. In the Subnet Mask field, change the subnet mask for the routing VLAN as needed. -
Page 335: Routing Table, Routes, And Route Preferences
S3600 Series 8- or 16-Port 10G/Multi-Gigabit Ethernet Smart Switch with 2 SFP+ Ports Routing table, routes, and route preferences The routing table collects routes from multiple sources and list all routes: static routes, local routes, dynamically added routes, and so on. Static routes are routes that you manually add. -
Page 336: Add A Static Or Default Route
S3600 Series 8- or 16-Port 10G/Multi-Gigabit Ethernet Smart Switch with 2 SFP+ Ports 6. Select the check box for the routing VLAN. 7. Click the Edit button. The Edit Router Discovery Configuration pop-up window displays. 8. From the Advertise Mode menu, select to enable or disable the transmission of router advertisements on the VLAN. - Page 337 S3600 Series 8- or 16-Port 10G/Multi-Gigabit Ethernet Smart Switch with 2 SFP+ Ports You can use a WiFi or wired connection to connect your computer to the network, or connect directly to a switch that is off-network using an Ethernet cable.
-
Page 338: Display The Routes
S3600 Series 8- or 16-Port 10G/Multi-Gigabit Ethernet Smart Switch with 2 SFP+ Ports You can specify the preference value (sometimes called administrative distance) of an individual static route. Among routes to the same destination, the route with the lowest preference value is the route entered into the forwarding database. By specifying the preference of a static route, you can control if a static route is more preferred or less preferred than routes from dynamic routing protocols. -
Page 339: Change A Route
S3600 Series 8- or 16-Port 10G/Multi-Gigabit Ethernet Smart Switch with 2 SFP+ Ports 4. Click the Login button. The Dashboard page displays. 5. Select Routing > Routing Table. The Routing Table page displays. 6. To refresh the page, click the Refresh button. -
Page 340: Delete A Route
S3600 Series 8- or 16-Port 10G/Multi-Gigabit Ethernet Smart Switch with 2 SFP+ Ports 3. Enter one of the following passwords: • Enter your device admin password. • If you previously managed the switch through the Insight Cloud Portal or Insight app, enter the Insight network password for the last Insight network location. -
Page 341: Address Resolution Protocol
S3600 Series 8- or 16-Port 10G/Multi-Gigabit Ethernet Smart Switch with 2 SFP+ Ports • Enter your device admin password. • If you previously managed the switch through the Insight Cloud Portal or Insight app, enter the Insight network password for the last Insight network location. -
Page 342: Display The Arp Entries In The Arp Cache
S3600 Series 8- or 16-Port 10G/Multi-Gigabit Ethernet Smart Switch with 2 SFP+ Ports address still exists. If an entry was identified as a sender of an ARP packet, the entry can be removed from the ARP cache. You can configure an age-out interval that determines how long an entry that is not updated remains in the ARP cache. -
Page 343: Add A Static Entry To The Arp Table
S3600 Series 8- or 16-Port 10G/Multi-Gigabit Ethernet Smart Switch with 2 SFP+ Ports Table 65. ARP cache information Field Description Management VLAN ARP Cache IP Address The IP address associated with the system’s MAC address. This must be the IP address of a device on a subnet attached to one of the switch’s existing routing interfaces. -
Page 344: Change A Static Entry In The Arp Table
S3600 Series 8- or 16-Port 10G/Multi-Gigabit Ethernet Smart Switch with 2 SFP+ Ports If you did not yet activate your warranty, the Register to activate your warranty page displays. For more information, see Register the switch on page 35. 3. Enter one of the following passwords: •... -
Page 345: Delete A Static Arp Entry
S3600 Series 8- or 16-Port 10G/Multi-Gigabit Ethernet Smart Switch with 2 SFP+ Ports If you do not know the IP address of the switch, see Access the switch on-network and connected to the Internet on page 25 or Access the switch off-network and not connected to the Internet on page 32. -
Page 346: Configure The Global Arp Table Settings
S3600 Series 8- or 16-Port 10G/Multi-Gigabit Ethernet Smart Switch with 2 SFP+ Ports If you do not know the IP address of the switch, see Access the switch on-network and connected to the Internet on page 25 or Access the switch off-network and not connected to the Internet on page 32. -
Page 347: Remove Entries From The Arp Table
S3600 Series 8- or 16-Port 10G/Multi-Gigabit Ethernet Smart Switch with 2 SFP+ Ports • Enter your device admin password. • If you previously managed the switch through the Insight Cloud Portal or Insight app, enter the Insight network password for the last Insight network location. - Page 348 S3600 Series 8- or 16-Port 10G/Multi-Gigabit Ethernet Smart Switch with 2 SFP+ Ports You can use a WiFi or wired connection to connect your computer to the network, or connect directly to a switch that is off-network using an Ethernet cable.
-
Page 349: Chapter 7 Configure Quality Of Service
Configure Quality of Service This chapter covers the following topics: • Quality of Service concepts • Class of Service • Differentiated Services... -
Page 350: Quality Of Service Concepts
S3600 Series 8- or 16-Port 10G/Multi-Gigabit Ethernet Smart Switch with 2 SFP+ Ports Quality of Service concepts In a switch, each physical port consists of one or more queues for transmitting packets on the attached network. Multiple queues per port are often provided to give preference to certain packets over others based on user-defined criteria. -
Page 351: Configure The Cos Trust Mode Settings Globally
S3600 Series 8- or 16-Port 10G/Multi-Gigabit Ethernet Smart Switch with 2 SFP+ Ports based on the existing port default priority as mapped to a traffic class by the current 802.1p mapping table. Alternatively, when a port is configured as untrusted, it does not trust any incoming packet priority designation and uses the port default priority value instead. -
Page 352: Configure The Cos Trust Mode And Shaping Rate For An Interface
S3600 Series 8- or 16-Port 10G/Multi-Gigabit Ethernet Smart Switch with 2 SFP+ Ports • Untrusted: Do not trust any CoS packet marking at ingress. • 802.1p: The eight priority tags that are specified in IEEE 802.1p are p0 to p7. -
Page 353: Configure Cos Queue Settings For An Interface
S3600 Series 8- or 16-Port 10G/Multi-Gigabit Ethernet Smart Switch with 2 SFP+ Ports 6. From the Filter By menu, select to display ports only (Ports), LAGs only (LAG), or both ports and LAGs (All). 7. Select one or more interfaces by taking one of the following actions: •... - Page 354 S3600 Series 8- or 16-Port 10G/Multi-Gigabit Ethernet Smart Switch with 2 SFP+ Ports To configure the CoS queue settings for an interface: 1. Connect your computer to the same network as the switch. You can use a WiFi or wired connection to connect your computer to the network, or connect directly to a switch that is off-network using an Ethernet cable.
-
Page 355: Map 802.1P Priorities To Queues
S3600 Series 8- or 16-Port 10G/Multi-Gigabit Ethernet Smart Switch with 2 SFP+ Ports • To configure a single interface, select the check box associated with the interface, or type the interface number (for example, xg5) in the Search field and click the Go button. -
Page 356: Map Dscp Values To Queues
S3600 Series 8- or 16-Port 10G/Multi-Gigabit Ethernet Smart Switch with 2 SFP+ Ports To map 802.1p priorities to queues: 1. Connect your computer to the same network as the switch. You can use a WiFi or wired connection to connect your computer to the network, or connect directly to a switch that is off-network using an Ethernet cable. - Page 357 S3600 Series 8- or 16-Port 10G/Multi-Gigabit Ethernet Smart Switch with 2 SFP+ Ports You can view or change which internal traffic classes are mapped to the DSCP values in Ethernet frames that the switch receives. The mapping allows the switch to group various traffic types (for example, data or voice) based on their latency requirements and give preference to time-sensitive traffic.
-
Page 358: Differentiated Services
S3600 Series 8- or 16-Port 10G/Multi-Gigabit Ethernet Smart Switch with 2 SFP+ Ports • Expedited Forwarding (EF) PHB: These values are used to prioritize traffic for real-time applications. In many situations, if the network exceeded traffic and you need some bandwidth guaranteed for an application, the EF traffic must receive this rate independently of the intensity of any other traffic attempting to transit the node. -
Page 359: Configure The Diffserv Mode And Display The Entries In The Diffserv Private Mib Tables
S3600 Series 8- or 16-Port 10G/Multi-Gigabit Ethernet Smart Switch with 2 SFP+ Ports 1. Class: Create a class and define class criteria (see Add and configure a DiffServ class on page 361 or Add and configure an IPv6 DiffServ class on page 366). -
Page 360: Configure A Diffserv Class
S3600 Series 8- or 16-Port 10G/Multi-Gigabit Ethernet Smart Switch with 2 SFP+ Ports • Enter your device admin password. • If you previously managed the switch through the Insight Cloud Portal or Insight app, enter the Insight network password for the last Insight network location. -
Page 361: Add And Configure A Diffserv Class
S3600 Series 8- or 16-Port 10G/Multi-Gigabit Ethernet Smart Switch with 2 SFP+ Ports Add and configure a DiffServ class You can add a new DiffServ class and define the criteria that must be associated with the DiffServ class. To add and configure a DiffServ class: 1. - Page 362 S3600 Series 8- or 16-Port 10G/Multi-Gigabit Ethernet Smart Switch with 2 SFP+ Ports 8. Click the Save button. Your settings are saved and the new class is added. 9. After creating the class, click the class name, which is a hyperlink.
- Page 363 S3600 Series 8- or 16-Port 10G/Multi-Gigabit Ethernet Smart Switch with 2 SFP+ Ports ○ Address: The destination MAC address that must match. The destination MAC address is specified as six two-digit hexadecimal numbers separated by colons. ○ Mask: The MAC mask, which specifies the bits in the destination MAC address to compare against an Ethernet frame.
-
Page 364: Change The Criteria For An Existing Diffserv Class
S3600 Series 8- or 16-Port 10G/Multi-Gigabit Ethernet Smart Switch with 2 SFP+ Ports • Precedence Value: Requires the packet’s IP precedence value to match the value that you select from the menu below the Class Configuration menu. You can select a value from 0 to 7. -
Page 365: Remove A Diffserv Class
S3600 Series 8- or 16-Port 10G/Multi-Gigabit Ethernet Smart Switch with 2 SFP+ Ports If you did not yet activate your warranty, the Register to activate your warranty page displays. For more information, see Register the switch on page 35. 3. Enter one of the following passwords: •... -
Page 366: Configure An Ipv6 Diffserv Class
S3600 Series 8- or 16-Port 10G/Multi-Gigabit Ethernet Smart Switch with 2 SFP+ Ports • Enter your device admin password. • If you previously managed the switch through the Insight Cloud Portal or Insight app, enter the Insight network password for the last Insight network location. - Page 367 S3600 Series 8- or 16-Port 10G/Multi-Gigabit Ethernet Smart Switch with 2 SFP+ Ports If you do not know the IP address of the switch, see Access the switch on-network and connected to the Internet on page 25 or Access the switch off-network and not connected to the Internet on page 32.
- Page 368 S3600 Series 8- or 16-Port 10G/Multi-Gigabit Ethernet Smart Switch with 2 SFP+ Ports • Match Every: Adds a match condition that considers all packets to belong to the class. In the field below the Class Configuration menu, the automatic selection for this option is Any.
-
Page 369: Change The Criteria For An Existing Ipv6 Diffserv Class
S3600 Series 8- or 16-Port 10G/Multi-Gigabit Ethernet Smart Switch with 2 SFP+ Ports 11. To add more criteria to the IPv6 DiffServ class, repeat the previous step. You can add multiple criteria to a single IPv6 DiffServ class. 12. Click the Apply button. -
Page 370: Remove An Ipv6 Diffserv Class
S3600 Series 8- or 16-Port 10G/Multi-Gigabit Ethernet Smart Switch with 2 SFP+ Ports 6. Click the class name, which is a hyperlink. The page on which you can change the class configuration displays. 7. In the IPv6 DiffServ Class Configuration section, change the class configuration as needed. -
Page 371: Configure A Diffserv Policy
S3600 Series 8- or 16-Port 10G/Multi-Gigabit Ethernet Smart Switch with 2 SFP+ Ports Configure a DiffServ policy A DiffServ policy defines the action that must occur when packets match the criteria that are configured in one ore more classes. Add and configure a DiffServ policy You can add a new DiffServ policy, attach a DiffServ class or IPv6 DiffServ class to the policy, and define the attributes that must be associated the policy. - Page 372 S3600 Series 8- or 16-Port 10G/Multi-Gigabit Ethernet Smart Switch with 2 SFP+ Ports 8. From the Member Class menu, select an existing DiffServ class or IPv6 DiffServ class that must be associated with the new policy. 9. Click the Save button.
- Page 373 S3600 Series 8- or 16-Port 10G/Multi-Gigabit Ethernet Smart Switch with 2 SFP+ Ports ○ A color-aware policy distinguishes between an action for packets that confirm to the policy, an action for packets that exceed the policy, and an action for packets that violate the policy.
-
Page 374: Change The Attributes For An Existing Diffserv Policy
S3600 Series 8- or 16-Port 10G/Multi-Gigabit Ethernet Smart Switch with 2 SFP+ Ports Table 70. DiffServ policy configuration, policy attributes Field Description Policy Name The name of the DiffServ policy Policy Type The type of the policy, which is always In for inbound... -
Page 375: Remove A Diffserv Policy
S3600 Series 8- or 16-Port 10G/Multi-Gigabit Ethernet Smart Switch with 2 SFP+ Ports For more information about the settings, see Add and configure a DiffServ policy on page 371. 8. Click the Apply button. Your settings are saved. Remove a DiffServ policy You can remove a DiffServ policy that you no longer need. -
Page 376: Attach A Diffserv Policy To An Interface
S3600 Series 8- or 16-Port 10G/Multi-Gigabit Ethernet Smart Switch with 2 SFP+ Ports Attach a DiffServ policy to an interface By attaching a DiffServ policy to an interface, you activate the policy on the interface, and traffic that enters through the interface is subject to the policy. You can attach only one policy to an interface. -
Page 377: Remove A Diffserv Policy From An Interface
S3600 Series 8- or 16-Port 10G/Multi-Gigabit Ethernet Smart Switch with 2 SFP+ Ports 8. Click the Edit button. The Edit Service Interface Configuration pop-up window displays. 9. From the Policy In Name menu, select the name of a policy. 10. Click the Save button. -
Page 378: Display Diffserv Service Statistics
S3600 Series 8- or 16-Port 10G/Multi-Gigabit Ethernet Smart Switch with 2 SFP+ Ports For information about the credentials, see Credentials for the device UI on page 34. 4. Click the Login button. The Dashboard page displays. 5. Select QoS > DiffServ > Service Configuration. - Page 379 S3600 Series 8- or 16-Port 10G/Multi-Gigabit Ethernet Smart Switch with 2 SFP+ Ports For information about the credentials, see Credentials for the device UI on page 34. 4. Click the Login button. The Dashboard page displays. 5. Select QoS > DiffServ > Service Statistics.
-
Page 380: Chapter 8 Manage Switch Security
Manage Switch Security The chapter covers the following topics: • Change the device admin password • RADIUS servers • TACACS+ servers • Authentication lists • Management access profiles and rules • Port authentication • MAC filters for traffic control • Storm control •... -
Page 381: Change The Device Admin Password
S3600 Series 8- or 16-Port 10G/Multi-Gigabit Ethernet Smart Switch with 2 SFP+ Ports Change the device admin password This device admin password is the password that you use to log in to the device UI of the switch. The password must be 8 to 20 characters in length and must contain at least one uppercase letter, one lowercase letter, and one number. -
Page 382: Radius Servers
S3600 Series 8- or 16-Port 10G/Multi-Gigabit Ethernet Smart Switch with 2 SFP+ Ports RADIUS servers RADIUS servers provide additional security for networks. The RADIUS server maintains a user database, which contains per-user authentication information. The switch passes information to the configured RADIUS server, which can authenticate a user name and password before authorizing use of the network. - Page 383 S3600 Series 8- or 16-Port 10G/Multi-Gigabit Ethernet Smart Switch with 2 SFP+ Ports If you did not yet activate your warranty, the Register to activate your warranty page displays. For more information, see Register the switch on page 35. 3. Enter one of the following passwords: •...
-
Page 384: Radius Authentication Servers
S3600 Series 8- or 16-Port 10G/Multi-Gigabit Ethernet Smart Switch with 2 SFP+ Ports RADIUS authentication servers You can configure and display settings for up to three RADIUS authentication servers in the network. Add a RADIUS authentication server You can add up to three RADIUS authentication servers. One server can be the primary server;... -
Page 385: Change The Settings For A Radius Authentication Server
S3600 Series 8- or 16-Port 10G/Multi-Gigabit Ethernet Smart Switch with 2 SFP+ Ports 9. In the Authentication Port field, type the UDP port number of the RADIUS authentication server. The range is from 1 to 65535. 10. From the Secret Configured menu, select if you want to enable or disable... -
Page 386: Remove A Radius Authentication Server From The Switch
S3600 Series 8- or 16-Port 10G/Multi-Gigabit Ethernet Smart Switch with 2 SFP+ Ports If you do not know the IP address of the switch, see Access the switch on-network and connected to the Internet on page 25 or Access the switch off-network and not connected to the Internet on page 32. -
Page 387: Display The Radius Authentication Server Statistics
S3600 Series 8- or 16-Port 10G/Multi-Gigabit Ethernet Smart Switch with 2 SFP+ Ports If you do not know the IP address of the switch, see Access the switch on-network and connected to the Internet on page 25 or Access the switch off-network and not connected to the Internet on page 32. - Page 388 S3600 Series 8- or 16-Port 10G/Multi-Gigabit Ethernet Smart Switch with 2 SFP+ Ports • Enter your device admin password. • If you previously managed the switch through the Insight Cloud Portal or Insight app, enter the Insight network password for the last Insight network location.
-
Page 389: Radius Accounting Server
S3600 Series 8- or 16-Port 10G/Multi-Gigabit Ethernet Smart Switch with 2 SFP+ Ports RADIUS accounting server You can configure and display the settings for a single RADIUS accounting server on the network. Configure a RADIUS accounting server You can configure a single dedicated RADIUS accounting server for the switch. -
Page 390: Display Or Clear The Radius Accounting Server Statistics
S3600 Series 8- or 16-Port 10G/Multi-Gigabit Ethernet Smart Switch with 2 SFP+ Ports 9. From the Secret Configured menu, select if you want to enable or disable authentication and encryption for communication between the switch and the RADIUS server: • No: Authentication and encryption are disabled. A secret (password) is not required. - Page 391 S3600 Series 8- or 16-Port 10G/Multi-Gigabit Ethernet Smart Switch with 2 SFP+ Ports For information about the credentials, see Credentials for the device UI on page 34. 4. Click the Login button. The Dashboard page displays. 5. Select Security > Management Security > RADIUS > Accounting Server Configuration.
-
Page 392: Tacacs+ Servers
S3600 Series 8- or 16-Port 10G/Multi-Gigabit Ethernet Smart Switch with 2 SFP+ Ports TACACS+ servers Terminal Access Controller Access Control System plus (TACACS+) provides a centralized user management system, while still retaining consistency with RADIUS and other authentication processes. TACACS+ provides the following services: •... -
Page 393: Add A Tacacs+ Server
S3600 Series 8- or 16-Port 10G/Multi-Gigabit Ethernet Smart Switch with 2 SFP+ Ports 5. Select Security > Management Security > TACACS+. The TACACS+ page displays. 6. In the Key String field, type the authentication and encryption key for TACACS+ communications between the switch and a TACACS+ server. -
Page 394: Change The Settings For A Tacacs+ Server
S3600 Series 8- or 16-Port 10G/Multi-Gigabit Ethernet Smart Switch with 2 SFP+ Ports The TACACS+ page displays. 6. Click the Add New button. The Add TACACS+ Server Configuration pop-up window displays. 7. In the TACACS+ Server field, type the IP address of the TACACS+ server. -
Page 395: Remove A Tacacs+ Server From The Switch
S3600 Series 8- or 16-Port 10G/Multi-Gigabit Ethernet Smart Switch with 2 SFP+ Ports If you did not yet activate your warranty, the Register to activate your warranty page displays. For more information, see Register the switch on page 35. 3. Enter one of the following passwords: •... -
Page 396: Authentication Lists
S3600 Series 8- or 16-Port 10G/Multi-Gigabit Ethernet Smart Switch with 2 SFP+ Ports 3. Enter one of the following passwords: • Enter your device admin password. • If you previously managed the switch through the Insight Cloud Portal or Insight app, enter the Insight network password for the last Insight network location. - Page 397 S3600 Series 8- or 16-Port 10G/Multi-Gigabit Ethernet Smart Switch with 2 SFP+ Ports If you do not know the IP address of the switch, see Access the switch on-network and connected to the Internet on page 25 or Access the switch off-network and not connected to the Internet on page 32.
-
Page 398: Configure The Dot1X Authentication List
S3600 Series 8- or 16-Port 10G/Multi-Gigabit Ethernet Smart Switch with 2 SFP+ Ports method that you select from the 3 menu is tried after the authentication method that you select from the 2 menu, and so on. If you select a method that does not time out, or you select None, the next method is not tried. -
Page 399: Management Access Profiles And Rules
S3600 Series 8- or 16-Port 10G/Multi-Gigabit Ethernet Smart Switch with 2 SFP+ Ports 7. To enable the Dot1x list, select the dotxList check box. The menu options become available. 8. Select the authentication method that must be used: • None: The user is allowed access without authentication. -
Page 400: Add A Rule To The Access Profile
S3600 Series 8- or 16-Port 10G/Multi-Gigabit Ethernet Smart Switch with 2 SFP+ Ports If you did not yet activate your warranty, the Register to activate your warranty page displays. For more information, see Register the switch on page 35. 3. Enter one of the following passwords: •... - Page 401 S3600 Series 8- or 16-Port 10G/Multi-Gigabit Ethernet Smart Switch with 2 SFP+ Ports If you do not know the IP address of the switch, see Access the switch on-network and connected to the Internet on page 25 or Access the switch off-network and not connected to the Internet on page 32.
-
Page 402: Activate The Access Profile
S3600 Series 8- or 16-Port 10G/Multi-Gigabit Ethernet Smart Switch with 2 SFP+ Ports is also configured with priority 2 to deny, then access is permitted if the profile is active, and the second rule is ignored. 12. Click the Save button. -
Page 403: Display The Access Profile Rules And The Number Of Filtered Packets
S3600 Series 8- or 16-Port 10G/Multi-Gigabit Ethernet Smart Switch with 2 SFP+ Ports CAUTION: If you configure a security access profile incorrectly and you activate the access profile, you might no longer be able to access the switch’s device UI. If that situation occurs, you must reset the switch to factory default settings (see Reset the switch to factory default settings on page 533). -
Page 404: Change A Rule For The Access Profile
S3600 Series 8- or 16-Port 10G/Multi-Gigabit Ethernet Smart Switch with 2 SFP+ Ports The following table describes the view-only fields on the page. Table 76. Access rule configuration information Field Description Rule Type The action performed when the rules match Service Type The service type selected. -
Page 405: Deactivate The Access Profile
S3600 Series 8- or 16-Port 10G/Multi-Gigabit Ethernet Smart Switch with 2 SFP+ Ports 7. Click the Edit button. The Edit Access Rule Configuration pop-up window displays. 8. Change the settings for the rule as needed. For more information about the settings, see Add a rule to the access profile on page 400. -
Page 406: Remove A Rule From The Access Profile
S3600 Series 8- or 16-Port 10G/Multi-Gigabit Ethernet Smart Switch with 2 SFP+ Ports When the access profile is set to be disabled, the toggle is gray and positioned to the left. 7. Click the Apply button. Your settings are saved and the access profile is now deactivated. -
Page 407: Remove The Access Profile
S3600 Series 8- or 16-Port 10G/Multi-Gigabit Ethernet Smart Switch with 2 SFP+ Ports Remove the access profile You can remove an access profile that you no longer need. Before you can remove the access profile, you must deactivate it (see Deactivate the access profile on page 405). -
Page 408: Configure The Global 802.1X Authentication Settings
S3600 Series 8- or 16-Port 10G/Multi-Gigabit Ethernet Smart Switch with 2 SFP+ Ports supplicant is allowed to attempt authentication on a port in this mode. Ports in this mode are under bidirectional control. 802.1X is the default authentication mode. 802.1X is also referred to as Dot1x. - Page 409 S3600 Series 8- or 16-Port 10G/Multi-Gigabit Ethernet Smart Switch with 2 SFP+ Ports If you did not yet activate your warranty, the Register to activate your warranty page displays. For more information, see Register the switch on page 35. 3. Enter one of the following passwords: •...
-
Page 410: Configure The 802.1X Authentication Settings For A Port
S3600 Series 8- or 16-Port 10G/Multi-Gigabit Ethernet Smart Switch with 2 SFP+ Ports VLAN creation is enabled on the switch and the RADIUS-assigned VLAN does not exist, the assigned VLAN is dynamically created. This means that the client device (supplicant) can connect from any port and is assigned to the appropriate VLAN. - Page 411 S3600 Series 8- or 16-Port 10G/Multi-Gigabit Ethernet Smart Switch with 2 SFP+ Ports 4. Click the Login button. The Dashboard page displays. 5. Select Security > Port Authentication > Port Authentication. The Port Authentication page displays. 6. From the Filter By menu, select to display ports only (Ports), LAGs only (LAG), or both ports and LAGs (All).
- Page 412 S3600 Series 8- or 16-Port 10G/Multi-Gigabit Ethernet Smart Switch with 2 SFP+ Ports • EAP-MD5: The switch uses Extensible Authentication Protocol with MD5 hashing (EAP-MD5) to authenticate 802.1x-unaware client devices. This is the default setting. • PAP: The switch uses Password Authentication Protocol (PAP) to authenticate 802.1x-unaware client devices.
-
Page 413: Initialize 802.1X On A Port
S3600 Series 8- or 16-Port 10G/Multi-Gigabit Ethernet Smart Switch with 2 SFP+ Ports The EAP retransmission is the period after which an EAPoL EAP Request/Identify frame is resent to the supplicant. Type a period from 0 to 65535 seconds. The default is 30 seconds. - Page 414 S3600 Series 8- or 16-Port 10G/Multi-Gigabit Ethernet Smart Switch with 2 SFP+ Ports You can initialize a port only if the control mode setting is Auto. This is the default setting, in which port access is determined by the outcome of the authentication exchanges between the supplicant, authenticator, and the authentication server.
-
Page 415: Restart 802.1X Authentication On A Port
S3600 Series 8- or 16-Port 10G/Multi-Gigabit Ethernet Smart Switch with 2 SFP+ Ports 802.1X is reset to the initialization state. Traffic sent to and from the port is blocked during the authentication process. When you click this button, the action is immediate. -
Page 416: Display The Port Summary
S3600 Series 8- or 16-Port 10G/Multi-Gigabit Ethernet Smart Switch with 2 SFP+ Ports • To configure a single interface, select the check box associated with the interface, or type the interface number (for example, xg5) in the Search field and click the Go button. -
Page 417: Display The Client Summary
S3600 Series 8- or 16-Port 10G/Multi-Gigabit Ethernet Smart Switch with 2 SFP+ Ports The Port Summary page displays. 6. To refresh the page, click the Refresh button. The following table describes the view-only fields on the page. Table 78. Port summary information... - Page 418 S3600 Series 8- or 16-Port 10G/Multi-Gigabit Ethernet Smart Switch with 2 SFP+ Ports To display the client summary: 1. Connect your computer to the same network as the switch. You can use a WiFi or wired connection to connect your computer to the network, or connect directly to a switch that is off-network using an Ethernet cable.
-
Page 419: Mac Filters For Traffic Control
S3600 Series 8- or 16-Port 10G/Multi-Gigabit Ethernet Smart Switch with 2 SFP+ Ports Table 79. Client summary information (Continued) Field Description VLAN Assigned The type of VLAN that the authenticator assigned to the supplicant: • Default Assigned VLAN: The client was authenticated on the port default VLAN and the authentication server was not a RADIUS server. - Page 420 S3600 Series 8- or 16-Port 10G/Multi-Gigabit Ethernet Smart Switch with 2 SFP+ Ports You can use a WiFi or wired connection to connect your computer to the network, or connect directly to a switch that is off-network using an Ethernet cable.
-
Page 421: Delete A Mac Filter
S3600 Series 8- or 16-Port 10G/Multi-Gigabit Ethernet Smart Switch with 2 SFP+ Ports 10. In the Destination Port Members section, in the Port and LAG tables, select the ports and LAGs that must be included in the outbound filter. A packet with the MAC address and VLAN ID that you specify can be transmitted only from a port that is part of the outbound filter. -
Page 422: Display The Mac Filter Summary
S3600 Series 8- or 16-Port 10G/Multi-Gigabit Ethernet Smart Switch with 2 SFP+ Ports 6. From the MAC Filter menu, select the MAC filter. 7. Click the Delete button. Your settings are saved and the MAC filter is removed. Display the MAC filter summary You can display the MAC filters that are configured on the switch. -
Page 423: Storm Control
S3600 Series 8- or 16-Port 10G/Multi-Gigabit Ethernet Smart Switch with 2 SFP+ Ports Table 80. MAC filter summary information Field Description MAC Address The MAC address of the filter in the format XX:XX:XX:XX:XX:XX VLAN ID The VLAN ID used with the MAC address... - Page 424 S3600 Series 8- or 16-Port 10G/Multi-Gigabit Ethernet Smart Switch with 2 SFP+ Ports • Enter your device admin password. • If you previously managed the switch through the Insight Cloud Portal or Insight app, enter the Insight network password for the last Insight network location.
-
Page 425: Configure The Storm Control Settings For A Port
S3600 Series 8- or 16-Port 10G/Multi-Gigabit Ethernet Smart Switch with 2 SFP+ Ports • Rate Limit: A rate limit is applied to traffic on the port. • Trap: An SNMP trap is sent. 10. Click the Apply button. Your settings are saved. - Page 426 S3600 Series 8- or 16-Port 10G/Multi-Gigabit Ethernet Smart Switch with 2 SFP+ Ports information about the global storm control settings, see Configure the global storm control settings on page 423. 6. Select one or more ports (interfaces) by taking one of the following actions •...
-
Page 427: Port Security
S3600 Series 8- or 16-Port 10G/Multi-Gigabit Ethernet Smart Switch with 2 SFP+ Ports Port security Port security lets you lock one or more ports on the switch. When a port is locked, the port can only forward packets if the total number of dynamically learned MAC addresses and the total number of statically added MAC addresses are not exceeded. -
Page 428: Configure A Port Security Interface
S3600 Series 8- or 16-Port 10G/Multi-Gigabit Ethernet Smart Switch with 2 SFP+ Ports • The toggle is gray and positioned to the left: Port security is globally disabled on the switch. This is the default setting. • The toggle is purple and positioned to the right: Port security is globally enabled on the switch. - Page 429 S3600 Series 8- or 16-Port 10G/Multi-Gigabit Ethernet Smart Switch with 2 SFP+ Ports If you did not yet activate your warranty, the Register to activate your warranty page displays. For more information, see Register the switch on page 35. 3. Enter one of the following passwords: •...
-
Page 430: Display Learned Mac Addresses And Convert Them To Static Addresses
S3600 Series 8- or 16-Port 10G/Multi-Gigabit Ethernet Smart Switch with 2 SFP+ Ports • No: The port is not shut down if a violation occurs. This is the default setting. • Yes: The port is shut down if a violation occurs. -
Page 431: Display Port Security Violations
S3600 Series 8- or 16-Port 10G/Multi-Gigabit Ethernet Smart Switch with 2 SFP+ Ports 4. Click the Login button. The Dashboard page displays. 5. Select Security > Traffic Control > Port Security > Security MAC Address. The Security MAC Address page displays. -
Page 432: Loop Protection
S3600 Series 8- or 16-Port 10G/Multi-Gigabit Ethernet Smart Switch with 2 SFP+ Ports If you do not know the IP address of the switch, see Access the switch on-network and connected to the Internet on page 25 or Access the switch off-network and not connected to the Internet on page 32. - Page 433 S3600 Series 8- or 16-Port 10G/Multi-Gigabit Ethernet Smart Switch with 2 SFP+ Ports receives a packet with the previously mentioned multicast destination address, the source MAC address in the packet is compared with the MAC address of the switch. If the MAC address does not match, the packet is forwarded to all ports that are members of the same VLAN, just like any other multicast packet.
-
Page 434: Configure The Global Loop Protection Settings
S3600 Series 8- or 16-Port 10G/Multi-Gigabit Ethernet Smart Switch with 2 SFP+ Ports Configure the global loop protection settings Before you can configure Layer 2 (L2) loop protection for individual ports (see Configure the loop protection settings for interfaces and display the loop protection state on page 435), you must globally enable and configure loop protection. -
Page 435: Configure The Loop Protection Settings For Interfaces And Display The Loop Protection State
S3600 Series 8- or 16-Port 10G/Multi-Gigabit Ethernet Smart Switch with 2 SFP+ Ports 8. From the Max PDU Receive menu, select the maximum number of packets that a port can receive before an action is taken. You can select from 1 to 10 packets. The default setting is 1 packet. The selected number of packets applies to all ports for which you enable loop protection. - Page 436 S3600 Series 8- or 16-Port 10G/Multi-Gigabit Ethernet Smart Switch with 2 SFP+ Ports 4. Click the Login button. The Dashboard page displays. 5. Select Security > L2 Loop Protection. The L2 Loop Protection page displays. 6. From the Filter By menu, select to display ports only (Ports), LAGs only (LAG), or both ports and LAGs (All).
-
Page 437: Denial Of Service
S3600 Series 8- or 16-Port 10G/Multi-Gigabit Ethernet Smart Switch with 2 SFP+ Ports Table 83. Loop protection interface configuration information (Continued) Field Description Loop Count The number of packets that were received on the port after the loop was detected... -
Page 438: Configure Individual Denial Of Service Attack Options
S3600 Series 8- or 16-Port 10G/Multi-Gigabit Ethernet Smart Switch with 2 SFP+ Ports For information about the credentials, see Credentials for the device UI on page 34. 4. Click the Login button. The Dashboard page displays. 5. Select Security > Denial of Service. - Page 439 S3600 Series 8- or 16-Port 10G/Multi-Gigabit Ethernet Smart Switch with 2 SFP+ Ports • Enter your device admin password. • If you previously managed the switch through the Insight Cloud Portal or Insight app, enter the Insight network password for the last Insight network location.
- Page 440 S3600 Series 8- or 16-Port 10G/Multi-Gigabit Ethernet Smart Switch with 2 SFP+ Ports • Denial of Service ICMPv4: Enabling ICMPv4 DoS prevention causes the switch to drop ICMPv4 packets with a type set to ECHO_REQ (ping) and a size greater than the ICMPv4 packet size that you configured.
-
Page 441: Chapter 9 Configure Access Control Lists
Configure Access Control Lists This chapter covers the following topics: • About access control lists • ACL Wizard • MAC ACLs • MAC ACL rules • MAC ACL bindings • IPv4 ACLs • Standard IPv4 ACL rules • Extended IPv4 ACL rules •... -
Page 442: About Access Control Lists
S3600 Series 8- or 16-Port 10G/Multi-Gigabit Ethernet Smart Switch with 2 SFP+ Ports About access control lists Access control lists (ACLs) ensure that only authorized users can access specific resources while blocking any unwarranted attempts to reach network resources. ACLs are used to provide traffic flow control, restrict contents, decide which types of traffic are forwarded or blocked, and provide security for the network. - Page 443 S3600 Series 8- or 16-Port 10G/Multi-Gigabit Ethernet Smart Switch with 2 SFP+ Ports You can use a WiFi or wired connection to connect your computer to the network, or connect directly to a switch that is off-network using an Ethernet cable.
- Page 444 S3600 Series 8- or 16-Port 10G/Multi-Gigabit Ethernet Smart Switch with 2 SFP+ Ports • ACL Based on Source IPv4 L4 Port: Creates an ACL based on the source IPv4 Layer 4 port number. • ACL Based on Destination IPv6 L4 Port: Creates an ACL based on the destination IPv6 Layer 4 port number.
- Page 445 S3600 Series 8- or 16-Port 10G/Multi-Gigabit Ethernet Smart Switch with 2 SFP+ Ports ACL Based On Fields Destination MAC • Destination MAC: Type the destination MAC address to compare against an Ethernet frame. The format is xx:xx:xx:xx:xx:xx. The BPDU keyword might be specified using a destination MAC address of 01:80:C2:xx:xx:xx.
-
Page 446: Change An Acl Rule That You Created With The Acl Wizard
S3600 Series 8- or 16-Port 10G/Multi-Gigabit Ethernet Smart Switch with 2 SFP+ Ports As an example, the following steps describe how you can create an ACL based on the destination MAC address: a. In the Destination MAC field, type the destination MAC address that must be compared against the information in an Ethernet frame. - Page 447 S3600 Series 8- or 16-Port 10G/Multi-Gigabit Ethernet Smart Switch with 2 SFP+ Ports NOTE: An ACL and associated rule display only while you remain on the ACL Wizard page after you created the ACL. If you go to another page and then return to the ACL Wizard page, the ACL and associated rule no longer display, and you cannot change the rule on the ACL Wizard page.
-
Page 448: Remove An Acl That You Created With The Acl Wizard
S3600 Series 8- or 16-Port 10G/Multi-Gigabit Ethernet Smart Switch with 2 SFP+ Ports c. Change the setting as needed. For more information, see Use the ACL Wizard to create a simple ACL on page 442. d. Click the Save button. -
Page 449: Mac Acls
S3600 Series 8- or 16-Port 10G/Multi-Gigabit Ethernet Smart Switch with 2 SFP+ Ports If you do not know the IP address of the switch, see Access the switch on-network and connected to the Internet on page 25 or Access the switch off-network and not connected to the Internet on page 32. -
Page 450: Add A Mac Acl
S3600 Series 8- or 16-Port 10G/Multi-Gigabit Ethernet Smart Switch with 2 SFP+ Ports Add a MAC ACL Configuring a MAC ACL is a two-step process: First, you add the MAC ACL. Then, you add rules to the MAC ACL. To add a MAC ACL: 1. -
Page 451: Change The Name Of A Mac Acl
S3600 Series 8- or 16-Port 10G/Multi-Gigabit Ethernet Smart Switch with 2 SFP+ Ports The MAC ACL is added. You can now add a rule for the MAC ACL (see Add a rule for a MAC ACL on page 453). Change the name of a MAC ACL You can change the name of an existing MAC ACL. -
Page 452: Remove A Mac Acl
S3600 Series 8- or 16-Port 10G/Multi-Gigabit Ethernet Smart Switch with 2 SFP+ Ports Your settings are saved. Remove a MAC ACL You can remove a MAC ACL that you no longer need. To remove a MAC ACL: 1. Connect your computer to the same network as the switch. -
Page 453: Mac Acl Rules
S3600 Series 8- or 16-Port 10G/Multi-Gigabit Ethernet Smart Switch with 2 SFP+ Ports MAC ACL rules You can define rules for MAC-based ACLs. The access list definition includes rules that specify whether traffic matching the criteria is forwarded normally or discarded. - Page 454 S3600 Series 8- or 16-Port 10G/Multi-Gigabit Ethernet Smart Switch with 2 SFP+ Ports The MAC ACL Configuration section displays the total number of MAC ACLs, IPv4 ACLs, and IPv6 ACLs that are configured on the switch and the maximum number of ACLs that can be configured.
- Page 455 S3600 Series 8- or 16-Port 10G/Multi-Gigabit Ethernet Smart Switch with 2 SFP+ Ports 16. In the Destination MAC field, type the destination MAC address that must be compared against the information in an Ethernet frame. The format is xx:xx:xx:xx:xx:xx. The BPDU keyword can be specified using a destination MAC address of 01:80:C2:xx:xx:xx.
-
Page 456: Change The Match Criteria For A Mac Acl Rule
S3600 Series 8- or 16-Port 10G/Multi-Gigabit Ethernet Smart Switch with 2 SFP+ Ports The range is from 1 to 4093. You can type an individual VLAN ID or a range of VLAN IDs. 23. From the Logging menu, select to enable or disable logging for the ACL rule: •... -
Page 457: Remove A Rule From A Mac Acl
S3600 Series 8- or 16-Port 10G/Multi-Gigabit Ethernet Smart Switch with 2 SFP+ Ports The Dashboard page displays. 5. Select Security > ACL > MAC ACL > MAC ACL/Rules. The MAC ACL/Rules page displays. The MAC ACL Configuration section displays the total number of MAC ACLs, IPv4 ACLs, and IPv6 ACLs that are configured on the switch and the maximum number of ACLs that can be configured. -
Page 458: Mac Acl Bindings
S3600 Series 8- or 16-Port 10G/Multi-Gigabit Ethernet Smart Switch with 2 SFP+ Ports 3. Enter one of the following passwords: • Enter your device admin password. • If you previously managed the switch through the Insight Cloud Portal or Insight app, enter the Insight network password for the last Insight network location. - Page 459 S3600 Series 8- or 16-Port 10G/Multi-Gigabit Ethernet Smart Switch with 2 SFP+ Ports You can use a WiFi or wired connection to connect your computer to the network, or connect directly to a switch that is off-network using an Ethernet cable.
-
Page 460: Display Or Delete Mac Acl Bindings
S3600 Series 8- or 16-Port 10G/Multi-Gigabit Ethernet Smart Switch with 2 SFP+ Ports Display or delete MAC ACL bindings You can display or delete the MAC ACL bindings in the MAC binding table. To display MAC ACL bindings or delete a MAC ACL binding: 1. -
Page 461: Ipv4 Acls
S3600 Series 8- or 16-Port 10G/Multi-Gigabit Ethernet Smart Switch with 2 SFP+ Ports Table 84. Interface MAC ACL binding information Field Description Interface The interface to which the MAC ACL is bound Direction The packet filtering direction for the MAC ACL, which is always inbound... -
Page 462: Add An Ipv4 Acl
S3600 Series 8- or 16-Port 10G/Multi-Gigabit Ethernet Smart Switch with 2 SFP+ Ports Add an IPv4 ACL You can add an IPv4 ACL and then add a rule later. The following procedure describes how to add an IPv4 ACL only. You can also add an IPv4 ACL and a rule together, as one task (see Add a rule for a standard IPv4 ACL on page 465 or Add a rule for an extended IPv4 ACL on page 470). -
Page 463: Change The Number Or Name Of An Ipv4 Acl
S3600 Series 8- or 16-Port 10G/Multi-Gigabit Ethernet Smart Switch with 2 SFP+ Ports • Number from 1–99: Creates a standard IP ACL, which allows you to permit or deny traffic from a source IP address. • Number from 100–199: Creates an extended IP ACL, which allows you to permit or deny specific types of Layer 3 or Layer 4 traffic from a source IP address to a destination IP address. -
Page 464: Remove An Ipv4 Acl
S3600 Series 8- or 16-Port 10G/Multi-Gigabit Ethernet Smart Switch with 2 SFP+ Ports The IP ACL/Rules page displays. The IP ACL Configuration section displays the total number of IPv4 ACLs, IPv6 ACLs, and MAC ACLs that are configured on the switch and the maximum number of ACLs that can be configured. -
Page 465: Standard Ipv4 Acl Rules
S3600 Series 8- or 16-Port 10G/Multi-Gigabit Ethernet Smart Switch with 2 SFP+ Ports For information about the credentials, see Credentials for the device UI on page 34. 4. Click the Login button. The Dashboard page displays. 5. Select Security > ACL > IP ACL > IP ACL/Rules. - Page 466 S3600 Series 8- or 16-Port 10G/Multi-Gigabit Ethernet Smart Switch with 2 SFP+ Ports If you did not yet activate your warranty, the Register to activate your warranty page displays. For more information, see Register the switch on page 35. 3. Enter one of the following passwords: •...
- Page 467 S3600 Series 8- or 16-Port 10G/Multi-Gigabit Ethernet Smart Switch with 2 SFP+ Ports • Permit: Forwards packets that meet the ACL criteria. You can configure an egress queue and you can let the switch mirror or redirect traffic to a specific interface.
-
Page 468: Change The Match Criteria For A Standard Ipv4 Acl Rule
S3600 Series 8- or 16-Port 10G/Multi-Gigabit Ethernet Smart Switch with 2 SFP+ Ports • In the Source IP Address field, type the IP address that must be compared against the packet’s source IP address. • In the Source IP Mask field, type the IP mask that must be compared against the packet’s source IP mask. -
Page 469: Remove A Rule From A Standard Ipv4 Acl
S3600 Series 8- or 16-Port 10G/Multi-Gigabit Ethernet Smart Switch with 2 SFP+ Ports 4. Click the Login button. The Dashboard page displays. 5. Select Security > ACL > IP ACL > IP ACL/Rules. The IP ACL/Rules page displays. The IP ACL Configuration section displays the total number of IPv4 ACLs, IPv6 ACLs, and MAC ACLs that are configured on the switch and the maximum number of ACLs that can be configured. -
Page 470: Extended Ipv4 Acl Rules
S3600 Series 8- or 16-Port 10G/Multi-Gigabit Ethernet Smart Switch with 2 SFP+ Ports If you did not yet activate your warranty, the Register to activate your warranty page displays. For more information, see Register the switch on page 35. 3. Enter one of the following passwords: •... - Page 471 S3600 Series 8- or 16-Port 10G/Multi-Gigabit Ethernet Smart Switch with 2 SFP+ Ports To add a rule for an existing or new extended IPv4 ACL: 1. Connect your computer to the same network as the switch. You can use a WiFi or wired connection to connect your computer to the network, or connect directly to a switch that is off-network using an Ethernet cable.
- Page 472 S3600 Series 8- or 16-Port 10G/Multi-Gigabit Ethernet Smart Switch with 2 SFP+ Ports • Add a rule to an existing extended IP ACL: From the ACL ID/Name menu, select the ACL. • Add a rule to a new extended IP ACL: a.
- Page 473 S3600 Series 8- or 16-Port 10G/Multi-Gigabit Ethernet Smart Switch with 2 SFP+ Ports A redirect interface and a mirror interface are mutually exclusive. 16. From the Match Every menu, select if all packets must match the IP ACL rule: • False: Not all packets need to match the ACL rule. You can configure other match criteria on the page.
- Page 474 S3600 Series 8- or 16-Port 10G/Multi-Gigabit Ethernet Smart Switch with 2 SFP+ Ports The source port is compared to a packet’s source port. • Range: Define a range by selecting a protocol from the Start Port menu and a protocol from the End Port menu: ○...
- Page 475 S3600 Series 8- or 16-Port 10G/Multi-Gigabit Ethernet Smart Switch with 2 SFP+ Ports ○ The destination IP TCP port protocols are domain, echo, ftp, ftpdata, www-http, smtp, telnet, pop2, pop3, and bgp. A selected protocol translates into its equivalent port number.
-
Page 476: Change The Match Criteria For An Extended Ipv4 Acl Rule
S3600 Series 8- or 16-Port 10G/Multi-Gigabit Ethernet Smart Switch with 2 SFP+ Ports 25. (Optionally) In the Service Type section, select the IP DSCP, IP Precedence, or IP TOS radio button to set a match criterion for the service type field in a packet’s IP header. - Page 477 S3600 Series 8- or 16-Port 10G/Multi-Gigabit Ethernet Smart Switch with 2 SFP+ Ports To change the match criteria for an extended IPv4 ACL rule: 1. Connect your computer to the same network as the switch. You can use a WiFi or wired connection to connect your computer to the network, or connect directly to a switch that is off-network using an Ethernet cable.
-
Page 478: Remove A Rule From An Extended Ipv4 Acl
S3600 Series 8- or 16-Port 10G/Multi-Gigabit Ethernet Smart Switch with 2 SFP+ Ports You cannot change the ACL ID, name, or sequence number. 10. Click the Save button. Your settings are saved. Remove a rule from an extended IPv4 ACL You can remove a rule from an extended IPv4 ACL if you no longer need the rule. -
Page 479: Ipv6 Acls
S3600 Series 8- or 16-Port 10G/Multi-Gigabit Ethernet Smart Switch with 2 SFP+ Ports 7. Select the check box for the rule. 8. Click the Delete button. Your settings are saved and the rule is removed. IPv6 ACLs An IPv6 ACL consists of a set of rules that are matched sequentially against a packet. -
Page 480: Change The Name Of An Ipv6 Acl
S3600 Series 8- or 16-Port 10G/Multi-Gigabit Ethernet Smart Switch with 2 SFP+ Ports If you do not know the IP address of the switch, see Access the switch on-network and connected to the Internet on page 25 or Access the switch off-network and not connected to the Internet on page 32. -
Page 481: Remove An Ipv6 Acl
S3600 Series 8- or 16-Port 10G/Multi-Gigabit Ethernet Smart Switch with 2 SFP+ Ports If you do not know the IP address of the switch, see Access the switch on-network and connected to the Internet on page 25 or Access the switch off-network and not connected to the Internet on page 32. -
Page 482: Ipv6 Acl Rules
S3600 Series 8- or 16-Port 10G/Multi-Gigabit Ethernet Smart Switch with 2 SFP+ Ports If you do not know the IP address of the switch, see Access the switch on-network and connected to the Internet on page 25 or Access the switch off-network and not connected to the Internet on page 32. - Page 483 S3600 Series 8- or 16-Port 10G/Multi-Gigabit Ethernet Smart Switch with 2 SFP+ Ports To add a rule for an existing or new IPv6 ACL: 1. Connect your computer to the same network as the switch. You can use a WiFi or wired connection to connect your computer to the network, or connect directly to a switch that is off-network using an Ethernet cable.
- Page 484 S3600 Series 8- or 16-Port 10G/Multi-Gigabit Ethernet Smart Switch with 2 SFP+ Ports The ACL Name field displays. b. In the ACL Name field, type a name. This is the IPv6 ACL name string, which includes up to 31 alphanumeric characters only.
- Page 485 S3600 Series 8- or 16-Port 10G/Multi-Gigabit Ethernet Smart Switch with 2 SFP+ Ports • False: Not all packets need to match the ACL rule. You can configure other match criteria on the page. • True: Each packet must match the ACL rule. You cannot configure other match criteria on the page.
- Page 486 S3600 Series 8- or 16-Port 10G/Multi-Gigabit Ethernet Smart Switch with 2 SFP+ Ports The source port is compared to a packet’s source port. • Range: Define a range by selecting a protocol from the Start Port menu and a protocol from the End Port menu: ○...
- Page 487 S3600 Series 8- or 16-Port 10G/Multi-Gigabit Ethernet Smart Switch with 2 SFP+ Ports The destination port is compared to a packet’s destination port. • Range: Define a range by selecting a protocol from the Start Port menu and a protocol from the End Port menu: ○...
-
Page 488: Change The Match Criteria For An Ipv6 Acl Rule
S3600 Series 8- or 16-Port 10G/Multi-Gigabit Ethernet Smart Switch with 2 SFP+ Ports • The toggle is gray and positioned to the left: The routing extension header in an incoming packet is ignored. This is the default setting. • The toggle is purple and positioned to the right: The routing extension header in an incoming packet is considered. -
Page 489: Remove A Rule From An Ipv6 Acl
S3600 Series 8- or 16-Port 10G/Multi-Gigabit Ethernet Smart Switch with 2 SFP+ Ports 3. Enter one of the following passwords: • Enter your device admin password. • If you previously managed the switch through the Insight Cloud Portal or Insight app, enter the Insight network password for the last Insight network location. -
Page 490: Ip Acl Bindings
S3600 Series 8- or 16-Port 10G/Multi-Gigabit Ethernet Smart Switch with 2 SFP+ Ports If you do not know the IP address of the switch, see Access the switch on-network and connected to the Internet on page 25 or Access the switch off-network and not connected to the Internet on page 32. -
Page 491: Configure An Ip Acl Interface Binding
S3600 Series 8- or 16-Port 10G/Multi-Gigabit Ethernet Smart Switch with 2 SFP+ Ports Configure an IP ACL interface binding You can bind an IP ACL (an IPv4 or IPv6 ACL) to one or more interfaces, which can be physical ports, LAGs, or both. -
Page 492: Display Or Delete Ip Acl Bindings
S3600 Series 8- or 16-Port 10G/Multi-Gigabit Ethernet Smart Switch with 2 SFP+ Ports is one number greater than the highest sequence number currently in use for the interface is used. The range is from 1 to 4294967295. 8. In the Ports table, LAG table, or both, click the ports and LAGs to which the IP ACL must be bound. -
Page 493: Display The Existing Acls And Associated Rules
S3600 Series 8- or 16-Port 10G/Multi-Gigabit Ethernet Smart Switch with 2 SFP+ Ports The binding is removed. The following table describes the information that is displayed in the IP ACL Binding Table. Table 85. Interface IP ACL binding status information... - Page 494 S3600 Series 8- or 16-Port 10G/Multi-Gigabit Ethernet Smart Switch with 2 SFP+ Ports For information about the credentials, see Credentials for the device UI on page 34. 4. Click the Login button. The Dashboard page displays. 5. Make one of the following selections, depending on the type of ACLs that you want to display: •...
-
Page 495: Vlan Acl Bindings
S3600 Series 8- or 16-Port 10G/Multi-Gigabit Ethernet Smart Switch with 2 SFP+ Ports Table 86. Sections that provide information about changing or removing an ACL or rule (Continued) Section Remove a rule from an extended IPv4 ACL on page 478... -
Page 496: Display Or Delete Vlan Acl Bindings
S3600 Series 8- or 16-Port 10G/Multi-Gigabit Ethernet Smart Switch with 2 SFP+ Ports • Enter your device admin password. • If you previously managed the switch through the Insight Cloud Portal or Insight app, enter the Insight network password for the last Insight network location. - Page 497 S3600 Series 8- or 16-Port 10G/Multi-Gigabit Ethernet Smart Switch with 2 SFP+ Ports If you do not know the IP address of the switch, see Access the switch on-network and connected to the Internet on page 25 or Access the switch off-network and not connected to the Internet on page 32.
-
Page 498: Chapter 10 Monitor The Switch And Network
Monitor the Switch and Network This chapter covers the following topics: • Switch, port, and EAP packet statistics • Perform a cable test • Logs • Port mirroring • Display the system CPU memory status and CPU utilization... -
Page 499: Switch, Port, And Eap Packet Statistics
S3600 Series 8- or 16-Port 10G/Multi-Gigabit Ethernet Smart Switch with 2 SFP+ Ports Switch, port, and EAP packet statistics You can view switch and port statistics, including detailed statistics, and Extensible Authentication Protocol (EAP) packets statistics. Display switch statistics You can display statistical information about the traffic that the switch processes. - Page 500 S3600 Series 8- or 16-Port 10G/Multi-Gigabit Ethernet Smart Switch with 2 SFP+ Ports Table 88. Switch statistics information Field Description Unicast Packets Unicast Packets Received The number of subnetwork-unicast packets delivered to a higher-layer protocol Unicast Packets Transmitted The total number of packets that higher-level protocols requested be...
-
Page 501: Display Or Clear Port Statistics
S3600 Series 8- or 16-Port 10G/Multi-Gigabit Ethernet Smart Switch with 2 SFP+ Ports Table 88. Switch statistics information (Continued) Field Description Packets Received Without The total number of packets (including broadcast packets and multicast packets) Errors received by the switch... - Page 502 S3600 Series 8- or 16-Port 10G/Multi-Gigabit Ethernet Smart Switch with 2 SFP+ Ports • Enter your device admin password. • If you previously managed the switch through the Insight Cloud Portal or Insight app, enter the Insight network password for the last Insight network location.
-
Page 503: Display Or Clear Detailed Statistics For A Port
S3600 Series 8- or 16-Port 10G/Multi-Gigabit Ethernet Smart Switch with 2 SFP+ Ports Display or clear detailed statistics for a port For a specific port, you can display a variety of per-port traffic statistics or clear the statistics. To display and clear detailed statistics for a port: 1. - Page 504 S3600 Series 8- or 16-Port 10G/Multi-Gigabit Ethernet Smart Switch with 2 SFP+ Ports Table 90. Port detailed statistics information Field Description ifIndex The ifIndex of the interface table entry associated with the port Port Type The port is either displayed blank for a normal port, or as one of the following types of ports: •...
- Page 505 S3600 Series 8- or 16-Port 10G/Multi-Gigabit Ethernet Smart Switch with 2 SFP+ Ports Table 90. Port detailed statistics information (Continued) Field Description Packets RX and TX 65-127 The total number of packets (including bad packets) received or transmitted Octets that were between 65 and 127 octets in length inclusive (excluding framing...
- Page 506 S3600 Series 8- or 16-Port 10G/Multi-Gigabit Ethernet Smart Switch with 2 SFP+ Ports Table 90. Port detailed statistics information (Continued) Field Description Unicast Packets Received The number of subnetwork-unicast packets delivered to a higher-Layer protocol Multicast Packets Received The total number of good packets received that were directed to a multicast address.
- Page 507 S3600 Series 8- or 16-Port 10G/Multi-Gigabit Ethernet Smart Switch with 2 SFP+ Ports Table 90. Port detailed statistics information (Continued) Field Description Packets Transmitted 65-127 The total number of packets (including bad packets) transmitted that were Octets between 65 and 127 octets in length inclusive (excluding framing bits but...
-
Page 508: Display Or Clear Eap And Eapol Statistics
S3600 Series 8- or 16-Port 10G/Multi-Gigabit Ethernet Smart Switch with 2 SFP+ Ports Table 90. Port detailed statistics information (Continued) Field Description Single Collision Frames The number of successfully transmitted frames for which transmission is inhibited by exactly one collision... - Page 509 S3600 Series 8- or 16-Port 10G/Multi-Gigabit Ethernet Smart Switch with 2 SFP+ Ports You can use a WiFi or wired connection to connect your computer to the network, or connect directly to a switch that is off-network using an Ethernet cable.
-
Page 510: Perform A Cable Test
S3600 Series 8- or 16-Port 10G/Multi-Gigabit Ethernet Smart Switch with 2 SFP+ Ports Table 91. EAP statistics information (Continued) Field Description Start Frames Received The number of EAPOL start frames that were received by the authenticator Logoff Frames Received The number of EAPOL logoff frames that were received by the authenticator... - Page 511 S3600 Series 8- or 16-Port 10G/Multi-Gigabit Ethernet Smart Switch with 2 SFP+ Ports If you did not yet activate your warranty, the Register to activate your warranty page displays. For more information, see Register the switch on page 35. 3. Enter one of the following passwords: •...
-
Page 512: Logs
S3600 Series 8- or 16-Port 10G/Multi-Gigabit Ethernet Smart Switch with 2 SFP+ Ports Table 92. Cable Test Field Description Cable Status Indicates the cable status: • Normal: The cable is working correctly. • Open: The cable is disconnected, or a faulty connector exists. -
Page 513: Manage And Display The Memory Log
S3600 Series 8- or 16-Port 10G/Multi-Gigabit Ethernet Smart Switch with 2 SFP+ Ports by line 318 of file mstp_api.c. This is the 237th message logged with system IP 0.0.0.0 and task-ID 1. • <15>Aug 24 05:34:05 STK0 MSTP[2110]: mspt_api.c(318) 237%% Interface 12 transitioned to root state on message age timer expiry. - Page 514 S3600 Series 8- or 16-Port 10G/Multi-Gigabit Ethernet Smart Switch with 2 SFP+ Ports 5. Select Monitoring > Logs > Memory Log. The Memory Log page displays. The following steps refer to the Memory Log Configuration section. 6. Click the Memory Logging toggle to enable or disable memory logging: •...
-
Page 515: Manage And Display The Flash Log
S3600 Series 8- or 16-Port 10G/Multi-Gigabit Ethernet Smart Switch with 2 SFP+ Ports Your settings are saved. The Memory Log table displays in the Memory Log section. The Total Number of Messages field displays the number of messages the system logged in memory. - Page 516 S3600 Series 8- or 16-Port 10G/Multi-Gigabit Ethernet Smart Switch with 2 SFP+ Ports If you did not yet activate your warranty, the Register to activate your warranty page displays. For more information, see Register the switch on page 35. 3. Enter one of the following passwords: •...
-
Page 517: Syslog And Log Server Host Settings
S3600 Series 8- or 16-Port 10G/Multi-Gigabit Ethernet Smart Switch with 2 SFP+ Ports • Informational: Level 6, provides device information. • Debug: Level 7, provides detailed information about the log. NOTE: A log records messages equal to or above a configured severity threshold. -
Page 518: Add A Syslog Server
S3600 Series 8- or 16-Port 10G/Multi-Gigabit Ethernet Smart Switch with 2 SFP+ Ports If you do not know the IP address of the switch, see Access the switch on-network and connected to the Internet on page 25 or Access the switch off-network and not connected to the Internet on page 32. - Page 519 S3600 Series 8- or 16-Port 10G/Multi-Gigabit Ethernet Smart Switch with 2 SFP+ Ports If you did not yet activate your warranty, the Register to activate your warranty page displays. For more information, see Register the switch on page 35. 3. Enter one of the following passwords: •...
-
Page 520: Change The Settings For A Syslog Server
S3600 Series 8- or 16-Port 10G/Multi-Gigabit Ethernet Smart Switch with 2 SFP+ Ports • Informational: Level 6, provides device information. • Debug: Level 7, provides detailed information about the log. 11. Click the Save button. Your settings are saved and the syslog server is added. -
Page 521: Delete The Settings For A Syslog Server
S3600 Series 8- or 16-Port 10G/Multi-Gigabit Ethernet Smart Switch with 2 SFP+ Ports For more information about the settings, see Add a syslog server on page 518. 9. Click the Save button. Your settings are saved. Delete the settings for a syslog server You can delete the settings for a syslog server that you no longer need. - Page 522 S3600 Series 8- or 16-Port 10G/Multi-Gigabit Ethernet Smart Switch with 2 SFP+ Ports To display or clear the trap log: 1. Connect your computer to the same network as the switch. You can use a WiFi or wired connection to connect your computer to the network, or connect directly to a switch that is off-network using an Ethernet cable.
-
Page 523: Port Mirroring
S3600 Series 8- or 16-Port 10G/Multi-Gigabit Ethernet Smart Switch with 2 SFP+ Ports Port mirroring Port mirroring lets you select the network traffic of specific switch ports for analysis by a network analyzer. You can select many switch ports as source ports but only a single switch port as the destination port. - Page 524 S3600 Series 8- or 16-Port 10G/Multi-Gigabit Ethernet Smart Switch with 2 SFP+ Ports 5. Select Monitoring > Port Mirroring. The Port Mirroring page displays the Port Mirroring Sessions section. 6. Click the number for a session ID. The session IDs from 1 through 4 are hyperlinks.
-
Page 525: Change The Traffic Direction Or Remove A Mirrored Port From A Mirroring Session
S3600 Series 8- or 16-Port 10G/Multi-Gigabit Ethernet Smart Switch with 2 SFP+ Ports • The toggle is gray and positioned to the left: The port mirroring session is disabled. This is the default setting. • The toggle is purple and positioned to the right: Port mirroring session is enabled. -
Page 526: Change The Destination Port For A Port Mirroring Session
S3600 Series 8- or 16-Port 10G/Multi-Gigabit Ethernet Smart Switch with 2 SFP+ Ports The session ID is a hyperlink. The page displays the Session Configuration and Source Interface Configuration sections. 7. In the Source Interface Configuration section, select the check box for the source port. -
Page 527: Enable Or Disable A Port Mirroring Session
S3600 Series 8- or 16-Port 10G/Multi-Gigabit Ethernet Smart Switch with 2 SFP+ Ports If you did not yet activate your warranty, the Register to activate your warranty page displays. For more information, see Register the switch on page 35. 3. Enter one of the following passwords: •... -
Page 528: Remove All Ports From A Mirroring Session
S3600 Series 8- or 16-Port 10G/Multi-Gigabit Ethernet Smart Switch with 2 SFP+ Ports • Enter your device admin password. • If you previously managed the switch through the Insight Cloud Portal or Insight app, enter the Insight network password for the last Insight network location. -
Page 529: Display The System Cpu Memory Status And Cpu Utilization
S3600 Series 8- or 16-Port 10G/Multi-Gigabit Ethernet Smart Switch with 2 SFP+ Ports For information about the credentials, see Credentials for the device UI on page 34. 4. Click the Login button. The Dashboard page displays. 5. Select Monitoring > Port Mirroring. - Page 530 S3600 Series 8- or 16-Port 10G/Multi-Gigabit Ethernet Smart Switch with 2 SFP+ Ports You can use a WiFi or wired connection to connect your computer to the network, or connect directly to a switch that is off-network using an Ethernet cable.
-
Page 531: Chapter 11 Maintenance And Troubleshooting
Maintenance and Troubleshooting This chapter covers the following topics: • Reboot the switch from the device UI • Reset the switch to factory default settings • Export the configuration file or log files from the switch • Update the switch software •... -
Page 532: Reboot The Switch From The Device Ui
S3600 Series 8- or 16-Port 10G/Multi-Gigabit Ethernet Smart Switch with 2 SFP+ Ports Reboot the switch from the device You can reboot the switch from the device UI. NOTE: If you can physically access the switch, you can reboot the switch by pressing the multi-function Reset button on the front panel for less than 5 seconds. -
Page 533: Reset The Switch To Factory Default Settings
S3600 Series 8- or 16-Port 10G/Multi-Gigabit Ethernet Smart Switch with 2 SFP+ Ports Reset the switch to factory default settings You can reset the switch configuration to factory default values. All changes that you made are erased. If the IP address changes, your web browser session might disconnect. -
Page 534: Export The Configuration File Or Log Files From The Switch
S3600 Series 8- or 16-Port 10G/Multi-Gigabit Ethernet Smart Switch with 2 SFP+ Ports • Reset the configuration to factory defaults and clear device logs but keep the registered device status: Click the Factory Reset button. After the switch is reset, you will need to go through the initial login and setup process again. - Page 535 S3600 Series 8- or 16-Port 10G/Multi-Gigabit Ethernet Smart Switch with 2 SFP+ Ports If you do not know the IP address of the switch, see Access the switch on-network and connected to the Internet on page 25 or Access the switch off-network and not connected to the Internet on page 32.
-
Page 536: Export A File From The Switch To A Computer Or Usb Storage Device
S3600 Series 8- or 16-Port 10G/Multi-Gigabit Ethernet Smart Switch with 2 SFP+ Ports 9. In the Transfer File Path field, type the path on the server where you want to save the file. The path name can include letters, numbers, forward slashes, periods, and underscores characters only. -
Page 537: Update The Switch Software
S3600 Series 8- or 16-Port 10G/Multi-Gigabit Ethernet Smart Switch with 2 SFP+ Ports 3. Enter one of the following passwords: • Enter your device admin password. • If you previously managed the switch through the Insight Cloud Portal or Insight app, enter the Insight network password for the last Insight network location. -
Page 538: Download The Switch Software From A Tftp Server And Update The Switch
S3600 Series 8- or 16-Port 10G/Multi-Gigabit Ethernet Smart Switch with 2 SFP+ Ports notes are available with new firmware, read the release notes to find out if you must reconfigure the switch after updating. In this context, downloading and installing a firmware update is also referred to as upgrading. - Page 539 S3600 Series 8- or 16-Port 10G/Multi-Gigabit Ethernet Smart Switch with 2 SFP+ Ports The TFTP Firmware/File Update page displays. 6. From the File Type menu, select Software. This selection represents the switch software image, which is saved in one of two flash sectors called images (Image1 and Image2).
-
Page 540: Download The Switch Software From A Computer Or Usb Storage Device And Update The Switch
S3600 Series 8- or 16-Port 10G/Multi-Gigabit Ethernet Smart Switch with 2 SFP+ Ports a. Select Maintenance > File Management. The File Management page displays. The Dual Image Configuration section displays which software image is the active image. The Activate button displays for the image that is not currently the active image, but that you want the switch to run after it reboots. - Page 541 S3600 Series 8- or 16-Port 10G/Multi-Gigabit Ethernet Smart Switch with 2 SFP+ Ports The Device Admin Password page displays. If you did not yet activate your warranty, the Register to activate your warranty page displays. For more information, see Register the switch on page 35.
-
Page 542: Download A File To The Switch
S3600 Series 8- or 16-Port 10G/Multi-Gigabit Ethernet Smart Switch with 2 SFP+ Ports The Dual Image Configuration section displays which software image is currently the active image. The Activate button displays for the new image that is not currently the active image but that you want the switch to run after it reboots. - Page 543 S3600 Series 8- or 16-Port 10G/Multi-Gigabit Ethernet Smart Switch with 2 SFP+ Ports For information about downloading switch software from a TFTP server and updating the switch, see Download the switch software from a TFTP server and update the switch on page 538.
- Page 544 S3600 Series 8- or 16-Port 10G/Multi-Gigabit Ethernet Smart Switch with 2 SFP+ Ports example, change the device name and IP address), and download it to the second switch. • X.509 Public Certificate PEM: SSL Trusted Root Certificate Privacy Enhanced Mail (PEM)-encoded file •...
-
Page 545: Download A File From A Computer Or Usb Storage Device To The Switch
S3600 Series 8- or 16-Port 10G/Multi-Gigabit Ethernet Smart Switch with 2 SFP+ Ports Download a file from a computer or USB storage device to the switch You can download files of various types from a computer or to the switch through an HTTP session on your web browser. -
Page 546: Download And Install An Ssl Security Certificate File On The Switch
S3600 Series 8- or 16-Port 10G/Multi-Gigabit Ethernet Smart Switch with 2 SFP+ Ports • Software: For information about downloading switch software and updating the switch, see Download the switch software from a computer or USB storage device and update the switch on page 540. - Page 547 S3600 Series 8- or 16-Port 10G/Multi-Gigabit Ethernet Smart Switch with 2 SFP+ Ports For an SSL security certificate, you must download two Privacy Enhanced Mail (PEM) files to the switch: • X.509 Public Certificate PEM: The SSL trusted root certificate PEM file, which must be in the format xxxxCERTxxxxx.pem.
-
Page 548: Manage Software Images
S3600 Series 8- or 16-Port 10G/Multi-Gigabit Ethernet Smart Switch with 2 SFP+ Ports 9. Select Maintenance > Update > HTTP Firmware/File Update. The HTTP Firmware/File Update page displays. 10. From the File Type menu, select X.509 Public Certificate PEM. 11. Click the Browse button, navigate to the file, and select the file to download. - Page 549 S3600 Series 8- or 16-Port 10G/Multi-Gigabit Ethernet Smart Switch with 2 SFP+ Ports You can use a WiFi or wired connection to connect your computer to the network, or connect directly to a switch that is off-network using an Ethernet cable.
-
Page 550: Display The Dual Image Configuration And Add Image Descriptions
S3600 Series 8- or 16-Port 10G/Multi-Gigabit Ethernet Smart Switch with 2 SFP+ Ports c. Click the OK button to close the window. d. After the switch completed its reboot, verify that the switch runs the newly activated image. On the Dashboard page, the Firmware Version field displays the firmware image that the switch runs. -
Page 551: Copy A Software Image From One Flash Sector To Another
S3600 Series 8- or 16-Port 10G/Multi-Gigabit Ethernet Smart Switch with 2 SFP+ Ports 6. To add descriptions to the image names, type a description in each Image Description field. You can type up to 255 characters in each field. 7. Click the Apply button. -
Page 552: Delete A Software Image
S3600 Series 8- or 16-Port 10G/Multi-Gigabit Ethernet Smart Switch with 2 SFP+ Ports The Dashboard page displays. 5. Select Maintenance > File Management. The File Management page displays. The Dual Image Configuration section displays which software image is the active image. -
Page 553: Diagnostics And Troubleshooting
S3600 Series 8- or 16-Port 10G/Multi-Gigabit Ethernet Smart Switch with 2 SFP+ Ports 5. Select Maintenance > File Management. The File Management page displays. The Dual Image Configuration section displays which software image is the active image. You cannot delete the active image. - Page 554 S3600 Series 8- or 16-Port 10G/Multi-Gigabit Ethernet Smart Switch with 2 SFP+ Ports You can use a WiFi or wired connection to connect your computer to the network, or connect directly to a switch that is off-network using an Ethernet cable.
-
Page 555: Ping An Ipv6 Address
S3600 Series 8- or 16-Port 10G/Multi-Gigabit Ethernet Smart Switch with 2 SFP+ Ports With this selection, the IP Address field displays and you must type the IPv4 address that must be used as the source. • Interface: The interface that must be used when echo request packets are sent. - Page 556 S3600 Series 8- or 16-Port 10G/Multi-Gigabit Ethernet Smart Switch with 2 SFP+ Ports If you do not know the IP address of the switch, see Access the switch on-network and connected to the Internet on page 25 or Access the switch off-network and not connected to the Internet on page 32.
-
Page 557: Send An Ipv4 Traceroute
S3600 Series 8- or 16-Port 10G/Multi-Gigabit Ethernet Smart Switch with 2 SFP+ Ports • None: The source address of the ping packet is the address of the default egress interface. • IP Address: The source IP address that must be used when echo request packets are sent. - Page 558 S3600 Series 8- or 16-Port 10G/Multi-Gigabit Ethernet Smart Switch with 2 SFP+ Ports The Device Admin Password page displays. If you did not yet activate your warranty, the Register to activate your warranty page displays. For more information, see Register the switch on page 35.
-
Page 559: Send An Ipv6 Traceroute
S3600 Series 8- or 16-Port 10G/Multi-Gigabit Ethernet Smart Switch with 2 SFP+ Ports With this selection, the IP Address field displays and you must type the IPv4 address that must be used as the source. • Interface: The interface that must be used when echo request packets are sent. - Page 560 S3600 Series 8- or 16-Port 10G/Multi-Gigabit Ethernet Smart Switch with 2 SFP+ Ports • Enter your device admin password. • If you previously managed the switch through the Insight Cloud Portal or Insight app, enter the Insight network password for the last Insight network location.
-
Page 561: Enable The Secure Diagnostic Mode
S3600 Series 8- or 16-Port 10G/Multi-Gigabit Ethernet Smart Switch with 2 SFP+ Ports With this selection, the Interface menu displays, and you must select a VLAN from the menu. 15. Click the Apply button. A traceroute request is sent to the specified IP address or host name. The results are displayed below the configurable data in the Results field. -
Page 562: You Cannot Log In To The Switch
S3600 Series 8- or 16-Port 10G/Multi-Gigabit Ethernet Smart Switch with 2 SFP+ Ports • The toggle is gray and positioned to the left: Secure diagnostic mode is disabled. This is the default setting. • The toggle is purple and positioned to the right: Secure diagnostic mode will be enabled after you click the Apply button. -
Page 563: Appendix A Configuration Examples
Configuration Examples This appendix contains information about how to configure the following features: • Virtual Local Area Networks (VLANs) • Access control lists (ACLs) • Differentiated Services (DiffServ) • 802.1X port access control • Multiple Spanning Tree Protocol • VLAN routing interface example configuration... -
Page 564: Virtual Local Area Networks (Vlans)
S3600 Series 8- or 16-Port 10G/Multi-Gigabit Ethernet Smart Switch with 2 SFP+ Ports Virtual Local Area Networks (VLANs) A local area network (LAN) can generally be defined as a broadcast domain. Hubs, bridges, or switches in the same physical segment or segments connect all end node devices. -
Page 565: Vlan Example Configuration
S3600 Series 8- or 16-Port 10G/Multi-Gigabit Ethernet Smart Switch with 2 SFP+ Ports • If the port through which the packet enters is not a member of the VLAN as specified by the VLAN ID tag, the packet is dropped. - Page 566 S3600 Series 8- or 16-Port 10G/Multi-Gigabit Ethernet Smart Switch with 2 SFP+ Ports For information about the credentials, see Credentials for the device UI on page 34. 4. Click the Login button. The Dashboard page displays. 5. Select Switching > VLAN > VLAN Management.
- Page 567 S3600 Series 8- or 16-Port 10G/Multi-Gigabit Ethernet Smart Switch with 2 SFP+ Ports Your settings are saved. • For the VLAN with VLAN ID 10, configure ports xg1 and xg2 as untagged (U) ports and port xg3 as a tagged (T) port: a.
-
Page 568: Access Control Lists (Acls)
S3600 Series 8- or 16-Port 10G/Multi-Gigabit Ethernet Smart Switch with 2 SFP+ Ports c. In the PVID field, type 20 for VLAN ID 20. d. Click the Save button. Your settings are saved. With the VLAN configuration that you set up, the following situations produce results as described: •... -
Page 569: Mac Acl Example Configuration
S3600 Series 8- or 16-Port 10G/Multi-Gigabit Ethernet Smart Switch with 2 SFP+ Ports traffic that matches the criteria to a particular queue or redirect the traffic to a particular port. A default deny all rule is the last rule of every list. - Page 570 S3600 Series 8- or 16-Port 10G/Multi-Gigabit Ethernet Smart Switch with 2 SFP+ Ports If you did not yet activate your warranty, the Register to activate your warranty page displays. For more information, see Register the switch on page 35. 3. Enter one of the following passwords: •...
- Page 571 S3600 Series 8- or 16-Port 10G/Multi-Gigabit Ethernet Smart Switch with 2 SFP+ Ports This means that not all packets need to match the ACL rule that permits the packets. You can configure additional criteria to refine the rule. f. From the EtherType Key menu, select IPV4.
-
Page 572: Standard Ip Acl Sample Configuration
S3600 Series 8- or 16-Port 10G/Multi-Gigabit Ethernet Smart Switch with 2 SFP+ Ports The MAC ACL with the name Sales_ACL looks for IPv4 packets with the source MAC address and MAC mask defined in the rule. Also, the packets must be tagged with VLAN ID 2. - Page 573 S3600 Series 8- or 16-Port 10G/Multi-Gigabit Ethernet Smart Switch with 2 SFP+ Ports You can use a WiFi or wired connection to connect your computer to the network, or connect directly to a switch that is off-network using an Ethernet cable.
- Page 574 S3600 Series 8- or 16-Port 10G/Multi-Gigabit Ethernet Smart Switch with 2 SFP+ Ports This button is selected by default. 10. Click the Add button. The window closes, and the Standard ACL Rule Configuration (1-99) section displays. 11. Create a first rule for the IP ACL with number 1 with the following criteria: a.
-
Page 575: Differentiated Services (Diffserv)
S3600 Series 8- or 16-Port 10G/Multi-Gigabit Ethernet Smart Switch with 2 SFP+ Ports This means that all packets need to match the ACL rule. You cannot configure other options for this rule. e. Click the Save button. Your settings are saved and the rule is added. -
Page 576: Diffserv Classes
S3600 Series 8- or 16-Port 10G/Multi-Gigabit Ethernet Smart Switch with 2 SFP+ Ports sent sporadically, or dropped. For typical Internet applications, such as email and file transfer, a slight degradation in service is acceptable and in many cases unnoticeable. However, any degradation of service can negatively affect applications with strict timing requirements, such as voice or multimedia. -
Page 577: Diffserv Traffic Classes
S3600 Series 8- or 16-Port 10G/Multi-Gigabit Ethernet Smart Switch with 2 SFP+ Ports • Secondary 802.1p priority value (second/inner VLAN tag) • Secondary VLAN ID range (second/inner VLAN tag) • IP Service Type octet (also known as: ToS bits, Precedence value, DSCP value) •... -
Page 578: Diffserv Traffic Conditioning Policy
S3600 Series 8- or 16-Port 10G/Multi-Gigabit Ethernet Smart Switch with 2 SFP+ Ports You must manually configure the various statements and rules used in the traffic conditioning and service provisioning policies to achieve the desired Traffic Conditioning Specification (TCS) and the Service Level Specification (SLS) operation, respectively. -
Page 579: Diffserv Example Configuration
S3600 Series 8- or 16-Port 10G/Multi-Gigabit Ethernet Smart Switch with 2 SFP+ Ports • Mirroring. Copies a classified traffic stream to a specified egress port (physical or LAG). This can occur in addition to any marking or policing action. It can also be specified along with a QoS queue assignment. - Page 580 S3600 Series 8- or 16-Port 10G/Multi-Gigabit Ethernet Smart Switch with 2 SFP+ Ports The Device Admin Password page displays. If you did not yet activate your warranty, the Register to activate your warranty page displays. For more information, see Register the switch on page 35.
- Page 581 S3600 Series 8- or 16-Port 10G/Multi-Gigabit Ethernet Smart Switch with 2 SFP+ Ports a. On the Class Configuration page, in the Class Name column, click 1. The page adjusts. b. From the Class Configuration menu, select Source IP. c. In the Address field, type 203.0.113.5.
- Page 582 S3600 Series 8- or 16-Port 10G/Multi-Gigabit Ethernet Smart Switch with 2 SFP+ Ports Your settings are saved and the fifth set of criteria is added to the Class Summary section. For more information about adding a class and class criteria, see Add and configure a DiffServ class on page 361 and Add and configure an IPv6 DiffServ class on page 366.
-
Page 583: 802.1X Port Access Control
S3600 Series 8- or 16-Port 10G/Multi-Gigabit Ethernet Smart Switch with 2 SFP+ Ports Your settings are saved. For more information about attaching a policy to an interface, see Attach a DiffServ policy to an interface on page 376. All UDP packet flows that enter on switch interface 7 or 8, that have 203.0.113.5 as the source IP address and 203.0.113.120 as the destination IP address, and that include a... -
Page 584: 802.1X Example Configuration
S3600 Series 8- or 16-Port 10G/Multi-Gigabit Ethernet Smart Switch with 2 SFP+ Ports which it is connected can be desirable if you restrict access to publicly accessible bridge ports or departmental LANs. Access control is achieved by enforcing authentication of supplicants that are attached to an authenticator’s controlled ports. - Page 585 S3600 Series 8- or 16-Port 10G/Multi-Gigabit Ethernet Smart Switch with 2 SFP+ Ports You can use a WiFi or wired connection to connect your computer to the network, or connect directly to a switch that is off-network using an Ethernet cable.
- Page 586 S3600 Series 8- or 16-Port 10G/Multi-Gigabit Ethernet Smart Switch with 2 SFP+ Ports The 802.1x Configuration page displays. 12. Click the Port-Based Authentication State toggle to enable 802.1X port-based authentication. The toggle is purple and positioned to the right. 13. Click the VLAN Assignment Mode toggle to enable automatic assignment of a port to a particular VLAN.
-
Page 587: Multiple Spanning Tree Protocol
S3600 Series 8- or 16-Port 10G/Multi-Gigabit Ethernet Smart Switch with 2 SFP+ Ports The menu options become available. 22. From the menu, select RADIUS. The user’s name and password are authenticated using the RADIUS server instead of the local server. - Page 588 S3600 Series 8- or 16-Port 10G/Multi-Gigabit Ethernet Smart Switch with 2 SFP+ Ports MSTP ensures the following: • frames with a VLAN ID are assigned to one and only one of the MSTIs or the IST within the region • the assignment is consistent among all the networking devices in the region •...
-
Page 589: Mstp Example Configuration
S3600 Series 8- or 16-Port 10G/Multi-Gigabit Ethernet Smart Switch with 2 SFP+ Ports With this allocation we ensure that every VLAN is assigned to one and only one MSTI. The CIST is also an instance of spanning tree with an MSTID of 0. - Page 590 S3600 Series 8- or 16-Port 10G/Multi-Gigabit Ethernet Smart Switch with 2 SFP+ Ports You can use a WiFi or wired connection to connect your computer to the network, or connect directly to a switch that is off-network using an Ethernet cable.
- Page 591 S3600 Series 8- or 16-Port 10G/Multi-Gigabit Ethernet Smart Switch with 2 SFP+ Ports Your setting are saved and the VLAN is added. 7. Select Switching > VLAN > VLAN Configuration (Basic). The VLAN Configuration (Basic) page displays. 8. Configure the membership for each VLAN: •...
- Page 592 S3600 Series 8- or 16-Port 10G/Multi-Gigabit Ethernet Smart Switch with 2 SFP+ Ports The bridge priority is a multiple of 4096. The default priority is 32768. 4096 is the bridge priority for Switch 1, which forces Switch 1 to function as the root bridge.
- Page 593 S3600 Series 8- or 16-Port 10G/Multi-Gigabit Ethernet Smart Switch with 2 SFP+ Ports The MST Configuration page displays. Create MST instance 1 that is associated with VLAN 300 and MST instance 2 that is associated with VLAN 500: a. Click the Add New button.
-
Page 594: Vlan Routing Interface Example Configuration
S3600 Series 8- or 16-Port 10G/Multi-Gigabit Ethernet Smart Switch with 2 SFP+ Ports VLAN routing interface example configuration VLANs divide broadcast domains in a LAN environment. When hosts in one VLAN must communicate with hosts in another VLAN, the traffic must be routed between them. - Page 595 S3600 Series 8- or 16-Port 10G/Multi-Gigabit Ethernet Smart Switch with 2 SFP+ Ports If you did not yet activate your warranty, the Register to activate your warranty page displays. For more information, see Register the switch on page 35. 3. Enter one of the following passwords: •...
-
Page 596: Appendix B Hardware Introduction
These hardware installation appendixes are for the following NETGEAR Smart switches with optional Remote/Cloud Management via Insight: • XS508TM: S3600 Series 8-Port 10G/Multi-Gigabit Ethernet Smart Switch with 2 SFP+ Ports • XS516TM: S3600 Series 16-Port 10G/Multi-Gigabit Ethernet Smart Switch with 2... -
Page 597: Overview
S3600 Series 8- or 16-Port 10G/Multi-Gigabit Ethernet Smart Switch with 2 SFP+ Ports Overview The switch provides eight or sixteen 10G/Multi-Gigabit Ethernet ports that support Layer 2+ and Lite Layer 3 features. Two additional ports can accept small form-factor pluggable (SFP) gigabit interface converters (GBICs) for 10G fiber or copper connectivity. - Page 598 S3600 Series 8- or 16-Port 10G/Multi-Gigabit Ethernet Smart Switch with 2 SFP+ Ports Do not service any product except as explained in your product documentation. ○ Some devices should never be opened. ○ If applicable to your product, opening or removing covers that are marked with the triangular symbol with a lightning bolt can expose you to electrical shock.
- Page 599 S3600 Series 8- or 16-Port 10G/Multi-Gigabit Ethernet Smart Switch with 2 SFP+ Ports • Depending on your product, use only a supplied power adapter or approved power cable: If your product uses a power adapter: ○ If you were not provided with a power adapter, contact your local NETGEAR reseller.
- Page 600 Hardware Overview This appendix describes the switch hardware features. The appendix includes the following sections: • Hardware description model XS508TM • Hardware description model XS516TM • Switch hardware interfaces...
-
Page 601: Appendix C Hardware Overview
S3600 Series 8- or 16-Port 10G/Multi-Gigabit Ethernet Smart Switch with 2 SFP+ Ports Hardware description model XS508TM The following sections describe the XS508TM switch hardware features. Front panel model XS508TM The switch provies eight 10G/Multi-Gigabit RJ-45 copper ports with two dedicated SFP+ ports. -
Page 602: Back Panel Model Xs508Tm
S3600 Series 8- or 16-Port 10G/Multi-Gigabit Ethernet Smart Switch with 2 SFP+ Ports Table 96. Front panel LEDs model XS508TM (Continued) Description RJ-45 SPD Mode LED No link established Link, Speed, Activity for Green Green Both solid green: copper ports (Ports 1-8) A valid link at a speed of 10 Gbps is established. -
Page 603: Hardware Description Model Xs516Tm
S3600 Series 8- or 16-Port 10G/Multi-Gigabit Ethernet Smart Switch with 2 SFP+ Ports Figure 2. Back panel model XS508TM Hardware description model XS516TM The following sections describe the XS516TM switch hardware features. Front panel model XS516TM The switch provies sixteen 10G/Multi-Gigabit RJ-45 copper ports with two dedicated SFP+ ports. - Page 604 S3600 Series 8- or 16-Port 10G/Multi-Gigabit Ethernet Smart Switch with 2 SFP+ Ports Table 97. Front panel LEDs model XS516TM Description Power LED Off: Power is not being supplied to the switch. Blinking green: The switch is powering on. Solid green: The switch is powered on.
-
Page 605: Back Panel Model Xs516Tm
S3600 Series 8- or 16-Port 10G/Multi-Gigabit Ethernet Smart Switch with 2 SFP+ Ports Back panel model XS516TM The back panel provides a Kensington lock and AC power receptacle. (The switch integrates a fixed, internal power supply.) The following figure shows the back panel of model XS508TM. -
Page 606: Sfp Ports For Fiber Or Copper Connectivity
S3600 Series 8- or 16-Port 10G/Multi-Gigabit Ethernet Smart Switch with 2 SFP+ Ports • Senses whether the cable is a straight-through or crossover cable. • Determines whether the link to the attached device requires a normal connection (such as when you are connecting the port to a computer) or an uplink connection (such as when you are connecting the port to a router, switch, or hub). -
Page 607: Multi-Function Reset/Factory Defaults Button
S3600 Series 8- or 16-Port 10G/Multi-Gigabit Ethernet Smart Switch with 2 SFP+ Ports Multi-function Reset/Factory Defaults button The switch provides a recessed, multi-function Reset/Factory Defaults button on the front panel. Depending on how long you press the button, this button lets you restart (power-cycle) the switch or reset it to factory defaults, either with or without maintaining the registration status. -
Page 608: Reset The Switch To Factory Default Settings And Erase The Registration Status
S3600 Series 8- or 16-Port 10G/Multi-Gigabit Ethernet Smart Switch with 2 SFP+ Ports CAUTION: Do not press the button for more than 10 seconds or the device registration flag will be erased from the switch and you will need to enter a registration key or log into your MyNETGEAR.com account and manually... -
Page 609: Appendix D Applications
Applications This appendix describes an application example. This appendix includes the following sections: • Connect equipment in a business environment... -
Page 610: Connect Equipment In A Business Environment
S3600 Series 8- or 16-Port 10G/Multi-Gigabit Ethernet Smart Switch with 2 SFP+ Ports Connect equipment in a business environment The following figure shows an example of how you can connect equipment (servers, laptops, storage devices) to the switch in a business environment to get multi-gigabit and 10G speed to your business devices. - Page 611 Installation This appendix describes the installation procedures for the switch. Switch installation involves the steps described in the following sections: • Step 1: Prepare the site • Step 2: Protect against electrostatic discharge • Step 3: Unpack the switch • Step 4: Mount or place the switch •...
-
Page 612: Appendix E Installation
S3600 Series 8- or 16-Port 10G/Multi-Gigabit Ethernet Smart Switch with 2 SFP+ Ports Step 1: Prepare the site Before you install the switch, make sure that the operating environment meets the site requirements that are listed in the following table. -
Page 613: Step 2: Protect Against Electrostatic Discharge
S3600 Series 8- or 16-Port 10G/Multi-Gigabit Ethernet Smart Switch with 2 SFP+ Ports Step 2: Protect against electrostatic discharge WARNING: Static electricity can harm delicate components inside your system. To prevent static damage, discharge static electricity from your body before you touch any of the electronic components, such as the microprocessor. - Page 614 S3600 Series 8- or 16-Port 10G/Multi-Gigabit Ethernet Smart Switch with 2 SFP+ Ports Figure 6. Switch package contents Check the contents of the boxes to make sure that all items are present before installing the switch. To check the package contents: 1.
-
Page 615: Step 4: Mount Or Place The Switch
S3600 Series 8- or 16-Port 10G/Multi-Gigabit Ethernet Smart Switch with 2 SFP+ Ports Step 4: Mount or place the switch You can mount the switch in a standard 19-inch (48.26-centimeter) network equipment rack, place the switch on a flat surface or it can be wall-mounted with the 200 x 100 mm vesa holes at the bottom panel. -
Page 616: Wall-Mount The Switch
S3600 Series 8- or 16-Port 10G/Multi-Gigabit Ethernet Smart Switch with 2 SFP+ Ports Wall-mount the switch The bottom panel of the switch provides four VESA mount holes that allow you to mount the switch to a wall. The switch comes with four wall-mount screws and anchors that you can secure to a wall and attach the switch to. -
Page 617: Place The Switch On A Flat Surface
S3600 Series 8- or 16-Port 10G/Multi-Gigabit Ethernet Smart Switch with 2 SFP+ Ports Leave about 6 mm (¼ inch) of each screw protruding from the wall so that you can insert the screws into the holes on the bottom of the switch. -
Page 618: Step 6: Connect Devices To The Switch's Rj-45 Ports
S3600 Series 8- or 16-Port 10G/Multi-Gigabit Ethernet Smart Switch with 2 SFP+ Ports NOTE: Contact your NETGEAR sales office to purchase these modules. If you do not want to install an SFP module, skip this procedure. To install an SFP transceiver module: 1. -
Page 619: Step 7: Check The Installation
S3600 Series 8- or 16-Port 10G/Multi-Gigabit Ethernet Smart Switch with 2 SFP+ Ports To connect devices to the switch’s RJ-45 ports: 1. Attach devices to the switch. 2. Verify that all cables are installed correctly. Step 7: Check the installation Before you apply power to the switch, perform the steps that are described in this section. -
Page 620: Step 9: Manage The Switch
• NETGEAR Insight app and Insight Cloud Portal: If you set the management mode of the switch to NETGEAR Insight Mobile App and Insight Cloud Portal, you can use the following applications to manage the switch remotely: ○... - Page 621 S3600 Series 8- or 16-Port 10G/Multi-Gigabit Ethernet Smart Switch with 2 SFP+ Ports For more information about the device UI, see the user manual, which you can download by visiting netgear.com/support/download. NOTE: If you plan to use the NETGEAR Insight Cloud Portal or Insight app...
-
Page 622: Appendix F Troubleshooting
Troubleshooting This appendix provides information about troubleshooting the switch. The appendix includes the following sections: • Troubleshooting chart • Additional troubleshooting suggestions... -
Page 623: Troubleshooting Chart
S3600 Series 8- or 16-Port 10G/Multi-Gigabit Ethernet Smart Switch with 2 SFP+ Ports Troubleshooting chart The following table lists symptoms, possible causes, and possible solutions for problems that might occur. Table 100. Troubleshooting chart Symptom Possible Cause Possible Solution The Power LED is off. -
Page 624: Additional Troubleshooting Suggestions
S3600 Series 8- or 16-Port 10G/Multi-Gigabit Ethernet Smart Switch with 2 SFP+ Ports Additional troubleshooting suggestions If the suggestions in the troubleshooting chart do not resolve the problem, see the following troubleshooting suggestions: • Network adapter cards: Make sure that the network adapters that are installed in the computers are in working condition and the software driver was installed. - Page 625 • Monitoring features default settings • Models XS508TM and XS516TM hardware technical specifications NOTE: For more information about the switch specifications and capabilities, including the maximum settings for many features, see the data sheet, which you can download by visiting netgear.com/support/download/.
-
Page 626: Appendix G Software Default Settings And Hardware Specifications
S3600 Series 8- or 16-Port 10G/Multi-Gigabit Ethernet Smart Switch with 2 SFP+ Ports Access default settings for the switch device UI The following table describes the default settings for access to the switch device UI. Settings that you cannot change in the device UI are not included in the table but might be included in the data sheet, which you can download by visiting netgear.com/support/download/. - Page 627 S3600 Series 8- or 16-Port 10G/Multi-Gigabit Ethernet Smart Switch with 2 SFP+ Ports Table 102. System features default settings Feature Name/Setting Default Time Configuration Clock source NTP time zone name None configured NTP offset hours NTP offset minutes NTP authentication mode...
- Page 628 S3600 Series 8- or 16-Port 10G/Multi-Gigabit Ethernet Smart Switch with 2 SFP+ Ports Table 102. System features default settings (Continued) Feature Name/Setting Default Hold multiplier Reinitializing delay Transmit delay LLDP-MED fast start duration SNMPv1/v2 Community configuration None configured Trap configuration...
- Page 629 S3600 Series 8- or 16-Port 10G/Multi-Gigabit Ethernet Smart Switch with 2 SFP+ Ports Table 102. System features default settings (Continued) Feature Name/Setting Default Host key None present Telnet Telnet Disabled DHCP Server Global Configuration DHCP server Disabled Bootp automatic mode...
-
Page 630: Vlan Features Default Settings
S3600 Series 8- or 16-Port 10G/Multi-Gigabit Ethernet Smart Switch with 2 SFP+ Ports Table 102. System features default settings (Continued) Feature Name/Setting Default DHCP snooping mode Disabled DHCP Snooping Interface Configuration Trust mode Disabled Invalid packets Disabled Rate limit None... - Page 631 S3600 Series 8- or 16-Port 10G/Multi-Gigabit Ethernet Smart Switch with 2 SFP+ Ports Table 103. VLAN features default settings (Continued) Feature Name/Setting Default Auto-VoIP 4088 (No members by default) Auto-Video 4089 (No members by default) VLAN Configuration (interfaces) PVID VLAN member...
- Page 632 S3600 Series 8- or 16-Port 10G/Multi-Gigabit Ethernet Smart Switch with 2 SFP+ Ports Table 103. VLAN features default settings (Continued) Feature Name/Setting Default OUI table 00:01:E3 SIEMENS 00:03:6B CISCO1 00:12:43 CISCO2 00:0F:E2 H3C 00:60:B9 NITSUKO 00:D0:1E PINTEL 00:E0:75 VERILINK 00:E0:BB 3COM...
-
Page 633: Switching Features Default Settings
S3600 Series 8- or 16-Port 10G/Multi-Gigabit Ethernet Smart Switch with 2 SFP+ Ports Table 103. VLAN features default settings (Continued) Feature Name/Setting Default Private VLAN promiscuous interface None configured Protected Port Protected port None configured Switching features default settings The following table describes the default settings for the switching features that you can configure. - Page 634 S3600 Series 8- or 16-Port 10G/Multi-Gigabit Ethernet Smart Switch with 2 SFP+ Ports Table 104. Switching features default settings (Continued) Feature Name/Setting Default Admin mode Enabled Speed Auto Link trap Enabled Frame size 1500 Flow control Disabled LAGs LAG name XS508TM: ch<n>...
- Page 635 S3600 Series 8- or 16-Port 10G/Multi-Gigabit Ethernet Smart Switch with 2 SFP+ Ports Table 104. Switching features default settings (Continued) Feature Name/Setting Default CST Port Configuration STP status Enabled Fast link Disabled BPDU forwarding Disabled Auto edge Enabled Path cost...
-
Page 636: Multicast Features Default Settings
S3600 Series 8- or 16-Port 10G/Multi-Gigabit Ethernet Smart Switch with 2 SFP+ Ports Table 104. Switching features default settings (Continued) Feature Name/Setting Default Burst interval(secs) DAI ACL/Rule Configuration DAI ACL/Rule None configured Nonconfigurable settings are not included in the table but might be included in the data sheet, which you can download by visiting netgear.com/support/download/. - Page 637 S3600 Series 8- or 16-Port 10G/Multi-Gigabit Ethernet Smart Switch with 2 SFP+ Ports Table 105. Multicast features default settings (Continued) Feature Name/Setting Default Mrouter time-out Fast leave mode Disabled Query mode Disabled Multicast Router Interface Configuration Multicast router Disabled Multicast Router VLAN Configuration...
-
Page 638: Routing Features Default Settings
S3600 Series 8- or 16-Port 10G/Multi-Gigabit Ethernet Smart Switch with 2 SFP+ Ports Table 105. Multicast features default settings (Continued) Feature Name/Setting Default MLD Snooping Multicast Router VLAN Configuration Multicast router Disabled MLD Snooping, Multicast Router, Interface Multicast router Disabled... - Page 639 S3600 Series 8- or 16-Port 10G/Multi-Gigabit Ethernet Smart Switch with 2 SFP+ Ports Settings that you cannot change in the device UI are not included in the table but might be included in the data sheet, which you can download by visiting netgear.com/support/download/.
-
Page 640: Qos Features Default Settings
S3600 Series 8- or 16-Port 10G/Multi-Gigabit Ethernet Smart Switch with 2 SFP+ Ports Table 106. Routing features default settings (Continued) Feature Name/Setting Default VLAN, Routing Routing VLAN None configured Router Discovery Router discovery configuration Automatically configured but disabled for any existing routing... - Page 641 S3600 Series 8- or 16-Port 10G/Multi-Gigabit Ethernet Smart Switch with 2 SFP+ Ports Table 107. QoS features default settings Feature Name/Setting Default CoS Configuration Global trust mode 802.1p CoS Interface Configuration Interface trust mode 802.1p Interface shaping rate Interface Queue Configuration...
- Page 642 S3600 Series 8- or 16-Port 10G/Multi-Gigabit Ethernet Smart Switch with 2 SFP+ Ports Table 107. QoS features default settings (Continued) Feature Name/Setting Default Assured Forwarding Selector (CS) PHB AF 11 -> 0 AF 12 -> 0 AF 13 -> 0 AF 21 ->...
-
Page 643: Security Features Default Settings
S3600 Series 8- or 16-Port 10G/Multi-Gigabit Ethernet Smart Switch with 2 SFP+ Ports Table 107. QoS features default settings (Continued) Feature Name/Setting Default DiffServ admin mode Enabled Class Configuration Class None configured IPv6 Class Configuration IPv6 class None configured Policy Configuration... - Page 644 S3600 Series 8- or 16-Port 10G/Multi-Gigabit Ethernet Smart Switch with 2 SFP+ Ports Table 108. Security features default settings (Continued) Feature Name/Setting Default Accounting server name Blank Port Blank Secret configured Not set Accounting mode Disabled TACAS+ Key String Blank...
- Page 645 S3600 Series 8- or 16-Port 10G/Multi-Gigabit Ethernet Smart Switch with 2 SFP+ Ports Table 108. Security features default settings (Continued) Feature Name/Setting Default Periodic reauthentication Disabled Reauthentication period Quiet period Resending EAP Maximum EAP requests Supplicant timeout Server timeout MAC Filter...
- Page 646 S3600 Series 8- or 16-Port 10G/Multi-Gigabit Ethernet Smart Switch with 2 SFP+ Ports Table 108. Security features default settings (Continued) Feature Name/Setting Default L2 loop protection Disabled Transmit interval Maximum PDU receive Disable timer L2 Loop Protection Interface Configuration Keep alive...
-
Page 647: Acl Features Default Settings
S3600 Series 8- or 16-Port 10G/Multi-Gigabit Ethernet Smart Switch with 2 SFP+ Ports ACL features default settings The following table describes the default settings for the ACL features that you can configure. Settings that you cannot change in the device UI are not included in the table but might be included in the data sheet, which you can download by visiting netgear.com/support/download/. -
Page 648: Models Xs508Tm And Xs516Tm Hardware Technical Specifications
S3600 Series 8- or 16-Port 10G/Multi-Gigabit Ethernet Smart Switch with 2 SFP+ Ports Table 110. Monitoring features default settings (Continued) Feature Default Server Log Server logging Disabled Server None configured Port Mirroring Port mirroring Disabled Destination port None Models XS508TM and XS516TM... - Page 649 S3600 Series 8- or 16-Port 10G/Multi-Gigabit Ethernet Smart Switch with 2 SFP+ Ports Table 111. Hardware technical specifications for models XS508TM and XS516TM (Continued) Feature Description Weight XS508TM: 4.85 lb (2.2 kg) XS516TM: 5.4 lb (2.45 kg) Operating temperature 32º to 122ºF (0° to 50°C)
Need help?
Do you have a question about the S3600 Series and is the answer not in the manual?
Questions and answers