Advertisement
Quick Links
Installation Guide
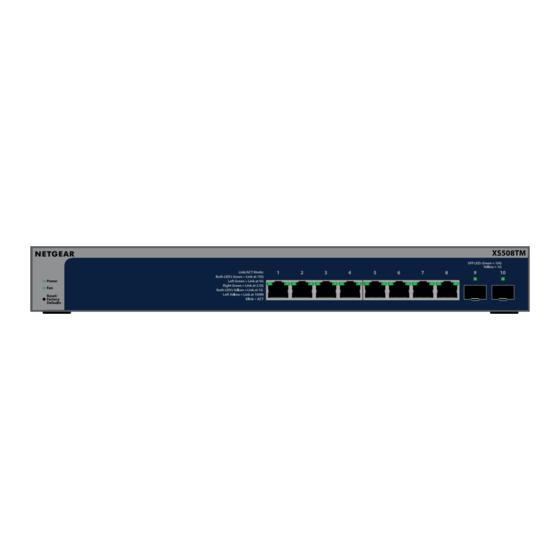
S3600 Series 8-Port 10G/Multi-Gigabit Ethernet Smart Switch
with 2 SFP+ Ports
XS508TM
S3600 Series 16-Port 10G/Multi-Gigabit Ethernet Smart
Switch with 2 SFP+ Ports
XS516TM
October 2023
Package contents
•
NETGEAR XS508TM or XS516TM switch
•
Detachable power cord (varies by region)
•
Rubber footpads for tabletop installation
•
Rack-mount kit
•
Wall-mount kit
•
Installation guide
NOTE: For more information about installing and mounting the switch, visit the NETGEAR Download Center at
netgear.com/support/download/ and enter the model number to access the Hardware Installation Guide and other
available documentation.
Step 1: Connect the switch
Sample connections
XS516TM
1G
1G workstation
1G laptop
1G
2.5G/5G/10G
10G
10G
10G servers
5G
5G storage
1.
Connect devices to the RJ-45 ports (XS508 ports 1–8 or XS516 ports 1-16) on the switch front panel.
Use Category 5e (Cat 5e) Ethernet cables terminated with RJ-45 connectors to make 1G, 2.5G, and 5G connections.
For 10G connections, use Cat 6a or higher rated Ethernet cables terminated with RJ-45 connectors.
2.
Connect one port on the switch to a network that includes a DHCP server such as a router.
NOTE: In a small office or home office network, connect the switch to the LAN port of a router that is
connected to a modem, or to a gateway.
To use an SFP+ port, you must insert an SFP+ transceiver module, which you can purchase from NETGEAR.
3.
Power on the switch and wait two minutes.
If you connected the switch to a network with a DHCP server, the switch is automatically assigned a new IP address.
(The default switch IP address is 192.168.0.239.)
This switch is designed for indoor use only. If you want to connect to a device located outdoors, the outdoor device
must be properly grounded and surge protected, and you must install an Ethernet surge protector inline between the
switch and the outdoor device. Failure to do so can damage the switch.
WARNING: Before connecting this switch to outdoor cables or devices, see kb.netgear.com/000057103 for safety and
warranty information.
Step 2: Discover the switch in your network
There are two ways to set up and manage the switch: Add it to a NETGEAR Insight managed network, or set it up as a
locally managed standalone switch. Follow the instructions for your preferred network setup.
Insight setup
Standalone setup
Option A: Use NETGEAR Insight
These instructions assume that you are already a NETGEAR Insight subscriber and want to add the switch to an Insight
managed network behind a NETGEAR Pro Router or ProWiFi system.
You can use the Insight app on a mobile device and scan the QR code or bar code to add the switch to Insight, or use the
Insight Cloud Portal to manually enter the switch's serial number and MAC address. These instructions describe how to use
the Insight app.
After the switch is onboarded, we recommend connecting a tablet or computer directly to the switch or to the network on
which you installed the switch to complete set up.
Internet
A1. Use the Insight app to add and discover your switch
PR60X router
1.
In the Insight app, enter the email address and password for your NETGEAR account and tap LOG IN.
2.
Use one of the following methods to add and discover the switch:
10G
•
If your switch and mobile device are connected to the same network. Your switch and its IP address display in
2.5G/5G/10G
2.5G/5G/10G workstation
the devices list. Do the following:
a.
Select the switch or tap Unclaimed.
b.
On the next screen, tap ADD DEVICE.
2.5G/5G/10G laptop
If the switch does not display in the devices list, tap + in the upper-right corner, and tap Scan Network. If the
switch still does not display, follow the instructions for a mobile device that is not connected to the same network.
•
Your switch and mobile device are not connected to the same network. Your switch and its IP address do not
display in the devices list. Do the following:
a.
Tap + in the upper-right corner.
b.
Either use the camera on your mobile device to scan the bar code or QR code, or type in the serial number.
3.
Follow the onscreen instructions to complete the registration of the switch.
At the NETGEAR Insight Cloud Portal or Insight app prompt: Tap Manage with Insight.
Then, continue with A2. Change the management mode to Insight.
A2. Change the management mode to Insight
By default, the management mode in the device UI is set to Directly Connect to Web Browser Interface, which lets you
configure the switch from the device UI. To manage the switch remotely from the cloud with the NETGEAR Insight Cloud
Portal or Insight app, you must change the management mode in the device UI.
1.
Open a web browser from a computer or tablet connected to the same network as your switch.
You can use a wired or WiFi connection.
2.
In the address field of your web browser, enter the IP address of the switch.
The Device UI login page displays.
If you did not yet register the switch, the Register to activate your warranty page displays. For more information, see
Optional Step 3: Log in to the device UI to configure the switch.
3.
Enter your device admin password.
This is the password that you set the first time that you logged in to the device UI.
Option A: Use NETGEAR Insight
Insight subscribers can use the Insight app for quick
onsite discovery.
Option B: Discover a standalone switch
For a standalone switch, use the NETGEAR Switch
Discovery Tool or Smart Control Center.
Continued on the next page
Advertisement

Related Manuals for NETGEAR S3600 Series


Summary of Contents for NETGEAR S3600 Series
- Page 1 NETGEAR XS508TM or XS516TM switch There are two ways to set up and manage the switch: Add it to a NETGEAR Insight managed network, or set it up as a locally managed standalone switch. Follow the instructions for your preferred network setup.
- Page 2 (If this product is sold in Canada, you can access this document in Canadian French at must configure the switch using the NETGEAR Insight Cloud Portal or Insight app. We recommend that you use the Insight 1G Copper SFP Transceiver netgear.com/support/download/.) For regulatory compliance information including the EU Declaration of Conformity,...
Need help?
Do you have a question about the S3600 Series and is the answer not in the manual?
Questions and answers