REITEL RETOMAT Series Operating Instructions Manual
With comfort-controller
Hide thumbs
Also See for RETOMAT Series:
- Operating instructions manual (20 pages) ,
- Operating instructions manual (20 pages)

Related Manuals for REITEL RETOMAT Series


Summary of Contents for REITEL RETOMAT Series
- Page 1 Operating Instructions RETOMAT-Series with COMFORT-controller REITEL Feinwerktechnik GmbH Senfdamm 20 | 49152 Bad Essen Tel.: +49(0)5472-9432-0 | Fax: +49(0)5472-9432-40 www.reitel.com | info@reitel.com...
- Page 2 Dear Customer! The laboratory furnaces of the RETOMAT series are especially designed for precious and non-precious alloys and partial frameworks. The COMFORT-control offers you 10 programming spaces with up to 30 heating ramps and a speed program for speed investment. Temperature is distributed and stays even in the chamber due to the four-sided heating element and optimal chamber insulation.
-
Page 3: Table Of Contents
INDEX TECHNICAL DESCRIPTION ................... 4 B ......................4 ASIC QUIPMENT S ....................4 PECIAL CCESSORIES O ....................4 PERATING LEMENTS T ......................6 ECHNICA SAFETY NOTES ......................6 G ....................6 ENERAL AFETY OTES ... -
Page 4: Technical Description
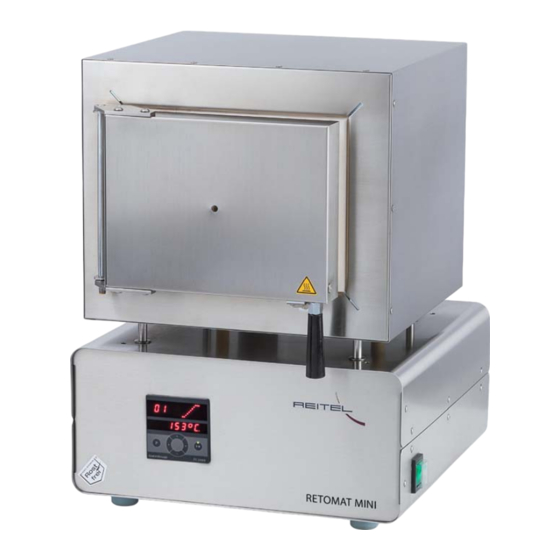
Technical Description Basic Equipment RETOMAT laboratory furnace with COMFORT-controller Special Accessories Order-No.: 27301000 Catalyst Order-No.: 27302000 Steam ventilator Order-No.: 27303000 Casting ring drawer Operating Elements Power switch Oven door Handle (furnace door) Control panel (COMFORT control) Rubber feet Socket (for optional steam ventilator or catalyst) Circuit breaker... - Page 5 Fig.: Side view Fig.: back view Fig.: Oven chamber...
-
Page 6: Technica Data
Technica Data RETOMAT MINI Comfort Line voltage 230 V/50-60 Hz Current consumption 2.500 W Height/width/depth 510 / 390 / 430 Heating chamber Height/width/depth in mm 115 / 165 / 150 Mould sizes 4 x moulds – size 3 Volume 4,6 l Weight 32 kg Number of heating... -
Page 7: Specific Safety Notes
Place the device only in a heated, ventilated, clean room, possibly under an extractor hood. The installation surface should be flat, level, and have appropriate stability for use. No objects should be placed on the device. To avoid any risk of injury, appropriate protective clothing should be worn, and suitable tools should be used (such as gloves, safety goggles, face mask, safety shoes, ear protection, and pliers). -
Page 8: Installation
The RETOMAT oven may only be operated by professionally trained personnel: o In dental laboratories for burning out muffles and other thermal processing; o In tool manufacturing companies for thermal processing of steel; o In industry; o In goldsmiths; o In research laboratories. ... -
Page 9: Use Of A Steam Catalyst
Use of a steam catalyst Notes: Please note that the ceramic filter can become clogged due to heavy soot development (depending on the fuel used). To clean it, loosen the screw on the side of the chamber and lift the filter insert upwards. The catalytic converter insert can be burned off for one hour in the preheating oven at 700°C. -
Page 10: Setting The Time And Date
Once the self-test has been completed, the current time and day of the week appear on the upper display. The current temperature is displayed on the lower display (see Start field diagram). The control can now be programmed. Fig.: Start on control panel Pressing the P button allows you to access the desired program. -
Page 11: Programming And Operation
Press the right arrow button to navigate to S92 for setting the date. Use the + and - buttons to adjust the day (S92), month (S93), and year (S94), each time advancing with the right arrow button. End the setting by saving, holding down the program button "P"... -
Page 12: Programming Step Program
Press the right arrow button to move to the next menu item for setting the target temperature using the + and - buttons. Holding down the + or - buttons will adjust the setting faster. Press the right arrow button to proceed. The programming of the program is complete. - Page 13 Press the right arrow button to navigate to setting the target temperature. Use the + and - buttons to adjust the temperature. Holding down the + or - buttons will increase the setting faster. Press the right arrow button again to proceed.
-
Page 14: Delayed Start
Delayed start To set a delayed start, you must first set the time and date as described in Chapter 4.2. Press the "P" button to select your desired program. Pressing the "P" button multiple times will cycle through your programs. Once you are in your desired program, press the left arrow button twice to access the control panel shown on the right. -
Page 15: After Operation
continues to heat after reaching the end temperature. Press the right arrow button to confirm your program. After Operation The molded parts of the oven door cannot withstand rapid temperature changes well. If the oven is turned off and left open after use at high temperature, the hot oven door is exposed to room temperature and cools down too quickly. -
Page 16: Maintenance
Regularly check the appliance for visible damage to the housing or the power cord. Clean the housing regularly with a damp cloth and use REITEL stainless steel care spray. Note: Clean and protect your device at regular intervals with the REITEL stainless steel care spray (order -no.: 90405000) to remove lime, plaster and dust as well as other... - Page 17 Warranty repairs have to performed by REITEL Feinwerktechnik GmbH or by authorised distributors. Repairs performed by non-authorised companies will void the claim for refund since damages to the product resulting hereof are not covered by warranty.
- Page 18 REITEL Feinwerktechnik GmH; The warranty does not cover the cost of removal and replacement of parts and accessories, unless supplied as original equipment by REITEL Feinwerktechnik GmbH All kind of damages occurred not directly at the device as well as consequential damages (e.g.
-
Page 19: Disposal Regulations
Should you need to borrow a device while your device is being repaired, please contact Messrs. REITEL or your distributor. These loans are a service for which availability cannot necessarily be guaranteed. After the warranty period, a free may be charged for loan equipment as well as for shipping and packaging. -
Page 20: Spare Parts List
Spare Parts List Best.-Nr. Retomat mini, Retomat, Retomat MG Ref.: Ersatzteilliste / Spare parts list 03/2019 Unit Feder Stck E8101500 Spring piece Holzgriff Stck E8101300 Wooden handle piece Katalysator ( Keramik ) für 73.1 Stck E5010600 Catalyst (ceramics) for 73.1 piece Keramik Einlegeplatte 067 (Retomat Mini) 130 x 135 mm Stck... -
Page 21: Eu-Richtlinien
EU-Richtlinien... - Page 24 We adhere to the quality management system of ISO 13485:2016, ensuring consistent process standards. REITEL Feinwerktechnik GmbH Senfdamm 20 | 49152 Bad Essen Tel.: +49-(0)5472-9432-0 | Fax: +49-(0)5472-9432-40 www.reitel.com | info@reitel.com...
Need help?
Do you have a question about the RETOMAT Series and is the answer not in the manual?
Questions and answers