Table of Contents
Advertisement
Quick Links
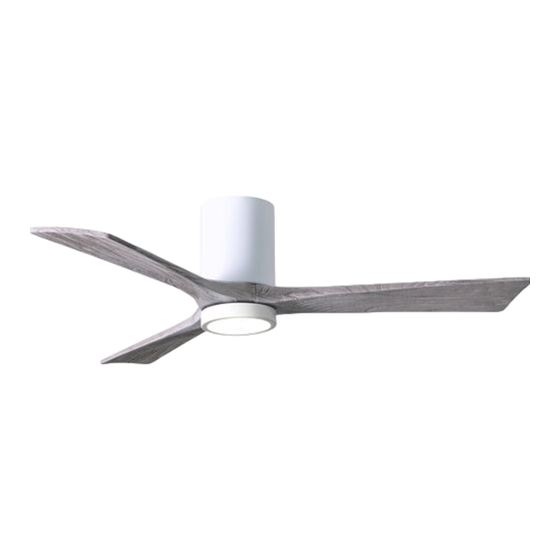
YG478B (Irene_3HLK)
YG478B (Irene_5HLK)
FAN RATING 220-240V, 50-60Hz, 53W (Fan: 35W, Light: 18W)
QUICK ASSEMBLY NOTES:
* Do not wire in fan while house wires are Live, turn power off at breaker before installation
begins.
* Do not use any controls, wall or remote, other than what we provided.
* Please do not use any electric or battery powered tools in the assembly and installation of this
or any Matthews Fan Company product.
IRENE-HLK
60", 52" or 42" CEILING FAN
Net Weight: 6.9Kg 3 blade fan, 8.5Kg 5 blade fan
AUSTRALIA ONLY
Model:YG478B (Irene_3/5HLK)
Advertisement
Table of Contents

Related Manuals for Atlas fan company IRENE-HLK 60


Summary of Contents for Atlas fan company IRENE-HLK 60
- Page 1 IRENE-HLK 60", 52" or 42" CEILING FAN YG478B (Irene_3HLK) YG478B (Irene_5HLK) Model:YG478B (Irene_3/5HLK) Net Weight: 6.9Kg 3 blade fan, 8.5Kg 5 blade fan FAN RATING 220-240V, 50-60Hz, 53W (Fan: 35W, Light: 18W) QUICK ASSEMBLY NOTES: * Do not wire in fan while house wires are Live, turn power off at breaker before installation begins.
-
Page 2: Tools And Materials Required
1. TOOLS AND MATERIALS REQUIRED Philips screwdriver Blade screwdriver 11 mm wrench Step ladder Wire cutters 2. PACKAGE CONTENTS Unpack your fan and check the contents. You should have the following items: a-1. Blade set (3) (for Irene-3HLK) a-2. Blade set (5) (for Irene-5HLK) Mounting bracket (preassembled with fan motor assembly) Fan motor assembly... - Page 3 READ AND SAVE THESE SAFETY AND INSTALLATION INSTRUCTIONS. Consult a licensed electrician if unsure of any point below mentioned. DANGER/WARNING/CAUTION 1. High voltage and moving parts around motors and motor driven equipment can cause serious or fatal injuries. Always disconnect power source at main switch before wiring, servicing or cleaning unit. Do not rely on fan control device to prevent unexpected start-up or electrical shock.
- Page 4 13. The replacement of parts of the safety suspension system device shall be performed by the manufacturer, its service agent or suitably qualified persons. 14. The fixing means for attachment to the ceiling such as hooks or other devices shall be fixed with a sufficient strength to withstand 4 times the weight of the ceiling fan.
-
Page 5: Hanging The Fan
3. HANGING THE FAN REMEMBER to turn off the power. Follow the steps below to hang your fan properly: Step 1. Disassemble the mounting bracket from the fan motor assembly. Washers Mounting bracket Step 2. Attach the mounting bracket to the Screws ceiling. -
Page 6: Make The Electric Connections
4. MAKE THE ELECTRIC CONNECTIONS Remember to disconnect the power. Follow the steps below to connect the fan to your household wiring. Use the wire connecting nuts supplied with your fan. Secure the connectors Blue with electrical tape. Make sure there are no (household) loose strands or connections. -
Page 7: Finishing The Installation
5. FINISHING THE INSTALLATION Step 1. Move fan motor into position over the Safety cable four mounting holes and secure with the four screws provided. (Fig. 4) Step 2. An additional safety support is provided Motor to prevent the fan from falling. Secure the safety cable to the ceiling joist with screw and washer. -
Page 8: Attaching The Fan Blades
6. ATTACHING THE FAN BLADES 1. Fasten blade to motor using the flat washers, lock washers and screws supplied. (Fig. 6) 2. Repeat process with other blades. Tighten each screw and make sure the blade is straight. NOTE: This fan is supplied with two types of blades for installation. -
Page 9: Installing The Light Kit
8. INSTALLING THE LIGHT REMEMBER: To disconnect the power. Caution: RISK OF ELECTRIC SHOCK ONLY u s e L E D l i g h t k i t m o d e l : G F B O L S - 230V14WD100mm for this fan. -
Page 10: Programming Your Fan And Operating The Remote Control
9. PROGRAMMING YOUR FAN AND OPERATING THE REMOTE CONTROL Your DC brushless motor is equipped with a automatically learned type remote control. Set screw Remove the set screw on the back of transmitter, take out the battery cover. Install one 3V battery cell (included) (Fig. -
Page 11: Operating Your Fan
NOTE: During self calibration test, the remote is non-fuctional. NOTE: The learning frequency function and self calibration test will continue to retain the last set frequency and calibration set even when the AC power is shut off. If the frequency is changed the self calibration test will occur again. -
Page 12: Care Of Your Fan
11. CARE OF YOUR FAN Here are some suggestions to help you maintain your fan 1. Because of the fan's natural movement, some connections may become loose. Check the support connections, brackets, and blade attachments twice a year. Make sure they are secure. (It is not necessary to remove fan from ceiling.) 2. -
Page 13: Troubleshooting
12. TROUBLESHOOTING Problem Solution Fan will not start. 1. Check circuit fuses or breakers. 2. Check line wire connections to the fan and switch wire connections in the switch housing. CAUTION: Make sure main power is off. 3. Check that the battery of the remote is functional. 4. - Page 14 INSTRUCTIONS ON HOW TO PROGRAM MULTIPLE FANS ON SINGLE CIRCUIT BREAKER. 1. Turn the power off at the breaker/service box. 2. Hang all fans by convenience cable located in top of motor to hook in ceiling bracket. This will allow you to easily access the leads from house and the leads of the fan.
- Page 15 MOTOR: The Atlas Fan Company (Atlas) warrants to the original consumer purchaser of each Atlas Fan ("You"), that if any part of the motor, excluding the wall controls, remote controls or pull cord mechanisms ("Controls”) fails due to a defect in material or workmanship ("Defect") during your lifetime while the Atlas Fan is still installed in the exact...
- Page 16 IN-HOME (ON-SITE) WARRANTY? The Atlas 12 month in-home warranty covers Atlas ceiling fans installed within the coverage of our network of service agents in cases where the product fails due to defective materials or workmanship. This warranty does not cover installation faults, house wiring faults, loose blades or fittings or damage of any kind. Claims regarding corrosion damage are subject to case by case appraisal.
- Page 17 Note: Signals sent through the power grid by the electricity supplier for the control of off peak hot water, street lights and other devices may cause an intermittent humming noise in your electrical appliances such as your ceiling fan. Filters are available in Australia at the customer's expense. These noises do not occur as a result of a faulty fan.
Need help?
Do you have a question about the IRENE-HLK 60 and is the answer not in the manual?
Questions and answers