
Subscribe to Our Youtube Channel
Related Manuals for Emax Tinyhawk III Plus


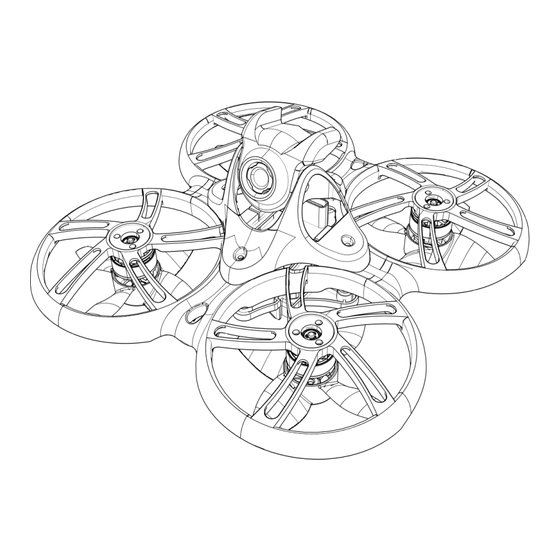
Summary of Contents for Emax Tinyhawk III Plus
- Page 1 Tinyhawk III Plus Thanks for purchasing the Tinyhawk III Plus. Please follow the instruction manual to assemble and configure your Tinyhawk III Plus. Design in California, Made in China...
-
Page 2: Important Notes
5. Before each flight, ensure the battery is fully charged, power connections are secure, and do not fly around crowds, children, animals, or objects. 6. Our Tinyhawk III Plus comes equipped with an open-source flight controller and electronic speed controller to meet the needs of FPV enthusiasts upgrading their quadcopters. - Page 3 Tinyhawk III Plus Tinyhawk III Plus(HD) Wheelbase 76mm Maximum appearance size LxWxH=105x105x45mm Weight 35.5g(without battery) Motor TH0802 II-15000KV propeller Avan TH Turtlemode-2 STM32F411 (100MHz) main control Main control board Integrated 4-in-1-6A-8 bit electrical regulation, input voltage 1-2S On board ELRS (2.4G) receiver (SPI communication)
- Page 4 Tinyhawk III Plus Charging System Turn on 5V/3A, turn off 5V/1A charging system Suggest using 8-32GB memory TF card (C10 high- speed TF card) Recording formats TS, MOV emax-usa.com...
- Page 5 Tinyhawk III Plus Tinyhawk III Plus(Analog) Wheelbase 76mm Maximum appearance size LxWxH=105x105x45mm Weight 32.5g (without battery) Motor TH0802 II 15000KV propeller Avan TH Turtlemode-2 STM32F411 (100MHz) main control Main control board Integrated 4-in-1-6A-8 bit electrical regulation, input voltage 1-2S On board ELRS (2.4G) receiver (SPI communication)
- Page 6 Tinyhawk III Plus Maximum support for memory 32G TF card File format AV size: VGA/D1/HD (optional) emax-usa.com...
- Page 7 Tinyhawk III Plus Tinyhawk III Plus -RTF HD 1.Tinyhawk III Plus ..×1 2.EMAX E8 Transmitter(ELRS-2.4G) ..×1 3.EMAX Transporter II HD ..×1 4.EMAX 1s HV 650mAh ..×1 5.Charger ..×1 6.Propeller..(2XCW, 2XCCW) 7.Other accessory ..×1 Tinyhawk III Plus -RTF (Analog) 1.Tinyhawk III Plus ..×1 2.EMAX E8 Transmitter(ELRS-2.4G) ..×1...
- Page 8 Tinyhawk III Plus 1.E8 Transmitter(ELRS-2.4G) 1.1 E8 Transmitter(ELRS-2.4G) 1.2 E8 Transmitter (ELRS-2.4G) Operation 1.3.1 Binding & Unbinding emax-usa.com...
-
Page 9: Button Functions
Tinyhawk III Plus Entering Binding Mode for E8 Transmitter (ELRS-2.4G): Firstly, turn on the E8 Transmitter (ELRS-2.4G). Then simultaneously press the "L4+" and "R3-" buttons, hold for 1 second. A prompt sound will be heard, and the central indicator light will alternate between green and red flashing, indicating that the remote controller has entered binding mode. -
Page 10: Joystick Calibration
Tinyhawk III Plus. In Right Hand Mode: Left joystick on the E8 Transmitter (2.4G) controls the pitch and roll of the Tinyhawk III Plus. The right joystick controls the throttle and yaw direction of the Tinyhawk III Plus. - Page 11 Tinyhawk III Plus Schematic diagram of the left and right-handed joysticks (the picture shows the left-handed mode, and of the joystick control reversed in the right-handed mode emax-usa.com...
- Page 12 Tinyhawk III Plus emax-usa.com...
-
Page 13: Battery And Charging
Tinyhawk III Plus 1.3.6 Trainer Port & Simulator Insert one end of a 3.5mm male-to-male cable into the trainer port (3.5mm audio jack) and the other end into a simulator (sold separately) to output corresponding channel values. Insert a Type-C data cable into the remote controller to output corresponding channel values. - Page 14 2. Connect the transmitter to your computer using a Type-C data cable. 3. Open the EMAX Serial Upgrade Tool on your computer. 4. Perform the following steps within the upgrade tool: (a) Identify and select the appropriate serial port. (b) Click on "Open Port." (c) Click on "Select File"...
- Page 15 Tinyhawk III Plus Disconnect and reconnect the Type-C data cable. 1.4.2 Power Switching and Changing Telemetry/Transmission Rate To switch power levels or modify telemetry/transmission rates, follow these steps: 1. Follow steps (1) from the Firmware Update and Upgrade section.
- Page 16 Note: Obtaining the Serial Update Tool: After extracting the "release" file, locate the file named "serial_bootloader.exe." Double-clicking this file will directly launch the tool. You can download the relevant compressed files and firmware update files from the EMAX official website (www.emax-usa.com). emax-usa.com...
- Page 17 Tinyhawk III Plus 2.Transporter II HD 2.1Transporter II HD emax-usa.com...
- Page 18 Tinyhawk III Plus 1. Distance adjustment card slot 2. Ventilation port 3. TYPE-C charging port 4. On/Off button 5. Confirm button 6. Fan 7. Down button 8. Firmware update indicator light 9. Recording indicator light 10 Charging indicator light 11. Up/menu button 12.
- Page 19 Tinyhawk III Plus Flight goggles consist of two main components: the display module and the main body shell. These can be combined together using magnets or separated as needed. emax-usa.com...
- Page 20 Tinyhawk III Plus There are three distance adjustment slots, allowing for three different distances to be set. When adjusting, please ensure that the distance adjustment slots on the left and right sides are kept consistent. 2.2 Transporter II HD Specifications Weight: Approximately 425g (including head strap and antennas) ...
- Page 21 Tinyhawk III Plus Please note that specifications and features are subject to change without notice. 2.3 Transporter II HD Operation 2.3.1 Button Instructions Up/Menu Button: In SCAN mode, long press to enter preview mode, then long press again to access the menu bar mode. In preview mode, short press to cycle through channels (R1-R2-R3-R4-R5-R6-R7-R8-F2- F4).
-
Page 22: System Settings Menu
Tinyhawk III Plus TYPE-C Charging Port: DC/5V charging (Recommended: 5V 3A charging in powered-on state, 5V 1A charging in powered-off state). Can be connected to an external power source with 5V 3A (Insufficient current may cause inadequate power supply). Warning: Do not use an external power source or power adapter with a voltage higher than 5V, as it may result in damage to the product. -
Page 23: Dvr Function
Tinyhawk III Plus 2.3.3 DVR Function (1) Automatic Recording Mode When the HD goggles meet the following conditions: 1.1 - Valid video signal (not a black screen) 1.2 - Available space on the TF (microSD) card is over 200MB And video signal is connected upon powering on, the goggles will automatically enter the automatic recording mode. -
Page 24: Screen Brightness Adjustment
Follow the steps below for the update process: 1. Format the TF (microSD) card and power off the HD goggles. 2. On your computer, extract the Emax Transporter II HD firmware update compressed package to the root directory of the TF (microSD) card. - Page 25 1. Format the TF (microSD) card and power off the HD goggles. 2. On your computer, extract the Emax Transporter II HD firmware update compressed package to the root directory of the TF (microSD) card. 3. Move the "Boot Switch" to the right side, as shown in the figure.
- Page 26 Tinyhawk III Plus 3.Transporter II 3.1Transporter II emax-usa.com...
- Page 27 Tinyhawk III Plus 1. Distance Adjustment Slot 2. Frequency Band Switch Button 3. Channel Switch Button 4. Recording Button 5. Audio Interface 6. Micro USB Port 7. Recording Indicator Light 8. Charging Indicator Light 9. Antennas 10. Auto Search Button 11.
- Page 28 Channel Select Button (C): Short press to cycle through the eight available channels in a continuous loop. Note: Ensure that the Tinyhawk III Plus is powered on and in the correct channel when cycling through frequencies to select the appropriate frequency band and channel.
-
Page 29: Recording On & Off
1. Before adjusting parameters, hold down the CH button or FR button for 3 seconds. 2. Ensure that the power of the Tinyhawk III Plus is turned on. When cycling through channels, using the video goggles of the Tinyhawk III Plus will make it easier to identify the correct channel. - Page 30 Tinyhawk III Plus To start recording: While in DVR working mode, short-press the right- side R button. A solid red dot will appear at the top-center of the screen, and the DVR's red LED will remain lit. After a moment, the red dot on the screen will begin blinking, and the DVR's red LED will also blink, indicating recording mode has been activated.
- Page 31 Tinyhawk III Plus Charge using a 5V-1A adapter and a micro USB cable. Charging indicator status: Solid red light: Charging in progress. Solid green light: Charging complete. Note: The battery level is displayed on the upper right corner of the ...
- Page 32 Warning: Incorrect propeller installation can lead to improper flight and loss of control of the Tinyhawk III Plus. Double-check the propeller orientations for accuracy. If the motor is not supported properly, it might lead to frame breakage.
- Page 33 2. Propeller Removal To remove propellers, use a small tool like a 1.5mm hex driver or a small screwdriver to press against the metal bottom of the motor and the Tinyhawk III Plus frame. Hold the propeller blade with your fingers and gently pry it off the motor until it pops out.
- Page 34 flight controller. 4.5 Changing Video Transmission Settings The default video transmission settings for the Tinyhawk III Plus are R:4:25mW. If you wish to change these settings, follow these steps: 1. Open the Betaflight Configurator software. 2. Navigate to the video transmission settings.
- Page 35 4. After making the desired changes, click "Save." 5. Once saved, restart the Tinyhawk III Plus to apply the new OSD settings. Note: The process for changing OSD settings is the same for both the HD and analog versions of the Tinyhawk III Plus.
- Page 36 UART2 TX, and the digital video transmitter SmartAudio is on UART1. To change VTX settings, follow these steps: 1. Power on the Tinyhawk III Plus, Transporter II (or Transporter II HD), and E8 Transmitter. 2. Follow the on-screen prompts to access the main setup menu. Keep the throttle centered, yaw to the left, and pitch up (THROTTLE MID + YAW LEFT + PITCH UP) to enter the OSD parameter adjustment menu.
- Page 37 5.2.1EMAX ELRS(2.4G) 5.2 Tinyhawk III Plus Receiver 5.2.1 EMAX ELRS (2.4G) Receiver Specifications The Tinyhawk III Plus receiver features an onboard ELRS (2.4G) receiver with an SX1280 RF module. The communication method is SPI, equipped with a ceramic antenna (3dB gain). It operates in the frequency range of 2400-2480MHz.
- Page 38 The E8 Transmitter (ELRS-2.4G) is already bound to the Tinyhawk III Plus included in the RTF kit. If necessary, follow these steps to bind (assuming you have not changed the binding key): 1.
- Page 39 Upgrade Tool, you can read the current binding key from the aircraft and the remote controller. You can then write the aircraft's binding key to the remote controller using the EMAX UART Upgrade Tool, or write the remote controller's binding key to the flight controller using the Betaflight Configurator software.
- Page 40 Tinyhawk III Plus 5.3 Tinyhawk III Plus ESC The Tinyhawk III Plus ESC is an integrated 4-in-1 8-bit 6A ESC. Maximum peak current: 6.7A; MCU: EFM8BB21F16G; Input voltage: 1-2S; ESC firmware: JESC_SH90_48_2_3.HEX; Supported signal protocols: D-Shot150, D-Shot300, D-Shot600, Multishot, OneShot125, PWM.
- Page 41 Tinyhawk III Plus Onboard 5V/2.5A BEC, 3.3V/300mA BEC; Firmware: EMAX_TINYHAWKF4SX1280. 5.5PID emax-usa.com...
- Page 42 Configurator software The Betaflight Configurator can be used to change the programming settings of Tinyhawk III Plus. The Betaflight configurator and flight controller firmware can be found in the https://github.com/betaflight/ Obtain.The Tinyhawk III Plus is factory configured as a channel diagram for TAER1234.
- Page 43 Tinyhawk III Plus AUX 3 is a 2-stage switch configured for FLIP Over After CARSH mode; AUX 4 is a two-stage switch configured as a buzzer (BEEPER); Configure your E8 Transmitter (ELRS-2.4G) using the above method, or change these settings in the Betaflight Configurator.
- Page 44 Tinyhawk III Plus (2) Select either "Load Firmware from Online" or "Load Firmware from Local Computer" and wait for the download to complete. (3) Finally, click on "Flash Firmware" and wait for a few seconds for the flashing process to complete.
- Page 45 Tinyhawk III Plus will be restored to default settings. Disclaimer: The Tinyhawk III Plus has been optimized to its best state. Changing PID settings may affect flight time, overall speed, aircraft control, and motor overheating. We do not recommend altering any PID settings or upgrading firmware to new versions for the Tinyhawk III Plus.
- Page 46 Calibration takes a few seconds, and then the Tinyhawk III Plus is ready to fly. With a fully charged battery, the Tinyhawk III Plus can fly for around 4 minutes. When the battery voltage reaches 3.2V, it's recommended to land the Tinyhawk III Plus promptly;...
- Page 47 LOCK Unlocking means preparing the Tinyhawk III Plus for takeoff. When the Tinyhawk III Plus is powered on for the first time, the propellers won't spin until it's unlocked. 1.Pull the throttle down to the lowest position, wait for the red light on the flight controller to stop blinking and the blue light to stay solid, indicating the aircraft is calibrated and ready.
-
Page 48: Flight Modes
3-position switch. When AUX 2 is in the first position, the Tinyhawk III Plus will be in Simple Mode. When the switch is in the middle position, it will be in Intermediate Mode, and finally, the third position is Advanced Mode. - Page 49 (without wearing video goggles). Power on the Tinyhawk III Plus and place it in a safe and open area. Start the Tinyhawk III Plus and use the left stick to raise the throttle to hover. Begin by attempting to maintain a stable altitude.
- Page 50 Tinyhawk III Plus Warning: Thank you for purchasing our product! Have a great time flying! Warning: Please be aware of your surroundings. This product is not suitable for individuals under the age of 18. It contains small parts, so please keep it out of reach of children to avoid accidental swallowing.
Need help?
Do you have a question about the Tinyhawk III Plus and is the answer not in the manual?
Questions and answers