
Related Manuals for Emax Tinyhawk III Plus Freestyle


Summary of Contents for Emax Tinyhawk III Plus Freestyle
- Page 1 Tinyhawk III Plus Freestyle Thanks for purchasing the Tinyhawk III Plus Freestyle. Please follow the instruction manual to assemble and configure your Tinyhawk III Plus Freestyle. Design in California, Made in China...
- Page 2 6. Our Tinyhawk III Plus Freestyle comes equipped with an open- source flight controller and electronic speed controller to meet the needs of FPV enthusiasts upgrading their quadcopters.
- Page 3 Tinyhawk III Plus Freestyle Tinyhawk III Plus Freestyle -RTF HD Tinyhawk III Plus Freestyle(HD) Wheelbase 110mm Maximum appearance size LxWxH=100x104x22 mm Weight 65.5g(without battery) Motor 12025-7000KV propeller AVAN Rush 2.5寸 STM32F411 (100MHz) main control Main control board Integrated 4-in-1-6A-8 bit electrical regulation, input voltage 1-2S On board ELRS (2.4G) receiver (SPI...
- Page 4 Tinyhawk III Plus Freestyle Battery Built in a 2200mAh 2C lithium battery Voltage 3.7-4.2V Operating Frequency 5.8GHz(5658-5945MHz) Charging System Turn on 5V/3A, turn off 5V/1A charging system Suggest using 8-32GB memory TF card (C10 high-speed TF card) Recording formats TS, MOV...
- Page 5 Tinyhawk III Plus Freestyle Tinyhawk III Plus Freestyle -RTF (Analog) Tinyhawk III Plus Freestyle(Analog) Wheelbase 110mm Maximum appearance size LxWxH=100x104x22 mm Weight 62.5g(without battery) Motor 12025 7000KV propeller AVAN Rush 2.5’’ STM32F411 (100MHz) main control Main control board Integrated 4-in-1-6A-8 bit electrical regulation, input voltage 1-2S On board ELRS (2.4G) receiver (SPI...
- Page 6 Tinyhawk III Plus Freestyle Resolution 480x800 Display Size 4.3’’ Battery Built in 1300mAh lithium-ion battery Voltage 3.7V-4.2V Operating Frequency 5.8GHz(5658-5945MHz) Charging System Built-in USB 1A linear lithium-ion battery charging system Maximum support for memory 32G TF card File format AV size: VGA/D1/HD (optional) emax-usa.com...
- Page 7 Tinyhawk III Plus Freestyle Tinyhawk III Plus Freestyle -RTF HD 1.Tinyhawk III Plus Freestyle ..×1 2.EMAX E8 Transmitter(ELRS-2.4G) ..×1 3.EMAX Transporter II HD ..×1 4.EMAX 1s HV 650mAh ..×1 5.Charger ..×1 6.Propeller..(2XCW, 2XCCW) 7.Other accessory ..×1 Tinyhawk III Plus Freestyle -RTF (Analog) 1.Tinyhawk III Plus Freestyle ..×1...
- Page 8 Tinyhawk III Plus Freestyle 1.E8 Transmitter(ELRS-2.4G) 1.1 E8 Transmitter(ELRS-2.4G) 1.2E8 Transmitter(ELRS-2.4G) Product Model: EMAX E8 Transmitter (ELRS-2.4G); Weight: 260g (without battery); Dimensions: LWH = 150x140x45mm; Channels: 8 (configurable channels); 2.4G System: SX1280 transmission module; emax-usa.com...
- Page 9 Tinyhawk III Plus Freestyle Frequency Range: 2.4GHz (2400MHz-2483.5MHz); Transmission Rate: 50Hz/150Hz/250Hz/500Hz; Telemetry Rate: OFF/1:2/1:4/1:8/1:16/1:32/1:64/1:128; Power Output: 10mW/25mW/50mW/100mW; Operating Voltage/Current: 3.7-4.2V/170mA; Battery: 1800mAh 18650 battery; Charging System: Type-C compatible, built-in 1A linear lithium-ion battery charging system; External Interfaces: Type-C interface, 3.5mm audio interface (wired trainer interface);...
- Page 10 Tinyhawk III Plus Freestyle Top of Form 1.3.4 Joystick Calibration The E8 Transmitter (ELRS-2.4G) comes pre-calibrated, but recalibrating can help address some issues. With the E8 Transmitter (ELRS-2.4G) turned off, simultaneously press the "L3-" button and the power button while powering on.
- Page 11 Tinyhawk III Plus Freestyle emax-usa.com...
- Page 12 Tinyhawk III Plus Freestyle 1.3.6 Trainer Port & Simulator Insert one end of a 3.5mm male-to-male cable into the trainer port (3.5mm audio interface) and the other end into a simulator (sold separately) to output corresponding channel values. Insert a Type-C data cable into the transmitter to output corresponding channel values.
- Page 13 Connect the transmitter to your computer using a Type-C data cable. Open the EMAX Serial Update Tool on your computer. (1) Identify the COM port number and select it. (2) Click "Open Port." (3) Click "Choose File" and select the firmware file you want to update. (4) Wait a few seconds;...
- Page 14 Tinyhawk III Plus Freestyle To switch power output and change telemetry/transmission rates, follow these steps: (1) Identical to the first step in the firmware update process. (2) Identical to the second step in the firmware update process. (3)In the parameter configuration section, click "Read Parameters." This will display all the current parameters set on the transmitter.
- Page 15 Tinyhawk III Plus Freestyle 2.Transporter II HD 2.1Transporter II HD emax-usa.com...
- Page 16 Tinyhawk III Plus Freestyle 1. Distance adjustment card slot 2. Ventilation port 3. TYPE-C charging port 4. On/Off button 5. Confirm button 6. Fan 7. Down button 8. Firmware update indicator light 9. Recording indicator light 10 Charging indicator light 11.
- Page 17 Tinyhawk III Plus Freestyle 12. Antenna 13. Firmware upgrade connection port 14. TF (microSD) card connector 15. Headband Hanging Hole 16. Face sponge 17. Boot switch 18. External connection port 19 Display screen 20. Magnet Flight goggles consist of two main components: the display module and the main body shell.
- Page 18 Tinyhawk III Plus Freestyle There are three distance adjustment slots, allowing for three different distances to be set. When adjusting, please ensure that the distance adjustment slots on the left and right sides are kept consistent. emax-usa.com...
- Page 19 Tinyhawk III Plus Freestyle 2.2 Specifications for the Transporter II HD: Weight: Approximately 425g (including headband and antennas) Dimensions: 145 x 155 x 92mm (excluding antennas) 145 x 155 x 190mm (including antennas) Screen Size: 4.45 inches Screen Resolution: 720 x 1080...
- Page 20 Tinyhawk III Plus Freestyle Down Button: In preview mode, short press to cycle through channels (R1- R2-R3-R4-R5-R6-R7-R8-F2-F4). In preview mode, long press to display the brightness bar. Short press the Down button to decrease screen brightness, and short press the Up button to increase screen brightness. Long press the Down button again to close the brightness bar.
- Page 21 Tinyhawk III Plus Freestyle Record Format: Chooses the recording format (MOV/TS format). Record OSD: Specifies whether to keep the on-screen display (OSD) during recording (Yes/No). Auto Scan: Enables or disables the auto-scan feature. About: Displays version information and manufacturer details.
- Page 22 Format the TF (microSD) Card: Power off the HD Goggles and format the TF card. Extract Firmware: On your computer, extract the Emax Transporter II HD firmware update package to the root directory of the TF card. Insert TF Card: Insert the TF card into the HD Goggles, power on the goggles.
- Page 23 Format the TF (microSD) Card: Power off the HD Goggles and format the TF card. Extract Firmware: On your computer, extract the Emax Transporter II HD firmware update package to the root directory of the TF card. Switch to Boot Mode: Slide the "Boot Switch" to the right side, as shown in the diagram.
- Page 24 Tinyhawk III Plus Freestyle emax-usa.com...
- Page 25 Tinyhawk III Plus Freestyle 1. Distance Adjustment Slot 2. Frequency Band Switch Button 3. Channel Switch Button 4. Recording Button 5. Audio Interface 6. Micro USB Port 7. Recording Indicator Light 8. Charging Indicator Light 9. Antennas 10. Auto Search Button 11.
- Page 26 Channel Selection Button (C): Each short press switches to the next channel among the 8 available channels. This cycle continues. Note: Make sure that the Tinyhawk III Plus Freestyle is powered on. When cycling through channels, ensure that you select the correct channel and frequency band.
- Page 27 Tinyhawk III Plus Freestyle is transmitting. Power on the Tinyhawk III Plus Freestyle first, then press the "A" button on the Transporter II to initiate the automatic search mode. This mode will scan through all channels and select the one with the best video reception.
- Page 28 Tinyhawk III Plus Freestyle Setting Record Duration: To set the recording duration, press the screen/card record parameter settings, then short press the right-side B/C button to choose from options: 3 minutes, 5 minutes, 10 minutes, or Off. 3.3.5 Card Record Parameter Settings Short press the left-side M button to access the screen/card record parameter settings menu (TF card needs to be purchased separately).
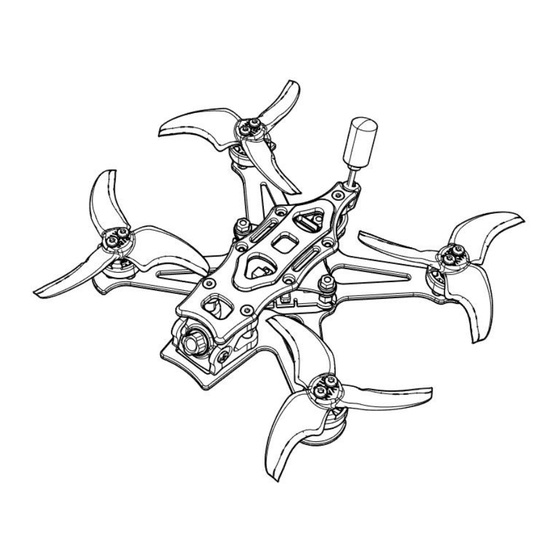
- Page 29 Tinyhawk III Plus Freestyle 4.Tinyhawk III Plus Freestyle 4.1Tinyhawk III Plus Freestyle emax-usa.com...
- Page 30 Nano 6 camera. 4.4Tinyhawk III Plus Freestyle Video Transmission The Tinyhawk III Plus Freestyle offers two versions of video transmission: (1) HD Digital Video Transmission The HD digital video transmission version uses the HDZero Whoop Lite system and is paired with the HD camera version.
- Page 31 Other: Supports Smartaudio protocol, can update VTX firmware via the flight controller. 4.5Changing Video Transmission Settings The default video transmission setting for the Tinyhawk III Plus Freestyle is R:4:25mW. If you wish to change it, follow these steps: Open the Betaflight Configurator software.
- Page 32 Top of Form (2) Changing VTX Settings through Betaflight OSD The Tinyhawk III Plus Freestyle comes equipped with SmartAudio, which is pre-configured. The SmartAudio for the analog video transmitter is on UART2 TX, and for the digital video transmitter, it's on UART1. Power on the Tinyhawk III Plus Freestyle, video goggles, and remote control.
- Page 33 One receiver can be bound to only one transmitter, while one transmitter can be bound to multiple receivers. The Tinyhawk III Plus Freestyle included in the RTF kit is already bound to the E8 Transmitter (ELRS-2.4G). If needed, follow these steps to bind (assuming you haven't changed the binding key): emax-usa.com...
- Page 34 Simultaneously press the "L4+" and "R3-" buttons on the E8 Transmitter (ELRS-2.4G) again. The blue LED on the Tinyhawk III Plus Freestyle flight controller will go from flashing back to solid, confirming the successful binding. Exit Binding Mode: Disconnect the battery from the Tinyhawk III Plus Freestyle to power it off and exit binding mode.
- Page 35 You have the option to write the aircraft's binding key to the remote control using the EMAX serial upgrade tool or write the remote control's binding key to the flight controller using the Betaflight Configurator software.
- Page 36 Supported signal protocols: D-Shot150, D-Shot300, D-Shot600, Multishot, OneShot125, PWM 5.4 Tinyhawk III Plus Freestyle Flight Controller The flight controller of the Tinyhawk III Plus Freestyle is equipped with the following features: Microcontroller unit (MCU): STM32F411CEU6 operating at 100MHz Motion processing unit (MPU): ICM20689 or ICM42688 (connected via SPI)
- Page 37 Tinyhawk III Plus Freestyle PID configuration profile 1 is tailored and optimized for the Tinyhawk III Plus Freestyle using the 2x provided Emax 1s HV 650mAh battery. It's designed for both indoor and outdoor flying control, offering the ultimate flight control experience.
- Page 38 Tinyhawk III Plus Freestyle Taking the E8 Transmitter (ELRS-2.4G) as an example: AUX 1 is a 3-position switch and serves as the Arm switch. AUX 2 is a 3-position switch and functions as the flight mode switch, with positions for Acro (Manual), Horizon (Semi-stabilized), and Angle (Stabilized) modes.
- Page 39 Tinyhawk III Plus Freestyle 5.7 Flashing Firmware for Flight Controller: First, locate the Boot button on the flight controller mainboard. While holding down the Boot button, connect the flight controller to your computer using a Type-C cable to enter DFU mode. Then, click on the "Update Firmware"...
- Page 40 Paste the settings into the command bar in the Betaflight Configurator. Press Enter to execute the commands. After completing these steps, reconnect to the Betaflight Configurator, and the Tinyhawk III Plus Freestyle will have its settings restored to default. emax-usa.com...
- Page 41 Turn on the Tinyhawk III Plus Freestyle by sliding the battery into the battery tray and connecting the power. Once the battery is in place, set the Tinyhawk III Plus Freestyle on a level, stable surface to allow for calibration.
- Page 42 Tinyhawk III Plus Freestyle 6.1Unlock 2.unlock 1.lock 2.Switch to Arm Position Unlock emax-usa.com...
- Page 43 Tinyhawk III Plus Freestyle Unlocking refers to setting the Tinyhawk III Plus Freestyle into a flight-ready state. When the Tinyhawk III Plus Freestyle is first powered on, the propellers won't spin until it's unlocked. 1.Move the throttle to the bottom position to control the aircraft. Wait for the red light on the flight controller to stop blinking and the blue light to stay solid, indicating that the aircraft calibration is complete and it's ready.
- Page 44 Straight Flight To learn how to pilot the Tinyhawk III Plus Freestyle, start by flying it within line of sight (without wearing video goggles). Power on the Tinyhawk III Plus Freestyle and place it in a safe and open area. Start the Tinyhawk III Plus Freestyle and use the left stick to raise the throttle to hover.
- Page 45 Always keep an eye on these numbers during flight to gauge the remaining battery voltage. The Tinyhawk III Plus Freestyle can fly for a maximum of 4 minutes. Land the Tinyhawk III Plus Freestyle when the battery reaches 3.2V.
- Page 46 Tinyhawk III Plus Freestyle Thank you for purchasing our product! Have a great time flying! Warning: Please be aware of your surroundings. This product is not suitable for individuals under the age of 18. It contains small parts, so please keep it out of reach of children to avoid accidental swallowing.
Need help?
Do you have a question about the Tinyhawk III Plus Freestyle and is the answer not in the manual?
Questions and answers
I bought the TinyHawk III Freestyle (analog) from Amazon and I **** using a RadioMaster Pocket transmitter. I was able to configure the drone in BetaFlight Config to work, but the power is very weak; the drone can only get inches off the ground. I **** using the batteries that came with the unit (2 1S 650), which are fully charged. How can I get the motors to run at full power so the drone flies properly?
To increase the motor power on the Emax Tinyhawk III Plus Freestyle, ensure you are using the correct battery with the appropriate voltage. The drone supports 1S and 2S LiPo batteries, so using a 2S battery will provide more power. Additionally, you can adjust the Electronic Speed Controller (ESC) settings through Betaflight Configurator to optimize throttle response. The ESC supports D-Shot150, D-Shot300, D-Shot600, Multishot, OneShot125, and PWM protocols, so selecting a higher-performance protocol like D-Shot600 may improve motor responsiveness.
This answer is automatically generated
@Mr. Anderson It was set to D-Shot600 by default. I noticed the batteries I **** using are puffy, so let me order some new batteries and see if that fixes the problem
i want to change the antenna on the drone but have no idea not to do so