
Related Manuals for BDI CORRIDOR 8175


Summary of Contents for BDI CORRIDOR 8175
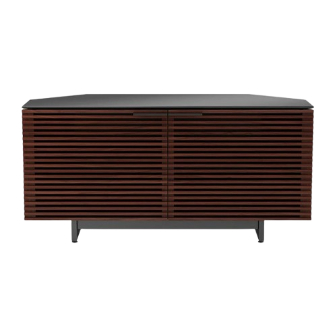
- Page 1 CORRIDOR® 8175 MEDIA CONSOLE INSTRUCTION MANUAL LET’S GET STARTED. DESIGNED BY MATTHEW WEATHERLY...
- Page 3 Congratulations on the purchase of your Corridor cabinet from BDI. Your cabinet has been designed to provide a lifetime of enjoyment. This manual will provide assembly instructions and other helpful information to ensure you get the most out of your product.
- Page 4 HARDWARE AND COMPONENTS Unpack and identify the parts listed below. The assembly workspace should be a non-marring surface, such as carpet. For missing hardware pieces, please contact BDI Customer Service at customerservice@bdiusa.com. For all other concerns, please contact your BDI retailer.
- Page 5 HARDWARE AND COMPONENTS Door Pull (I) QTY: 2 Rubber Bumper (J) QTY: 7 Glass Top (K) QTY: 1 Adjustable Shelf (L) QTY: 2 Back Panel (M) QTY: 1 NEED ASSISTANCE? customerservice@bdiusa.com | 5...
- Page 6 PART/DESCRIPTION by using (B1) Hex Wrench and 8 (D) Screws. NOTE: You MUST align arrows on (F) Metal Rails with B1-HEX WRENCH arrows on (E) Metal Legs for proper orientation. D-SCREW Æ Æ Æ Æ 6 | BDIUSA.COM CORRIDOR 8175...
-
Page 7: Step 2. Attach The Base
STEP 2. ATTACH THE BASE ASSEMBLY (C) Cabinet Carefully lay on its back. Using PART/DESCRIPTION (B1) Hex Wrench , attach the base assembly to (C) Cabinet (D) Screws the bottom of the with (G) Screws B1-HEX WRENCH Note: Each of the metal legs has levelers that can be adjusted using the (B2) Hex Wrench. - Page 8 Position the (C) Cabinet upright and install PART/DESCRIPTION (I) Door Pulls using (H) Screws and (A) Screwdriver. Adhere (J) Rubber Bumper at least one (1) inch from edges of the cabinet and A-SCREWDRIVER one centered as shown below. H-SCREW J-RUBBER BUMPER 8 | BDIUSA.COM CORRIDOR 8175...
- Page 9 STEP 4. PLACE GLASS TOP ASSEMBLY Place (K) Glass Top on top of (C) Cabinet. Position glass flush with cabinet front doors. STEP 5. INSTALL BACK PANELS ASSEMBLY Install both (M) Back Panel to the backside of the cabinet by inserting top edge in upper channel then tipping bottom edge forward and into lower channel.
-
Page 10: Fine Tuning
FINE TUNING ADJUSTABLE SHELVES If desired, lift (L) Adjustable Shelf away, loosen & remove related Shelf Support Pins, reinstall the Shelf Support Pins at desired height, then reinstall (L) Adjustable Shelf. 10 | BDIUSA.COM CORRIDOR 8175... -
Page 11: Door Alignment
FINE TUNING LEVEL CABINET Levelers are integrated into each leg assembly PART/DESCRIPTION and are accessed at the bottom of each cabinet leg using (B2) Open Mouth Wrench. If your B2-OPEN MOUTH floor is uneven, you may extend one or more WRENCH levelers to attain a level, stable cabinet placement. - Page 12 By adjusting Screw 2 the entire door will move IN or OUT, opening or closing the gap between the door frame and cabinet. (This screw rarely needs adjustment.) 12 | BDIUSA.COM CORRIDOR 8175...
-
Page 13: Care And Maintenance
While BDI’s stained wood finishes are stable in tone & appearance, all finishes are subject to some degree of discoloration with prolonged exposure to direct sunlight. Please avoid positioning your BDI cabinet in any area with ample direct sunlight. -
Page 14: Warranty
The decision to repair or replace will be at BDI’s sole discretion. BDI furniture is warranted for three (3) years from the date of purchase, as shown on your sales receipt. The warranty period starts from the date of purchase. This warranty extends only to the original purchasers who acquire new products from BDI Authorized Resellers. - Page 15 WARNING SERIOUS OR FATAL CRUSHING INJURIES CAN OCCUR FROM FURNITURE TIP-OVER. TO HELP PREVENT TIP-OVER: n Install tip-over restraint. Place heaviest items in lower compartments. n Never allow children to climb or hang on drawers, doors or shelves. n Never open more than one drawer at a time. USE OF TIP-OVER RESTRAINT MAY REDUCE—BUT NOT ELIMINATE—THE RISK OF TIP-OVER.
- Page 16 These distinctive product configurations are protected by US and international patents, trade dress, and/or copyright laws. Corridor & BDI are trademarks of Becker Designed, Inc. All rights reserved. ©2024, BDI | V.01.22.2024 Made in China.
Need help?
Do you have a question about the CORRIDOR 8175 and is the answer not in the manual?
Questions and answers