Advertisement
Advertisement
Table of Contents

Subscribe to Our Youtube Channel
Related Manuals for Vista PVM10CAMS


Summary of Contents for Vista PVM10CAMS
- Page 1 PVM10CAMS Quick Guide PVM10CAMS Quick Guide Ver 1.0 2024-02-14...
-
Page 2: Table Of Contents
Contents Before You Begin ......................2 Packing List ......................3 Safety & Maintenance Instructions ................3 Indicators and Interfaces..................4 Connecting PVM Monitor ..................5 Initial Setup ......................6... -
Page 3: Before You Begin
CCTV, IT and electrical wiring and products. Technical Support If you still have questions after referring to the guide, or require more information, please contact Vista Technical Support or use the QR code. Vista Technical Support +44 (0) 118 912 5125... -
Page 4: Packing List
Please contact Norbain if any items are missing or damaged. ➢ PVM Monitor ➢ Remote Control ➢ Torx key and screw ➢ DC Cable Adapter (PVM10CAMS only) Safety & Maintenance Instructions • Use only correctly rated PSUs supplied with the device. •... -
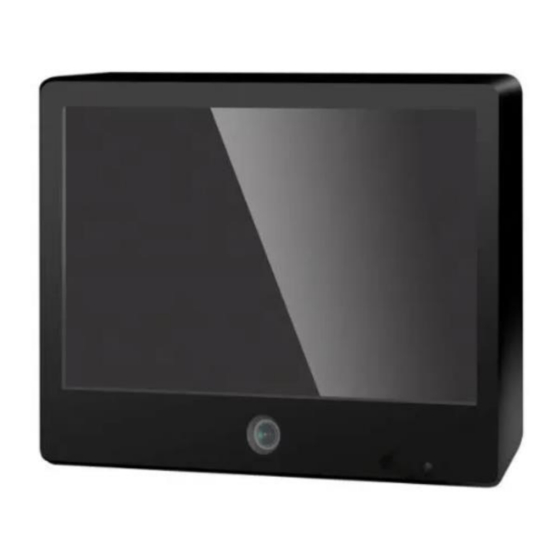
Page 5: Indicators And Interfaces
Indicators and Interfaces Refer below for description of indicators and interfaces. Front view Rear View FRONT VIEW Name Function White LED Configurable as an alert/deterrent Blue LED Indicates Power On (configurable on | off) Remote IR Remote Control Receiver REAR VIEW Name Function 12VDC... -
Page 6: Connecting Pvm Monitor
Connect either PoE Ethernet or a 12VDC supply. Note: if powering via a 12VDC PSU with a 2.1mm jack, use the enclosed DC cable adapter (included with PVM10CAMS Only/ all other models optional extra) (see below) - simply connect it to the PVMs 12VDC screw terminals. -
Page 7: Initial Setup
Initial Setup Enter the PVMs menus to configure any required features or settings below. Use the remote control (right) and use the [menu] button, the arrow and [OK] buttons to navigate and select. CONFIGURABLE FEATURES • Date & Time • Network DHCP | static •... - Page 8 PVM LOGO PARAMETERS • JPEG image of resolution 1080 x 1920 Portrait or 1920 x 1080 Landscape. • File size less than 1.5MB Click and follow the below link for PVM Logo Upload instructions; Vista PVM10CAMx Logo Upload...
- Page 9 No liability will be accepted by Vista for any errors or omissions in this information and reserves the right to make changes to the product and its specification from time to time...
- Page 10 Page intentionally left blank...
Need help?
Do you have a question about the PVM10CAMS and is the answer not in the manual?
Questions and answers