
Related Manuals for Vista VFS-300 Series


Summary of Contents for Vista VFS-300 Series
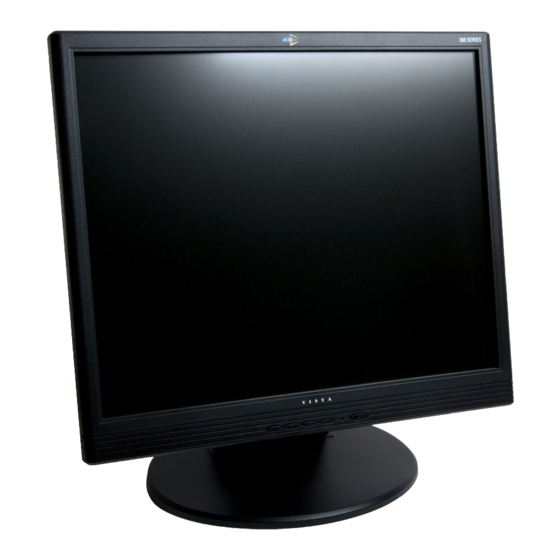
- Page 1 VFS-300 range Installation and user manual Installation and user instructions for: VFS-300 Range of flat screen monitors...
-
Page 3: Table Of Contents
Contents FCC INFORMATION ......................4 CE INFORMATION ......................4 SAFETY PRECAUTIONS ....................4 1. Scope ..........................6 2 Functional Specifications ....................6 3. Controls and indicators ....................9 4. OSD Menu ........................10 Hot key: ........................10 PC mode: ........................11 Video/HDMI mode:... -
Page 4: Fcc Information
FCC INFORMATION This equipment has been tested and found to comply with the limits for a class B digital device, pursuant to Part 15 of the FCC Rules. These limits are designed to provide reasonable protection against harmful interference in a residential installation. This equipment generates uses and can radiate radio frequency energy and, if not installed and used in accordance with the instructions, may cause harmful interference to radio communications. - Page 5 personnel or damage equipment. 8. Route power cords so that they cannot be walked upon or tripped over. Do not allow anything to rest on the power cord. 9. Do not install monitor in wet areas, or where it may be exposed to rain or water. Do not spill liquid of any kind on the unit.
-
Page 6: Scope
1. Scope This specification is used to define the performance of VFS series color TFT LCD monitor. This system also supports both video input and PC input. In video input mode, the system can automatically detect the NTSC signal and PAL signal. In PC mode, this system can support up to 1920 x 1080 VESA standard. - Page 7 2.4 HDMI Input HDMI 1.3 Compatible Interface HDMI Timing Modes 480i / 480p 576i / 576p 720p 1080i / 1080p 2.5 Audio Input Signal Level: 1.0 Vrms 2.6 Environmental Temperature Operating: 0 C to +40 Storage: -20 C to +60 ...
- Page 8 2.8 Connectors VIDEO AUDIO: Stereo Phone Jack x2, OUT x1, IN x1 CVBS 1: BNC x2, OUT x1, IN x1 CVBS 2: BNC x2, OUT x1, IN x1 S-VIDEO (Y/C): Mini-DIN 4 pins, input only HDMI: HDMI connector VGA: D-SUB 15 pins connector POWER DC JACK: DC12V in, 5.5 / 2.5...
-
Page 9: Controls And Indicators
3. Controls and indicators A. “i” Channel button Press the button to select input signal. B. “-“ / “+” buttons Press the buttons to scrolling the cursor to desired function. Press the buttons to adjust the value of selected function in sub OSD menu. C. -
Page 10: Osd Menu
4. OSD Menu Hot key: - / + VOLUME:Press button to enter the function and press buttons to adjust the volume value, the press MENU button to exit OSD menu. FREEZE:Press button to enter the function and press any button to release the function. -
Page 11: Pc Mode
PC mode: MAIN ADJUST, COLOR ADJUST, IMAGE ADJUST (VGA only), INFORMATION, PIP/PAP SETTING, LANGUAGE, SETUP MENU, RECALL, AUDIO CONTROL, EXIT Press MENU button to enable MAIN MENU. - / + Press buttons to select an item, then Press MENU button to enter the function or next sub menu. - Page 12 MAIN ADJUST - / + 1. Press buttons to select an item, then press MENU button to Enter adjust item or function. - / + 2. Press buttons to adjust the value, then press MENU button to Exit adjusts. VIVID MODE Select the VIVID MODE(0~3 and USER) 0: NORMAL, 1: TEXT, 2: PHOTO, 3: MOVIE BRIGHTNESS Adjust the brightness value CONTRAST Adjust the contrast value...
- Page 13 COLOR ADJUST Press MENU button to enter the sub-menu Set the color temperature of the LCD monitor for the CIE coordinate 9300˚k or 6500˚k or USER MODE - / + 1. Press buttons to select an item 2. Press MENU button to select adjust item, - / + 3.
- Page 14 IMAGE ADJUST (VGA only) Press MENU button to enter the sub-menu - / + 1. Press buttons to select an item 2. Press MENU button to select adjust item - / + 3. Press buttons to adjust the value 4. Press MENU button to return AUTO ADJUST Press...
- Page 15 INFORMATION Press MENU button to get the VGA timing information PIP/PAP SETTING Press MENU button to enter the sub-menu - / + 1. Press buttons to select an icon 2. Press MENU button to select adjust item - / + 3.
- Page 16 LANGUAGE Press MENU button to enter the sub-menu - / + 1. Press buttons to select language 2. Press MENU button to enter SETUP MENU Press MENU button to enter the sub-menu - / + 1. Press buttons to select an item 2.
- Page 17 STATUS LINE Enable / Disable the STATUS LINE display. (Display the CVBS1, CVBS2 and S-VIDEO signal status) The status line auto close: when the PIP is enable; the OSD is open or Auto Shift is working. GREEN MODE Off or On (5 min ~ 10 min) OFF –...
- Page 18 RECALL Recall the Brightness, Contrast, Sharpness, Saturation, Tint, Volume value of the mode data and DLC = DISABLE, Vivid Mode = USER, OSD Timeout = 15, Green Mode = OFF, Auto Shift = OFF, CVBS1 LPF = OFF, CVBS2 LPF = OFF, PIP/PAP = OFF, SOURCE = CVBS1, LOCATION = 0, RATIO = 2, then press MENU button to return to the main menu...
-
Page 19: Video/Hdmi Mode
Video/HDMI mode: MAIN ADJUST, COLOR ADJUST, SCAN SETTING, INFORMATION, PIP/PAP SETTING, LANGUAGE, SETUP MENU, RECALL, AUDIO CONTROL, EXIT Press MENU button to enable MAIN MENU. - / + Press buttons to select an item, then Press MENU button to enter the function or next sub menu. - Page 20 MAIN ADJUST - / + 1. Press buttons to select an item 2. Press MENU button to select adjust item, - / + 3. Press buttons to adjust the value 4. Press MENU button to return VIVID MODE Select the VIVID MODE (0~3 and USER) 0: NORMAL, 1: TEXT, 2: PHOTO, 3: MOVIE BRIGHTNESS Adjust the brightness value CONTRAST Adjust the contrast value...
- Page 21 TINT Adjust the tint value 3D COMB FILTER (Video only) 3D COMB FILTER - - DISABLE / ENABLE NR Noise reduction - - LOW / MID / HIGH MPEG NR MPEG Noise reduction - - LOW / MID / HIGH DLC Dynamic Luminance Control - - DISABLE / ENABLE VOLUME Adjust the volume value EXIT Press...
- Page 22 - / + 1. Press buttons to select an icon 2. Press MENU button to select adjust item - / + 3. Press buttons to adjust the value 4. Press MENU button to return OVERSCAN Select scan mode is Over scan, Under scan or 4:3(for future use) NORMAL Select scan mode is NORMAL or 4:3 INFORMATION Press...
-
Page 23: Regulatory Agency
5. Regulatory Agency 5.1 Safety Approvals This series design shall meet the standards of the following domestic and foreign agencies: CE LVD : EN60950: 2006 + All : 2009 5.2 EMI/EMS Emission Approvals This series design shall meet following EMI/EMS specifications: FCC Compliance: FCC Rules and Regulations, Part 15, subpart B, Class B. -
Page 24: Mechanical
7. Mechanical 7.1 Cabinet Material: Plastic Finish: Black 7.2 Dimensions Model VFS-315 VFS-317 VFS-319... - Page 26 NORBAIN SD LTD 210 Wharfedale Road Winnersh Triangle Wokingham Berkshire Subject to change without notice RG41 5TP United Kingdom 3121-1213G01...
Need help?
Do you have a question about the VFS-300 Series and is the answer not in the manual?
Questions and answers