
Related Manuals for SSV Works DF-2A


Summary of Contents for SSV Works DF-2A
- Page 1 DF-2A Can-Am Defender SSV Works 2 Speaker Audio Kit MRB3 and Dash Kit Installation Kick Panel Speakers Installation...
-
Page 2: Installation Notes
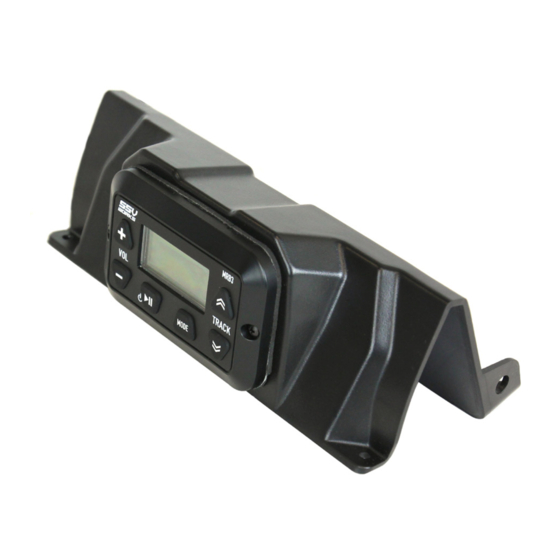
DF-2A Can-Am Defender MRB3 Dash Kit and MRB3 Brain Tray SSV WORKS, 201 N. Rice Ave Unit A, Oxnard, CA 93030 www.SSVworks.com | Phone: 818-991-1778 | Fax: 866-293-6751 TOOLS NEEDED FOR INSTALLATION MRB3 DASH KIT AND MRB3 BRAIN - #2 Phillips Screw Driver - 1/8”... - Page 3 To remove the pocket, pull the pocket open, slightly squeeze the Once connected, coil up any slack and zip tie the additional cable neatly out sides, and twist it out. of the way. Connect to the driver side speaker pod. DF-2A...
- Page 4 F. Pry away ignition/switch panel from the bottom. Once detached from the dash, let the panel hang away from where you will be drilling. G. Insert the drill bit guide buttons into the two (2) mounting tabs on the back of DM3 dash kit DF-2A...
- Page 5 L. Feed the MRB3 cable through the controller opening and M. Use a 1/8” drill bit to drill a pilot hole for the MRB3 cable. place the MRB3 controller in the DM3. Fasten down with the two (2) provided Phillips screw and 5.5mm nuts. DF-2A...
- Page 6 P. Insert push pins through the back of the DM3 into the dash. Q. Fasten the front of the DM3 with provided two (2) Phillips screws. R1.Connect the MRB3 controller to the brain. R2. Connect the power/ground wire. R3. Connect the antenna. DF-2A...
- Page 7 POWER wire. Refasten on the nut (C1). Then unscrew the nut on the first position terminal and attach the black GROUND wire. Re-screw on the nut (C2). DF-2A © 2018 SSV Works, Oxnard, CA 93030 DF-2A Rev. A 11-12-18...
- Page 8 All SSV Works enclosures are covered by a limited lifetime warranty against defects in instructions completely before material or workmanship. All SSV Works Electronics are covered by a limited 1 year warranty installation to avoid possible injury, or against defects in material or workmanship. All SSV Works Speakers are covered by a damage to the accessory or vehicle.
- Page 9 E. Place enclosure in location for mounting. Re-use the (2) F. Repeat for the opposite side. factory T30 torx screws and SSV provided M6 screws and washers. to mount the pod loosely. Once all screws have been loosely installed, tighten down by hand. DF-2A...
- Page 11 DEFENDER F65 DRIVER SIDE DRILL TEMPLATE DF-2A...
- Page 13 DEFENDER F65 PASS SIDE DRILL TEMPLATE DF-2A...
Need help?
Do you have a question about the DF-2A and is the answer not in the manual?
Questions and answers