Advertisement
Quick Links
SSV WORKS, 201 N. Rice Ave Unit A, Oxnard, CA 93030
www.SSVworks.com | Phone: 818-991-1778 | Fax: 866-293-6751
WARRANTY INFORMATION:
All SSV Works enclosures are covered by a limited lifetime warranty against defects in material
or workmanship. All SSV Works Electronics are covered by a limited 1 year warranty against
defects in material or workmanship. All Kicker Speakers are covered by a limited 1 year
warranty against defects in material or workmanship. All Kicker Amplifiers are covered by a
limited 2 year warranty against defects in material or workmanship. Labor for replacement of
defective components is not covered. Contact SSV Works for further warranty information.
TOOLS NEEDED FOR INSTALLATION
- 10mm, 13mm, 16mm and
18mm Sockets & Wrenches
PARTS LIST IMAGES
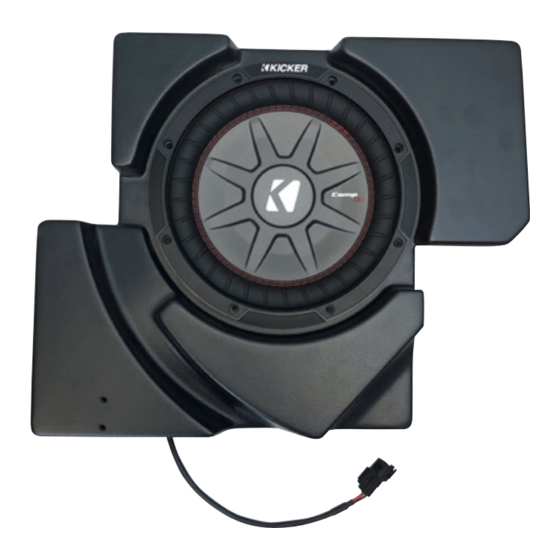
1. X32-DUS10 Enclosure
5. Large washers x 2
9. Seat Spacer x 1
- T-30 & T-40
- 1½" Hole Saw
Torx Driver
2. M6 x 16mm Screws &
Washers x 10 (T-30 torx)
6. C-Bracket
10. Small Spacer x 1
2016+ Can-Am Maverick x3
10" Driver Side Under Seat Enclosure
!
- Hole Punch /
- Ratchet & Extension
Scribe Tool
Triangular
end
3. Thread Rolling Screw x 2
7. A-Bracket x 1
11. M6 Locking Hex Nut
X32-DUS10
Please read and understand these
instructions completely before
installation to avoid possible injury, or
damage to the accessory or vehicle.
- #3 Phillips
Screwdriver
4. M6 x 25mm Screw x 1
8. Large Bracket
12. Foam Strips x 5
Advertisement

Related Manuals for SSV Works X32-DUS10


Summary of Contents for SSV Works X32-DUS10
- Page 1 WARRANTY INFORMATION: Please read and understand these All SSV Works enclosures are covered by a limited lifetime warranty against defects in material instructions completely before or workmanship. All SSV Works Electronics are covered by a limited 1 year warranty against installation to avoid possible injury, or defects in material or workmanship.
- Page 2 If not, make sure to drill new holes away from the pre-drilled holes. Be sure to use the 8 supplied SSV Works #7 screws when installing your own subwoofer. #7 Screws x 8...
- Page 3 Make any routing adjustments to the brake line so the enclosure lays down flat without any tension on the brake line. Bracket C should be sitting flat on top of the floor plastic once the enclosure is in place. X32-DUS10...
- Page 4 (2) thread rolling screws and washers. J. Route the speaker wire away from any moving parts and any sharp metal, then connect to the amplifier. Connecting the X32-DUS10 using the pre-installed four-pin connector will require an optional SSV Works plug-&-play harness B-H1152 (sold separately).
-
Page 5: Wiring Instructions
USING A SSV WORKS HARNESS Connecting the X32-DUS10 using the pre-installed, four-pin connector will require an optional SSV Works plug-&-play harness (B-H1152 - sold separately). If you are not using the B-H1152 harness, simply cut off the four-pin connector and follow the wiring instruction below.
Need help?
Do you have a question about the X32-DUS10 and is the answer not in the manual?
Questions and answers