Advertisement
Quick Links
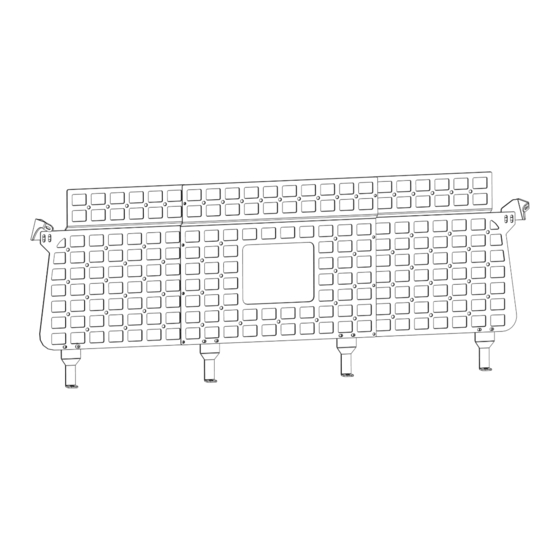
JEEP G L ADIATO R J T ( 202 0+ )
R EAR W IN DOW MO LL E
PA NE L
INS TAL L I NSTRUC T ION S
Please read the mounting instructions below carefully before attempting to install.
Be sure to check out the install video on the product page, if available.
Thank you for purchasing from JcrOffroad! Checkout our website, www.jcroffroad.com for other great off-road
products. Be sure to rate and review our product online. If you have any questions or are missing parts, please
don't hesitate to call us at 269-353-1184!
Advertisement

Subscribe to Our Youtube Channel
Related Manuals for JCROffroad JTRWP


Summary of Contents for JCROffroad JTRWP
- Page 1 Be sure to check out the install video on the product page, if available. Thank you for purchasing from JcrOffroad! Checkout our website, www.jcroffroad.com for other great off-road products. Be sure to rate and review our product online. If you have any questions or are missing parts, please...
-
Page 2: I Nc Lu D E D Ha R Dwar E
I NC LU D E D HA R DWAR E IN CLUDED BO LT PAC K(S ) 045 -01 68 1/4”-20 x 1/2” 1/4”-20 Button Head Flange Nut M8 x 1.25mm x 25mm Heax Head Note: Some Victory 4x4/JCR Offroad/SquatchProof products share hardware kits. Any extra hardware you may recieve that is not listed above can be reurposed or discarded. -
Page 3: Included Parts
I NCLU D E D PARTS 1L/1R 1L/1R... - Page 4 D I S A SSE MB LY To start you will need to fold your back seats down for better access to the hard top bolts. Once the seats are down, remove all (4) of the hard top bolts, as shown below.
- Page 5 AS SE M BLY With the (4) hard top bolts removed, you can take the (4) provided lower brackets and M8 hex heads and install them as shown in the orientation below, replacing the factory hard top bolts with the new M8 hex heads.
- Page 6 AS SE M BLY You can now take the (3) panel pieces and assemble them together using (8) of the provided 1/4”-20 button heads and flange nuts, as shown in the orientation below.
- Page 7 ASSE M BLY With the panel now assembled, take (8) more of the provided 1/4”- 20 button heads and flange nuts, and install the panel to the (4) lower mounting brackets that were previously installed, as shown in the orientation below.
- Page 8 ASSEMBLY Now that the panel is secure to the bottom mounting brackets, take the last (2) provided top backets and the last (4) of the 1/4”-20 button heads and flange nuts and bolt them to the panel in the upper corners of each side, as shown in the orientation below.
- Page 9 A SSE MBLY With the top brackets on the panel, you will now need to remove the factory bolt in the roll cage that the moutning hole lines up with. Once the bolt is removed, you will be re-using the same factory bolt though the bracket to hold it in place, as shown below.
- Page 10 Now load up your Molle Panel with your desired equipment such as flashlights, recovery gear, or first aid supplies and hit the trail prepared! Visit us at www.jcroffroad.com to check out other options for made-in-the- USA storage and armor, and follow us on Facebook and Instagram.
Need help?
Do you have a question about the JTRWP and is the answer not in the manual?
Questions and answers