Table of Contents

Related Manuals for Oliver 4040


Summary of Contents for Oliver 4040
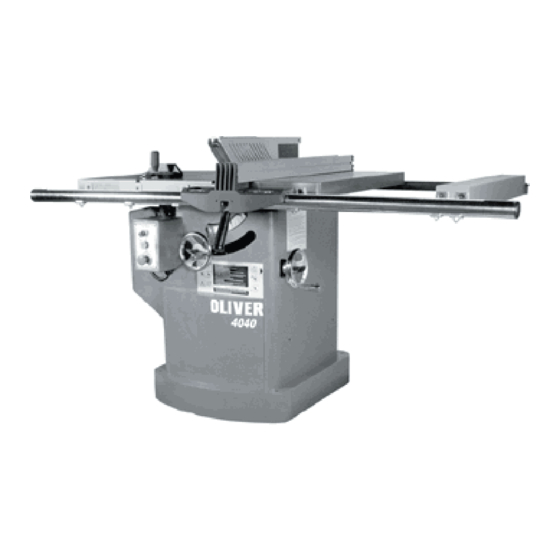
- Page 1 4040 12” Professional Tablesaw Owner’s Manual Oliver Machinery M-4040 8/2003 1210 Andover Park East Tukwila, WA 98188 � Copyright 2003 Fax: 1-206-575-2723 www.olivermachinery.net Phone: 1-206-575-2722 email: info@olivermachinery.net...
-
Page 2: Warranty
Read this manual thoroughly before operating the machine. Oliver Machinery disclaims any liability for machines that have been altered or abused. Oliver Machinery reserves the right to effect at any time, without prior notice, those alterations to parts, fittings, and accessory equipment which they may deem necessary for any reason whatsoever. -
Page 3: Warnings
���WARNING Read this manual completely and observe all warning labels on the machine. Oliver Machinery has made every attempt to provide a safe, reliable, easy-to-use piece of machinery. Safety, however, is ultimately the responsibility of the individual machine operator. As with any piece of machinery, the operator must exercise caution, patience, and common sense to safely run the machine. -
Page 4: Dust Port Diameter (In)
15. Misuse: Do not use this Oliver tablesaw for other than its intended use. If used for other purposes, Oliver disclaims any real or implied warranty and holds itself harmless for any injury or damage which may result from that use. -
Page 5: Table Of Contents
Specifications Model Number............................4040 Stock No. - 4040.003 ....................5HP, 1Ph, 220V Only Stock No. - 4040.004 ................5HP, 3Ph, 220V/440V Prewired 220V Blade Diameter (In) ............................. 12 Arbor Diameter (In) ....................1" or 5/8" interchangeable Maximum Width of Dado (In) ........................13/16”... -
Page 6: Contents Of The Shipping Containers
Contents of the Shipping Containers Oliver 4040 – 12” Professional Tablesaw 1. 12” Left Tilt Tablesaw 1. Miter Gauge 4. Wrenches 1. 5/8” Arbor 1. Arbor Nut 2. Handles Extension Wing Assembly 2. Extension Wings 6. M10-1.5Px30 Hex Head Bolts 6. -
Page 7: Uncrating The Machine
Uncrating the Machine Uncrate the machine and inspect the unit for signs of shipping damage. If damage is found, contact your dealer immediately. Retain all packaging materials case becomes necessary to ship the machine to another site. Machine Preparation and Setup ���WARNING! The equipment used to lift this machine must have a rated capacity at, or above the weight... -
Page 8: Rail Assembly
Rail Assembly 1. Place a M8x16 carriage bolt (A, Figure 4) through the bracket (B, Figure 4) and hold in place with a M8 lock washer and M8 cap nut (C, Figure 4). Note: Just thread the cap nut onto carriage bolt a couple turns to hold in place. -
Page 9: Fence Assembly And Adjustment
7. Mount the support (A, Figure 7) between the guide rail and the rear rail. Attach the front side with two M10x16 flat head socket bolts, two M10 lock washers and two M10 hex nuts (B, Figure 7). 8. Attach the rear side with two M10x20 hex head bolts, two M10 lock washers and two M10 hex nuts. -
Page 10: Adjusting 45� And 90� Stops
4. Move the fence into position so that the fence and the miter gauge slot align as shown in Figure 10. The fence should be parallel to the miter gauge slot. If not loosen the four screws (A, Figure 10). Adjusting 45��and 90��... -
Page 11: Leveling Table Insert
9. Set the blade 45� to the table by turning the blade tilting handwheel counter-clockwise as far as it will go. Place a combination square on the table and check to see that the blade is at a 45��angle to the table. 10. -
Page 12: Blade Diameter (In)
6. Insert front fork of blade guard assembly (A, Figure 16) through opening in the table. The tab is held in place between the flat washer and bracket, see Figure 16. Finger tighten hex nut (B, Figure 16) only at this time. 7. -
Page 13: Miter Gauge
Miter Gauge 1. Slide the miter gauge bar into the miter gauge slot in table. Loosen the handle (A, Figure 19) and pull out indexing rod (B, Figure 19) to pivot the miter gauge body. 2. Push the indexing rod in to engage the preset stops (C, Figure 19). -
Page 14: Electrical Connections
220V. If you need to switch the tablesaw from 220V to 440V have a qualified electrician make the changes. Oliver Machinery recommends using a dedicated circuit. Make sure the voltage of your power supply matches the specifications on the motor plate of the machine. -
Page 15: Changing Arbors
Changing Arbors The blade guard has been removed for photos, but it is possible to change the blade without removing the blade guard. 1. Disconnect saw from power source. 2. Remove the table insert and raise the blade completely. 3. Use the two provided arbor wrenches to loosen the arbor nut, as shown in Figure 22. -
Page 16: Maintenance
Maintenance Use a wire brush to clean trunnions and worm gears. Apply white lithium grease or powdered graphite to lubricate worm gears, and trunnions. ���WARNING! Disconnect the machine from power source Keep pulleys and belts free from dirt, dust, oil before proceeding with any maintenance, or and grease. - Page 17 1. Reposition on flat, level 1. Stand on uneven floor surface 2. Damaged saw blade 2. Replace saw blade 3. Bad V-belts 3. Replace V-belts Saw vibrates excessively 4. Bent pulley 4. Replace pulley 5. Improper motor mounting 5. Check and adjust motor 6.
-
Page 20: Specifications
Sub. No. Key No. Part No. Description Specification Qʼty TJ0106 Spreader Assʼy TJ010001 Spreader TJ010003 Guard Bracket TJ010005 Bracket - Crank TJ010002 spacer TJ010006 Blade Guard Side TJ010008 Anti-Kick Pawl L TJ010004 Anti-Kick Pawl R TJ010007 Blade Guard Front OE090103 Top Cover 1.10 OE090108 Guard Front Bracket 1.11 OE090109 Collar 1.12 TJ010081 Spring 1.13 TH010040 Fix Collar 1.14 TJ010014 1.15 ... - Page 21 2.18 HA180304 Round HD Phil. Screw M4*1.59P*10染黑 2.19 HA090410 Round HD Socket Screw M6*1.0P*20染黑 2.20 HA090510 Round HD. Socket Screw M8*1.25P*20染黑 2.21 HE012600 Flat Washer 6.7*19*1t染黑 2.22 HF031600 E-RING ETW-7 2.23 HE014100 Spring Washer 8.8*18*2t染黑 2.24 HE012500 Flat Washer 6.7*16*2t染黑 2.25 HA030405 Set Screw M6*1.0P*12染黑 th0303 Miter Guage Assʼy HB040807 Rounf HD Phil. Screw 5/32-32NC*5/8”染黑 HB040905 Rounf HD Phil. Screw 3/16”-24NC*3/8”染黑 HD010200 Hex HD Bolt 5/32”-32NC* 染黑...
- Page 22 HA020413 SKT. HD. Bolt M6*1.0P*25染黑 HG011111 Spring Pin 6*20 HA020513 SKT. HD. Bolt M8*1.25P*25染黑 HA030304 Set Screw M5*0.8P*10 染黑 HA030303 Set Screw M5*0.8P*8染黑 HA040602 RD HD Bolt M5*0.8P*6 染黑 HH030415 Key Way 5*5*30 HW011000 Hex Nut M10*1.5P 電鍍 HA010519 Hex HD Bolt M8*1.25P*35染黑 HA010647 Hex HD Bolt M10*1.5P*80電鍍 HS010613 Hex HD Bolt M10*1.5P*25電鍍 HS010628 Hex HD Bolt M10*1.5P*50電鍍 HE021100 Spring Washer 8.2*15.4*2t染黑 HE021300 Spring Washer 10.2*18.5*2.5t染黑...
- Page 23 TJ010061 TJ010067 Shaft TJ010068 1” Blade Nut TJ010069 Motor Bracket TJ010072 TJ010073 1” Arbor TJ010074 5/8” Arbor TJ010075 5/8” Arbor Nut TJ010077 Blade Washer TJOA HA020450 SKT. Cap Bolt M6*1.0P*65 染黑 HA020537 SKT. Cap Bolt M8*1.25P*65 染黑 HG010911 spring Pin 4*20 TJ010084 Throat Plate Clip HF023700 R-Ring RTW-47 HA040402 RD HD Bolt M4*0.7P*6染黑 HH010422 Key Way 5*5*38 HJ032100 Bearing 6203-2NSE HJ031000 Bearing 6005-2NSE...
Need help?
Do you have a question about the 4040 and is the answer not in the manual?
Questions and answers