
Related Manuals for Mount-It! MI-386


Summary of Contents for Mount-It! MI-386
- Page 1 MI-386 MI-386W Please Scan this QR code to visit the product page. Motorized Fireplace TV Wall Mount...
- Page 2 Thank you for choosing Mount-It Mount-It! Mount-It! will automatically move to the position saved in the 1. The mount beeps constantly or is making an abnormal noise. a). Reset the system: Press and hold the " " button for 5 seconds. The mount will retract to the highest position, and the reset is complete.
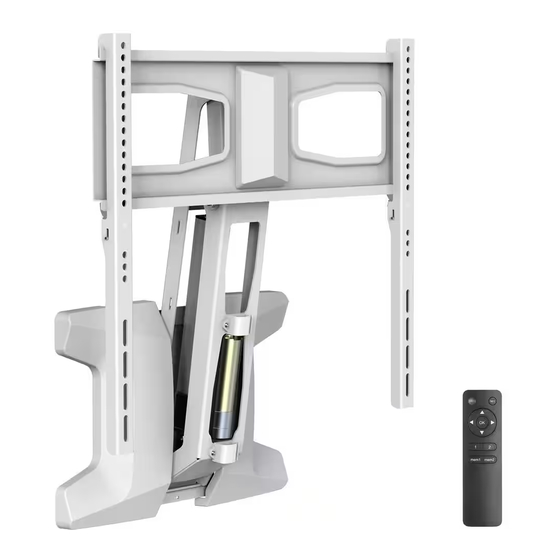
- Page 3 COMPATIBLE WITH COMPATIBLE VESA SIZES Screens UP TO Tools Needed 200x100 200x200 300x200 35kg 300x300 400x200 400x300 (77lbs) RATED 400x400 600x400 • The height of the mount is dependent on the depth of the mantel to ensure the motorized arm clears the mantel when fully lowered.
- Page 4 Step 1a Step 1b Concrete/Brick Installation Option Wood Stud Installation Option • Once the proper height is determined using • Once the proper height is determined using the Mounting Height Chart. hold the Wall the Mounting Height Chart. locate the studs using a stud finder and hold the Wall Template Template (#C) at the proper height on the (#C) at the proper height on the wall.
- Page 5 Step 2 Step 4 Completing Wall Installation Attaching the TV Plate • Plug in the Power Cord (#H) and then attach the Decorative Covers (#B) to cover the wall plate. • Remove the three nuts and washers (pictured here) from the end of the arm using the Wrench (#I). Install the TV Plate (#D) over the three exposed bolts and reinstall the nuts and washers.
- Page 6 Step 5 Step 6 Attaching the VESA Arms to the TV Attaching the TV to the Motorized Arm • Lay your TV down on a flat surface and align VESA Arms (#E) over the VESA holes as shown. • Remove the security nut (pictured in bubble #1) from both VESA Arms and flip the tab down. Hang the •...
Need help?
Do you have a question about the MI-386 and is the answer not in the manual?
Questions and answers