Table of Contents
Advertisement
Quick Links
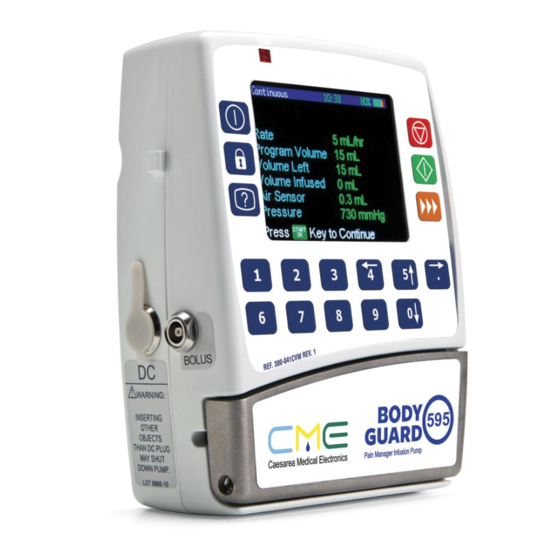
BodyGuard 595
Color Vision
Pain Manager Infusion System
Directions For Use
Caesarea Medical Electronics Ltd.
16 Shacham Street
Industrial Park Caesarea North
P.O.Box 3009
Caesarea 3088900, Israel
E:
sales@cme-infusion.com
W:
www.cme-infusion.com
TM
0344
MedNet GmbH.
Borkstrasse 10
48163 Muenster
Germany
T: +49 251 32266 0
Ref.: DFU999-803EN Rev.01
Advertisement
Table of Contents
Troubleshooting

Subscribe to Our Youtube Channel
Related Manuals for CME Color Vision BodyGuard 595


Summary of Contents for CME Color Vision BodyGuard 595
- Page 1 Pain Manager Infusion System Directions For Use 0344 Caesarea Medical Electronics Ltd. 16 Shacham Street MedNet GmbH. Industrial Park Caesarea North Borkstrasse 10 P.O.Box 3009 48163 Muenster Caesarea 3088900, Israel Germany T: +49 251 32266 0 sales@cme-infusion.com www.cme-infusion.com Ref.: DFU999-803EN Rev.01...
- Page 2 BodyGuard 595 Color Vision™ Directions For Use...
-
Page 3: Table Of Contents
Table of Contents 1 - Introduction Overview Keypad Descriptions and Functions System Safety Checks Pump Accuracy 2 – Symbols, Warnings, and Cautions System Symbols Terms Used In Manual Intended Use Warnings Cautions 3 – Installation and Set Up Unpacking Charging the Pump 4 –... - Page 4 BodyGuard 595 Color Vision™ Directions For Use...
-
Page 5: Introduction Overview
Rechargeable internal Lithium-Polymer battery Battery charged in a BodyGuard Color Vision Charger or with an A/C adapter Free flow protection Anti-Siphon valve standard on every CME administration set Quiet operation 2000 event log plus detailed patient history ... -
Page 6: Keypad Descriptions And Functions
1 – Introduction Keypad Descriptions and Functions Front of BodyGuard 595 Color Vision™ Pain Manager 1. Operation LED Green Indicator Lights during system Self-Test An intermittent green light indicates infusion delivery Red Indicator Indicates a High Priority alarm state with a continuous red light ... - Page 7 1 – Introduction 2. Display Screen • Displays pump operations and infusion status • Displays programming choices and instructions • Deferent title bar color for each program (Blue-PCA, Yellow- EPIDURAL, Green- REGIONAL) 3. Power ON/OFF • Turn the system ON by pressing and holding the button until the Self-Test screen appears.
- Page 8 1 – Introduction BodyGuard 595 Color Vision™ Pain Manager with Door Open Area Function Holds the door closed when latch is in vertical Latch Holder position. Shows direction of pump operation indicating the Flow Direction Arrows flow to the patient. Detects downstream tubing restriction, occlusion, and set key.
- Page 9 1 – Introduction BodyGuard 595 Color Vision™ Charger Area Function Displays major pump messages and operation Charger Display values. Release Handle Push to release the pump from the Charger. Charger LED (orange) Indicates connection to supply mains. Pump Battery LED (red/green) Indicates battery charge status. NOTE: Battery charging is enabled as long as the charger cord is connected to the ...
-
Page 10: System Safety Checks
1 – Introduction System Safety Checks The following details outline the safety checks designed into the BodyGuard 595 Color Vision™ pump to minimize the possibility of under or over infusions. Free Flow Protection The system’s customized IV lines are equipped with a check valve that prevents free flow towards the patient when the IV line is not attached to the pump. -
Page 11: Pump Accuracy
1 – Introduction have to select an alternative appropriate protocol or consult senior clinical staff with Level 3 authorization. Under Program Limits you can choose to limit the bolus volume over either a 1, 4, or 24 hour period according to local practice. Pump Accuracy The following graphs and curves were derived from testing described in IEC60601-2-24. - Page 12 1 – Introduction Trumpet and Flow Rate With the BodyGuard 595 Color Vision™, as with all infusion systems, the action of the pumping mechanism and variations cause short term fluctuations in rate accuracy. The following curves show typical performance of the system in two ways: The accuracy of fluid delivery over various time periods is measured (trumpet curves).
- Page 13 1 – Introduction Trumpet Graph at 25 ml/h (2nd hour of delivery) BodyGuard 595 Color Vision™ Directions For Use...
-
Page 14: Symbols, Warnings, And Cautions
2 – Symbols, Warnings, and Cautions 2 – Symbols, Warnings, and Cautions System Symbols The following symbols are used on the BodyGuard 595 Color Vision™ Pain Manager and components. Labels on the system or statements in this manual proceeded by any of the following words and/or symbols are of special significance and are intended to help you to operate the pump in a safe and successful manner. - Page 15 2 – Symbols, Warnings, and Cautions Battery Sterilized with Ethylene Oxide (applicable to administration sets) STERILE EO Degree of particle and water ingress protection. IP33 Defintion of code: I=Ingress P=Protection 3= Protection from solid objects ≥ 2.5 mm 3=Protection from spraying water Class II Medical Electrical Equipment providing double insulation for operator and patient safety Identifies the manufacturer of a product.
-
Page 16: Terms Used In Manual
2 – Symbols, Warnings, and Cautions Terms Used In Manual indicates that the information is a warning. Warnings advise you of Warning circumstances that could result in injury or death to the patient or operator. Read and understand this manual and all warnings completely before operating the BodyGuard 595 Color Vision™... - Page 17 2 – Symbols, Warnings, and Cautions Drugs must not be administered to the epidural space unless the drugs are indicated for this purpose and are administered in accordance with the indications included in the manufacture’s package. Epidural administration of drugs other than those indicated for Epidural use could result in serious injury to the patient.
-
Page 18: Cautions
2 – Symbols, Warnings, and Cautions Use of accessories, transducers and cables other than those specified or provided by the manufacturer of this equipment could result in increased electromagnetic emissions or decreased electromagnetic immunity of this equipment and result in improper operation. -
Page 19: Installation And Set Up
3 – Installation and Set Up 3 – Installation and Set Up Unpacking Carefully remove the pump and charger from the box. Make sure no items were damaged during shipment. Make sure you have the following items: BodyGuard 595 Color Vision™ Infusion Pump ... - Page 20 3 – Installation and Set Up Connect the charger unit to AC power and verify that the AC indicator is lit. Put the pump into the charger (top first) until it clicks into place. The battery is charging when the red battery LED on the front of the charger is lit. The battery is fully charged when the battery LED symbol turns green.
-
Page 21: Operation
4 – Operation 4 – Operation Operating the Pain Manager Infusion Pump Before performing any of the set-up and period tests or to operate, program or configure the pump, you will need to access the pump using the security codes. As the BodyGuard 595 Color Vision™... -
Page 22: Dedicated Administration Sets
4 – Operation To Lock Keypad EPIDURAL 10:00 █ ■ Keypad Press and hold until the entire bar graph is yellow and a beep is heard. The beep indicates that the locking Lock Mode program is turned ON. ████████████████ NOTE: the keys are locked in memory until they are unlocked or until entering ... -
Page 23: The Bodyvalve
4 – Operation The BodyValve™ The Anti-Free Flow valve, BodyValve™, enhances safety by: Preventing free-flow in the event the set is detached from the pump. Preventing free-flow in the event of a mechanical malfunction. Preventing pump operation if the set has been loaded incorrectly. ... -
Page 24: Microset™ With 0.2Mic Filter
4 – Operation MicroSet™ with 0.2mic Filter Area Function Spike Cap Keeps the set sterile Connects the administration set to Spike solution bag Administration Tubing 1.5 x 3 mm Transfers the solution Prevents incorrect tube stretching Anti-Stretch locator and locates the administration set correctly Soft segment of the set for increased Administration Tubing 3 x 4.1 mm... -
Page 25: Priming The Set
4 – Operation Vision™ pump door and remove the administration set from the sterile packaging leaving the end caps on the line. Connect the administration set to the medication bag. Hold the section of tubing with the set key (small plastic block).. Insert the IV tubing into the pump by placing the set key into the keyway as shown by the arrow in the diagram. - Page 26 4 – Operation From the menu select "Prime" by pressing EPIDURAL 10:00 █ ■ Enter level one access code again. Prime Select Protocol Change Bag View Protocol Settings View Shift Totals View Patient History View Event Log Clinician Bolus Select and press BodyGuard 595 Color Vision™...
-
Page 27: Modify Protocol
4 – Operation Modify Protocol When you receive your BodyGuard 595 Color Vision™ pump and go to "Modify Protocol Library" on the main menu for the first time you will see the protocols are blank. On the first few patients using the BodyGuard 595 Color Vision™ you can edit, add or delete any of these infusion protocols to tailor the protocols to your service. - Page 28 4 – Operation NOTE: entry of all parameters is via the numeric keypad. Only the protocol selection, concentration, limits setting are a scroll option menu using the up and down arrows. The previous value will be displayed. Enter the new value which will automatically delete the previous value.
- Page 29 4 – Operation The BodyGuard 595 Color Vision™ has 26 10:00 █ ■ A: MORPHINE protocols (A-Z), which are divided between PCA 10 protocols (A-J) Select and press EPIDURAL 10:00 █ ■ K: BUPIVICAINE Epidural 8 Protocols (K-R) Select and press REGIONAL 10:00 █...
- Page 30 4 – Operation Use numeric keys 5 (up) 4 (left), point (right) and 10:00 █ ■ 0 (down) to navigate around the letter, number and symbol choices. To select a character, EFGH1234+- position the cursor box over the target IJKLMNOPQ5678%& letter/number/symbol and press RSTUVWXYZ90.,:/ Abcdefghijklmno...
- Page 31 4 – Operation 14. Enter VTBI in ml. to change any numeric 10:00 █ ■ program parameter just enter the numbers A: MORPHINE which will replace the previous values and this Volume To Be Infused will overwrite the previous value. If you make a mistake press which will delete the last digit.
- Page 32 4 – Operation 17. Set the protocol maximum rate. This will set the 10:00 █ ■ maximum rate allowed for titration. A: MORPHINE Protocol Maximum Rate mL/hr Enter and Press If your protocol requires bolus press 10:00 █ ■ A: MORPHINE confirm.
- Page 33 4 – Operation 20. In case of patient bolus: Patient triggers the 10:00 █ ■ bolus through an external bolus cable. A: MORPHINE Set bolus dose volume and press Patient Bolus Dose Enter and Press 21. Set a maximum bolus dose allowed for the 10:00 █...
- Page 34 4 – Operation Set bolus dose volume and press 10:00 █ ■ A: MORPHINE Auto-Bolus Dose Enter and Press 26. Set a maximum bolus dose allowed for the 10:00 █ ■ A: MORPHINE protocol Maximum Bolus Dose Enter and Press Set bolus interval and press 10:00 █...
- Page 35 4 – Operation Set bolus dose volume and press 10:00 █ ■ A: MORPHINE Trigger the bolus through the external bolus Patient Bolus Dose cable Enter and Press Set bolus dose volume and press 10:00 █ ■ A: MORPHINE Auto-Bolus Dose Enter and Press Set the patient lockout time and press 10:00...
- Page 36 4 – Operation 35. Set the lockout time from auto bolus and patient 10:00 █ ■ A: MORPHINE bolus and press Auto-Bolus To Patient Bolus Minutes Enter and Press 36. Set the maximum bolus volume allowed by a 10:00 █ ■...
- Page 37 4 – Operation Set KVO rate and press . The to 0 if not 10:00 █ ■ applicable. A: MORPHINE Keep Vein Open Rate mL/hr Enter and Press Set occlusion pressure alarm level specific to 10:00 █ ■ A: MORPHINE the protocol/patient and press Occlusion Pressure mmHg...
-
Page 38: Select Protocol (Start An Infusion)
4 – Operation 44. If the protocol parameters that were set exceed 10:00 █ ■ the toxicity limit (MediGuard level) the pump MEDIGUARD LIMIT will not allow you to proceed to the next step and will alarm "MediGuard Limit Exceeded" and return to the "Max MediGuard Rate"... - Page 39 4 – Operation If the previous infusion was not over, the following EPIDURAL 10:00 screen will appear: █ ■ K: BUPIVICAINE Press key to Resume Press key for Menu To continue previous infusion, press EPIDURAL 10:00 █ ■ The screen will then prompt for code. Enter level one access code and press Review the Start Infusion ?
- Page 40 4 – Operation The display will show: ‘New Patient?". EPIDURAL 10:00 █ ■ New Patient? Patient ID: Answer For same patient: Press to switch the current patient to an alternative protocol. Warning: selecting new protocol on same patient EPIDURAL 10:00 █...
-
Page 41: Titrating Basal Rate During Infusion
4 – Operation 12. If auto-bolus, the following screen appears: EPIDURAL 10:00 █ ■ make sure that auto bolus is in fact required. To BUPIVICAINE confirm press Warning ! Patient will Periodically receive an automatic bolus. Press to Confirm 13. Scroll using the arrow keys to the requested EPIDURAL 10:00 █... -
Page 42: Patient Activated Bolus
4 – Operation To change Rate during the infusion, enter the new rate using the keypad and confirm by pressing the key. Confirm again the new rate by entering the Relevant Code. The Rate can be increased up to the “Max Titration Rate” programmed into the specific infusion. -
Page 43: Auto Bolus
4 – Operation Auto Bolus Auto bolus is the facility to set an automatic (intermittent) bolus. Auto bolus can be combined together with patient controlled bolus. Auto bolus is not available on pump default settings; it must be activated via the technician menu. NOTE: when a protocol is selected with the auto bolus feature activated the ... -
Page 44: Clinician Activated Bolus
4 – Operation Change Bolus Dose: set a new bolus volume and EPIDURAL 10:00 █ ■ BUPIVICAINE press . To confirm the change enter code level Change Bolus Dose one and press Press to Cancel Enter and Press Change lockout/interval: set a new time between EPIDURAL 10:00 █... - Page 45 4 – Operation If auto bolus: next auto bolus due time will be EPIDURAL 10:00 █ ■ displayed. Press to continue to set the loading dose or to return to previous screen Next autobolus due In 10 Minutes Press key to Confirm to Go Back Enter code level 2 and press Enter the volume of the Clinician Bolus and press...
-
Page 46: Automatic Bolus Rate Adjustment
4 – Operation To infuse a Clinician Activated Bolus during an infusion, perform the following steps: During operation, press and then press to stop the current infusion and initiate the clinician bolus. Enter relevant code and press Enter the volume of the clinician bolus and press EPIDURAL 10:00 █... -
Page 47: Interpreting The Display Screen During Infusion
4 – Operation automatically reduce the bolus delivery speed until it senses a pressure below the level at which an occlusion alarm would normally sound. If it still senses an occlusion pressure above this level at the minimum bolus delivery rate the pump will then alarm ‘Down Occlusion’. -
Page 48: Mediguard
4 – Operation Actual Pressure The bar displays real time in-line pressure. Units of measure, start value, and peak value are subject to the pump pressure settings (See change set-up menu). The bar is divided to 3 parts. Actual pressure is displayed as red fill. When the pressure rises from one segment to the next a beep will sound. -
Page 49: Using History Functions
4 – Operation one bolus. Maximum volume saved in the credit buffer is the bolus volume. The credit buffer enables delivery of patient and clinician boluses. When a bolus is required (either by patient or by clinician): if the bolus volume is less than the volume in the buffer, the bolus will be delivered at maximal bolus rate;... -
Page 50: End Of Program/Infusion And Bag Change
4 – Operation etc). It is not patient specific (i.e. the 2000 events are likely to span many patients recently treated with that particular pump). To access the events history: From the main menu scroll to ‘View Event Log’ and press The screen will now show the most current user Event Number: 123456... - Page 51 4 – Operation The alarm will stop after 4 beeps. The pump will REGIONAL 10:00 █ ■ show the pre-set KVO rate (see 'Change Set Up'). The alarm will sound again every 4 minutes, until End of Infusion the user changes bag or stops the pump. Keep Vein Open Rate 2.5 mL/hr...
-
Page 52: Eliminating Air During Operation
4 – Operation Change the bag and press again. 10:00 █ ■ Confirm protocol data and start infusion. Change Bag Press when done NOTE: if using an infusion set with drip chamber, change to a new infusion bag, but make sure that the drip chamber is half filled and there is no air in the administration set. -
Page 53: Down Occlusion Alarm
4 – Operation Repeat steps 3-6 until all air is eliminated from the line and fluid is seen at the distal end of the set. Press to return to the menu option screen. Press to resume the current infusion. 10. Check the Infusion Summary if screen which shows: bag volume, volume left and infused, is correct then press again to restart delivery Down Occlusion Alarm... - Page 54 4 – Operation Enter the relevant access code & press again. NOTE: not all default parameters mentioned in the above table can be configured by the user. Only those highlighted in the table are changeable at a local level. Scroll through the parameters to the one you wish to change and press .
-
Page 55: Pump Parameters
4 – Operation Pump Parameters The pump comes programmed with a number of parameters that can be viewed using ‘View Set Up’ from the main menu and changed using the technician access code in ‘Change Set Up’ mode. PARAMETER PURPOSE RANGE Battery Level Current battery charge... - Page 56 4 – Operation features sound alarm test, door sensor test, air sensor test, motor & encoder test, pressure sensor test, electrical measurements of key components (voltages test) Exit the set up menu and return to Exit main menu NOTE: only highlighted parameters can be changed (see ‘Change Set Up’). ...
-
Page 57: Alarm Conditions And Troubleshooting
5 – Alarm Conditions and Troubleshooting 5 – Alarm Conditions and Troubleshooting Alarm Condition When the infusion pump detects a problem, the following occurs: The infusion stops An audible alarm is activated A message appears on the display screen indicating the cause of the alarm ... -
Page 58: Alarm Definitions
5 – Alarm Conditions and Troubleshooting Alarm Definitions Alerts and alarms are indicated by a combination of audible tones, visual flashing behavior, and a descriptive message on the pump display. Alarms notify the clinician and/or patient of a potential or an actual hazardous condition. -
Page 59: Troubleshooting
5 – Alarm Conditions and Troubleshooting Troubleshooting Alarm Type Description Result Possible Cause Required Action Disconnect line from Air in Line/Up Occlusion patient, press Air is present in 10:00 ███■ Remove the air, as administration set. described on priming Infusion Air/Up High section. - Page 60 5 – Alarm Conditions and Troubleshooting Description Result Possible Cause Required Action Alarm Type Pump Unattended 10:00 ███■ Two minutes has Pump Paused Low Priority An alarm is elapsed without a Press to resume. Alarm activated button press during Too Long programming.
- Page 61 5 – Alarm Conditions and Troubleshooting Alarm Type Description Result Possible Cause Required Action Error 10:00 ███■ Restart the pump. If the alarm does Restart Pump not stop pack the High Priority Infusion System internal Switch off & on pump properly, in Alarm stops error has occurred...
- Page 62 5 – Alarm Conditions and Troubleshooting EOI to KVO 10:00 ███■ Program Medium End of Infusion ends, pump Current infusion Press to restart a new Priority continues program has been program or turn the pump Keep Vein Open Alarm to run at completed.
-
Page 63: Specifications
6 – Specifications 6 – Specifications Pumping Mechanism: Peristaltic Pump Flow Rate: 0 to 100 ml/hr in 0.1ml increments (depends on infusion modes) Priming Rate Range: Default 400 ml/hr, adjustable between 300 ml/hr to 1000 ml/hr Total Infused Volume: 0.1 to 1000 ml Accuracy: System Accuracy: ±5% achieved under nominal conditions 1. - Page 64 6 – Specifications Bolus Volume Actual test data for bolus accuracy for 1ml at 100ml/h, typical: -1.48%, maximum negative deviation: -3.12%, maximum positive deviation: Accuracy +0.25% Actual test data for bolus accuracy for 100ml at 1200ml/h, typical: +3.04%, no negative deviation, maximum positive deviation: +4.24% : The volume accuracy for a single bolus delivery less than Caution 0.4ml may be substantially greater than +/- 5%.
- Page 65 6 – Specifications Power Supply: Power Supply 100 – 240V AC, 50/60 Hz (10W / 0.3A) Battery: Rechargeable Lithium-Polymer 7.4V 1800 mAh. Down Occlusion Rate Min. Pressure Max.Pressure Detection Time to 0.1 ml/h ≤100 min ≤900 min alarm (with occlusion 1ml/h ≤5 min ≤45 min...
- Page 66 6 – Specifications Weight 325 grams without battery 410 grams with battery Environmental Specifications Non-Operating Conditions Shipping: Temperature: -20 C to +60 C (-4 F to +140 Relative Humidity: 15% to 85% Air Pressure: 48kPa (19350 ft, 5900 m) to 110 kPa (-2500ft, - 760 m) Transportation Between Uses: Temperature: -40...
- Page 67 6 – Specifications Dedicated administration sets with anti-siphon valve. The Administration set recommended administration set change interval is 72 hours. NOTE: The set length and temperature of the administration set can affect occlusion time to alarm. Increases in temperature and increases in length may increase time to alarm.
- Page 68 6 – Specifications Immunity Test EMC Standard Test Level Compliance Electrostatic IEC 61000-4-2 Contact ±2, ±4, ±6 kV Complies, No degradation Discharge (ESD) Discharge of performance Immunity Air Discharge ±2, ±4, ±8 IEC 60601-2-24 Contact ±8 kV Complies, Temporary Discharge degradation, loss of function or performance which Air Discharge...
-
Page 69: Service And Maintenance
Run the pump for several hours to make sure no abnormalities occur during infusion such as alarms, inaccurate infusion, and battery inconsistencies. NOTE: Service and maintenance should be performed by a certified CME technician. The only maintenance a patient can perform is the changing of the battery and cleaning of the device. -
Page 70: Battery Replacement
7 – Service and Maintenance NOTE: It is the CME technician's responsibility to repair any faults found during the Periodic Maintenance. NOTE: Do not service the pump while it is in use and/or attached to patient. Battery Replacement On the back of the pump, lift the battery unlock clip. - Page 71 7 – Service and Maintenance NOTE: After the “End Battery“ signal has been activated or following long periods of storage, wait 2 minutes after the pump has been connected to an AC power supply before operating. Caution: Leaving the battery in an uncharged state for a long period of time may damage the battery.
-
Page 72: Limited Warranty
CME or its designated representative reserves the right to invoice purchaser for such inspection. This Limited Warranty is the sole and entire warranty pertaining to CME’s products and is in lieu of and excludes all other warranties of any nature whatsoever, whether stated, or implied or arising by operation of law, trade, usage or course of dealing, including but not limited to, warranties of merchantability and warranties of fitness for a particular purpose. - Page 73 BodyGuard 595 Color Vision™ Directions For Use...
- Page 74 BodyGuard 595 Color Vision™ Directions For Use...
Need help?
Do you have a question about the Color Vision BodyGuard 595 and is the answer not in the manual?
Questions and answers