Advertisement
Advertisement
Table of Contents

Related Manuals for QualGear QG-PM-002-WHT-S


Summary of Contents for QualGear QG-PM-002-WHT-S
- Page 1 QG-PM-002-WHT-S PROJECTOR CEILING MOUNT Scan the QR Code™ below for more info about this product: Do not exceed the maximum rated weight 13.5kg 13.5kg specified. Otherwise, serious injury or (29.7lbs) (29.7lbs) RATED RATED property damage may occur. Version September 2018...
- Page 2 Before starting installation, please check that all parts shown in this checklist IMPORTANT: are included. If any parts are missing or damaged, contact your local distributor or support@qualgear.com for replacement parts and do not start assembly and installation WARNING until you receive all the parts.
- Page 3 Cable Management Mounting to a Wooden Ceiling For concrete ceiling mounting, NOTE follow Step 2b. Ceiling Plate with Connector Using an edge-to-edge stud finder, find the Using a straight edge, mark the centerline edges of the stud. of the stud. Feed the projector cable(s) through the top of the Ceiling Plate.
- Page 4 Mounting to a Concrete Ceiling NOTE Do NOT use power drill and do NOT over tighten the lag bolts. Wooden Ceiling Hold the marking template provided against the ceiling where you want to install the projector, mark four holes for drilling. 70mm 70mm (2.7")
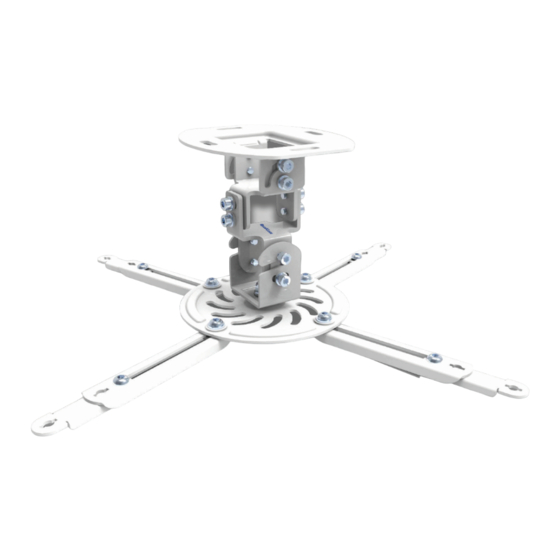
- Page 5 Installing Projector Mounting Bracket to the Projector NOTE Do NOT use power drill and do NOT over tighten the lag bolts. Projector Mounting Bracket Concrete Ceiling M-A/ M-B/ M-C/ M-D Projector M-I/ M-J/ M-K Recessed Hole M-E/ M-F/ M-G/ M-H Choose the appropriate spacer (M-I/ M-J/ M-K) NOTE when mounting to recessed holes.
- Page 6 Installing the Projector Celing Mount Assembly This mount allows pitch NOTE and roll adjustments for a HEAVY! perfect viewing experience. Use an assistant for this step. Ceiling Ceiling Plate with Connector Projector Projector Mounting Assembly Align the Projector Mount Assembly to the Ceiling Plate with Connector, then using the Alley Key (M-P), attach them together with the provided Screws (M-M), Washers (M-N), and Plastic Washers (M-O).
Need help?
Do you have a question about the QG-PM-002-WHT-S and is the answer not in the manual?
Questions and answers