Table of Contents
Advertisement
Quick Links
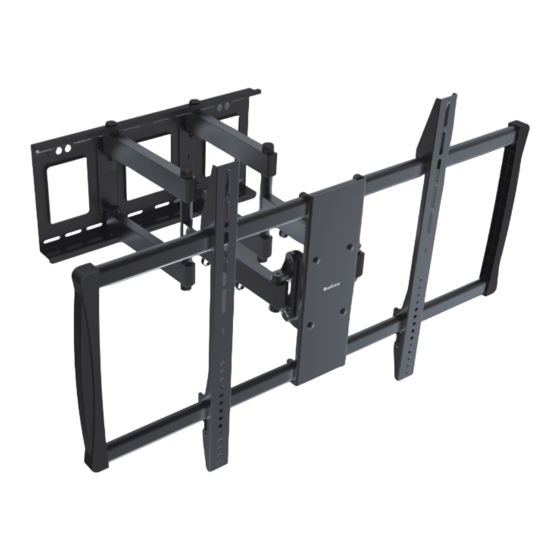
Adjustments
6
Tilt -15°~+5°
Level -3°~+3°
In order to make tilting adjustments by
hand, first please check the tightness
of the screws at the head of the mount
and adjust them using the Allen key as
follows. If the screws are too tight or too
loose, it will prevent the TV from being
adjusted by hand. For example, a light
weight TV with overly tight screws will
need to be loosen slightly, or a heavy
TV with loose screws need to be tighten.
E
Allen Key
Adjust to the desired position by
tilting -15°~+5°,
swiveling: -45°~+45° at pivot points,
and by leveling -3°~+3°.
;
HEAVY DUTY FULL MOTION TV WALL MOUNT
Scan the QR Code™ below
for more info about this product:
QG-TM-092-BLK
For Most 60" to 100" Flat Panel and
100
Curved TVs
80kg
80kg
Do not exceed the maximum rated weight
(176lbs)
(176lbs)
specified. Otherwise, serious injury or
property damage may occur.
200x200|300x200|300x300|400x200|400x300|400x400
600x200|600x300|600x400|800x200|800x300|800x400
800x600|900x200|900x300|900x400|900x600
Version October 2017
Advertisement
Table of Contents

Related Manuals for QualGear QG-TM-092-BLK


Summary of Contents for QualGear QG-TM-092-BLK
- Page 1 Adjustments QG-TM-092-BLK In order to make tilting adjustments by hand, first please check the tightness HEAVY DUTY FULL MOTION TV WALL MOUNT of the screws at the head of the mount and adjust them using the Allen key as follows. If the screws are too tight or too loose, it will prevent the TV from being adjusted by hand.
- Page 2 If any parts are missing or damaged, contact your local distributor or WARNING support@qualgear.com for replacement parts and do not start assembly and installation until you receive all the parts. Do not begin to install your QualGear product Tighten screws firmly, but do not over tighten.
- Page 3 Mounting to a Wooden Stud Wall Insert two lag bolts (W-A) at the top drilled holes and tighten with a socket wrench, leaving For concrete wall mounting, NOTE a 5mm space from the wall. follow Step 1b. Stud Finder Lift the wall mount and place against the wall, align the keyholes of the wall plate with the lag bolt heads, so the wall plate sits on the 5mm space.
- Page 4 Mounting to a Concrete or Brick Wall NOTE Do NOT use power drill and do NOT over tighten the top two lag bolts. Marking Template Bubble Level 95mm 95mm ( 3.7" ) 3.7" ø 12mm (ø 1/2") 2-B LK QG -TM -09 Mark at the top of the keyhole shape holes Align the top holes on the wall mount with the bolt heads on the wall, then lower the wall plate...
- Page 5 Installing to a Flat Back Panel Installing to a Curved or Recessed Back Panel Adapter Bracket Curved Back Panel Flat Back Adapter Bracket Panel 5.5mm 8.5mm M-D/ M-E M-C/ M-D M-A/ M-B Choose the appropriate screws and washers according to the IMPORTANT! type of your TV, and attach adapter brackets (B) to the back of Tighten all screws but...
- Page 6 Hanging the TV onto the Wall Mount Cable Management Cable Clip HEAVY! Use an assistant for this step. M4x6 Screw Wall Mount Attach the cable clips to the arm using the appropriate screws. Tighten all screws using a proper Phillips screwdriver. Leave slack in cables NOTE for arm movement.
Need help?
Do you have a question about the QG-TM-092-BLK and is the answer not in the manual?
Questions and answers