Advertisement
Table of Contents
Read these instructions and follow steps carefully to ensure you assemble the
product correctly and avoid damages. Check that all parts and
hardware have been provided before assembling the product. Place all
contents on a clean, soft-flat surface to avoid scratching the product.
CAUTION:
Only tighten bolts to 80% at first. Once all parts have been assembled, fully tighten all
hardware.
To prevent damage to threads, do not use a power tool and do not overtighten bolts.
Use two people to lift and turn the product when assembling.
Do not attempt with only one person and do not roll onto legs.
Keep all hardware and small parts away from children.
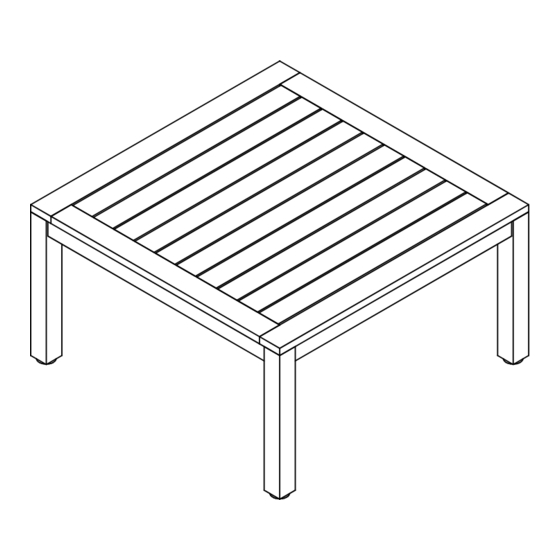
STEP 1:Attach both legs (A) to table top (B). Install washers (2) and lock nuts (1) on each
bolt of the legs as shown below. Use wrench (3) to secure.
ITEM DESCRIPTION
A
B
B
2
1
A
ASSEMBLY INSTRUCTIONS
GLCBCT80
PART LIST
QTY
LEG
4PCS
TABLE TOP
1PC
STEP 2: Attach both legs (A) to table top (B). Install washers (2) and lock nuts (1) on each
bolt of the legs as shown below. Use wrench (3) to secure.
3
HARDWARE LIST
ITEM DESCRIPTION
1
LOCK NUTS
2
WASHERS
3
KEY
A
1
2
B
QTY
8PCS
8PCS
1PC
3
Advertisement
Table of Contents

Subscribe to Our Youtube Channel
Related Manuals for TEMPLE & WEBSTER GLCBCT80


Summary of Contents for TEMPLE & WEBSTER GLCBCT80
- Page 1 ASSEMBLY INSTRUCTIONS GLCBCT80 Read these instructions and follow steps carefully to ensure you assemble the PART LIST HARDWARE LIST product correctly and avoid damages. Check that all parts and ITEM DESCRIPTION ITEM DESCRIPTION hardware have been provided before assembling the product. Place all contents on a clean, soft-flat surface to avoid scratching the product.
- Page 2 ASSEMBLY INSTRUCTIONS GLCBCT80 Read these instructions and follow steps carefully to ensure you assemble the PART LIST HARDWARE LIST product correctly and avoid damages. Check that all parts and ITEM DESCRIPTION ITEM DESCRIPTION hardware have been provided before assembling the product. Place all contents on a clean, soft-flat surface to avoid scratching the product.
Need help?
Do you have a question about the GLCBCT80 and is the answer not in the manual?
Questions and answers