Table of Contents
Advertisement
Quick Links
Read these instructions and follow steps carefully to ensure you assemble the product correctly and avoid damages. Check
that all parts hardware have been provided before assembling the products. Place all contents on a clean, soft-flat surface to
avoid scratching the product.
CAUTION:
Only tighten bolts to 80% at first. Once all parts have been assembled, fully tighten all hardware. To prevent damage to threads,
do not use a power tool and do not over tighten bolts.
Use two people to lift and turn the product when assembling.
Do not attempt with only one person and do not roll on to legs. Keep all hardware and small parts away from children.
A
B
14 PCS
G
9 PCS
C
6 PCS
15 PCS
8
8
11
10
9
2
D
E
15 PCS
2 PERSON RECOMMENDED
1
5
6
4
10
F
17 PCS
17 PCS
3
7
Advertisement
Table of Contents

Related Manuals for TEMPLE & WEBSTER FJNODKWH


Summary of Contents for TEMPLE & WEBSTER FJNODKWH
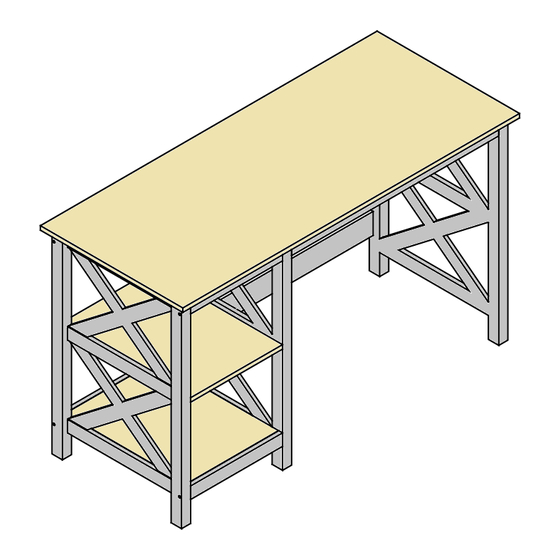
- Page 1 2 PERSON RECOMMENDED Read these instructions and follow steps carefully to ensure you assemble the product correctly and avoid damages. Check that all parts hardware have been provided before assembling the products. Place all contents on a clean, soft-flat surface to avoid scratching the product.
- Page 2 Step 1: FLIP Attach 3 x Cam Bolts (C) to Panel (4) as shown. Tighten with a Phillips Head Screwdriver. Step 2: Attach 2 x Cam Bolts (C) to Panel (2) as shown. Tighten with a Phillips Head Screwdriver.
- Page 3 Step 3: Attach 4 x Cam Bolts (C) to Panel (10) as shwon. Insert 4 x Cam Nuts (D) into the holes of Panel (9). Rotate the cam nuts so the arrows point towards the incoming cam bolts. Attach Panels (10) into place and tighten the cam nuts.
- Page 4 Step 5: Insert 2 x Dowels (A) into Panel (11) as shwon. Insert 2 x Cam Nuts (D) into the holes of Panel (11). Rotate the cam nuts so the arrows point towards the incoming cam bolts. Push Panel (11) into place and tighten the cam nuts. Step 6: Insert 4 x Dowels (A) into Panesl (9, 11).
- Page 5 Step 7: Push 5 x Bolts (E) through Panel (3) and insert 5 x Nuts (F) into Panels (5, 6, 7). Rotate the nuts so the opening point towards the incoming bolts. Attach Panel (3) to Panels (5, 6, 7) by tightening with the Phillips Head Screwdriver.
- Page 6 Step 9: Attach 6 x Cam Bolts (C) to Panel (1). Tighten with the Phillips Head Screwdriver. Step 10: Insert 6 x Dowels (A) into Panels (2, 3, 4). Insert 6 x Cam Nuts (D) into the holes of Panels (2, 3, 4). Rotate the cam nuts so the arrows point towards the incoming cam bolts.
Need help?
Do you have a question about the FJNODKWH and is the answer not in the manual?
Questions and answers