Munters Trio User Manual
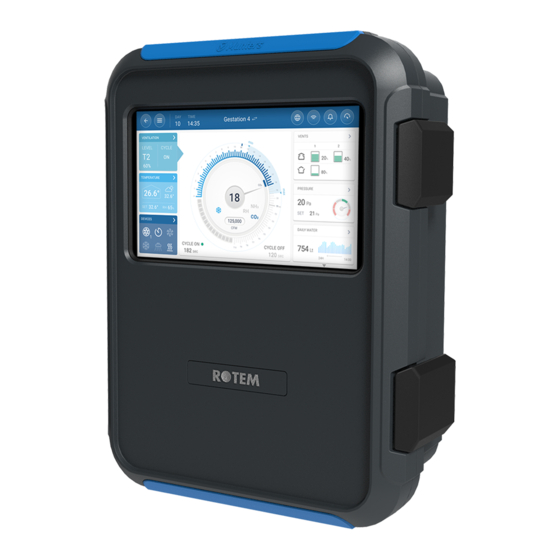
Poultry controller
Hide thumbs
Also See for Trio:
- User and installation manual (206 pages) ,
- User manual (113 pages) ,
- Installation manual (104 pages)

Related Manuals for Munters Trio


Summary of Contents for Munters Trio
- Page 1 Trio Poultry User Manual Controller Trio Poultry Controller Ag/MIS/UmEn-2777-08/20 Rev 3.0 P/N: 116825...
- Page 2 Munters reserves the right to effect modifications to the apparatus in accordance with technical and legal developments.
-
Page 3: Table Of Contents
Index Chapter page ........................INTRODUCTION Disclaimer......................... 7 Introduction ......................7 Notes ........................7 USING THE TRIO TOUCH SCREEN ..................Icons ........................8 Dashboard ....................... 9 BASIC SETUP ........................Defining the General Settings ................11 3.1.1 Defining the Preferences .................................. - Page 4 Stir Fan ........................59 ..................... COOLING FUNCTIONS Cooling Principles ....................60 Selecting the Cooling Mode ................. 61 ..................8.2.1 Continuous Cooling 8.2.2 Cycle Cooling ......................................... 8.2.3 Ramping Cooling HEATING FUNCTIONS ...................... Heating Functions ....................65 © Munters AB, 2020...
- Page 5 14.2 Defining the Air Quality Settings ............... 103 ..........................TIMERS ..........................ALARMS 16.1 Defining the Alarm Parameters ................107 16.1.1 Alarm Definitions ................... 16.1.2 Alarm Test ....................... Manual Test ................108 16.1.2.1 Scheduled Tests ................ 108 16.1.2.2 © Munters AB, 2020...
- Page 6 RESETTING, SAVING AND LOADING SETTINGS, UPDATING SOFTWARE ..... 18.1 Resetting the Settings..................118 18.2 Resetting the Trio CPU and Sensor Connections ..........119 18.3 Saving or Loading the Settings ................120 18.4 Viewing the Log ....................120 18.5 Updating the Software ..................121 WARRANTY ........................
-
Page 7: Introduction
Munters Controllers. 1.3 Notes Date of release: Jan 2020 Munters cannot guarantee to inform users about the changes or to distribute new manuals to them. All rights reserved. No part of this manual may be reproduced in any manner whatsoever without the expressed written permission of Munters. -
Page 8: Using The Trio Touch Screen
• 2.1 Icons Go back to the previous screen View the Main menus Choose language Trio connected to internet via WiFi. Click to view network settings. Trio connected to internet via LAN. Click to view network settings. View alarms Go back to the main screen... -
Page 9: Dashboard
Click the circle containing the user name to edit personal preferences such as the language, units, name, and more. When a Trio controls two or more rooms or there are two or more houses on a farm, Send to All enables editing certain select functions in more than one room or house. - Page 10 Click on the in each section to go to the relevant control page. • Click on Ventilation, Temperature, or Devices squares to view the hot screen for • those functions. © Munters AB, 2020...
-
Page 11: Basic Setup
Pressure (Pascal/Inches of Water) o Weight (Kilogram/Pounds) o Air Flow: Cubic Meter/Hour or Cubic Feet/Minute 3. Enable/disable Pin Code Access: Pin Code Access is a security measure. Anyone wanting to edit the settings must have this code. © Munters AB, 2020... -
Page 12: Defining The Time/Date
Date and Time Set: Manually enter the date and time. o Time Zone: Select the zone from the drop-down list. CAUTION Set the time zone even if you enable automatic date and time adjustment. © Munters AB, 2020... -
Page 13: Defining The House Setting
Growth day (used in various system algorithms) • Flock number enables tracking each flock’s production • Defining the Flock Settings Parameters • Defining House Modes • 3.2.1 D EFINING THE LOCK ETTINGS ARAMETERS Manual Set Up • New Flock Wizard • © Munters AB, 2020... -
Page 14: Manual Set Up
Growth day: This parameter defines the birds’ age. Growth day automatically goes up by one (1) at midnight. When editing the growth day, you can increase the number; you cannot decrease the number. Trio increases the growth day at midnight. Range: 0 - 999 o Initial Number of Birds: Set the number of birds that are in the beginning of a flock. -
Page 15: New Flock Wizard
NOTE For information on Brooding, refer to Brood Area, page 70. 3.2.1.2 New Flock Wizard Trio provides a simple to use wizard to set up the Growing or Pre-Heat modes. Using the wizard enables defining negative growth days. When starting a new flock Trio:... - Page 16 2. Define the flock number and click Next. 3. Select Growing or Pre-Heat. You must select an option to continue. o Growing Mode © Munters AB, 2020...
- Page 17 Define the Growth Day (zero or higher), Initial Number of Birds, and Initial Bird Weigh. o Pre-Heat Mode: Define: o Growth Day (-7 or higher; default is -2) o Initial Number of Animals o Next Growing Stage o Initial Bird Weight © Munters AB, 2020...
-
Page 18: Defining House Modes
If these values are the same, ventilation is constant. o Enable Temperature Alarms: Set the temperature below/above which Trio activates an alarm. Range: -40 to +90⁰ C; Default: Low alarm 0, High alarm +40⁰. -
Page 19: Adjusting The Bird Count
Total Mortality: Cumulative mortality. o Mortality %: Total mortality divided by the initial number of birds. o Bird Count: Current bird count. Trio calculates this number based on the above factors. NOTE If you wish to display the number of female and male birds separately, go to Control Strategy >... - Page 20 The Dashboard summarizes this screen’s data showing: the current total number of birds. • the FCR (feed conversion ratio (the amount of feed delivered converted to meat. • The lower the number, the better)). the mortality rate. • © Munters AB, 2020...
-
Page 21: Temperature Settings
For example, if on day 1 the target temperature is 95° F and on day 5 the target temperature is 86° F, Trio adjusts the target temperature on days 2 to 4 so that it approaches the day 5 setting. -
Page 22: Configuring The Temperature Curve
(refer to the Installation Manual). Tunnel appears if Tunnel Ventilation is enabled in Ventilation Settings (page 52). o Low/High Temperature Alarm: These parameters are differentials from the target temperature at which Trio sends an alarm. Range: Low Temp Alarm: -40°- Target ... -
Page 23: Defining Temperature Curve Settings
4.3 Emergency Temperature Control In the event that Trio fails to receive a signal from the temperature sensor for an extended period of time, an alarm is triggered. Between the time that Trio stops receiving a signal and when an alarm is triggered, ventilation remains at the current level. When an alarm is... -
Page 24: Temperature Humidity Index
Cooling and air quality treatment cease 4.4 Temperature Humidity Index As an option, Trio Version 6.07 can operate the ventilation according to a temperature- humidity index (THI), a formula that combines the temperature and humidity levels. This formula measures heat stress and is an industry standard that can be used to provide ventilation efficiently. - Page 25 Maximum offset below target: Sets the maximum change below the target temperature. Range: 0 - 5⁰ C. Default 3 o Maximum offset above target: Sets the maximum change below the target temperature. Range: 0 - 5⁰ C. Default 1 © Munters AB, 2020...
-
Page 26: Introduction To Ventilation
Scheme: Defining the fans/ventilation determines • how much air the fans provide and which fans provide the air. In addition, Trio controls the inlets and tunnel doors. There are two ways to control • the inlets and tunnel doors: o Static pressure: Based on the difference in the interior and exterior air pressures, Trio continually calculates the inlets’/doors’... -
Page 27: Defining The Fans/Ventilation Scheme
For more information, refer to Ventilation by Weight, page 34. Curve: Trio calculates a curve between growth days; the increase between days is • steady. If a curve is not enabled, ventilation increases at the next defined growth day. -
Page 28: Extra Ventilation
Target Temperature The temperature is still below the Tunnel Set Point. • Trio only enters Extra Ventilation if the temperature is 0.5⁰ above the Target • Temperature (this is the minimum; you can set the differential to be higher). You can set a differential for each level to ensure that ventilation increases only •... -
Page 29: Tunnel Ventilation
As in Basic Ventilation, you define the fans to be used in each level. However, there is no curve between levels. Even if Extra Ventilation is enabled, Trio will go straight to tunnel mode if the •... -
Page 30: Minimum And Maximum Ventilation
Ventilation The following sections detail how to configure the minimum and maximum ventilation levels by growth day. As the temperature rises above the target temperature, Trio gradually increases ventilation level using a combination of increased fan speeds, cycle times, opening the inlets and more. -
Page 31: Defining Basic Ventilation
Day: Set the growth day for the required min/max set points. Each day must have a unique number. Add up to ten lines. o Min/Max Level: Define the minimum and maximum ventilation levels. Trio will automatically adjust the ventilation as the temperature changes. -
Page 32: Defining Dynamic Ventilation
(for cold temperatures) and the ventilation level (for warm temperatures). 1. Go to System > Control Strategy > Ventilation 2. Under Minimum / Maximum Ventilation, enable o Dynamic Minimum Ventilation or o Dynamic Maximum Ventilation or o Both. In this example both are enabled. © Munters AB, 2020... - Page 33 Cold Maximum: When the outside temperature reaches the Dynamic Maximum Cold Outside Temperature, Maximum Ventilation runs at this percentage . o Warm Max. Level: When the outside temperature reaches the Dynamic Maximum Warm Outside Temperature, Maximum Ventilation runs at this Extra Ventilation level. © Munters AB, 2020...
-
Page 34: Ventilation By Weight
When using cycle fans, each level has minimum and maximum on times, which determine the minimum and maximum CFM. If the ventilation doesn't provide enough air for the birds (based on their numbers and weight) Trio sends an alarm. You will need to redefine the minimum level. -
Page 35: Adding A Curve
The following section shows how to configure your fans to increase in a curve between the days defined in the Min Max Ventilation Screen. 1. Go to System > Control Strategy > Ventilation 2. Enable Curve Status. Ventilation now increases in a curve. © Munters AB, 2020... -
Page 36: Levels Of Ventilation
1. Go to Climate > Ventilation and click 2. Define: o Efficiency Maximum: Refer to Fans (Efficiency Fan) o Ventilation Tuning: This parameter determines how aggressively the Trio responds to differences between the measured temperature and the target temperature. CAUTION Munters recommends leaving this paramter at Normal. -
Page 37: Basic Ventilation
7.2.1 D EFINING ASIC ENTILATION In this configuration, Trio raises the minimum ventilation from 10% at Level One to 100% at Level 10. In Devices and Sensors map relays and analog output ports to fans, inlets, and stir fans as required. Only mapped devices show up in the following screens. - Page 38 3. Click a relay-controlled fan that you want to activate. 1) A box appears around the fan. 2) A fan appears in the upper right. 4. Click the fan in the upper right. Both fans turn blue. 5. Define fans as required. © Munters AB, 2020...
-
Page 39: Fan Options
Analog Fans: Fan speed changes as ventilation requirements change. • Efficiency fan: Fan runs at a maximum speed percentage defined by the user. • Fan Rotation: Different fans running in Minimum Ventilation Cycle can be • designated to run in rotation. © Munters AB, 2020... -
Page 40: Minimum Ventilation Cycle
Total Cycle Time (sec): Define the minimum ventilation cycle time. Range: 60 – 999 seconds. o Min Cycle Off Time (sec.): When using cycle time, Trio automatically adjusts the ON time set in the main screen. This parameter defines the minimum cycle off time. - Page 41 Under On (sec), enter the cycle ON time (Go to the Settings to define the Off time). In this example, at Level 4 Fan 1 runs in cycles (100 seconds on) and Fan 2 runs continuously. The maximum ventilation capacity reflects the change caused by running the fan in a cycle. © Munters AB, 2020...
-
Page 42: Analog Fans
At Level 1 (10% output of the total fan capacity), Fan 1 runs at 35% speed. At Level 4 (40% of the total output), the speed drops to 20% but Fan 2 turns on as well. © Munters AB, 2020... -
Page 43: Fans (Efficiency Fan)
2. Click the fan in the upper right. Both fans turn blue. A percentage appears under the fan. 3. Click . This icon and the fan icon turn green. 4. In the percentage, enter the fan’s minimum speed (in percentage). 5. Go to Settings. © Munters AB, 2020... -
Page 44: Fan Rotation
Using the same fan or a limited number of fans exclusively can lead to mechanical wear and tear, for example to the drive belt. To minimize this damage, Trio enables “rotating” between fans. The rotation function switches between cycle fans in the same stage. - Page 45 2. Enable Fan Cycle and Fan Rotation (Fan Rotation does not appear unless Fan Cycle is enabled.) 3. Go to Climate > Ventilation. 4. After enabling fans, click on any fan that you want to rotate. appears. 5. Click the icon. Repeat for any required fans. © Munters AB, 2020...
-
Page 46: Inlet And Curtain Ventilation
Fan 3 remains constant. 7.2.3 I NLET AND URTAIN ENTILATION In Basic Ventilation, Trio enables control over the inlets using one of two methods: Level Control • Static Pressure Control • NOTE Outlet control is by level only. -
Page 47: Level Control
4. Define the opening level. 5. Repeat for every required fan at each level. NOTE Munters recommends configuring the inlets for every ventilation level. NOTE Inlets open before the fans being to operate, preventing excess pressure. © Munters AB, 2020... -
Page 48: Static Pressure Control
Note that the Trio adjusts the inlets' opening only if one or more fan is operating. Set the required pressure, according to the air flow specification. The greater the difference between the exterior and interior pressures, the greater the air flow. -
Page 49: Static Pressure Main Screen
Outside Temperatures: Set the temperatures at which the inlets open or close. (This parameter requires an outside temperature sensor). o Pressure Alarm: Set the low and high pressures, at which an alarm is transmitted. 7.2.3.2.3 Static Pressure Settings Screen Define: • © Munters AB, 2020... -
Page 50: High Static Pressure Alarm State
Wind delay: When pressure rises above or drops below the required level, Trio waits this amount of time before adjusting the inlet openings. Range: 0 – 999 seconds o Low Pressure Alarm Minimum Level: Low static pressure alarm is disabled when the minimum ventilation drops below this level. - Page 51 NOTE Each differential must be equal to or higher than the previous level’s differential. o Fan Status. Refer to Defining Basic Ventilation, page 37 on how to configure fans. Extra Ventilation Fan Cycle (Optional): 6. Go to System > Control Strategy > Ventilation © Munters AB, 2020...
-
Page 52: Tunnel Ventilation
One tunnel door must be mapped or tunnel ventilation will not operate. Configuring Tunnel Ventilation requires mapping at least one fan or one tunnel door. Tunnel Ventilation must be enabled for the functions to appear on the screen. © Munters AB, 2020... -
Page 53: Defining The Tunnel Ventilation Parameters
3. Go to Climate > Temperature Curve. 4. For each day, define the Tunnel temperature. This parameter defines the temperature at which Tunnel Mode begins to operate. 5. Go to Climate > Ventilation and click the Tunnel Tab. © Munters AB, 2020... - Page 54 Level: Read-only. o Diff: Define the temperature differential. This factor defines the wind chill factor. Trio switches to the higher level when the temperature reaches the tunnel temperature plus the differential. Range: 0.0°C >10.0°C. NOTE The Diff parameter manually defines the wind chill factor for each level. To automatically define the wind chill factor, refer to Defining the Wind Chill Factor, page 57.
- Page 55 8. Under Enable Fan Cycle, check Tunnel. 9. Go to Climate > Ventilation > Tunnel. 10. Define the cycle times. Refer to Minimum Ventilation Cycle, page 40 for details. © Munters AB, 2020...
-
Page 56: Defining The Tunnel Ventilation Settings
7.4.3 UNNEL OORS In Tunnel Ventilation, Trio enables control over the tunnel doors using control by level or control by static pressure. Control of these doors is the same as control over inlets. Refer to these sections for details. Inlet and Curtain Ventilation •... -
Page 57: Defining The Wind Chill Factor
HILL ACTOR Trio can take into account the tunnel wind speed. The effect of this speed is the wind chill factor. When taken into account, the ventilation is adjusted to reflect the effective temperature according to a built-in algorithm. The algorithm takes into account the wind velocity, house dimensions, and growth day. -
Page 58: Calibrating The Inlet/Tunnel Door
1. Go to System > Control Strategy > Ventilation 2. Click 3. Define: o Enable Calibration: Select 24 hours a day or define a specific time frame. o Number of steps: Set up the number of steps (number of movements). © Munters AB, 2020... -
Page 59: Stir Fan
3. Option: Define the stir fan cycle time (refer to Minimum Ventilation Cycle, page 40) 4. If the ventilation fans are running in a cycle, go to Climate > Ventilations > Settings. 5. Define when the stir fan operates, during the cycle On or Off time. © Munters AB, 2020... -
Page 60: Cooling Functions
• Invalid humidity sensor readings are not taken into consideration. • To avoid causing the animals undo heat stress during periods of high relative humidity, Trio employs the following rules: When the temperature reaches the Cooling Temperature in the Temperature •... -
Page 61: Selecting The Cooling Mode
8.2 Selecting the Cooling Mode Trio enables running the cooling device in three different modes: Ramping: Cycle modulation, frequency depends on the error in °C, with respect to • the cooling setting (target). Ramping is the default mode. Continuous: When activated, the cooling devices operate continuously. -
Page 62: Continuous Cooling
NOTE If you want cool pads to operate only in Tunnel mode, 1) enable Tunnel Mode 2) set up the Temperature Curve so that Tunnel Targe Temperature is below the Cooling Temperature. o Humidity Limit: Stop cooling when the humidity level reaches the level defined in the Humidity settings. © Munters AB, 2020... -
Page 63: Cycle Cooling
Enable from ventilation Level: Select the level (ventilation output) to enable cooling operation. (Default 1). o ON/OFF Time: Define the amount of time the cycle is ON and OFF, respectively. o Humidity Limit: Enable stopping cooling at a certain humidity level. © Munters AB, 2020... -
Page 64: Ramping Cooling
When cooling starts, the off time will be the maximum off time. As the temperature rises to the band maximum, the maximum off time decreases to the minimum. o Humidity Limit: Enable stopping cooling at a certain humidity level. © Munters AB, 2020... -
Page 65: Heating Functions
• 9.1 Heating Functions TRIO supports up to six (6) on/off heating devices and variable heaters. To control the heat, TRIO has two different programs, one to maintain the target temperature in the entire house and one program that controls separate heating zones. In the case of the latter, each heater has a dedicated sensor and unique target temperature. -
Page 66: Analogue Heaters
Heater On Temp: Define the difference from the Heat target temperature at which the heaters turn on. Range: 0.2 - 5⁰ C. o Heat Tuning: This parameter determines how aggressively the TRIO responds to differences between the measured temperature and the target temperature. -
Page 67: Heat Cycles
Total Cycle Time (sec.): Range 5 – 600 seconds. Default 300 seconds o Minimum Cycle On Time (sec): Range 5 – 600 seconds. Default 60 seconds o Minimum Cycle Off Time (sec): Range 5 – 600 seconds. Default 30 seconds © Munters AB, 2020... -
Page 68: Zone Heaters
Heater On Temp: Define the difference from the Heat target temperature at which the heaters turn on. Range: 0.2 - 5⁰ C. o Heat Tuning: This parameter determines how aggressively the TRIO responds to differences between the measured temperature and the target temperature. - Page 69 6. Map each heater to one or more temperature sensors. Options: • o Analogue Heaters o Heat Cycles © Munters AB, 2020...
-
Page 70: Brood Area
Chicks require extra heat during the first few weeks (8 – 14 days) of their lives. To reduce energy costs, Trio enables designating a certain area as a brooding area; that specific area can be kept extra warm. At a certain point in the chicks’ growth cycle, the brooding area is expanded to the full house. - Page 71 (next step). 2. Go to Flock > Flock Settings. 3. In Growing Stage, select Brooding. 4. Go to System > Temperature Definition (temperature sensors must be defined). © Munters AB, 2020...
- Page 72 5. Map temperature sensor(s) to the brooding area. © Munters AB, 2020...
-
Page 73: Feed And Silo Management
Feed lines transport the feed from the hoppers to feeding pans, according to signals sent from the hoppers. Trio receives inputs from the augers and hoppers that enable controlling the feed distribution (start and stop signals). In addition, the user enable am alarm if the run time exceeds the defined parameters. - Page 74 Alarm Start Day: The growth day on which the controller begins to send alarms. o Over/Under Runtime: If the feeders and auger run more or less (respectively) than these times, the controller sends an alarm. © Munters AB, 2020...
-
Page 75: Configuring The Silo
The screen displays the amount of feed remaining in each silo, in quantity and percentage of the total capacity. 2. Enter the amount of feed in each silo. Range: 0 – 50000 kgs. 3. To specify the feed type, click Feed Supply. Click Feed Type and select the type. © Munters AB, 2020... - Page 76 Range 50 – 5000 kg. o Silo Low Storage Alarm: Enabling this alarm allows generating an alarm when the amount of feed in the silo drops to this percentage of the capacity. © Munters AB, 2020...
-
Page 77: Batch Weighing System
11.4 Batch Weighing System The Trio Batch Weighing System enables mixing different feeds stored in two or three silos and distributing the feed mixture to hoppers (Figure 2). Trio supports two types of weighers: External batch weighers, in which defined quantities of feed are added to the mix. - Page 78 Qty/Pulse: Define the quantity of feed per pulse (designate the quantity as metric • or imperial in Defining the Time/Date, page 12). This quantity must match the quantities defined in the external controller. Click Test to ensure that the Trio connection to the batch counter is operating. • © Munters AB, 2020...
-
Page 79: Electronic Batch Weighing Installation
Over time, Trio learns how much time is needed between transmitting the stop signal and actually stopping the augers. After filling the batch bin, Trio releases a valve, emptying the feed into the batch hoppers. The mixing process continues until the hopper is filled and a signal is sent. - Page 80 Auger 1 – Silo 1, etc.). NOTE This parameter is hidden when Silo Weight is used to manage the feed inventory. 5. In System > Devices & Sensors > Installation, define up to three relays as Silo Augers. © Munters AB, 2020...
- Page 81 7. In System > Devices & Sensors > Installation, define one digital port as Batch Hopper Limit. This sensor (placed in the bin) stops feed delivery when the feed level reaches the sensor. 8. Define the Active State. o Open: The circuit is open when the sensor is activated. © Munters AB, 2020...
- Page 82 Seconds to close Valve: Define the amount of time required for the release valve to go from opened to closed. Range: 0 – 255. Default 10. o Test checks the relay functionality. NOTE Testing stops the weigher process. © Munters AB, 2020...
-
Page 83: Batch Bin Calibration
When you press Next, the batch weigher bin opens and any feed in the weigher spills out! 3. In the following screen, place a weight (betwen 1 – 10 kilograms/2 – 22 pounds) and enter the gain. Click Next. © Munters AB, 2020... - Page 84 The following screen appears. © Munters AB, 2020...
-
Page 85: Configuration
Cycles Per Batch: Trio can divide each batch into sub-batches. This parameter defines how many sub-batches there are in each batch. The quantity of each feed type in each cycle is determined by this number. Range: 1 –... -
Page 86: Dashboard
NOTE Mixing always begins with the silo proving the largest amount of feed (Silo 3 in the screen above). 11.4.2.4 Dashboard After configuring the various parameters, Batch Weighing appears on DashBoard. The graphic shows: The number of silos • The feed quantities in percentages and weight (25 kg in this example) • © Munters AB, 2020... -
Page 87: Pausing Batching Mixing And Feed Mixing
Stop Mixing: This function manually stops (and restarts) the feed mixing system. If enabled, you must confirm the selection. If either of these options is chosen, the Dashboard displays the option. © Munters AB, 2020... -
Page 88: Batch Weigher Alarms
Feeder under time: Feeder under time defines the time required to generate an alarm when the feeder is not active. o Silo Auger Alarm. Define: Over Runtime (Min): Trio generates an alarm when the silo auger provides too much feed to the hoppers. © Munters AB, 2020... - Page 89 once a cross over runtime is detected. o Batch Weigher Alarm. Define: Maximum Discharge Time: Set maximum time that it takes for the feed to be released from the bin before sending an alarm. © Munters AB, 2020...
-
Page 90: Lighting Program
12 Lighting Program Trio supports on/off (non-dimmable) lights and dimmable lights. In setting up the program, the following options must be defined: On/Off and/or 0 – 10 Volt Variable Lights (defined in Devices and Sensors). A • system can include both. - Page 91 In multi-line control, click the icon of each required line. Another light icon appears. Click that icon. All icons turn blue. 7. Add additional programming lines to define when the light lines go off and then on. Repeat for each growth day. 8. Click Save. © Munters AB, 2020...
-
Page 92: Volt Variable Lights
At 7:30, light line 3 goes on along with light line 1. 12.2 0 – 10 Volt Variable Lights 1. To enable multi line control, go to Control > Light > Settings and enable Multi Line Control (option). © Munters AB, 2020... - Page 93 In single line control, click the light icon. Another light icon appears. Click that icon. Both icons turn blue. o In multi-line control, click the icon of each required line. Another light icon appears. Click that icon. All icons turn blue © Munters AB, 2020...
- Page 94 In this scenario, all light lines begin to turn on at 5:40. At 6:00, lights reach 45% intensity. At 6:40, light intensity begins to increase, reaching 55% at 7:00. At 8:10, light intensity begins to increase, reaching 60% at 8:30. At 18:40, lights begin to dim, reaching 0% at 19:00. © Munters AB, 2020...
-
Page 95: Light Settings
This function requires a light sensor. Refer to the Installation Manual. 1. Go to Control > Light > Settings and enable Light intensity alarm. 2. Define the minimum light intensity that lights must achieve. Below this level, Trio generates an alarm. -
Page 96: Expected Bird Weight
13 Expected Bird Weight Trio collects bird weight data. Factors to set up when configuring how Trio measures weight: Reference Bird Curve: The reference weight is a value that reflects the birds’ • expected target weight. o Enabled: Trio provides a weight curve (by growth day). The user can choose an industry standard template or manually define a curve. - Page 97 Industry standard curve o Blank. This option enables manually defining a growth curve. 4. Click Next and confirm your choice. 5. If required, edit the curve and save. 6. Go to Flock > Bird Weight. © Munters AB, 2020...
-
Page 98: Curve Disabled
Weight: Set the expected bird weight. Range 0 - 30.0 kg/0- 66 lbs. 8. Click and edit the Curve Offset (option). 13.1.2 C URVE ISABLED 1. To disable a bird curve, go to System > Control Strategy > Scales © Munters AB, 2020... - Page 99 2. Verify that the curve is disabled. 3. Go to Flock > Bird Weight. 4. Click to edit the reference weight. © Munters AB, 2020...
-
Page 100: Male/Female Weighing
1. Go to System > Control Strategy > Flock 2. Click and enable Separate Male/Female. 3. Go to System > Control Strategy > Scales 4. Define: o Gender Selection: Define each scale as Male & Female, Male, or Female. © Munters AB, 2020... -
Page 101: Non-Separated Weighing
3. Go to System > Control Strategy > Scales o Weight Range: These parameters define the bands above and below the reference weights. If a bird’s weight is above or below this band, it is not included in the data. © Munters AB, 2020... -
Page 102: Air Quality
Ensuring air quality means configuring the Trio relative humidity, CO2, and ammonia sensors. Each of these factors are independent and require a sensor. When any of these factors rise above the user defined levels, Trio compensates by increasing the ventilation rate or by increasing the heat. -
Page 103: Defining The Air Quality Settings
14.2 Defining the Air Quality Settings When the air quality (CO2/NH3/Humidity) exceeds the specifications defined in the Air Quality Screen, Trio can increase the ventilation, the heat or both. (Alternatively, additional treatment can be disabled). When central heating is employed, the changes to heating are global. When zone heaters are employed, changes are specific to each heater. - Page 104 RH Shutoff Differential: (%): Below this level, humidity treatment ceases. Range: 0% to 10% o High RH Alarm Threshold (%): Trio sends an alarm when the humidity level rises above this level. Range: 0% to 100% o Co2 Shutoff Differential: (ppm): When CO2 levels are below the target level by this amount, all CO2 treatment stops.
-
Page 105: Timers
15 Timers Timers provide an additional method of controlling relay devices, namely setting a timetable in which the device can operate. In addition to the timetable, Trio enables setting up time cycles and temperature ranges in which a device can operate. - Page 106 If an outside temperature sensor is enabled, map timers to it (if required). • © Munters AB, 2020...
-
Page 107: Alarms
Trio waits this amount of time before sending an alarm. This prevents sending alarms for short deviations. Range: 0 – 999 seconds. o Alarm Reminder: Trio will resend an alarm after this amount of time if the alarm is not acknowledged. Range: 0 – 999 minutes. -
Page 108: Alarm Test
Water Overflow Max Water/Hour: Trio sends an alarm if the water flow exceeds this amount. o Water Shortage: Min Water/Hour: Trio will send an alarm if the water flow is less than this amount. Range: 0 – 999 gallons/liters. -
Page 109: Viewing The Alarms
This function compares the relay’s current state to its defined state (normally open, normally close). If the relay is not in its defined state, Trio sends an alarm. You can define the auxiliary alarms to operate during specific time periods. Use this alarm for those relays controlling important functions. - Page 110 Time Frames: Define the time frame, either 24 hours a day or specific time frames. o Relay Function: Enable this function. Define the relay being monitored. When this relay is no longer in its defined state (normally open, normally closed) an alarm is sent. © Munters AB, 2020...
-
Page 111: Sending A General Alarm
In Devices and Sensors, map and define at least one digital sensor as a water meter sensor and defined as drinking water. Refer to the Installation Manual. 1. Go to System > Control Strategy > Water © Munters AB, 2020... - Page 112 6. Define: o High Flow Delay (Min.): Define the amount of time that water flows at the high flow rate before Trio sends an alarm. o Low Flow Delay (Min.): Define the amount of time that water flows at the low flow rate before Trio sends an alarm.
-
Page 113: History
17 History A Trio controller saves: • o 150 growth days of history data (minimum). o Up to 365 growth days of history data (estimated maximum) TrioAir saves data on the server for an unlimited amount of time. • Starting a new batch/flock erases all history data. -
Page 114: Alarms And Events
Go to this screen to view the last 999 alarms and events. Alarms history can display the following alarms. NOTE Performing a Cold Start or Starting a new group clears the Alarm History. 1. Go to Flock > History > 2. Click the relevant tab. © Munters AB, 2020... -
Page 115: Water And Feed History
NOTE Water, auger, feeder relays or sensors must be enabled to see these screens. 1. Go to Flock > History > Water 2. Click the relevant tab to see its history. NOTE Click the clock symbol to view the hourly breakdown. © Munters AB, 2020... -
Page 116: Devices History
24H resolution, this information gives the opportunity to investigate and verify if the runtime of a device performs as expected. Go to Flock > History > • Click the clock symbol to view the hourly breakdown. • NOTE History displays installed devices only. © Munters AB, 2020... -
Page 117: Bird Weight History
17.5 Bird Weight History Trio provides the history of the average weight, daily gain, and uniformity. In addition, data from one or both scales is provided. Go to Flock > History > • Click to view the bird scale data. -
Page 118: Resetting, Saving And Loading Settings, Updating Software
18 Resetting, Saving and Loading Settings, Updating Software Resetting means erasing the tables and current product definitions. Once the settings have been erased, the user can manually reconfigure the Trio or load settings from a USB device. Resetting the Settings •... -
Page 119: Resetting The Trio Cpu And Sensor Connections
18.2 Resetting the Trio CPU and Sensor Connections There are two ways to reset the Trio unit, depending on what is required. To reset the CPU and the user interface, press the button shown in Figure 3: CPU • Reset Button. -
Page 120: Saving Or Loading The Settings
2. Click Choose Operation and select Load Settings, Save Settings, or Delete File. 3. Follow the instructions. NOTE In Choose Operation, you can also delete a backed-up file. 18.4 Viewing the Log The log displays which tables were successfully saved. © Munters AB, 2020... -
Page 121: Updating The Software
18.5 Updating the Software CAUTION Do not disconnect the power while resetting the unit. Any disconnection can cause severe hardware damage. To update the Trio Software: 1. Go to System > General Settings. 2. Click 3. In Software Version, click Update. -
Page 122: Warranty
Munters plant was required: if this is not done, the user is fully responsible for the damage which they could suffer. - Page 123 Dismantling and assembly must be performed by qualified technicians and according to the manufacturer’s instructions. The use of non-original spare parts or incorrect assembly exonerates the manufacturer from all liability. Requests for technical assistance and spare parts can be made directly to the nearest Munters office. © Munters AB, 2020...
Need help?
Do you have a question about the Trio and is the answer not in the manual?
Questions and answers