Table of Contents
Advertisement
Quick Links
Advertisement
Table of Contents

Subscribe to Our Youtube Channel
Related Manuals for Impulse HSP-PRO002


Summary of Contents for Impulse HSP-PRO002
- Page 1 Инструкция Многофункциональный силовой тренажёр, тяговая колонна Impulse HSP-PRO002 Полезные ссылки: Многофункциональный силовой тренажёр, тяговая колонна Impulse HSP-PRO002 - смотреть на сайте Многофункциональный силовой тренажёр, тяговая колонна Impulse HSP-PRO002 - читать отзывы...
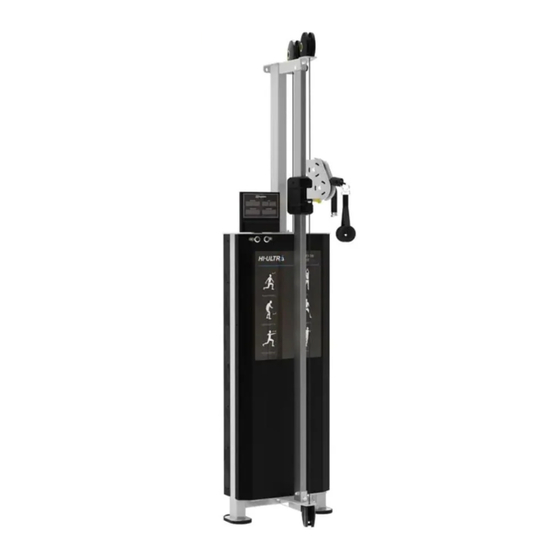
- Page 2 HSP-PRO002 HI-LOW FUNCTIONION TRAINER OWNER'S MANUAL CAUTION! Read all precautions and instructions in this manual before using this equipment.
-
Page 3: Table Of Contents
Table Of Contents CAUTION! Read all precautions and instructions in this manual before using this equipment. Important Safety Instructions----------------------------------------------------------- 3 Instructions-------------------------------------------------------------------------------- 5 Exploded View and Parts List------------------------------------------------------------ 6 Measurement Guide---------------------------------------------------------------------- 8 Assembly Instructions-------------------------------------------------------------------- 9 Assembly--------------------------------------------------------------------------------- 10 Adjust Instructions and Exercise Instructions---------------------------------------- 17 Maintenance Schedule------------------------------------------------------------------ 18 Console Panel Functions---------------------------------------------------------------- 19... -
Page 4: Important Safety Instructions
Important Safety Instructions Before beginning any fitness program, you should obtain a complete physical examination from your physician. When using exercise equipment, basic precautions should always be taken, including the following: 1. Read all instructions before using the equipment. These instructions are written to ensure your safety and to protect the unit. 2. - Page 5 Important Safety Instructions Personal Safety During Assembly Read each step in the assembly instructions and follow the steps in sequence. Do not skip ahead. If you skip ahead, you may learn later that you have to disassemble components and that you may have damaged the equipment. Assemble and operate the equipment on a solid, level surface.
-
Page 6: Instructions
Instructions Before beginning assembly please take the time to read instructions thoroughly. Please use the various lists in this manual to make sure that all parts have been included in your shipment. When ordering, use part number and description from the lists. -
Page 7: Exploded View And Parts List
Exploded View and Parts List Overall Item No. Part No. Description HSP-PRO00201ASSY Main Assy HSP-PRO0021700 Back Cover A09-5 Power Cable DQSPQ24V6A Adaptor HSP-PRO00202ASSY Up Bracket Assy HSP-PRO00203ASSY Underframe Assy HSP-PRO00204ASSY Slide Assy HSP-PRO00205ASSY Console Assy HSP-PRO00229000ASSY Rope Hook Assy CG60006100V2 Strap Handle GB845ST4.2*13DHS Pan Head Tapping Screws With Cross Recessed 4.2*13... - Page 8 Exploded View and Parts List Overall...
-
Page 9: Measurement Guide
Measurement Guide BHCS = Button Head Cap Screw SHCS = Socket Head Cap Screw FHCS = Flat Head Cap Screw HHB = Hex Head Bolt CRPHS = Cross Recessed Pan Head Screw Millimeters Inches Diameter of bolt M6(1/4") M8(5/16") M10(3/8") M12(1/2") M16(5/8") (mm/inch) -
Page 10: Assembly Instructions
Assembly Instructions Assembly of the equipment takes professional installers about 2 hours. If this is the first time you have assembled this type of equipment, plan to spend more time. It is strongly recommended to assemble the equipment by professional installers. You may find it quicker, safer, easier to assemble this equipment with the help of a friend, as some of components may be large, heavy or awkward to handle alone. -
Page 11: Assembly
Assembly STEP 1 Install the Main Assy (#1) and Underframe Assy (#6) together, Use the following parts: two Screw M10*25 (#17) one Screw M10*70 (#19) three Spring Washer Φ10 (#21) three Flat Washer Φ10 (#22) Tighten with a wrench S=8 (#24) Note: If expansion bolts are used, remove the 2 floor mat, as is shown in. - Page 12 Assembly STEP 2 Install the Main Assy (#1) and Up Bracket Assy (#5) together, Use the following parts: two Screw M10*25 (#17) two Spring Washer Φ10 (#21) two Flat Washer Φ10 (#22) Note: Do not tighten the bolts.
- Page 13 Assembly STEP 3 Install the Main Assy (#1) and Console Assy (#8) together, Use the following parts: two Screw M10*25 (#17) two pring Washer Φ10 (#21) two Flat Washer Φ10 (#22) Tighten with a wrench S=8 (#24) Note: Insert the two connectors A and B before installation.
- Page 14 Assembly STEP 4 Install the Main Assy (#1) and Slide Assy (#7) together, Use the following parts: two Screw M10*90 (#20) one Screw M10*55 (#27) one Screw M10*50 (#18) one Nylon Bush (#26) seven Flat Washer Φ10 (#22) four Nut M10 (#23) Tighten with a wrench S=8 (#24) Note: Tighten the bolts of step 2.
- Page 15 Assembly STEP 5 Cut off the ties, as is shown in no 1-13. Note: Do not cut the cable, cut all the ties.
- Page 16 Assembly STEP 6 1. Slip the upper cable from pulley A and pulley B in the Strap Handle (#10), remove the screws before putting them in, put the cable into the outer set and then into the inner set, tighten the bolts (Refer to the attached figure). 2.
- Page 17 Assembly STEP 7 Install the Main Assy (#1) and Back Cover (#2) together, Use the following parts: twelve Pan Head Tapping Screws With Cross Recessed 4.2*13 (#16)
-
Page 18: Adjust Instructions And Exercise Instructions
Adjust Instructions and Exercise Instructions Adjust the pulley frame Hold the handrail, lift the bolt, adjust the pulley frame to the right position, loosen the bolt and insert the bolt into the hole. Note: Make sure the bolt has been inserted into the hole before use. Handrail Exercise Instructions Fixed Pin... -
Page 19: Maintenance Schedule
Maintenance Schedule Every 6 months (use frequrency can increase or decrease interval time), remove the bottom cover (there's one on each side) & back cover, then open the plug for draining the tank of water. Note: Please place the water container in advance, preventing the water from dripping into the equipment. -
Page 20: Console Panel Functions
Console Panel Functions 1. Definition of LED display interface of electronic watch: Parameter display and function description range unit RESISTANCE 2.0—37.5(400Kpa) REPS (left) 00-99 frequency REPS (right) 00-99 frequency PEAKPOWER% 000-100 PEAKPOWER 0000-9999 1.1 RESISTANCE: The resistance window displays the resistance value set by the user. Minimum adjusted variable 0.1, "OFF"... - Page 21 Console Panel Functions 2. Resistance increase/ decrease and data reset 2.1 Standby mode: After no one uses it for 60 seconds, the system enters standby mode and all display windows are cleared. The resistance window displays "OFF" and turns off the screen. 2.2 Switch from standby mode to use mode: pull the instrument or press any key to adjust the air pressure to start the use mode.
- Page 22 Console Panel Functions 3.2 Other errors 3.2.1 Communication error, display interface is ---- Including: 1. No signal for data transmission between upper and lower control, 2. abnormal contact of communication line terminal. 3.2.2 The frequency data cannot change normally during exercise: the position sensor is faulty.
Need help?
Do you have a question about the HSP-PRO002 and is the answer not in the manual?
Questions and answers