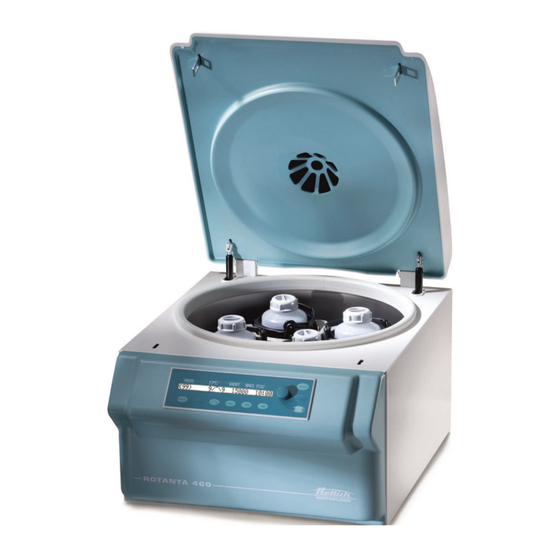
Hettich ROTANTA 460 Operating Instructions Manual
Hide thumbs
Also See for ROTANTA 460:
- Manual (328 pages) ,
- Operating instructions manual (164 pages) ,
- Repair instructions (92 pages)

Related Manuals for Hettich ROTANTA 460


Summary of Contents for Hettich ROTANTA 460
- Page 1 ROTANTA 460 / 460 R / 460 RC / 460 RF Inhalt des Dokuments / content of the document Operating instructions (EN) Rotoren und Zubehör / Rotors and accessories AB5650en_SA Rev.: 05 / 11.2023...
- Page 2 Rev.: 05 / 11.2023 AB5650en_SA...
- Page 3 Operating instructions ROTANTA 460 / 460 R / 460 RC / 460 RF Translation of the original operating instructions AB5650en_SA Rev.: 05 / 11.2023 1 / 73...
- Page 4 ©2023 – All rights reserved Andreas Hettich GmbH & Co. KG Föhrenstrasse 12 D-78532 Tuttlingen, Germany Telephone: +49 (0)7461 705-0 Fax: +49 (0)7461 705-1125 Email: info@hettichlab.com, service@hettichlab.com Internet: www.hettichlab.com 2 / 73 Rev.: 05 / 11.2023 AB5650en_SA...
-
Page 5: Table Of Contents
Table of contents Table of contents About this document........1.1 Use of this document. - Page 6 Table of contents 6.8 Centrifugation........6.8.1 Centrifugation in continuous operation.
- Page 7 Table of contents 7.6.9 Audible signal........59 7.6.9.1 General.
-
Page 8: About This Document
Safety About this document Use of this document ■ Read this document carefully and in full before commissioning the device for the first time. Observe other enclosed instruction sheets where necessary. ■ This document is part of the device and must be kept within easy reach. ■... -
Page 9: Personnel Requirements
Safety Any other use or use beyond this is considered improper. Andreas Hettich GmbH & Co. KG shall not be liable for any damage arising from this. Intended use also includes the observation of all instructions in the user manual and compliance with the required inspection and maintenance inter- vals. -
Page 10: Operator's Responsibility
Safety Operator's responsibility Follow the instructions in this document for proper and safe use of the device. Keep the user manual for future reference. ■ Provide information Following the instructions in this document will help: – To avoid dangerous situations. –... - Page 11 Safety WARNING Dangers due to insufficient maintenance or maintenance not carried out on time. − Follow maintenance intervals. − Check the device for visible damage or defects. If any visible damage or defects are present, take the device out of service and inform a service technician. WARNING Risk of electric shock due to ingress of water or other liq- uids.
-
Page 12: Device Overview
Do not trigger the emergency release on the device while the program is running. − Do not pull out the mains plug while the program is running. Device overview Technical data Manufacturer Andreas Hettich GmbH & Co. KG, D-78532 Tuttlingen Model ROTANTA 460 Type 5650 5650-01 Mains voltage (±10%) 200-240 V 1~... - Page 13 (rotor-dependent) Dimensions: Width 554 mm Depth 706 mm 715 mm Altitude 456 mm Weight approx. 101 kg approx. 111 kg Manufacturer Andreas Hettich GmbH & Co. KG, D-78532 Tuttlingen Model ROTANTA 460 R Type 5660 5660-20 5660-07 5660-77 5660-50 5660-70 Mains voltage (±10%) 200-240 V 1~ 200-240 V 1~...
- Page 14 723 mm 706 mm 723 mm Altitude 456 mm 481 mm 456 mm 481 mm Weight approx. 141 kg Manufacturer Andreas Hettich GmbH & Co. KG, D-78532 Tuttlingen Model ROTANTA 460 R ROTANTA 460 RC Type 5660-01 5670 5660-51 5670-50 Mains voltage (±10%) 100-127 V 1~...
- Page 15 Device overview Mains frequency 50 Hz 50 Hz 50 Hz power consumption max. 2000 VA 1800 VA Power consumption 8.5 A Refrigerant R452A max. capacity 4 x 1000 ml max. permissible density 1.2 kg/dm³ max. speed (RPM) 15000 max. acceleration (RCF) 24400 max. kinetic energy 51000 Nm Obligation to perform checks...
- Page 16 Device overview Altitude 456 mm 683 mm Weight approx. 151 kg approx. 140 kg Manufacturer Andreas Hettich GmbH & Co. KG, D-78532 Tuttlingen Model ROTANTA 460 RF Type 5675 5675-01 5675-50 5675-51 Mains voltage (±10%) 200-240 V 1~ 100-127 V 1~ 100 V 1~ Mains frequency 50 Hz 60 Hz 50 Hz...
- Page 17 Device overview Emitted EM interference, EN / IEC 61326-1 FCC Class B EM interference immunity Class B Noise level £68 dB(A) (rotor-dependent) Dimensions: Width 554 mm Depth 697 mm Altitude 961mm Weight approx. 164 kg approx. 174 kg Rating plate Fig. 1: Rating plate Item number Serial number Revision Equipment number Data matrix code...
-
Page 18: European Registration
SRN: DE-MF-000010680 Basic-UDI-DI Basic-UDI-DI Device assignment 040506740100039N ROTANTA 460 / 460R / 460RC / 460RF (medical device) Important labels on the packaging This is the correct upright position of the shipping container for transport and/or storage. FRAGILE GOODS The contents of the shipping container are fragile, so it must be handled with care. -
Page 19: Important Labels On The Device
Device overview HUMIDITY LIMITATION The shipping container must be stored, transported and handled within the indicated air humidity range (10% to 80%). STACK LIMITATION BASED ON QUANTITY Maximum number of identical packages that may be stacked on the lowest package, "n" standing for the number of packages allowed. -
Page 20: Operating And Indicator Elements
Device overview Equipotential: Connector (PE plug) for equipotential bonding (only for centrifuges with a PE plug). Automatic circuit breaker Operating and indicator elements 3.5.1 Control Fig. 2: Control (device with cooling) Fig. 3: Control (device without cooling) 3.5.2 Indicator elements ■... -
Page 21: Controls
Device overview ■ The button flashes until the rotor is read in. ■ The button lights up during the centrifugation run for as long as the rotor is not yet at a standstill. Fig. 7: [START] button ■ The right side of the button lights up when the centrifuge is in ramp- down. - Page 22 Device overview ■ Link programs, parameter EDIT. ■ ‘Machine Menu’ . Open the ■ Scroll forward in the menus. ■ Relative centrifugal force, parameter RCF. The RCF is displayed in brackets ñ á. A numerical value can be set that gives a speed between 50 RPM and Fig.
-
Page 23: Original Spare Parts
Device overview Original spare parts Only use original spare parts from the manufacturer and approved accesso- ries. Scope of supply The following accessories are supplied with the centrifuge: ■ 1 grease for the trunnions ■ 1 Hex key (5 mm x 170) ■... -
Page 24: Transport And Storage
Transport and storage Transport and storage Transport and storage conditions Transport conditions NOTICE Damage to the device due to failure to use the transport locks. − Secure the transport locks before transporting the device. NOTICE Damage to the device due to condensation. There is a risk of condensation forming on electrical com- ponents when component surfaces are cold and the sur- rounding air is warmer. - Page 25 Transport and storage Fig. 20: Transport lock ROTANTA 460 Screws Motor cover *Bellows (only for centrifuges with cooling) Transport lock Transport lock screws Fig. 21: Transport lock ROTANTA 460 RC Screws Motor cover Bellows Transport lock Screws for transport lock AB5650en_SA Rev.: 05 / 11.2023...
-
Page 26: Commissioning
Screws for transport lock Open the lid. 2 ). Unscrew the motor cover ( For ROTANTA 460 R / RC / RF: 3 ). Remove the bellows ( 4 ) using the 3 screws of the transport 3 Screw on the transport locks ( 5 ). - Page 27 Commissioning CAUTION Risk of injury from lifting heavy loads. − Provide an adequate number of helpers. − Note the weight. See ⮫ Chapter 3 ‘Device overview’ on page 10 . NOTICE Damage to the device due to improper lifting. − Do not lift the centrifuge by the control panel or the control panel holder.
-
Page 28: Remove The Transport Lock
Commissioning Fig. 24: Unpacking 5675 Hexagon nut Flat Device feet Castor Metal rail Wooden beams Remove the packaging. 6 ). Remove the wooden beam ( 5 ) to the wooden pallet using two nails each. Attach the metal rails ( 6 ) under the metal rails ( 5 ) to support them. - Page 29 Commissioning Fig. 25: Transport lock ROTANTA 460 Screws Motor cover *Bellows (only for centrifuges with cooling) Transport lock Transport lock screws Fig. 26: Transport ROTANTA 460 RC Screws Motor cover Bellows Transport lock Screws for transport lock AB5650en_SA Rev.: 05 / 11.2023...
- Page 30 2 ) and insert it. Note the recess for the Turn over the motor cover ( cable. For ROTANTA 460 R / RC / RF: 3 ) over the edge of the centrifuging chamber. Push the bellows ( 1 ).
-
Page 31: Setting Up And Connecting The Centrifuge
Commissioning Setting up and connecting the centrifuge Setting up the centrifuge WARNING Risk of injury due to failing to maintain a sufficient distance to the centrifuge. − As per EN / IEC 61010-2-020, no persons, hazardous materials or objects may be present within a safety zone of 300 mm around the centrifuge during a centrifugation run. - Page 32 Commissioning NOTICE Damage to the device due to condensation. There is a risk of condensation forming on electrical com- ponents when component surfaces are cold and the sur- rounding air is warmer. The condensation that forms may cause a short circuit and/or destroy electronics. −...
-
Page 33: Switching The Centrifuge On And Off
Commissioning Nitrogen outlet Nitrogen inlet, throttle valve 2 ) is located at the back of the machine and is The nitrogen inlet ( connected via a pneumatic quick-release fitting with a 6 mm pneu- matic hose. The nitrogen outlet ( 1 ) is located on the lid and is connected via a 12 mm hose connection. -
Page 34: Operation
Operation [I] . Immediate display of centrifu- Set the mains switch to gation data after switching on Press and hold any button at the first visual change in the display (inverse display). �� Centrifugation data is displayed. Switching off the centrifuge The rotor is stationary. -
Page 35: Inserting And Removing Buckets
Operation Open the lid. Loosen the rotor clamping nut using the supplied spanner. �� After passing the working point for lifting the rotor, the rotor 2 ). detaches from the cone of the motor shaft ( Turn the clamping nut until the rotor can be lifted off the motor shaft. Remove the rotor. -
Page 36: Inserting And Removing Adapters
Operation Check that the rotor is firmly seated. Grease the trunnions (3). Insert the bucket (1) into the rotor from above. The trunnions (3) must be in the grooves (2). Push the bucket (1) down as far as it will go. Removing the bucket Pull the bucket (1) vertically upwards out of the rotor. - Page 37 Operation NOTICE Damage to the device due to highly corrosive substances. Highly corrosive substances may impair the mechanical strength of rotors, buckets and accessories. − Do not centrifuge highly corrosive substances. Standard glass centrifuge tubes can be loaded up to RCF 4000 (DIN 58970 part 2).
-
Page 38: Opening And Closing The Biosafety System
Operation Empty buckets can be loaded with compensating inserts if there are insufficient blood bag systems available to load the rotor fully. If necessary, fine-tune with the tare weights supplied. Loading the angle rotors Personnel: ■ Trained user Check that the rotor is firmly seated. The centrifuge tubes must be distributed evenly over all locations on the rotor. -
Page 39: Lid With Screw Cap And Hole
Operation Biosafety systems must only be stored with the lid open to avoid damage to the sealing rings during storage. 6.6.2 Lid with screw cap and hole Fig. 29: Biosafety system Rotary handle Rotor 3 ) centrally on the rotor ( 2 ). Closing Place the lid ( 4 ) into the hole in the rotary handle ( 1 ). -
Page 40: Lid With Screw Cap
Operation For transport or when inserting and removing the bucket, swing the 4 ) and hold the bucket by the bucket into the carrying position ( bracket. �� The tightness of the biosafety system is also guaranteed in the carrying position. Do not rock the biosafety system back and forth during transport, otherwise leak-tightness is no longer ensured. - Page 41 Operation Insert the blood bag (1) into the insert (2). Hold the blood bag by the connectors (1) and push the support plate (2) on the outer side of the blood bag into the insert from top to bottom. Ensure that the lower edge of the support plate stands on the floor as completely as possible.
-
Page 42: Centrifugation
Operation If available, fold empty satellite bag(s) and pack differently depending on the appropriate accessories and filling volume of the blood bag. It is advantageous to fold the satellite bags and pack them on the outside between the folded-down support plate and the outer wall of the insert. -
Page 43: Centrifugation With Time Preselection
Operation [STOP/OPEN] button to end the centrifugation run. Press the �� Ramp-down takes place with the selected ramp-down parameter. The ramp-down parameter is displayed. [STOP/OPEN] button lights up when the The right side of the centrifuge is in ramp-down. [STOP/OPEN] button lights up when the rotor is The left side of the at a standstill. -
Page 44: Changing Settings During Centrifugation
Software operation [START] button to end the centrifugation run. Release the �� The ramp-down parameter is displayed. [STOP/OPEN] button lights up when the The right side of the centrifuge is in ramp-down. [STOP/OPEN] button lights up when the rotor is The left side of the at a standstill. -
Page 45: Runtime Time
Software operation [Ramp-up and ramp-down parameters] button If required: Press the to set the next parameter. [START] button. Press the [Ramp-up and ramp-down parameters] button repeatedly Press the until the centrifugation data is displayed. Brake level and ramp-down B-brake levels can only be set for rotors that are suitable for time use with blood bags. -
Page 46: Speed, Rpm
Software operation [TIME] button. Press the �� The seconds are displayed in brackets á ñ. Use the [Rotary knob] to set the desired value. [TIME] button. Press the �� The hours are displayed in brackets á ñ. [Rotary knob] to set the desired value. Use the [START] button. -
Page 47: Temperature (For Centrifuges With Cooling)
Software operation [RCF] button repeatedly until the integral RCF is displayed. Press the [RCF] button. Press the �� The centrifugation data is displayed. [RPM] button. If necessary, press the �� The RPM is displayed. Press and hold the [PROG] button. Enabling or disabling integral ‘***Machine Menu***’... -
Page 48: Relative Centrifugal Force Rcf And Centrifuging Radius Rad
Software operation r = centrifuging radius in mm = distance from the centre of the axis of rotation to the bottom of the centrifuge tube. 7.1.7 Relative centrifugal force RCF and centrifuging radius RAD The relative centrifugal force RCF is dependent on the centrifuging radius RAD. -
Page 49: Programming
Software operation Programming 7.2.1 Write protection for programs Write protection can be enabled or disabled when the rotor is at a standstill. Open the desired program. [PROG] button. Press the �� The RCL parameter is displayed. [PROG] button. Press and hold the ��... -
Page 50: Automatic Buffer
Software operation 7.2.4 Automatic buffer ‘0’ and The centrifugation data is temporarily stored at program location can be retrieved after each start of a centrifugation run. ‘0’ . No programs can be stored in program location Rotor detection ■ Rotor detection is performed after starting a centrifugation run. ■... -
Page 51: Delayed Cooling
Software operation [Cooling] button. Press the �� The button flashes until the rotor is read in for precooling. The button lights up once the rotor has been read in. The rotor speed or the resulting RCF value, the temperature in the centrifuging chamber (only for centrifuges with cooling) and the remaining or elapsed time are displayed during the centrifugation run. -
Page 52: Temperature Monitoring
Software operation [PROG] button repeatedly until ‘Cool dec speed = ... rpm’ is Press the displayed. [Rotary knob] to set the desired value. Use the [START] button. Press the �� The setting is stored. ‘Store Settings...’ is displayed briefly. ‘-> Settings’ is then displayed. [STOP/OPEN] button once to exit the ‘Settings menu’... -
Page 53: Machine Menu
Software operation CAUTION Danger of burns from hot surfaces. The surface temperature of the heating element in the centri- fuging chamber can be up to 500 °C or 932 °F. − Do not touch the heating element. NOTICE Damage to plastic buckets due to excessive temperature −... -
Page 54: Centrifuge Address
Software operation [PROG] button. Press the �� The rotor code (Rotor), the maximum rotor speed (Nmax) and the centrifuging radius (R) of the last rotor recognised by the rotor detection are displayed. The last rotor recognised is marked with an asterisk (*). [Rotary knob] can be used to display the information of the rotors approved for the centrifuge. - Page 55 Software operation ‘0’ after inserting new buckets. The Resetting the cycle counter The cycle counter must be reset to and entering the maximum maximum permissible number of run cycles must be entered. permissible number of run [PROG] button. Press and hold the cycles ‘***Machine Menu***’...
-
Page 56: Querying Operating Hours, Centrifugation Runs And Cycle Counter
Software operation [OPEN/STOP] button twice to exit the ‘Operating Time’ Press the menu [OPEN/STOP] button three times to exit the ‘Machine Press the Menu’ . The rotor is stationary. Disabling the cycle counter [PROG] button. Press and hold the ‘***Machine Menu***’ is displayed after 8 seconds. ��... -
Page 57: Enabling Or Disabling Dual Time Mode
Software operation [PROG] button. Press the ‘Number of Starts =’ is displayed. �� This is the number of all centrifugation runs. [PROG] button. Press the ‘Cycles =’ is displayed. �� This is the number of run cycles (centrifugation runs) of the rotor code used since the last cycle counter reset to ‘0’... -
Page 58: Enabling Or Disabling B-Brake Levels
Software operation 7.6.5 Enabling or disabling B-brake levels B-brake levels can only be set for rotors that are suitable for use with blood bags. − Setting the B-brake levels is only possible if they are enabled. − Setting ramp-down times is only possible if they are enabled. -
Page 59: Program Lock
Software operation 7.6.7 Program lock The following program locks can be set when the rotor is at a standstill: LOCK 1 LOCK 1 is displayed. Programs can only be retrieved, not changed. LOCK 2 LOCK 2 is displayed. No programs can be retrieved or changed. The centrifuge can be controlled via the interface (only for centrifuges with an interface). - Page 60 Software operation [Rotary knob] to set the valid PIN. Use the ‘0000’ . If you are setting the PIN for the first time, skip this step or set Input help: Press and hold down the relevant button. [Ramp-up and ramp-down only the thousands digit of the parameters] button PIN is changed.
-
Page 61: Audible Signal
Software operation 7.6.9 Audible signal 7.6.9.1 General The audible signal sounds: ■ after a problem occurs in the 2 s interval. ■ after completion of the centrifugation run and rotor standstill in the 30 s interval. Opening the lid or pressing any button stops the audible signal. 7.6.9.2 Enabling or disabling an audible signal The rotor is stationary. -
Page 62: Setting A Temperature Unit (For Centrifuges With Cooling)
Software operation [Rotary knob] to set ‘Last’ or ‘First’ . Last = last program used First = program 1 [START] button. Press the �� The settings are stored. ‘Store Settings...’ is displayed briefly. ‘-> Settings’ is then displayed. [STOP/OPEN] button once to exit the ‘Settings menu’ Press the [STOP/OPEN] button twice to exit the ‘Machine Menu’... -
Page 63: Program Links
Software operation [Rotary knob] to set ‘off’ or ‘on’ . off = disable automatic switch-off on = automatic switch-off enabled [START] button. Press the �� The setting is stored. ‘Store Settings...’ is displayed briefly. ‘-> Settings’ is then displayed. [STOP/OPEN] button once to exit the ‘Settings menu’ Press the [STOP/OPEN] button twice to exit the ‘Machine Menu’... -
Page 64: Opening A Program Link
Cleaning and care [START] button. Press the ‘STO B’ is displayed. �� [START] button to save the program link. Press the ‘Multi program store...’ is displayed briefly. �� 7.7.2 Opening a program link Press the [PROG] button repeatedly until ‘RCL A…Z’ is displayed. [Rotary knob] to set the desired program location. -
Page 65: Cleaning And Disinfection Instructions
Cleaning and care Chap. Task to execute Cleaning the accessories Disinfection Disinfecting the device Disinfecting the accessories Maintenance Greasing the rubber seal of the centrifuging ... -
Page 66: Cleaning
Cleaning and care Do not use an ethanol-propanol mixture to disinfect the viewing window in the lid of the device. ■ Concentration is not less than 30 % ■ pH: 6 – 8 ■ Non-corrosive Cleaning Cleaning the device Open the lid. Switch off the device and disconnect it from the power supply. -
Page 67: Maintenance
Clean the trunnions. Remove any detergent residues with a damp cloth after using deter- gents. Grease the trunnions and suspension with Hettich Tubenfett 4051. Excess grease in the centrifuging chamber must be removed. Checking the accessories The accessories are to be checked for wear and corrosion damage. -
Page 68: Troubleshooting
Clean the motor shaft. Remove any detergent residues with a damp cloth after using deter- gents. Grease the motor shaft with Hettich Tubenfett 4051. Excess grease in the centrifuging chamber must be removed. Accessories with a limited The use of certain accessories is time-limited. For safety reasons, the... - Page 69 Troubleshooting Fault description Cause Remedy ■ No display No power. Triggering of the over- Check the supply voltage. current protection fuse. ■ [I] . Set the mains switch to ■ TACHO-ERROR 1, 2, 96 Tacho defective. Motor, electronics Open the lid. defective.
- Page 70 Troubleshooting Fault description Cause Remedy ■ SENSOR-ERROR 90 Error/defect in electronics. Perform a MAINS RESET. ■ SENSOR-ERROR 91-93 Error/defect in imbalance sensor. Perform a MAINS RESET. ■ ° C * -ERROR 97, 98 Error/defect in electronics. Perform a MAINS RESET. ■...
-
Page 71: Perform A Mains Reset
Troubleshooting Fault description Cause Remedy ■ MAX CYCLES PASSED The maximum permissible number Replace the buckets with new of run cycles entered has been buckets for safety reasons. exceeded. ■ Reset the cycle counter to "0" after replacing the buckets. ■... -
Page 72: Disposal
The device can be disposed of via the manufacturer. A Return Material Authorisation (RMA) form must always be requested for a return. If necessary, contact the Technical Service Department of the manufacturer. − Andreas Hettich GmbH & Co. KG − Föhrenstrasse 12 − 78532 Tuttlingen, Germany −... - Page 73 Disposal The crossed-out wheelie bin symbol indicates that the device must not be disposed of with household waste. Regulations governing disposal of such devices may differ in individual countries. If necessary, contact the supplier. Fig. 35: Household waste ban AB5650en_SA Rev.: 05 / 11.2023 71 / 73...
-
Page 74: Index
Index Index Integrale Zentrifugalbeschleunigung abfragen......44 Adresse der Zentrifuge..... . 52 aktivieren/deaktivieren. - Page 75 Index Schilder am Gerät......17 auf der Verpackung..... . 16 Schleuderraum prüfen.
- Page 76 Rev.: 05 / 11.2023 AB5650en_SA...
- Page 77 Rotoren und Zubehör / Rotors and accessories Rev.: 05 / 11.2023 AB5650en_SA...
- Page 78 5699-R 5625-A 5627 Ausschwingrotor 4-fach / Swing out rotor 4-times mit Bioabdichtung / with bio-containment max. Laufzyklen / max. cycles: 80 000 max. Beladung / max. load: 750 g 4730 4732 90° max. Laufzyklen / max. cycles 400 000 Kapazität / capacity Maße / dimensions ...
- Page 79 5699-R 5625-A 5627 Ausschwingrotor 4-fach / Swing out rotor 4-times mit Bioabdichtung / with bio-containment max. Laufzyklen / max. cycles: 80 000 max. Beladung / max. load: 750 g 4739 4740 4739 4734 4740 4736 90° max. Laufzyklen / max. cycles 400 000 Kapazität / capacity Maße / dimensions ...
- Page 80 5699-R 5625-A 5627 Ausschwingrotor 4-fach / Swing out rotor 4-times mit Bioabdichtung / with bio-containment max. Laufzyklen / max. cycles: 80 000 max. Beladung / max. load: 750 g 4733 4732 4733 90° max. Laufzyklen / max. cycles 400 000 Kapazität / capacity 1,6 - 5 4 - 7...
- Page 81 5699-R 5628 5629 Ausschwingrotor 4-fach / Swing out rotor 4-times mit Bioabdichtung / with bio-containment max. Laufzyklen / max. cycles: 50 000 max. Beladung / max. load: 800 g 4626 Microtest- platten / plate 90° Terasaki max. Laufzyklen / max. cycles 400 000 Maße / dimensions 86x128x 83 86x128x44,5...
- Page 82 5699-R 5628 5220-A Ausschwingrotor 4-fach / Swing out rotor 4-times max. Laufzyklen / max. cycles: 50 000 max. Beladung / max. load: 800 g 5267 5268 5264 5258 5227 90° max. Laufzyklen / max. cycles 400 000 Kapazität / capacity 1,1;...
- Page 83 5699-R 5628 5220-A Ausschwingrotor 4-fach / Swing out rotor 4-times max. Laufzyklen / max. cycles: 50 000 max. Beladung / max. load: 800 g 5263-A + 5242 5243 5249 5262 5263-A 5268 6319 90° 5127 max. Laufzyklen / max. cycles 400 000 Kapazität / capacity 12 x 12 x...
- Page 84 5699-R 5630-B Ausschwingrotor 4-fach / Swing out rotor 4-times max. Laufzyklen / max. cycles: 80 000 max. Beladung / max. load: 500 g 5672 5673 4626 + 1485 PCR-Strips 96-PCR-Platte / plate 90° max. Laufzyklen / max. cycles 400 000 Kapazität / capacity Maße / dimensions 82x124x20...
- Page 85 5699-R 5628 5220-A 5280 Ausschwingrotor 4-fach / Swing out rotor 4-times max. Laufzyklen / max. cycles: 50 000 max. Beladung / max. load: 800 g 1662 1670 2 x in 5280 2 x in 5280 1663 1664 1665 1666 1667 1668 1663 1664...
- Page 86 5699-R 4880 4883 4885 Ausschwingrotor 4-fach / Swing out rotor 4-times mit Bioabdichtung / with bio-containment max. Laufzyklen / max. cycles: 75 000 max. Beladung / max. load: 1000 g 4830 4832 90° max. Laufzyklen / max. cycles 400 000 Kapazität / capacity Maße / dimensions ...
- Page 87 5699-R 4880 4883 4885 Ausschwingrotor 4-fach / Swing out rotor 4-times mit Bioabdichtung / with bio-containment ----- max. Laufzyklen / max. cycles: 75 000 max. Beladung / max. load: 1000 g 4835 4837 4836 4838 4839 90° max. Laufzyklen / max.
- Page 88 5699-R 4880 4883 4885 Ausschwingrotor 4-fach / Swing out rotor 4-times mit Bioabdichtung / with bio-containment ---- max. Laufzyklen / max. cycles: 75 000 max. Beladung / max. load: 1000 g 4830 4832 4833 90° max. Laufzyklen / max. cycles 400 000 Kapazität / capacity 1,1;...
- Page 89 5699-R 4880 4883 4885 Ausschwingrotor 4-fach / Swing out rotor 4-times mit Bioabdichtung / with bio-containment ----- max. Laufzyklen / max. cycles: 75 000 max. Beladung / max. load: 1000 g 4834 4840 4836 4847 4848 90° max. Laufzyklen / max.
- Page 90 5699-R 4880 4885 Ausschwingrotor 4-fach / Swing out rotor 4-times max. Laufzyklen / max. cycles: 75 000 max. Beladung / max. load: 1000 g 4831 4851 Falcon Greiner Nunc Nunc Sarstedt 90° max. Laufzyklen / max. cycles 400 000 Kapazität / capacity Maße / dimensions ...
- Page 91 5699-R 4890 4883 4895 Ausschwingrotor 4-fach / Swing out rotor 4-times mit Bioabdichtung / with bio-containment max. Laufzyklen / max. cycles: 38 000 max. Beladung / max. load: 1000 g 4451 4430 4430 4432 4433 0512 Corning Nunc ® Nalgene ®...
- Page 92 5699-R 4890 4883 4895 Ausschwingrotor 4-fach / Swing out rotor 4-times mit Bioabdichtung / with bio-containment ---- max. Laufzyklen / max. cycles: 38 000 max. Beladung / max. load: 1000 g 4434 90° max. Laufzyklen / max. cycles 400 000 Kapazität / capacity 4 -7 8,5 - 10...
- Page 93 5699-R 4890 4883 4895 5691-A Ausschwingrotor 4-fach / Swing out rotor 4-times mit Bioabdichtung / with bio- ---- containment max. Laufzyklen / max. cycles: 38 000 max. Laufzyklen / max. cycles: 80 000 max. Beladung / max. load: 1000 g max.
- Page 94 5654 5651-A 5652 Ausschwingrotor 4-fach / Swing out rotor 4-times mit Bioabdichtung / with bio-containment max. Laufzyklen / max. cycles: 60 000 max. Beladung / max. load: 1520 g 5681 5687 + 4449 5669 Nalgene ® Nunc ® 90° ® 5127 Falcon + 5677...
- Page 95 5654 5651-A 5652 Ausschwingrotor 4-fach / Swing out rotor 4-times mit Bioabdichtung / with bio-containment max. Laufzyklen / max. cycles: 60 000 max. Beladung / max. load: 1520 g 5682 5683 5684 90° max. Laufzyklen / max. cycles 400 000 Kapazität / capacity 7,5 - 8,2 9 - 10...
- Page 96 5654 5651-A 5652 Ausschwingrotor 4-fach / Swing out rotor 4-times mit Bioabdichtung / with bio-containment max. Laufzyklen / max. cycles: 60 000 max. Beladung / max. load: 1520 g 5685 5674 90° max. Laufzyklen / max. cycles 400 000 Kapazität / capacity 4 - 7 1,6 - 5 2,6 –...
- Page 97 5654 5653 5629 Ausschwingrotor 4-fach / Swing out rotor 4-times mit Bioabdichtung / with bio-containment max. Laufzyklen / max. cycles: 80 000 max. Beladung / max. load: 500 g 4626 Microtest- 90° platten / plate Terasaki max. Laufzyklen / max. cycles 400 000 Maße / dimensions 86x128x 83 86x128x44,5...
- Page 98 4446 5051 5053 Ausschwingrotor 6-fach / Swing out rotor 6-times max. Laufzyklen / max. cycles: 50 000 max. Beladung / max. load: 500 g 5248 5247 5262 5249 5243 5242 5227 5257 5248-91 5247-91 90° max. Laufzyklen / max. cycles 120 000 Kapazität / capacity 12 x 12 x...
- Page 99 4446 5051 5053 Ausschwingrotor 6-fach / Swing out rotor 6-times max. Laufzyklen / max. cycles: 50 000 max. Beladung / max. load: 500 g 5248 6306 5281 5258 5243 5264 5227 6306 5248-91 90° max. Laufzyklen / max. cycles 120 000 Kapazität / capacity 2,7 - 3 4,5 - 5...
- Page 100 4446 5051 5280 5053 Ausschwingrotor 6-fach / Swing out rotor 6-times max. Laufzyklen / max. cycles: 50 000 max. Beladung / max. load: 500 g 1662 1670 2 x in 5280 2 x in 5280 1663 1664 1665 1666 1667 1668 1663 1664...
- Page 101 4446 5092 5093 Ausschwingrotor 6-fach / Swing out rotor 6-times mit Bioabdichtung / with bio-containment max. Laufzyklen / max. cycles: 30 000 max. Beladung / max. load: 500 g 5126 5125 5123 5129 5124 5122 5120 90° max. Laufzyklen / max.
- Page 102 4446 5092 5093 Ausschwingrotor 6-fach / Swing out rotor 6-times mit Bioabdichtung / with bio-containment max. Laufzyklen / max. cycles: 30 000 max. Beladung / max. load: 500 g 5121 6319 5136 - - - 90° max. Laufzyklen / max. cycles 120 000 4/15) Kapazität / capacity 2,6 –...
- Page 103 4446 5092 5093 Ausschwingrotor 6-fach / Swing out rotor 6-times mit Bioabdichtung / with bio-containment max. Laufzyklen / max. cycles: 30 000 max. Beladung / max. load: 500 g 5137 5138 90° max. Laufzyklen / max. cycles 120 000 1,6 - 1,1 - 2,6 - 2,7 -...
- Page 104 5622 5631 4627 Ausschwingrotor 2-fach / Swing out rotor 2-times mit Bioabdichtung / with bio-containment max. Laufzyklen / max. cycles: 50 000 max. Beladung / max. load: 500 g 4626 4626 1485 Microtest- 90° PCR-Strips platten / plate 96-PCR-Platte / plate Terasaki max.
- Page 105 4474 4275 Ausschwingrotor 4-fach / Swing out rotor 4-times max. Laufzyklen / max. cycles: 50 000 max. Beladung / max. load: 370 g 4276-B 4277 0771 0703 0531 0528 90° max. Laufzyklen / max. cycles 40 000 Kapazität / capacity Maße / dimensions ...
- Page 106 5615 Winkelrotor 6-fach / 1454 1446 1447 1466 1451 1448 Angle rotor 6-times 45° mit Bioabdichtung / with bio-containment Jahre Verwendungsdauer / service life years Max. Laufzyklen / max. cycles 15 000 Kapazität / capacity 9 - 10 7,5 - 8,2 38 x 38 x 24 x...
- Page 107 5615 5645 1449 5637 5638 Winkelrotor 6-fach / Winkelrotor 6-fach / Angle rotor 6-times Angle rotor 6-times 45° 25° mit Bioabdichtung / mit Bioabdichtung / with bio-containment with bio-containment Jahre Verwendungsdauer / Verwendungsdauer / service Jahre / service life life years years Max.
Need help?
Do you have a question about the ROTANTA 460 and is the answer not in the manual?
Questions and answers