Advertisement
Quick Links
Teknik
www.teknikoffice.co.uk
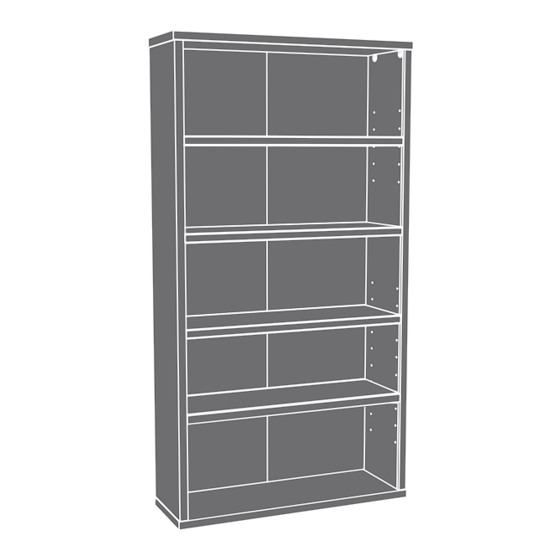
5-Shelf Bookcase
NOTE: THIS INSTRUCTION
BOOKLET CONTAINS
IMPORTANT SAFETY
INFORMATION.
Hudson Elm finish | Model 5427457
PLEASE READ AND KEEP
FOR FUTURE REFERENCE.
English pg 1-14
Français pg 15-17
Español pg 18-20
Lot # 566580
11/23/21
Purchased:
__________________
Advertisement

Subscribe to Our Youtube Channel
Related Manuals for Teknik Hudson Elm finish 5427457


Summary of Contents for Teknik Hudson Elm finish 5427457
- Page 1 Teknik www.teknikoffice.co.uk 5-Shelf Bookcase NOTE: THIS INSTRUCTION BOOKLET CONTAINS IMPORTANT SAFETY INFORMATION. Hudson Elm finish | Model 5427457 PLEASE READ AND KEEP FOR FUTURE REFERENCE. English pg 1-14 Français pg 15-17 Español pg 18-20 Lot # 566580 11/23/21 Purchased: __________________...
- Page 2 Table of Contents Assembly Tools Required Part Identification No. 2 Phillips Screwdriver Hardware Identification Tip Shown Actual Size Hardware Usage Guide Assembly Steps 5-14 Hammer Not actual size Français 15-17 Español 18-20 Nail Holder (provided) Safety 21-22 Warranty Page 2...
- Page 3 Now you know Part Identification our ABCs. å While not all parts are labeled, some of the parts will have a label or an inked letter on the edge to help distinguish similar parts from each other. Use this part identification to help identify similar parts. RIGHT END (1) ADJUSTABLE SHELF (3) TOP (1)
- Page 4 Hardware Identification å Screws are shown actual size. You may receive extra hardware with your unit. 44F TWIST-LOCK FASTENER - 8 TOUCH-UP PEN - 1 ® RUBBER SLEEVE - 12 NAIL - 43 FURNITURE TIPPING SHELF REST - 12 RESTRAINT KIT - 1 147S BLACK 2-9/16"...
- Page 5 Hardware Usage Guide HOW TO USE A TWIST-LOCK FASTENER ® Push a TWIST-LOCK® FASTENER 1. Insert the dowel end of the FASTENER into the into the large hole in the part. hole of the adjoining part. NOTE: The dowel end of the FASTENER must remain fully inserted in the hole of the adjoining part while locking the FASTENER.
- Page 6 Step 2 å Fasten the FIXED SHELF (G) to the LEFT END (B). Tighten two TWIST-LOCK® FASTENERS. Some assembly (and snacks) required. Notched edge S u r N E R f a c S T E i t h ® F A I S T - L O - L O...
- Page 7 Step 3 å Push two SAUDER TWIST-LOCK® FASTENERS (44F) into Caution the large holes in the RIGHT END (A). Do not stand the unit upright without the å Fasten the RIGHT END (A) to the FIXED SHELF (G). BACK fastened. The unit may collapse. Tighten two TWIST-LOCK®...
- Page 8 Step 4 å Open the FURNITURE TIPPING RESTRAINT KIT (97) and fasten the SAFETY STRAP to the TOP (F). Use the short screw provided. å NOTE: Position the SAFETY STRAP exactly as shown. Part (F). Another sturdier, easier, friendlier component! Safety strap Page 8...
- Page 9 Step 5 å Fasten the TOP (F) to the ENDS (A and B). Tighten four TWIST-LOCK® FASTENERS. Now might be a good time to refresh your drink. Notched edge i t h o f a c s t r a S u r e t y s a f...
- Page 10 Step 6 å Fasten the BOTTOM (C) to the ENDS (A and B) as shown. Use four BLACK 2-9/16" FLAT HEAD SCREWS (147S). Notched edge Wrapped seam 147S BLACK 2-9/16" FLAT HEAD SCREW (4 used in this step) Page 10...
- Page 11 Step 7 å We have provided a Nail Holder tool to use in this step for proper positioning of the NAILS. Please refer to the parts of the Nail Holder as the bead, offset edge, and nail slot as shown in the diagram below. å...
- Page 12 Step 8 å Fasten the BACK (E) to the FIXED SHELF (G). Use two BLACK 7/8" LARGE HEAD SCREWS (17S). BLACK 7/8" LARGE HEAD SCREW (2 used in this step) Page 12...
- Page 13 Step 9 å Carefully stand your unit upright in its final location against a wall. We recommend using the SAFETY STRAP for added stability. å NOTE: Do not turn the SAFETY DRYWALL ANCHOR into a wall stud. If you prefer to fasten the SAFETY STRAP to a wall stud, go to your local hardware store for proper hardware.
- Page 14 Step 10 å Push the RUBBER SLEEVES (2R) over one end of the SHELF RESTS (10R). Insert the SHELF RESTS into the hole locations of your choice in the ENDS (A and B). Set the ADJUSTABLE SHELVES (D) onto the SHELF RESTS. å...
Need help?
Do you have a question about the Hudson Elm finish 5427457 and is the answer not in the manual?
Questions and answers