Table of Contents
Advertisement
Quick Links
Advertisement
Table of Contents

Related Manuals for Dnake 905D-Y4


Summary of Contents for Dnake 905D-Y4
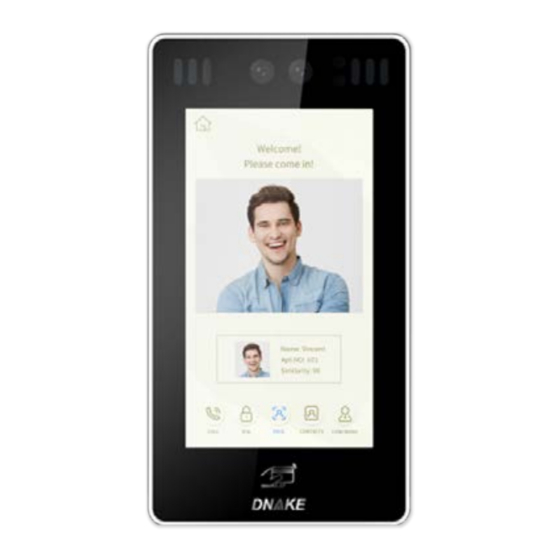
- Page 1 User Manual 905D-Y4...
- Page 2 Foreword About User Manual Tips to Save Your Time ⚫ Please beforehand refer to 3.2 Network settings or 7.2 Network Settings to make sure your network functions well. ⚫ Please beforehand refer to 2.2 Check Building and Unit number if you need to connect your device with other devices.
-
Page 3: Table Of Contents
Contents 1 Home page ................... 1 1.1 Home page ............................1 1.2 Call ..............................1 1.3 PIN ..............................2 1.4 FACE ..............................2 1.5 CONTACTS ............................3 1.6 CONCIERGE ..........................4 2 Device ....................5 2.1 Go to Device page ..........................5 2.2 Check Building and Unit number ....................5 2.3 Mode, Language, Password, Volume and Size ................5 3 Network .................... - Page 4 7.5 VOIP Settings..........................18 7.6 Forward Settings .......................... 18 7.7 Advanced Settings ........................19 7.8 PhoneBook Settings ........................19 7.9 Debug Settings ..........................20 7.10 Logout Settings .......................... 21...
-
Page 5: Home Page
1 Home page 1.1 Home page 1. At the top of the home page: ◆ Time, date, location, and network connection status. Little computer icon in the corner is the network connection status. ◆ White computer means your network is connected while red computer means your network is disconnected. -
Page 6: Pin
1.3 PIN 1. Open the door: ◆ Step 1: Click PIN icon on the home page. ◆ Step 2: Enter the default unlock password: 0000 and then click the little blue Lock icon. 2. Go to administrator's interface: ◆ Step 1: Click PIN icon on the home page. ◆... -
Page 7: Contacts
The door will automatically open for you. (Please refer to 5 Face to see how to input face information) 1.5 CONTACTS 1. Make a call by CONTACTS: ◆ Step 1: Click CONTACTS icon on the home page. ◆ Step 2: Click the one you want to call. Or you can search by name and apartment number to find the one you want to call if you have too many contacts. -
Page 8: Concierge
1.6 CONCIERGE 1. Click CONCIERGE icon on the home page to call Management Center. -
Page 9: Device
2 Device 2.1 Go to Device page Device page 1. Go to ◆ Step 1: Click PIN icon on the home page. ◆ Step 2: Enter the default administrator's password: 123456 and then click the little blue Lock icon. ◆ Step 3: Click Device. 2.2 Check Building and Unit number 1. -
Page 10: Network
3 Network 3.1 Go to Network page Network page 1. Go to ◆ Step 1: Click PIN icon on the home page. ◆ Step 2: Enter the default administrator's password: 123456 and then click the little blue Lock icon. ◆ Step 3: Click Network. 3.2 Network settings 1. -
Page 11: Access
4 Access 4.1 Go to Access page Access page 1. Go to ◆ Step 1: Click PIN icon on the home page. ◆ Step 2: Enter the default administrator's password: 123456 and then click the little blue Lock icon. ◆ Step 3: Click Access. 4.2 Password Manage 1. -
Page 12: Card Manage
4.3 Card Manage 1. Add card: Step 1: Click Enter behind Card Manage Step 2: Click Add. Type in Name and Apartment No. of the member you want to add. Step 3: Please swipe your card on the card reader zone. If this card is unregistered and available, the Done icon will turn white from grey. - Page 13 Step 2: Click Delete By Apt.. Type in Apartment No. The card or member you want to delete, of course, should be in this apartment list. Step 3: Click Del icon to delete card and then the corresponding one will disappear from the list.
-
Page 14: Unlock Time, Unlock Delay, Elev Refer, And Encrypt
◆ It is how long the lock will unlock after swiping the card or scanning your face. 3. Elev Refer: ◆ The number is the floor the elevator will stop. When Dnake intercom system integrates with Elevator Control System (additional modules are needed), the elevator will reach the designated floor automatically when the resident unlocks the door by Indoor Monitor. -
Page 15: Face
5 Face 5.1 Go to Face page Face page 1. Go to ◆ Step 1: Click PIN icon on the home page. ◆ Step 2: Enter the default administrator's password: 123456 and then click the little blue Lock icon. ◆ Step 3: Click Face. 5.2 Input and delete face information Input face information ◆... - Page 16 2. Delete face information a. Delete: ◆ Step 1: Click Del behind Delete. ◆ Step 2: Click Delete By Apt.. Type in Apartment No. The face information or member you want to delete, of course, should be in this apartment list. ◆...
-
Page 17: Similarity And Live Detect
5.3 Similarity and Live Detect 1. Similarity ◆ Similarity and Live Detect are for you to customize. Similarity (Low, Normal or High) is the ability to distinguish different faces. 2. Live Detect ◆ Live Detect (Close, Normal or High) is the ability to detect whether the detected is a living thing or not. -
Page 18: Other And Version
6 Other and Version 6.1 Go to Other page Other page 1. Go to ◆ Step 1: Click PIN icon on the home page. ◆ Step 2: Enter the default administrator's password: 123456 and then click the little blue Lock icon. ◆... -
Page 19: Basic Information About The Device
6.4 Basic information about the device Version page contains basic information about the device such as FW, Firmware, MCU, IP, MAC, SIP. -
Page 20: Web Settings
7 Web Settings Before you start: ⚫ Make sure your network functions well. The device and computer are under the same LAN. ⚫ Download Remote Upgrade tool and Upgrade Instruction from the link below for entering Web Settings. Or you can enter Web Settings by browser without downloading. (https://mega.nz/file/hglDVYxB#6Igsmo031nupq30DosaSxHay0WzwwgFQh5ew521hkAA) ⚫... -
Page 21: Device Settings
7.3 Device Settings 1. BuildNo and UnitNo ◆ Make sure the BuildNo and UnitNo of the device is the same as other devices you want to connect. 2. Mode, Language, Password, Volume and Video ◆ Mode (Unit, Wall and Flat), Language, Volume of the device and Video can be changed according to user's needs. -
Page 22: Voip Settings
your card on the card reader zone and then this card becomes an admin card. b. Add other cards by admin card: ◆ Swipe your admin card once and then swipe other cards immediately. Other cards you have swiped can be used to open the door. ◆... -
Page 23: Advanced Settings
◆ Step 2: Click Submit. 7.7 Advanced Settings 1. Advertising ◆ Check the box to enable this function. Enter the specified advertisement URL in the box. The interface will play the online advertisement automatically. 2. Quick Call ◆ Check the box to enable this function. It refers to the call to management center. Enter the SIP address of the specified management center. -
Page 24: Debug Settings
and Apartment IP. ◆ Step 3: Select the file you have just filled in and upload it. 7.9 Debug Settings 1. Tcpdump ◆ Tcpdump is a common packet analyzer that runs under the command line. It allows the user to display TCP/IP and other packets being transmitted or received over a network to which the computer is attached. -
Page 25: Logout Settings
7.10 Logout Settings 1. Click Submit to logout Web Settings.
Need help?
Do you have a question about the 905D-Y4 and is the answer not in the manual?
Questions and answers