Table of Contents
Advertisement
Quick Links
Advertisement
Table of Contents

Related Manuals for Dnake 902C-A


Summary of Contents for Dnake 902C-A
- Page 1 User Manual ——— DNAKE 902C-A...
- Page 3 REMARK Please follow the user manual for correct installation and testing. If there is any doubt please call our tech-supporting and customer center. Our company applies ourselves to reformation and innovation of our products. No extra notice for any change. The illustration shown here is only for reference. If there is any difference, please take the actual product as the standard.
-
Page 4: Table Of Contents
CATALOG PRODUCT FEATURE ..........1 TECHNICAL PARAMETER ........1 PACKAGE CONTENT ..........2 OVERVIEW .............. 3 BASIC OPERATION ..........4 DEVICE SETTING ........... 8 WEB SETTING ............13 SYSTEM DIAGRAM ..........21 DEVICE WIRING ........... 22 INSTALLATION ............23 TROUBLESHOOTING ........... 24 SAFETY INSTRUCTION ........ -
Page 5: Product Feature
PRODUCT FEATURE 1. 10.1-inch capacitive touch screen 2. Android System 3. Alarm/Call logs 4. Message Sending/Receiving 5. Powered by PoE or power adapter (DC12V/2A) 6. Support SIP 2.0 protocol, easy integration with other SIP devices 7. Support monitoring 16 IP cameras TECHNICAL PARAMETER Power Supply: PoE (802.3af) or DC 12V/2A Standby Power: 3 W... -
Page 6: Package Content
PACKAGE CONTENT MODEL: 902C-A (Desktop Mounting) 902C-A Handset Desktop Bracket Desktop Stand Quick Start Guide... -
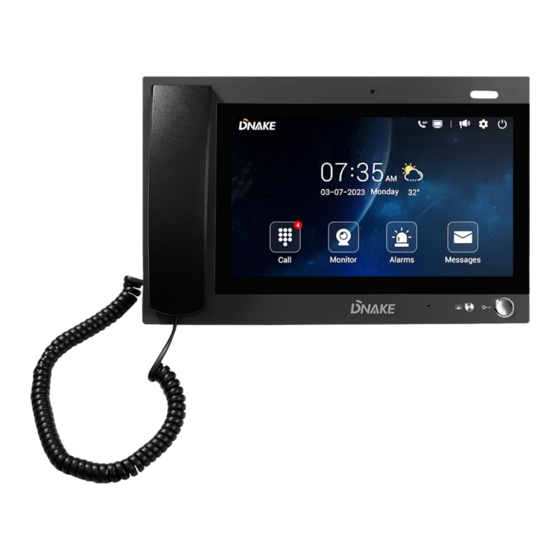
Page 7: Overview
OVERVIEW... -
Page 8: Basic Operation
BASIC OPERATION 1. Call Click Call icon on Master Station’s homepage to call Indoor Monitor. Enter Building number + Building + Unit number + Unit + Room number + dial icon to call Indoor Monitor (such as 1 + Building + 1 + Unit + 1111 + Dial button). 2. - Page 9 In IP Cameras page, you can click the arrows above to switch to other IP cameras (16 Max). The menu on the right is for adding or deleting IP cameras. 3. Contacts Click Call icon on Master Station’s homepage to find Contacts on the left. Unfold Groups and press to call.
- Page 10 5. Alarms Click Alarms icon on Master Station’s homepage to check alarm logs. Tick icon is for canceling alarm, dial icon is for calling back, and the trash can is used to delete the log. Clear icon on the right upper icon is used for clearing up all logs. 6.
- Page 11 8. Turn off Screen Click the off icon on the right upper corner to turn off the display.
-
Page 12: Device Setting
DEVICE SETTING Connect Master Station and other devices to a network switch in the same LAN. Go to Settings to configure the device. 1. Display Brightness level: Screen brightness adjustment; Sleep: Screen sleep time (15s, 30s, 1min, 2mins, 5mins, 20mins, 30mins); 2. - Page 13 Intercom Vol: Volume of Intercom can be set from 1 to 6. Volume 6 is the maximum volume (Call volume); Ringtone: The ringing sound (Ringtone 01-04); Key Tone: The keytone (Enable or disable); Auto Answer: Pick up automatically when receiving a call; 3.
- Page 14 Firmware: Firmware version of the device; Current IP address of the device; MAC: MAC address of the device; SIP: Status of SIP registration of the device; 6. More > Ethernet The device network can be set to either DHCP or a static IP address. CMS parameters should be configured here when you try to register this device to CMS.
- Page 15 Concierge Group: Master Station will ring according to the concierge number. No.1 Master Station will ring first. If it’s not answered, No.2 will ring… (Range: 1-5); Device No: Number of the device (Range: 0-9); Sync: A number used to synchronize to other Master Stations;...
- Page 16 Old: Current administrator password of the Device (Default 123456); New: New administrator password of the Device; Confirm: Confirm administrator password of the Device; 10. More > Apps Apps: 3rd party apps can be managed here; 11. More > Reset Reset to Factory: Reset to factory settings;...
-
Page 17: Web Setting
(admin) and password (123456). This is where you can configure the device. For getting the IP address, you can search by DNAKE Remote Upgrade Tool which is installed in the same LAN with the devices. 1. Main When you first log in to the web interface, you can find basic information displayed in this dashboard. - Page 18 2. Network The device network can be set to either DHCP or a static IP address. CMS parameters should be configured here when you try to register this device to CMS. DHCP: Enable DHCP (Dynamic Host Configuration Protocol) to dynamically distribute network configuration parameters;...
- Page 19 Concierge Group: Master Station will ring according to the concierge number. No.1 Master Station will ring first. If it’s not answered, No.2 will ring… (Range: 1-5); Device No: Number of the device (Range: 0-9); Sync: A number used to synchronize to other Master Stations;...
- Page 20 SIP enabled: Enable to use SIP; Proxy: SIP Server Host of SIP; the default port is 5060; Outbound: Outbound Proxy of SIP; the default port is 5060; User: Username of SIP; Password: Password of SIP; Timeout: The call will be ended automatically after a period of time (120s, 300s, 600s, 1200s, 1800s);...
- Page 21 Ex Phone 1-4: Extend to more Master Stations by filling in sip:IP address (4 Max) such as sip:192.168.68.90 (4 Max); Auto Pickup: Pick up automatically when receiving a call; ONU Pass: Enable to prevent ONU from banning multicast; Deaf Mode: The lamp connecting to Indoor Monitor will be turned on when receiving a call;...
- Page 22 Advertising & Url: Enable to advertise on the screen saver of the device; 7. Phonebook All contacts on Master Station can be edited here. Group Name: Fill in text inputs to add or delete group; Choose File & upload: Choose and upload after template is edited for phonebook;...
- Page 23 The system column is designed for rebooting the device. Reboot: Reboot the device; 9. Debug The system column is designed for packet capture and logs capture. Tcpdump: Capturing packets can help developers reproduce positioning problems; Logcat: Device logs; 10. Logout The logout column is designed for logging out the web.
- Page 24 User Logout: Click to log out; 11. IPC You can enter the IP address of Indoor Monitor in the web browser search bar and log in with the default account (user) and password (1234). This is where you can add IPC.
-
Page 25: System Diagram
SYSTEM DIAGRAM... -
Page 26: Device Wiring
DEVICE WIRING 1. Network (PoE) Standard RJ45 interface used to connect to the Master Station, Indoor Monitor, and/or other network equipment via a network switch. PSE shall comply with IEEE 802.3at (PoE+) and its output power not less than 30W and its output voltage not be less than 50V. 2. -
Page 27: Installation
INSTALLATION Desktop Product size: 303 × 195 × 35 mm... -
Page 28: Troubleshooting
TROUBLESHOOTING The Indoor Monitor cannot start up or power off automatically. Check whether it has power-failure, and power it on again The Indoor Monitor display screen is too dim. Check whether the brightness and contrast settings of screen are correct. ... -
Page 29: Safety Instruction
SAFETY INSTRUCTION In order to protect you and others from harm or your device from damage, please read the following information before using the device. Do not install the device in the following places: Do not install the device in high-temperature and moist environment or the area close to ... - Page 30 V1.1 EASY SMART INTERCOM SOLUTIONS...
Need help?
Do you have a question about the 902C-A and is the answer not in the manual?
Questions and answers