Thermador Professional Series Use And Care Manual
Dual fuel steam and 60-inch ranges
Hide thumbs
Also See for Professional Series:
- Installation manual ,
- Recipes (148 pages) ,
- Use and care manual (104 pages)

Related Manuals for Thermador Professional Series


Summary of Contents for Thermador Professional Series
- Page 1 Thermadar. Use and care GUIDE PRD48WDSGC PRD48WDSGU Professional Series Pro Grand® Dual Fuel Steam PRD48WISGC PRD48WISGU and 60-Inch Ranges PRD606WEG PRD606WESG THERMADOR.COM...
-
Page 2: Table Of Contents
en-us Table of contents 1 IMPORTANT SAFETY INSTRUCTIONS.... 4 8 Electric griddle ............ 25 1.1 Safety definitions............ 5 8.1 Operating the electric griddle........ 25 1.2 General information........... 5 8.2 Seasoning the griddle plate ........ 25 1.3 Safe use.............. - Page 3 en-us 14 Troubleshooting............ 56 15 Disposal.............. 58 15.1 Disposal of your old appliance ...... 58 16 Customer Service .......... 58 16.1 Remote Customer Service connection .... 59 16.2 Model number (E-Nr.) and production number (FD) .............. 59 16.3 Rating plate location.......... 59 16.4 Product registration ..........
-
Page 4: Important Safety Instructions
en-us IMPORTANT SAFETY INSTRUCTIONS READ AND SAVE THESE INSTRUCTIONS Read all instructions carefully before use. These precautions will reduce the risk of electrical shock, fire and injury to persons. When using kitchen appliances, basic safety precautions must be followed including those in the following pages. -
Page 5: Safety Definitions
The use of undersized utensils will All product manuals may be downloaded online at expose a portion of the burner to direct contact and www.thermador.com/us/support/owner-manuals. may result in ignition of clothing. Proper relationship of INSTALLER: Please leave these instructions with this unit utensil to burner will also improve efficiency. - Page 6 en-us IMPORTANT SAFETY INSTRUCTIONS READ AND SAVE THESE INSTRUCTIONS Glazed cooking utensils – Only certain types of glass, Do not use a protective coating to line the oven and do ▶ ▶ glass/ceramic, ceramic, earthenware, or other glazed not use a commercial oven cleaner unless certified for utensils are suitable for range-top service without use in a self-cleaning oven.
- Page 7 en-us IMPORTANT SAFETY INSTRUCTIONS READ AND SAVE THESE INSTRUCTIONS provide necessary airflow that is important for proper shall not be used in conjunction with a gas range performance. unless the hood and range have been designed and tested in accordance with the Standard for Domestic Gas Ranges, ANSI Z21.1 •...
-
Page 8: Steam Cooking
en-us IMPORTANT SAFETY INSTRUCTIONS READ AND SAVE THESE INSTRUCTIONS The water in the oven cavity becomes very hot during WARNING cooking. DANGER OF TIPPING ON RANGES DO NOT clean the appliance immediately after ▶ switching it off. Wait until the appliance has cooled down. ▶... -
Page 9: Remote Operation
en-us IMPORTANT SAFETY INSTRUCTIONS READ AND SAVE THESE INSTRUCTIONS See the Installation Instructions for electrical Connecting the receiver into an outlet different than the ▶ ¡ requirements, grounding instructions and clearance to cooktop. combustible material requirements. ▶ It is the user's responsibility to correct any interference. Service should only be done by an authorized service ¡... -
Page 10: State Of California Proposition 65 Warnings
en-us IMPORTANT SAFETY INSTRUCTIONS READ AND SAVE THESE INSTRUCTIONS 1.9 State of California Proposition 65 Warnings This product may contain a chemical known to the State of California, which can cause cancer or reproductive harm. Therefore, the packaging of your product may bear the following label as required by California: IMPORTANT SAFETY NOTICE: The California Safe Drinking and Toxic Enforcement Act requires the... -
Page 11: Preventing Material Damage
Preventing material damage en-us After the oven has cooled down, remove the dirt from ▶ Preventing material damage 2 Preventing material damage the oven cavity. Completely wipe out any type of cleaning solution in Preventing material damage ▶ order to prevent damage to the coating. 2.1 Preventing oven cavity damage If there is water on the oven cavity bottom when operating NOTICE:... -
Page 12: Environmental Protection And Energy-Saving
en-us Environmental protection and energy-saving Aluminum foil and plastic melt on hot burners. If the cooking time is relatively long, you can switch the Do not let aluminum foil or plastic come into contact appliance off 10 minutes before the cooking time ends. ▶... -
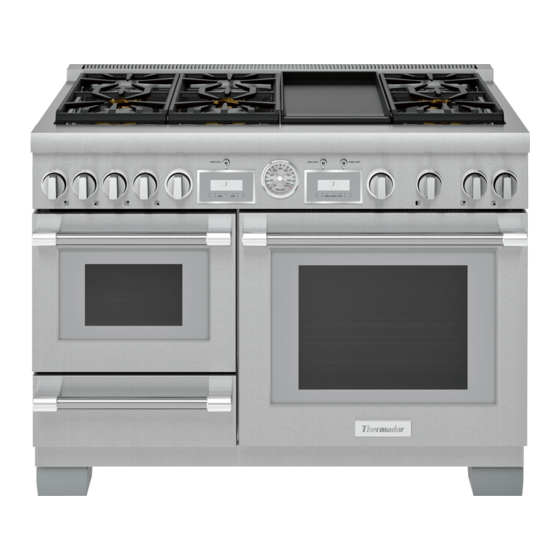
Page 13: Familiarizing Yourself With Your Appliance
Familiarizing yourself with your appliance en-us Familiarizing yourself with your appliance 4 Familiarizing yourself with your appliance This Use and Care Guide covers several models. Your model may have some but not all of the features listed. Familiarizing yourself with your appliance 4.1 Appliance Here you can find an overview of the parts of your appliance. - Page 14 en-us Familiarizing yourself with your appliance Leg covers Pro Grand® models only. If additional leg covers are required, you can order them from Customer Service at no charge for up to one year after delivery date of the appliance. The model shown is 60'' steam oven with 6 burners and a griddle option. Rear vent trim/oven vent Griddle tray (electric griddle option) Island trim included or low backguard ordered...
-
Page 15: Oven Cavities And Warming Drawer Interior
Familiarizing yourself with your appliance en-us 4.2 Oven cavities and warming drawer interior Here you can find information about the features of the oven and warming drawer cavities. Oven cavities Oven rails Rack positions Broil element Oven racks Oven thermostat Bake element, hidden Oven light Convection fan cover Socket for meat probe... - Page 16 en-us Familiarizing yourself with your appliance Steam oven cavity Oven rails Oven vent Warm air may be released from the oven vent before, Oven light during and after cooking. It is normal to see steam Steam vent escaping from the vent, and condensation may collect in this area.
-
Page 17: Oven Controls
Familiarizing yourself with your appliance en-us Clock Panel light (Pro Grand® models only) Displays the time of day during all operating To turn the panel light on or off, flip the light switch on the modes oven control panel up or down. Information area Temperature gauge Displays instructions or information... - Page 18 en-us Familiarizing yourself with your appliance Mode Definitions and recommendations Main oven Secondary Steam oven oven BAKE Cooks with dry, heated air. Use for a variety of foods, such as cakes, cookies, pastries, quick breads, quiche and casseroles. CONV BAKE Similar to bake, but air is circulated by a fan at ...
- Page 19 Accessories en-us Mode Definitions and recommendations Main oven Secondary Steam oven oven PROBE Appears when a probe is detected. KITCHEN TIMER The kitchen timer runs independently of the other appliance functions. OVEN TIMER Allows you to set a cook timer. ...
-
Page 20: Accessories
en-us Accessories 5.1 Accessories included - conventional oven Accessories Wire rack These racks can be used for most ¡ cooking. You can use multiple racks at the ¡ same time. Note: Do not clean using the SELF CLEAN function. Telescopic rack Use with heavier dishes to make placement into the oven easier. -
Page 21: Other Accessories
Use rack positions 1 through 5 only. DO NOT attempt to appliance in our brochures and online: use the top guide to support an oven rack, it may tip. www.thermador.com Accessories are appliance-specific. When purchasing, always check for compatibility with your appliance model number (E-Nr). -
Page 22: Installing The Full Access® Racks
en-us Before using for the first time Tilt the rack up to allow the stop into rack guide. Push the rack in until it is even with the front hooks. Bring the rack to a horizontal position and push it in the Lift the rack up to lock the last hook into place. -
Page 23: Before Using For The First Time
Before using for the first time en-us If equipped, heat up the electric griddle for about 6.1 Start-up settings 10 minutes to eliminate manufacturing residues and After the appliance has been connected to the power smells. Let cool and wash with warm soapy water and supply, you are prompted to set some basic settings to rinse well. -
Page 24: Placing The Burner Grates
Refer to the instructions IN CASE OF AN ELECTRICAL ▶ FAILURE listed in the IMPORTANT SAFETY INSTRUCTIONS. → Page 7 6.5 Register your appliance Register your Thermador product to access your ▶ product related information. For product registration information see → "Customer Service", Page 58 . -
Page 25: Extralow® Feature
Electric griddle en-us Knob position ExtraLow® level 7.4 ExtraLow® feature Lowest ExtraLow® setting The XLO feature cycles the burner flame on and off in The flame cycles on for approximately various increments to maintain a very low temperature. 10 seconds and off for 50 seconds of The 60-second revolution (as low as 10 seconds on and each minute. -
Page 26: Oven Operation
en-us Oven operation Use a paper towel to apply a thin, even coating of lard, 9.3 Fast preheat shortening, or olive oil to the griddle surface. With fast preheat, you can shorten the preheat time Bake the griddle plate in the oven at 350°F (175°C) for required for some heating modes. -
Page 27: Turning The Panel Lock On Or Off
Oven operation en-us Note: The handle of the probe becomes hot during Changing the kitchen timer cooking. Always use oven mitts when touching the Press TIMERS. probe handle. Press the left or to set the desired time. Insert the plug of the probe into the socket at the side of Press ENTER. -
Page 28: Sabbath Mode
en-us Oven operation Press ENTER. 9.8 Sabbath mode A 5 minutes delay notification appears on the display. The Sabbath mode enables those of particular faiths to During this pause, you can adjust the parameters. After use their ovens on the Sabbath. the countdown the oven starts heating and all buttons are disabled. -
Page 29: Getting The Most Out Of Your Appliance
Oven operation en-us Preheating is not necessary for ROAST and CONV ¡ Oven temperature offset ROAST. The oven is calibrated to provide accurate results. This feature is useful if you prefer your foods lighter or darker. Bakeware type When an offset temperature is selected, the actual oven ¡... -
Page 30: Steam Oven Operation
en-us Steam oven operation For small items such as cookies, check 1 - 2 minutes Determine the water hardness using a water hardness ¡ before the recipe time. test strip or ask your water utility company. For larger baked items such as cakes, check 5 - → ... -
Page 31: Operating The Steam Oven
Steam oven operation en-us Fill the water tank to the “MAX” line with cold water. The recalibrate the steam oven manually to ensure that it tank holds 1.4 quarts (1.3 liters) of water. automatically adjusts to your new location. Recalibration is not necessary after a power failure. Requirement: The oven cavity is cool. -
Page 32: Removing The Water Tank During Or After Operation
en-us Steam oven operation Press the right < or > to set the desired cook time and Steam clean ¡ press ENTER. Factory reset ¡ A beep sounds when the timer ends. Press ENTER to Changing the basic settings terminate the beep and timer. Requirement: The oven is in standby mode. - Page 33 Steam oven operation en-us Press the right < or > to select the desired food Setting an end time for a steam program category. You can change the time when the food will be done. The Press ENTER. appliance starts automatically and turns off at the Press the right <...
- Page 34 en-us Steam oven operation Food Default weight Min. weight Max. weight Accessories and rack levels Risotto, arborio 2.2 lbs (1.0 kg) 1.0 lbs (0.5 kg) 4.2 lbs (2.0 kg) Baking pan (level 2) Poultry Weigh the individual pieces of chicken. Enter the weight of the heaviest piece. DO NOT place pieces of chicken on top of one another in the ovenware.
-
Page 35: Getting The Most Out Of Your Steam Oven
Steam oven operation en-us Food Default weight Min. weight Max. weight Accessories and rack levels Fresh rolls 0.1 lbs (0.05 kg) 0.1 lbs (0.05 kg) 0.6 lbs (0.3 kg) Baking pan (level 2) Cooking times and quantities 10.9 Getting the most out of your steam When steaming, the cooking times are based on the ¡... - Page 36 en-us Steam oven operation Food Size Accessories and rack levels Heating Temperature Cooking mode in °F (°C) time in minutes Leeks Slices Perforated + baking pan STEAM 212 (100) 4 - 6 Peas Perforated + baking pan STEAM 212 (100) 5 - 10 Pea pods Perforated + baking pan STEAM...
- Page 37 Steam oven operation en-us Poultry Food Weight Accessories and rack levels Heating Temperature Cooking mode in °F (°C) time in minutes Chicken, whole 2.65 lbs Wire rack + baking pan level 2) STEAM 375 (190) 35 - 45 (1.2 kg) CONV Chicken, halved per 1 lbs Wire rack + baking pan level 2) STEAM 375 (190)
- Page 38 en-us Steam oven operation Veal Food Weight Accessories and rack levels Heating Temperature Cooking mode in °F (°C) time in minutes Veal, bone-in 3.5 lbs Wire rack + baking pan (level 2) STEAM 350 (177) 50 - 70 (1.5 kg) CONV Veal loin 2 lbs Wire rack + baking pan (level 2) STEAM 350 (177)
- Page 39 Steam oven operation en-us Fish Food Weight Accessories and rack levels Heating Temperature Cooking mode in °F (°C) time in minutes Whole Perforated (level 3) + baking pan STEAM 175 (80) 15 - 25 0.66 lbs (level 1) (0.3 kg) Fillet per 3.5 lbs Perforated (level 3) + baking pan STEAM 175 (80) 10 - 20...
- Page 40 en-us Steam oven operation Soufflés, casseroles, additions to soups Food Accessories and rack levels Heating mode Temperature Cooking time in °F (°C) in minutes Lasagna Baking pan (level 2) STEAM CONV 350 (177) 35 - 45 Soufflés Soufflé dish + wire rack (level 2) STEAM CONV 350 (177) 15 - 25...
- Page 41 Steam oven operation en-us Food Accessories and rack levels Heating mode Temperature Cooking time in °F (°C) in minutes Delicate fruit flan, Spring-form cake pan + wire rack TRUE CONV 300 (150) 45 - 55 sponge (level 2) Sponge base, 2 eggs Ring + wire rack (level 2) TRUE CONV 375 (175) 12 - 16...
- Page 42 en-us Steam oven operation Small baked products Food Accessories and rack levels Heating mode Temperature Cooking time in °F (°C) in minutes Merengue Baking pan (level 2) TRUE CONV 175 (80) 120 - 180 Macaroons Baking pan (level 2) TRUE CONV 300 (150) 15 - 25 Puff pastry Baking pan (level 2)
- Page 43 Steam oven operation en-us Food Weight Accessories and rack levels Temperature Cooking time in °F (°C) in minutes Chicken parts, 1 lb (0.4 kg) Perforated (level 3) + baking pan 120 (50) 30 - 35 boneless (level 1) Block-frozen 1 lb (0.4 kg) Perforated (level 3) + baking pan 120 (50) 20 - 30 vegetables, such as...
- Page 44 en-us Warming drawer operation Food Accessories and rack levels Heating mode Temperature Cooking time in °F (°C) in minutes Herb butter baguettes, Baking pan (level 2) TRUE CONV 350 (177) 15 - 20 refrigerated Pretzels, frozen Baking pan + parchment paper TRUE CONV 350 (177) 18 - 22 (level 2)
-
Page 45: Warming Drawer Operation
Warming drawer operation en-us DO NOT store explosives, such as aerosol cans, in or Note: DO NOT place cold plates in an already heated ▶ near the drawer. Flammable materials may explode and warming drawer. Placing a cold dish into a hot result in fire or property damage. -
Page 46: Home Connect
en-us Home Connect® Food/cookware Level 12.1 Setting up Home Connect® Plate of food Requirements Preheat cookware The appliance is connected to the power supply and is ¡ Cover food switched on. You have a mobile device with a current version of the ¡ iOS or Android operating system, e.g. a smartphone. 12 Home Connect®... -
Page 47: Changing The Settings Via The Home Connect® App
Home Connect® en-us Basic setting Options Description and additional information Remote control When this function is deactivated, you can only view the ¡ operating status of the oven in the app. ¡ When this function is activated, you can remotely start and control the oven. -
Page 48: Data Protection
– The first step is the download. cleaners-accessories. – The second step is the installation on your appliance. Tip: Thermador cleaners have been tested and approved You can continue to use your appliance as normal while ¡ for use on Thermador appliances. Other recommended updates are downloading. -
Page 49: Cleaning Recommendations
Cleaning and maintenance en-us 13.2 Cleaning recommendations Clean only those parts of your range that are listed in this CAUTION cleaning chart. All igniters spark when any single burner is turned on. Do not touch any of the burners when the cooktop is in ▶... - Page 50 Stainless steel cleaners: ¡ – Siege® Stainless Steel and Aluminum Cleaner – Stainless Steel Magic® – Thermador Stainless Steel Conditioner (part # 00576697) Important notes: Never allow food stains or salt to remain on stainless ¡ steel for any length of time.
- Page 51 Cleaning and maintenance en-us Part/Material Cleaning instructions Recommendations Griddle grease tray Remove the grease tray after Recommended cleaners: ¡ the grease has cooled. Non-abrasive cleaners: Dish soap and hot water ¡ Discard grease into a grease The grease tray is dishwasher-safe. ¡...
-
Page 52: Self Clean Function
en-us Cleaning and maintenance Part/Material Cleaning instructions Recommendations Oven racks and rack Wash with soapy water. Recommended cleaners: ¡ guides Rinse and dry immediately. Non-abrasive cleaner: ¡ ¡ – Dish soap and hot water – Vinegar and water Mild abrasive cleaners: ¡... -
Page 53: Steam Clean
Cleaning and maintenance en-us provide necessary airflow that is important for proper Press ENTER. performance. After the information text, press ENTER. Completing self clean When self clean is finished, the oven cools down. The door latch will open automatically when the oven is below Do not touch the vent area while the appliance is on ▶... -
Page 54: Descaling
en-us Cleaning and maintenance Cycle 1: Cleaning Using the cleaning sponge, wipe any remaining water ‒ from the evaporator dish, and wipe down the oven. Turn the mode knob to CLEAN. ‒ Thoroughly rinse out the cleaning sponge. Press the right < or > to select STEAM CLEAN and ‒... - Page 55 Cleaning and maintenance en-us Turn off the power to the oven at the main power supply Replacing a steam oven light (fuse or breaker box). Requirement: You can purchase a heat-resistant 230 V / Remove the oven racks. 25 W max halogen bulb with seal through Customer Slide the tip of a flat blade screw driver between the Service or at a retail store.
-
Page 56: Troubleshooting
en-us Troubleshooting Troubleshooting 14 Troubleshooting You can eliminate minor issues on your appliance If the power cord of this appliance becomes damaged, it Troubleshooting ▶ yourself. Please read the information on eliminating issues must be replaced by the manufacturer, the before contacting Customer Service. This may avoid manufacturer's Customer Service, or an authorized unnecessary repair visits. - Page 57 Troubleshooting en-us Issue Cause and troubleshooting The burner flame is not uniform. Clean the grooves on the burner. ▶ The gas flow is not normal or there The gas supply is blocked by intermediate gas valves. is no gas. Open the gas valves. ▶...
-
Page 58: Disposal
(E-Nr.) and the production number (FD) of your appliance. Information about current disposal methods can be USA: obtained from your specialist dealer or local authority. 1-800-735-4328 www.thermador.com/support www.thermador.com/us/accessories 1-800-735-4328 www.thermador.ca www.thermador.ca/en/support/filters-cleaners-accessories For assistance with connecting to Home Connect®, you can also view instructions here:... -
Page 59: Customer Service
Please make sure to register your Product; while not necessary to effectuate warranty coverage, it is the best way for Thermador to notify you in the unlikely event of a safety notice or product recall. 17.2 How long the warranty lasts... -
Page 60: Repair/Replace As Your Exclusive Remedy
17.3 Repair/replace as your exclusive 17.4 Out of warranty product remedy Thermador is under no obligation, at law or otherwise, to provide you with any concessions, including repairs, During this warranty period, Thermador or one of its prorates, or Product replacement, once this warranty has authorized service providers will repair your Product expired. -
Page 61: Obtaining Warranty Service
BSH. 17.6 Obtaining warranty service To obtain warranty service for your product, you should contact Thermador Customer Support at 1-800-735-4328 to schedule a repair. 17.7 Product information For handy reference, copy the information below from the rating plate. - Page 64 1901 MAIN STREET, SUITE 600 IRVINE, CA 92614 USA // 1-800-735-4328 // WWW.THERMADOR.COM © 2023 BSH HOME APPLIANCES CORPORATION 8001265299 // en-us // 030609...
Need help?
Do you have a question about the Professional Series and is the answer not in the manual?
Questions and answers