Thermador Professional Series Use And Care Manual
Hide thumbs
Also See for Professional Series:
- Installation manual ,
- Recipes (148 pages) ,
- Use and care manual (104 pages)
Table of Contents
Advertisement
Advertisement
Table of Contents

Subscribe to Our Youtube Channel
Related Manuals for Thermador Professional Series


Summary of Contents for Thermador Professional Series
- Page 1 ® ® Professional Series Pro Grand and Pro Harmony Ranges THERMADOR.COM...
- Page 2 Use and care G U I D E ® Professional Series Pro Grand and Pro Harmony Ranges Models: Table of contents................2 Pro Grand Pro Harmony PRD364WDGU PRD304WHU PRD364WIGU PRD305WHU PRD364WLGU PRD364WDHU PRD366WGU PRD364WLHU PRD484WCGU PRD366WHU PRD486WDGU PRD484WCHU PRD486WIGU PRD486WDHU...
- Page 3 A Digital Guide to Your Thermador Appliance From initial set-up and device pairing to proper care and cleaning, consider this your one-stop guide to getting the most out of your Thermador appliance. Open your camera app, then hover over the QR code to scan.
-
Page 4: Table Of Contents
Home Connect® assistant ..........18 Setting the convection conversion ......... 18 Setting the oven offset ........... 19 ® This THERMADOR appliance is made by Setting the cooking mode and temperature ....19 BSH Home Appliances Corporation Setting the timers ............19 1901 Main Street, Suite 600 Setting fast preheat ............ -
Page 5: Important Safety Instructions
All product manuals may be downloaded online at death. www.thermador.com/us/support/owner-manuals. — DO NOT store or use gasoline or other INSTALLER: Please leave these instructions with this unit flammable vapors and liquids in the for the owner. - Page 6 9 IMPORTANT SAFETY INSTRUCTIONS READ AND SAVE THESE INSTRUCTIONS WARNING—ALL APPLIANCES WARNING—INDUCTION SURFACES • Do not use water on grease fires – Smother fire or Do not place metallic objects such as knives, forks, flame or use dry chemical or foam-type extinguisher. spoons, and lids on the cooktop surface since they can get •...
- Page 7 9 IMPORTANT SAFETY INSTRUCTIONS READ AND SAVE THESE INSTRUCTIONS WARNING—VENTILATING HOODS WARNING—AIR FLOW • Clean ventilating hoods frequently – Grease should • Do not block or obstruct the flow of air not be allowed to accumulate on hood or filter. through the ventilation openings.
- Page 8 9 IMPORTANT SAFETY INSTRUCTIONS READ AND SAVE THESE INSTRUCTIONS • See the Installation Instructions for electrical WARNING—DANGER OF TIPPING ON RANGES requirements, grounding instructions and clearance to • All ranges can tip and injury can result. To combustible material requirements. prevent accidental tipping of the range, •...
-
Page 9: Familiarizing Yourself With Your Appliance
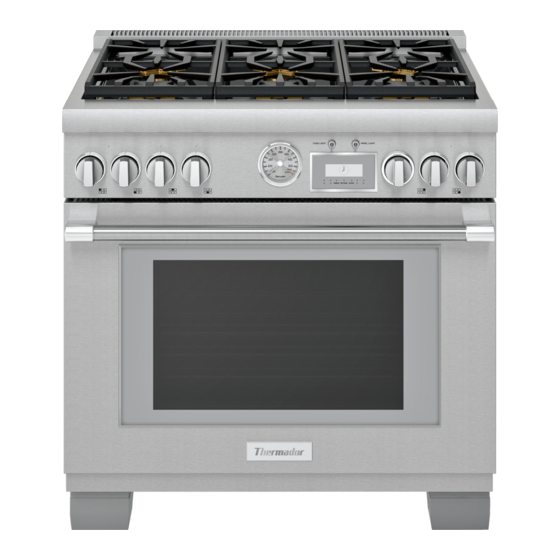
Familiarizing yourself with your appliance This Use and Care Guide covers several models. Your model may have some but may not have all of the features or displays listed. All graphics are representative. Your appliance may vary in appearances and features. Appliance exterior identification Island trim included or low backguard ordered separately (See Installation Instructions concerning spacing behind the range when using the range with the island trim.) -
Page 10: Oven Interior Identification
Oven interior identification Dual fuel oven(s) interior Oven interior light Bake element (hidden) Broil element Convection fan cover Oven thermostat Meat probe outlet Rack guides Rack positions Oven racks Gas oven(s) interior Oven interior light Meat probe outlet Broil igniter Rack positions Infrared broil burner Convection fan cover... - Page 11 Automatic operation of the cooling fan Convection fan The cooling fan runs during all cooking modes. The fan The convection fan operates during all convection modes. can be heard when it is running, and warm air may be felt When the oven is operating in a convection mode, the fan as it is released from the oven vent.
-
Page 12: Before Using For The First Time
Before using for the first time Installing flat racks The graphics are representative. Your appliance may have different appearances. 1. Grasp rack firmly on both sides and insert rack. 2. Tilt rack up to allow stop into rack guide. 9 WARNING To help prevent burns, never remove or reposition the oven racks while the oven is ON or while the oven is cooling. -
Page 13: Checking The Burner Cap Placement
Installing the burner grates Each cap has a letter (B, D, or F) cast in the underside of the cap that corresponds to a letter (B, D, or F) cast in the 1. Place grates flat-side down and align into the burner base that is attached to the appliance. -
Page 14: Using The Rangetop
Using the rangetop Preparing the griddle This Use and Care Guide covers several models. Your model may have some but may not have all of the features listed. 9 WARNING To avoid risk of injury, never operate the griddle without Turning on the burners the griddle plate installed. -
Page 15: Preparing The Grill
Preparing the grill Operating the grill 9 WARNING • To avoid risk of injury, NEVER operate grill without the grates or griddle plate accessory installed. • NEVER leave grill unattended while cooking. • Observe caution with oils and fats. Overheated oils and fats can easily cause fires. -
Page 16: Rangetop Recommendations
Rangetop recommendations STAR® burner cooking recommendations Finish setting ® Food Start setting Finish setting XLO burners standard burners Beverages MED – heat milk, cover LO – finish heating XLO – keep warm, cover Cocoa Breads MED – preheat skillet LO to MED – cook LO to MED –... -
Page 17: Griddle Cooking Recommendations
Finish setting ® Food Start setting Finish setting XLO burners standard burners Pastas HI – bring water to a boil, MED HI to HI – to maintain MED HI to HI – to maintain a add pasta a rolling boil rolling boil Macaroni, noodles, spaghetti... -
Page 18: Grill Cooking Recommendations
Grill cooking recommendations IMPORTANT: • GRILL SHOULD NOT BE OPERATED WITHOUT PROPER VENTILATION. • Foods with excessive fat or grease should not be prepared on an indoor grill. Grilling foods with high fat content (certain types of ground beef, sausage, etc.) increases the chances of smoke and flames. Cook time Food* Setting**... -
Page 19: Using The Oven
Using the oven This Use and Care Guide covers several models. Your model may have some but not all of the modes and features listed. Mode descriptions Electric Electric Mode Definitions and recommendations main main aux. aux. Bake Cooks with dry, heated air. Variety of foods, such as cakes, ... -
Page 20: Initial Start-Up
Electric Electric Mode Definitions and recommendations main main aux. aux. Symbol is displayed during and after the self-clean mode Door locking when the door is locked. Symbol is displayed if customer service is connected during Remote service ... -
Page 21: Setting The Oven Offset
4. Press ENTER. 5. Turn the mode knob to CONV BAKE and the TEMPERATURE knob to the recipe temperature. – The oven automatically reduces the input temperature by 25°F (14 °C) to the correct temperature. 6. Allow oven to preheat and place food inside. Setting the oven offset NOTE: If the mode knob is rotated to any position other The offset feature allows the cook to further fine-tune... -
Page 22: Setting Fast Preheat
3. Press TIMERS. 2. To deactivate, press and hold the TIMERS button for four seconds. 4. Press the left ( or ) and select OVEN TIMER. 5. Press the right ( or ) to set your desired time and press Setting the oven for proof ENTER. -
Page 23: Setting The Sabbath Mode
Setting the Sabbath mode – A delay notification appears. During this five minute pause, the user can adjust the parameters. About Sabbath mode – using the rangetop After the countdown the oven starts heating and all buttons are disabled. 9 WARNING –... - Page 24 For some models a permanent remote start can be activated via the Home Connect app. This function allows a remote start of the available operating modes without automatically deactivating remote start. • Remote start allows you to start, pause, and abort oven programs remotely via the Home Connect on a mobile device.
-
Page 25: Oven Recommendations
Oven recommendations Oven rack positions Secondary oven (48" models) • Rack level positions in the oven are numbered on the Level Bake mode front frame like an elevator. Number one level is the Best used for most baked items. lowest and number five level is at the top. •... - Page 26 • When baking on more than one rack, cookie sheets Pro Grand — Three rack convection baking should not be staggered; round cake pans should be Levels Conv bake mode staggered. 1, 3, and 5 When several sheets of cookies are to •...
-
Page 27: True Convection
True convection Roast True convection recommendations Roasting recommendations Dual fuel levels True conv mode Meat and poultry Temperature Level 4 and 5 Cookies Beef 2, 3, and 4 Cookies Pot roast, 3 – 4 lbs. 350°F (180°C) 1, 3, and 5 Pastries and other baked goods Beef brisket 350°F (180°C) -
Page 28: Home Connect
“PAIRING SUCCESSFUL” is shown in the display. To help your pairing experience, follow the link for a quick Connect your appliance to your home network with ‘how-to’ video guide: www.thermador.com/us/home- connect/wifi-pairing-instructions. 1. Press SETTINGS and select HOME CONNECT. Notes 2. -
Page 29: Setting The Remote Start
Setting the remote start Connecting to the network 1. Press SETTINGS to cycle through available options See “Setting remote start” on page 22. until “HOME CONNECT SETTINGS” is displayed. Setting the remote control 2. Press ENTER. “PRESS ENTER FOR HC” is displayed. 1. -
Page 30: Care And Maintenance
2. Turn the mode knob to SELF CLEAN and the www.thermador.com/us/support/customer-care/faqs/ temperature knob to CLEAN. gas-ranges. 3. Press the right ) to set the desired clean level and press ENTER. -
Page 31: Cleaning The Appliance
• If the user tries to enable a self-clean function in an Replacing the light bulb oven where the self-clean function has been 1. Turn off circuit breaker. restricted, the oven lights will blink on and off in 2- 2. Remove the oven racks. second intervals to indicate to the user that the function is not available. -
Page 32: Troubleshooting
(FD) and the consecutive numbering (Z-Nr.) of service visits and more. your appliance noted. Browse our online resources, such as FAQs and How-to Videos, or call us. Contacting customer support Canada This information can be found on the appliance rating 1-800-735-4328 plate. www.thermador.com/support www.thermador.ca... -
Page 33: Remote Customer Service Connection
• Mail in the completed product registration card to the address printed on the card. • Register your product online at www.thermador.com. • Call Thermador customer service at 1-800-735-4328. Remote customer service connection It is possible for customer service to access the appliance... -
Page 34: Statement Of Limited Product Warranty
Thermador to notify you in the unlikely event Product yourself, or use a non-authorized service provider; of a safety notice or product recall. -
Page 35: Warranty Exclusions
God. In no event shall Thermador have any liability or responsibility whatsoever for damage to surrounding property, including cabinetry, floors, ceilings, and other structures or objects around the Product. -
Page 36: 1901 Main Street, Suite 600
Thank you for being a Thermador customer! Thermador is dedicated to supporting you and your appliance so you have many years of creative cooking. Please don't hesitate to contact us if you have any questions. We're happy to help you with cleaning and care instructions, cooking tips, accessories, troubleshooting, and more.
Need help?
Do you have a question about the Professional Series and is the answer not in the manual?
Questions and answers