
Related Manuals for Hachette ALIEN PACK 6


Summary of Contents for Hachette ALIEN PACK 6
- Page 1 A L I E N spectacular scale EASY EASY ASSEMBLY ASSEMBLY BUILD THE TERRIFYING XENOMORPH FROM ALIEN PACK 6 KITS 37 - 44...
-
Page 2: Table Of Contents
Some parts may have sharp edges, please handle them with care. Hachette Partworks Ltd, 4th Floor, Jordan House, 47 Brunswick Place, London N1 6EB The installation of electronic parts must always be carried out by an adult. When replacing batteries, www.hachettepartworks.com... -
Page 3: K I
A S S E M B L Y G U I D E K I T 3 7 : T H E L E F T R I B S A N D R I G H T T H I G H ( I I ) In this kit you will continue to work on the left rib and right thigh assemblies. - Page 4 K I T 3 7 : T H E L E F T R I B S A N D R I G H T T H I G H ( I I ) 37-6 37-2 Fit the peg at the end of the Left 37-2 into the raised socket inside Rib...
- Page 5 K I T 3 7 : T H E L E F T R I B S A N D R I G H T T H I G H ( I I ) 37-3 (D1) Take the Right Thigh Skin 36-2 supplied with pack 5 - kit 36 and test-fit Pipe D1...
- Page 6 K I T 3 7 : T H E L E F T R I B S A N D R I G H T T H I G H ( I I ) 37-5 37-5 Turn the Thigh Skin 36-2 over and note the position of the...
-
Page 7: K I
A S S E M B L Y G U I D E K I T 3 8 : T H E L E F T R I B S A N D R I G H T T H I G H ( I I I ) In this kit you will continue to build the left rib section and work on the right femur and thigh. - Page 8 K I T 3 8 : T H E L E F T R I B S A N D R I G H T T H I G H ( I I I ) 38-6 Take the support assembly 32-3 from the previous kit.
- Page 9 K I T 3 8 : T H E L E F T R I B S A N D R I G H T T H I G H ( I I I ) 35-4 33-4 34-3 Magnets are now fitted to the femur.
- Page 10 K I T 3 8 : T H E L E F T R I B S A N D R I G H T T H I G H ( I I I ) Turn the thigh skin 36-2 over and test-fit the Pipe D3 38-4...
-
Page 11: K I
A S S E M B L Y G U I D E K I T 3 9 : T H E L E F T R I B S A N D R I G H T T H I G H ( I V ) In this kit you will continue to work on the left rib and right thigh assemblies. -
Page 12: K I
K I T 3 9 : T H E L E F T R I B S A N D R I G H T T H I G H ( I V ) 39-6 Take the rib support assembly 32-3 and fit the raised screw socket on Rib... -
Page 13: K I
K I T 3 9 : T H E L E F T R I B S A N D R I G H T T H I G H ( I V ) 39-5 In a similar way to steps 3 and 4 in the previous kit, further magnets 39-5 are to be fitted to the inside of the... - Page 14 K I T 3 9 : T H E L E F T R I B S A N D R I G H T T H I G H ( I V ) 39-4 (D5) Repeat the previous step to fix Pipe D5 39-4 in place on...
- Page 15 A S S E M B L Y G U I D E K I T 4 0 : T H E P E LV I S ( I ) In this kit you will start to build the Xenomorph’s pelvis. 40-1 40-2 40-3...
- Page 16 K I T 4 0 : T H E P E L V I S ( I ) 40-5 Fit the two pegs on one of the Socket Liners 40-5 into the holes in the Joint 1 40-1. 40-1 40-5 Repeat the previous step to fit the other Socket Liner 40-5...
- Page 17 K I T 4 0 : T H E P E L V I S ( I ) 40-2 Take the Ball Joint 40-4 and fit the larger end into the insert assembly 1/40-5, as shown. Take time to study the diagram and make sure that part 40-4 is fitted the correct...
- Page 18 K I T 4 0 : T H E P E L V I S ( I ) 40-7 40-6 40-3 40-1 40-2 40-2 34-3 35-4 40-8 40-8 Take the right thigh assembly 34-3/35- Insert three 3x22mm screws which was worked on in the previous 40-7 into the remaining holes kit.
- Page 19 A S S E M B L Y G U I D E K I T 4 1 : T H E R I G H T L E G ( I V ) In this kit you will continue to build the Xenomorph’s right leg - working on the tibia, femur and knee.
- Page 20 K I T 4 1 : T H E R I G H T L E G ( I V ) 14-1 22-1 Take the right calf assembly which was last worked on in pack 4 - kit 24. Detach the two outer Skins 14-1 (A) 4-4 (B)
- Page 21 K I T 4 1 : T H E R I G H T L E G ( I V ) Take the thigh assembly 29-2 3/29-2 from pack 5 - kit 31 and separate the outer skin 29-2 from the femur assembly 25-3.
- Page 22 K I T 4 1 : T H E R I G H T L E G ( I V ) Carefully study the Knee 32-4 41-4 and the diagrams on the left in preparation for joining the seam. There are 15-1 pegs on one side of the seam and corresponding...
- Page 23 K I T 4 1 : T H E R I G H T L E G ( I V ) Take the outer skin assemblies A and B, put aside in step 1, ready to join them together. There are pegs along the edge of part 4-4 (B) which fit into...
- Page 24 K I T 4 1 : T H E R I G H T L E G ( I V ) Turn the tibia assembly over and study the inset (left) and diagram of the completed kit on page 7 to see how the skin and calf protector are fitted.
- Page 25 K I T 4 1 : T H E R I G H T L E G ( I V ) KIT 41 IS COMPLETE The right tibia and femur have been joined and the tibia skin, calf protector and knee covering have been fitted. ! Keep the Thigh Protectors safely aside until they are needed in the next kit.
- Page 26 A S S E M B L Y G U I D E K I T 4 2 : T H E R I G H T F O O T A N D R I B C A G E In this kit you will start to build the right foot and assemble the left and right ribs.
- Page 27 K I T 4 2 : T H E R I G H T F O O T A N D R I B C A G E 38-4 (D3) Take the thigh skin assemblies 36-2 29-2 from the previous kit and 36-2 test-fit them together.
- Page 28 K I T 4 2 : T H E R I G H T F O O T A N D R I B C A G E 38-2 38-3 Turn the leg over, as shown. The edges of skin at either end of parts 29-2 36-2...
- Page 29 K I T 4 2 : T H E R I G H T F O O T A N D R I B C A G E 42-7 42-4 42-3 42-6 In a similar way, fit a second Joint Liner 42-6 into the other half...
- Page 30 K I T 4 2 : T H E R I G H T L E G A N D R I B C A G E 42-2 Take the left (L) and right rib (R) assemblies which were last worked on in kit 39 and pack 5 - kit 30 respectively.
- Page 31 A S S E M B L Y G U I D E K I T 4 3 : T H E R I G H T F O O T In this kit you will finish building the right foot of the Xenomorph. 43-1 43-2 43-3...
- Page 32 K I T 4 3 : T H E R I G H T F O O T 43-1 43-3 (F1) Test-fit Pipe F1 43-3 into the right half of the Foot 43-1, as shown. Once sure of a good fit, apply a little glue to the tabs on Pipe 43-3 and fix in place.
- Page 33 K I T 4 3 : T H E R I G H T F O O T 43-1 43-3 (F1) 43-4 (F2) Similarly, fit Pipe F2 43-4 above Pipe F1 43-3, as shown.
- Page 34 K I T 4 3 : T H E R I G H T F O O T 43-1 43-4 (F2) Pipe F3 43-5 is fitted above 43-4, towards the front of the foot. After test-fitting apply a little glue to the tabs and secure in place.
- Page 35 K I T 4 3 : T H E R I G H T F O O T 42-3 Take the foot (leg) assembly from the previous kit and fit the right half of 43-1 over the Foot 42-3, as shown. 43-1 Test fit the left half of the Foot 43-2...
- Page 36 K I T 4 3 : T H E R I G H T F O O T KIT 43 IS COMPLETE BUILD SUMMARY BUILD SUMMARY You have now completed three main assemblies: the skull and jaw, the ribs and the right leg. Pipes have been added to the right foot and the foot skin fitted in place.
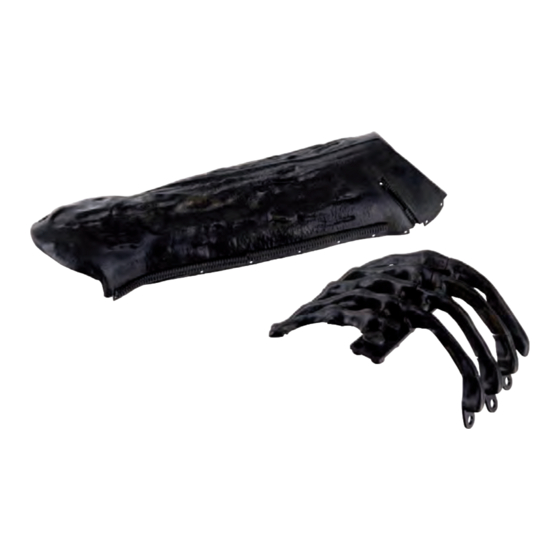
- Page 37 A S S E M B L Y G U I D E K I T 4 4 : T H E R I G H T H A N D A N D S K U L L ( I ) In this kit you will start to build the Xenomorph’s right hand, and install an LED on the skull.
- Page 38 K I T 4 4 : T H E R I G H T H A N D A N D S K U L L ( I ) 44-4 (R2) Test-fit the pegs on Right Finger R2 44-4 into corresponding raised sockets on the back of the Hand 44-2.
- Page 39 K I T 4 4 : T H E R I G H T H A N D A N D S K U L L ( I ) 3-12 44-7 3-13 3-12 44-7 3-13 9V 6LR61 Next, the LED Strip 44-7 is tested.
- Page 40 K I T 4 4 : T H E R I G H T H A N D A N D S K U L L ( I ) 44-7 Study the diagram and parts carefully before removing the backing from the adhesive strip on the Skull LED A 44-7.
Need help?
Do you have a question about the ALIEN PACK 6 and is the answer not in the manual?
Questions and answers