Advertisement
Product Packing List
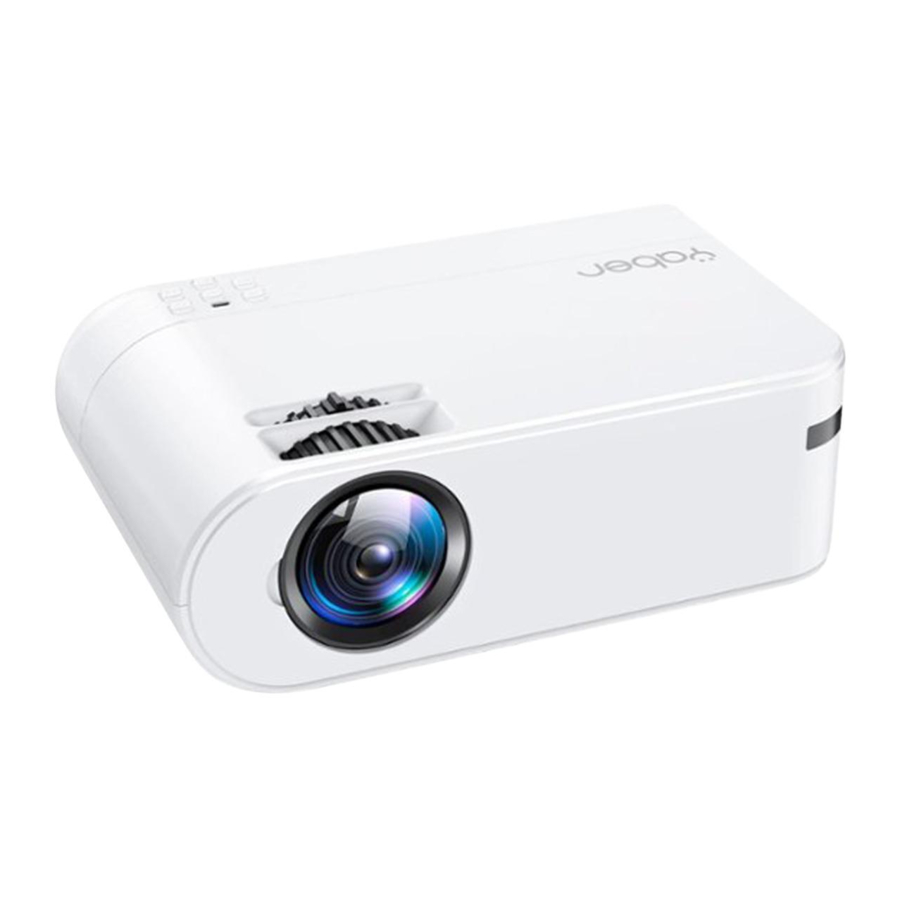
- U2 Projector *1
- 3-in-1 AV Cable *1
- Support Base*1
- Projector Screen*1
- Power Cord *1
- HDMI Cable *1
- Remote Control *1
- lnstruction Manual *1
- Lens Cleaning Cloth*1
(Batteries not included)
Product Description

| Name | Description | |
| 01 | Focus Ring | Adjust the focus ring to get the clearest image. |
| 02 | Keystone Correction | Adjust the keystone ring to get a rectangle shape. |
| 03 | Power | This button can lead the projector to working/ standby mode. |
| 04 | OK | Confirm |
| 05 | Source | Choose Source (AV,HD VGA MEDIA,Screen) |
| 06 | Left Move | Left Move |
| 07 | Right Move | Right Move |
| 08 | Return | Back |
| 09 | Earphone Port | Earphone port |
| 10 | AV Port | AV input |
| 11 | USB-T | Wired screen mirroring port (With Original USB cable) |
| 12 | USB | USB port |
| 13 | HDMI | HDMI input |
| 14 | VGA | VGA input |
| 15 | Power Cable Port | Plug the power cable |
Pictures shown are for illustration purpose only. Actual product may vary due to product enhancement.
Projector Specification
| Native Resolution | 1280*720p |
| Display Technology | LCD |
| Light Source | LED |
| Display Colors | 16.7M Full Color |
| Aspect Ratio | 4:3/16:9/zoom1/zoom2 |
| Projector Weight | 2.2lb |
| Picture File | bmp./jpg/png/gif |
| Recommended Projection Distance | 3.6-14.2ft |
| Minimum Projection Distance | 3.6ft |
| Keystone Correction | ±15° Manual |
| Power Voltage | AC 100-240V |
| Projection Method | Front/rear on desk, Front/rear on ceiling |
| Focus | Manual Operation |
| Audio File | AAC/MP2/MP3/FLAC/WAV |
| Video File | MP4/MKV/MPG |
| Port | AV, USB, USB-T, HDMI, VGA, 3.5mm Headphone Jack |
Remote control

Replace the remote control battery
- Push to open the battery cover.
- Remove both old batteries and install new ones (AAA). Make sure that the polarity of the batteries (+/-) is correctly aligned.
Please Attention:
The Mirror display function doesn't support protected videos due to copyright protection, (Netflix, Prime Video and Hulu etc.)
Installation
- For best results, use the projector in a dark room.
- Place the projector on a flat, level surface in a dry area away from dust and moisture.
- Exposure to direct sunlight, smoke or steam may damage internal components.
- Handle the projector carefully. Falling or shaking can damage internal components.
- Do not place heavy objects on top of the projector.
Adjust the Tilt Base and Hang Ceiling
Adjust the tilt base:
Install the screws (included in the package) to place  , lift the front edge of the projector to the desired height.
Hang ceiling:
Please purchase the projector stand and M5 screw additionally.
Install the projector stand to place , and hang the projector on the ceiling.
(Note: You can install the Tripod Stand to the place )

| 2 | Dusting mouth | Cleaning the dust through the dusting mouth if has black spot |
Supply
- The projector is designed to operate with a 100-240 V ~ 50/60 Hz AC adapter. Ensure that the power supply meets this requirement before attempting to use the projector.
- Handle the power cord carefully and avoid bending it too much. A damaged cord can cause electric shock or fire.
- If the projector will not be used for a long time, unplug the power cord from the outlet.
Cleaning
- Unplug the projector before cleaning it.
- Periodically clean the cabinet with a damp cloth. If it is very dirty, use a mild detergent. Never use strong detergents or solvents such as alcohol or thinners.
- Use a blower or lens paper to clean the lens and be careful not to scratch or damage the lens.
FAQ
- At the time Of switching on, the indicative light does not work
- The power supply may not be well connected
- Check the overheating protection system
- Pressing the power button on the remote control does not turn on the projector
- The remote control batteries are empty
- The signal between the remote control and the IR sensor is obstructed
- Strong direct light on the IR sensor?
- No image on the screen
- Is the channel setting correct?
- Is there an input signal?
- Is the input cable inserted correctly or is it in the wrong position?
- In PC mode the refresh rate is >75KHz?
- The image works but there is no sound
- Are the input cables connected correctly?
- Volume at minimum or silent
- Check that the audio format of the video is in the supported list
- Turns off automatically after being turned on for a while
- Is there a barrier around the fan?
- Small or large voltage fluctuations
- Check the overheating protection system
- I can not find devices connected with hard drives or flash drives
- Re-insert the device
- Check if the device is working
- Unable to play video
- Is the video format correct?
- The file is corrupted?
- The device is damaged
STARTING PROJECTOR
Turn on the projector
- Install two AAA batteries in the remote control before using.
- Remove the lens cover of the projector.
- Press the Power key on the remote controller or panel, the indicator light tum off from Red.
- The lamp will start working, 2 seconds later, when an image is projected on the screen, the machine is working smoothly. If the first projection screen is not the start up screen, press the "S" button on the remote controller and select Media source.
- Adjust the keystone ring to get a rectangle shape.
- Adjust the focus ring or rotate the lens of the projector to get the best image performance. (If it is still blurry, please try to adjust the projection distance.)
- If you connect other devices, be sure to select the corresponding source. If you do not select the correct source, the projector will not be able to detect the signal.
- Press the Menu button on the remote control to enter [Setup] option - OSD Language to set your preferred language.
Turn off the projector
- Press the Power button When the projector is in use, this Will cause it to switch to standby mode.
- When the projector switch into standby mode, the light will turn red.
Keystone and Focus
If the projected image is in a trapezoidal shape, it can be resolved by Keystone correction. ( Do Manual Keystone Correction )

Note: If the Keystone correction fail to resolve image shape, please reduce the vertical height Of the projector in relation to the center Of the screen.

The projected image may be blurry or difficult to see, this is due to lack of Focus adjustment with the lens, please follow the processes below to adjust the Focus. ( Do Manual Focus, find the most sharpness picture on the screen )

Note: It is normal when sharpness in the central, blur in the edge.
Setting the Main Menu
The projectors normal start up screen is as follows. If the first projection screen is not this one, press the " " button on the remote controller or "S" on the projector to select Media source.

Select the Input Source
When the "No Signal" prompt appears. you need to select the input source:
- Press the
![]() button on the remote control to select the desired signal, then press the OK button to conform the input source by the remote control.
button on the remote control to select the desired signal, then press the OK button to conform the input source by the remote control. - Once the signal is detected, the selected source information will be displayed on the screen after a few seconds.
![]()

Screen Mirroring Methods
 Warming Tips:
- The fluency of screen mirroring with wireless connection will be affected by the network environment. A bandwidth Of 100Mbit or more is recommended when using screen mirroring.
- Make sure your mobile device is close to the projector when using wireless connection. A distance within 1 meter is recommended.
- Some mobile devices may not support screen mirroring due to the compatibility.
- Any questions, please feel free to contact YABER via aftersales@yabertech.com.
At first, turn on the the projector, press the"" bottom on the remote controller, then it will shows "Source" option on the projection image. Choose the "Screen ", then press "OK' you will get this menu:

Wireless Projection Method
- IOS Cast (for IOS Devices)
- Select "IOS Cast" with left or right move button on the remote controller or projector, then press the OK button to enter the Network Setup - Select your home WIFI from the list - Connect the 1.12 projector to your home WIFI.
![]()
- Select the [Settings] menu on your IOS device - Turn on the [WIFI] function Connect your IOS device to the same home network as the projector.
![]()
- Open Control Center- Tap the Screen Mirroring button-Connect [RKcast-xxxxxx]
- Open control center.
- Tap on Screen Mirroring-Select the Device name [RKcast-xxxxxx]
![]()
- Select "IOS Cast" with left or right move button on the remote controller or projector, then press the OK button to enter the Network Setup - Select your home WIFI from the list - Connect the 1.12 projector to your home WIFI.


- For Android Users
Android Cast (for Android Devices)- Select "Android Cast" with left or right move button on the remote controller or projector, then press the OK button to enter Android Cast.
- Select the [ Settings ] menu on your Android device — Select the [ Screen mirroring ] function — Select your Miracast receiver named [ RKCast-XXXX ] your Android device screen will be displayed on the projection screen after 3 seconds.
![]()
- On your Android device, tap [ Settings ] - [ WLAN Display ] -Turn [ Wi-Fi ] ON, Connect your home WiFi.
![]()


Menu Setting Method
- Press the "
![]() " on the remote controller, then the menu picture will display on screen.
" on the remote controller, then the menu picture will display on screen. - Press "
![]() "key, the menu will move to "Picture>Sound>Projection>Time>Setup".
"key, the menu will move to "Picture>Sound>Projection>Time>Setup". - Select the adjust interface, use"
![]() " key to choose the wanted item.
" key to choose the wanted item. - Press"OK" or "
![]() " to adjust the item parameter.
" to adjust the item parameter. - Press "
![]() " to quit the chosen menu after finishing adjusted, and then can choose other menu by pressing "
" to quit the chosen menu after finishing adjusted, and then can choose other menu by pressing "![]() " key.
" key.
 " on the remote controller, then the menu picture will display on screen.
 "key, the menu will move to "Picture>Sound>Projection>Time>Setup".
 " key to choose the wanted item.
 " to quit the chosen menu after finishing adjusted, and then can choose other menu by pressing "
PROJECTOR IMAGE SETTING
Picture Menu

| PICTURE MENU | MODE | FUNCTION |
| Picture Mode | Standard, Mid, Personal, Dynamic | Switch among the image mode |
| Brightness | 0~100 | Adjust the brightness parameter 0-100 |
| Contrast | 0~100 | Adjust the contrast parameter 0-100 |
| Sharpness | 0~100 | Adjust sharpness parameters 0-100 |
| Saturation | 0~100 | Adjust saturation parameters 0-100 |
| Color Temp | Standard, Warm, Cool | Adjust color temperature |
| Aspect Ratio | Dot to Dot, 4:3, 16:9, Full, Zoom1, Zoom2 | Adjust the video aspect ratio |
| Screen Mode | Auto, Video, VGA | Adjust screen mode |
| Advanced Settings | Strong, Medium, Weak, Off | Adjust dynamic contrast |
Note:
Only if you open the movie, the aspect ratio could be adjusted by PICTURE MENU. PICTURE MENU couldn't change the parameter of aspect ratio in other situation.
Sound Menu

| SOUND MENU | MODE | FUNCTION |
| SOUND MODE | Personal, Standard, Music, Movie | Set up the sound mode |
| Treble | 0~50 | Adjust the treble parameter 0-50 |
| Bass | 0~50 | Adjust the bass parameter 0-50 |
| Balance | 0~50 | Adjust the balance parameter -50~50 |
| Surround Sound | On, Off | Set up the surround sound mode |
| AVL | On, Off | Set up the AVL (AUTO VOICE LEVEL) mode |
Projection Menu

| Projection MENU | MODE | FUNCTION |
| Network Information | WIFI List | Display WiFi access point |
| Network PercentZoom | 75%~100% | Reduce the screen size up to 25% |
| Network Mirror | Flip Mirror, Narmali Flip, Mirror | Set up the projection mode |
<ZOOM Functions>
When playing an image or video, if you want to reduce the size of the projected image or video, you can use the remote control to select the
ZOOM to adjust the projection size:
You can reduce the height and width of original size up to 25%.
Network Mirror (projection mode)
The projector can be hanged on the ceiling with special hanger frame, and placed on the stable desk to project the image according to the operating environment and requirements In addition, the projector can be installed with following methods:
- Front projection Ceiling mount
![]()
- Rear projection Ceiling mount
![]()
- Front projection Table mount
![]()
- Rear projection Table mount
![]()


Time Menu

| Time MENU | MODE | FUNCTION |
| OSD Time | Off, 5See, 15Sec, 30Sec | Adjust the duration of keeping the menu interface |
| Sleep Timer | Off/5min/15min/30min/60rnin, etc. | Shut off the projectcor after a set arnaunt time. |
| Auto Standby | Off/3 hours/4 hours/5 hours | Automatic sleep times |
Setup Menu

| Setup MENU | MODE | FUNCTION |
| OSD Language | English, France, Italian, Spanish, etc. | Setup different language |
| Version | Display system version | |
| USB Upgrade | Upgrade the system version | |
| Reset | Reset the projector |
To update the system
- After decompressing the installation package, put it into the root directory of the U disk.
- Insert the USB flash drive into the USB port, do not insert it into the USB-T port.
- Select the USB Upgrade function.
- After the system upgrade is complete, you need to unplug the U disk, unplug the power cord to shut down, and boot to restart.
PROJECTOR CONNECTIONS
Connecting to the Computer
Using the HDMI or VGA cable to connect with projector.
(An HOMI connection is recommended for projecting movies, videos, and Other files which need to be HD)
- Turn on your computer and the projector;
- Connect the HDMI/VGA cable to your computer's HDMI/VGA port;
- Connect the other end to any available HDMI/VGA port on your projector;
- Press the "Source" button to enter interface of Source;
- Select HD/VGA source to project any files on your computer;
- On your laptop, hold down the keyboard keys
![]() to change your display mode:
to change your display mode:
![]()
Computer only: is the default option — only displays on the main monitor.
Duplicate: makes all of the monitors display the same thing duplicating the desktop on each monitor.
Extend: makes all of your monitors act like one big monitor extending the desktop across all of them
Projector only: Displays only on the secondary monitor like a projector - You can change your screen resolution:
Choose Start → Control Panel → Appearance and Personalization → Adjust Screen Resolution
![]()
(Note: VGA connection can only transmit analog signal of video not audio. An external speaker is required when the device is connected via VGA cable.)

 to change your display mode:


Connecting to the DVD player
- Use the supplied AV cable to connect the DVD player to the projector.
- Turn on the projector and DVD player.
If your player has an HDMI output, it is best to use it over the analog (AV) option. Audio output must be configured from the DVD player menu if external speakers are installed.

Connecting to the soundbar
- Use the supplied AV cable to connect the soundbar to the projector.
- Turn on the projector and the sound bar.


PROJECTION DISTANCE AND SIZE
Please follow the data in chart below, to adjust the image size and the distance (Aspect Ratio: 16:9, Default)
| Distance (ft.) | Distance (cm) | Screen Size (in) |
| 3.6 | 110 | 35" |
| 6.1 | 186 | 60" |
| 8.4 | 256 | 85" |
| 9.7 | 295 | 100" |
| 11.5 | 350 | 118" |
| 14.2 | 433 | 147" |
The image size depends on the distance between projector and screeni there may be 3% deviation among above listed data. Different settings cause various distances.
Thank you very much for purchasing the YABER U2 projector.
Please read this instruction manual carefully before use. Also, please keep it handy so you can check it at any time.
If you have any problem, please feel free to contact us (Email: aftersales@yabertech.com), we will always try to offer you a satisfactory solution.
www.yabertech.com
aftersales@yabertech.com
 Yaber entertainment projector
 @Yaber.official

Documents / Resources
References
Download manual
Here you can download full pdf version of manual, it may contain additional safety instructions, warranty information, FCC rules, etc.
Advertisement


Need help?
Do you have a question about the U2 and is the answer not in the manual?
Questions and answers