Advertisement
Quick Links
Advertisement

Related Manuals for Kozyard KZSW3108


Summary of Contents for Kozyard KZSW3108
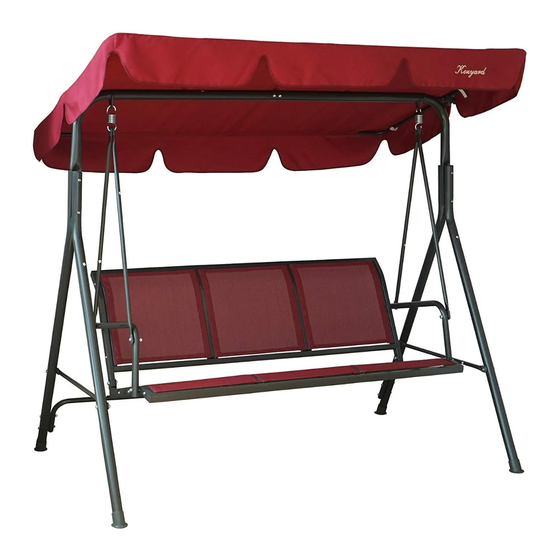
- Page 1 Patio Porch Swing Assembly Manual...
-
Page 2: Care And Warranty
Assembly Instructions • Prior to assembly, ensure that you lay out and identify all the parts listed in the parts list. • Tighten all nuts and bolts securely. Hand-tighten all bolts before use. Avoid using power tools or applying excessive force during assembly and bolt tight- ening. -
Page 3: Part List
Part list... - Page 4 Part list PLASTIC END PLASTIC SCREW WASHER M6X15 M6X15 M6X15 M8X8 M8X8 M8X8 ALLEN KEY WRENCH...
- Page 5 Step 1: Connect Part D and Part C to build the beam using Bolt Q, Washer X, Nut W, and Plastic End-Cap Z as shown in the diagram. Step 2: Connect Part A and Part B with the beam using Bolt U, Washer X, Nut W, and Plastic End-Cap Z as shown in the diagram.
- Page 6 Step 3: Connect Part E to the legs (Part A and B) using Bolt R, Washer X, Nut W, and Plastic End-Cap Z as shown in the diagram. Step 4: Connect Part G and Part F to build a connection tube for the rear foot using Bolt O, Washer X, Nut W, and Plastic End-Cap Z as shown in the diagram.
- Page 7 Step 5: Connect the rear foot tube to Part B using Bolt S, Washer X, Nut W, and Plastic End-Cap Z as shown in the diagram. Step 6: Set up seat&back together 1. Connect part J1 and part J together using bolt N,washer X,nut W and plastic end-cap Z as shown in diagram.
- Page 8 Step 7: 1. Connect part E1 with backseat (part J1)using bolt V,washer X,nut W and plastic end-cap Z as shown in diagram. 2. Connect part E1 to armrest (part I) using bolt P,washer X,nut W and plastic end-cap Z as shown in diagram.
- Page 9 Step 9: Affix part K to beam using screw Y. Step 10: Insert part L to canopy.
- Page 10 Step 11: Connect Part L and Part K to support canopy. Before using, make sure to check that all screws are securely tightened.
Need help?
Do you have a question about the KZSW3108 and is the answer not in the manual?
Questions and answers