
Subscribe to Our Youtube Channel
Related Manuals for Kozyard KZAHG1012GRA


Summary of Contents for Kozyard KZAHG1012GRA
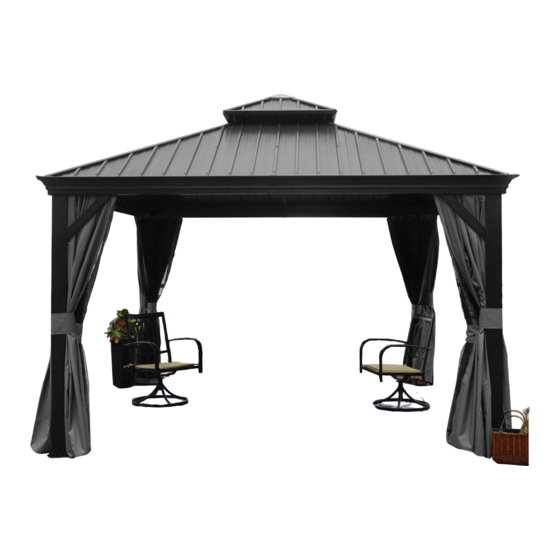
- Page 1 10’x12’ Hardtop Gazebo With Double Roof Assembly Manual Kozyard LLC Products © Copyright 2016 - 2022 Kozyard LLC. | All Rights Reserved.
- Page 2 5.Use the hex keys in the box. 1.Two or more people are required for assembly. 6.Please use a Phillips screwdriver. 2.You will need one or more stepladders. 7.Do not fully tighten screws prior to complete assembly. 3. Wearing protective gloves is recommended.
- Page 3 J1 x4 A x4 J2 x4 B x2 K x1 B1 x2 B2 x2 K1 x1 C x2 L x4 C1 x2 M x4 C2 x2 N x4 D x2 ITEM DESCRIPTION Pole D1 x2 Beam Joint Bar Sidewall Track D2 x2 Beam Jointer Bar...
- Page 4 P1 x2 P x2 W3 x2 W4 x2 Q x2 Q2 x2 Q1 x2 W2 x2 W5 x2 R x8 S x104 W6 x2 W1 x2 T1 x2 T2 x2 X5 x2 X4 x2 U0 x4 U x4 ITEM DESCRIPTION Finishing Bar Net Frame Finishing Bar...
-
Page 5: Description Qty
5# x64+3 6# x8+1 X3 x2 X6 x2 7# x28+2 9# x24+2 10# x4+1 11# x8+1 X2 x2 X1x2 X7 x2 X8 x2 Allen key Y1 x2 Y2 x2 Wrench Y5 x2 Y6 x2 ITEM DESCRIPTION Roof Panel Roof Panel Yb x4 Z x56 Roof Panel... - Page 6 Step 1: Parts Required: Set up poles (Part A) with stand plates (Part L) using screws 1# as shown in diagram. L x4 A x4 page 4...
-
Page 7: Parts Required
Parts Required: F x4 C x2 B x2 E x2 D x2 Step 2: Connect (Part C) and (Part B) into one beam using union bar (Part F) with screws 1#. ③ Connect Part E and Part D into one beam using union bar (Part F) with screws 1# as shown in diagram. - Page 8 Parts Required: B1 x2 C1 x2 C2 x2 B2 x2 D1 x2 E1 x2 D2 x2 E2 x2 Step 3 : E1 E2 D1 D2 B1 B2 C1 C2 Connect parts (E2&D2) to the finished beam (part E& part D) using screws 1# as shown in diagram.
- Page 9 Parts Required: Step 4 : Use screws (2# & 3#) to connect poles and beams together as shown in diagram. ① ① ② ② page 7...
- Page 10 Parts Required: J1 x4 J2 x4 Step 5: Affix the frame with corner solidifying bars (Parts J1 & J2) using screws 1# as shown in diagram. page 8...
- Page 11 Parts Required: H x4 G x4 ① ② Step 6: ① Affix middle beams using joint cover (Part H) and screws 9# Finish connecting beams using and 1# as shown in diagram. corner covers (Part G) and screws 9# as shown ②...
- Page 12 x104 H1 x4 ① ② ② ① After finishing hooks into tracks, then put H1 to lock them. Step 7: Put 6 hooks to each slot of Put 7 hooks to each slot of ① ② sidewall track (part C2&Part B2) sidewall track (part E2&Part D2) page 10...
- Page 13 Parts Required: H2 x1 Reminder: with silicone rubber to seal after finishing the assembly it will be better for no water leaking in heavy rain. page 11...
- Page 14 Parts Required: P x2 M x4 K x1 R x4 Q x2 Step 8: Set up roof frame ② Connect the inside roof connect(Part K) with the corner roof bar (Part M)using screws 1#. ② Attach finishing bar (Part P&Q)with finish end (Part R) using screws 1# to corner roof bar (Part M) as shown in diagram.
- Page 15 Parts Required: N x4 Step 9: ① Attach roof bar (Part N) to main frame using screw 1# as shown in diagram. page 13...
- Page 16 Parts Required: K1 x1 Step 10 :Connect outside roof connctor (Part K1)to inside roof (Part K)using screw 1# as shown in diagram. page 14...
- Page 17 Parts Required: Step 11: Cover metal bracket (Part Z,Z1,Z2) to roof panels as shown in diagram. page 15...
- Page 18 Parts Required: T1 x2 R x4 T2 x2 Step 12 Attach finishing bars (Part T1&T2)to upper roof with finish end (Part R) Push the roof panels using screws 1#as shown in diagram. (Part v1,v2,v3,v4,v5,v6)to upper roof as shown in diagram. page 16...
- Page 19 Parts Required: U0 x4 U x4 U3 x4 U4 x4 ② ② ① Step 13: Affix solidifying bars to roof corner Affix solidifying bars (Part U0&U)together bar using iron angle (Part U3) and to roof bar using iron angle (Part U4) and screw 1# as shown in diagram.
- Page 20 Parts Required: Step 14: Cover metal bracket (Part Z,Z3,Z4) to roof panels as shown in diagram. page 18...
- Page 21 Parts Required: page 19...
- Page 22 Overall roof assembly: Please put the panels on the frame anti-clockwisely Connect roof as below: Tip: Wearing protective gloves is recommended. Tips: For fastening roof panels (Part W3 and Part X4) easily, please glue Part S onto Panel W3 and Part X4 by adhesive tape in advance to avoid Part S sliding down during assembly..
- Page 23 Parts Required: S x104 Step 15: Affix roof panels using screws and spacers (Part S) as shown in diagram. Attention: Put on one roof panel and fasten it accordingly before attaching second roof panel. ② ① ② ① ② ① ③...
- Page 24 Parts Required: P1 x2 Q1 x2 Q2 x2 Step 16: Perspective: Attach net frames (Part P1,Q1&Q2) to finishing bars(Part P &Q) using screws 1#&11# as shown in diagram. ① page 22...
- Page 25 Parts Required: Y1 x2 Y5 x2 Y6 x2 Y2 x2 Y1&Y2 Y5&Y6 Step 17 : Hang up mosquito sidewalls and solid sidewalls as shown in diagram. page 23...
- Page 26 Parts Required: Yb X4 Step 18: When you close the curtain,please refer to below steps to fix with poles as shown in diagram. ① ② ③ Y5/Y6 Y5/Y6 Y1/Y2 Y5/Y6 Y1/Y2 ④ ⑤ Y5/Y6 Y5/Y6 Y1/Y2 Y1/Y2 In the end,Check all screws are fixed tightly before using. page 24...
- Page 27 10808 6th ST, Unit 100, Rancho Cucamonga,CA 91730...
Need help?
Do you have a question about the KZAHG1012GRA and is the answer not in the manual?
Questions and answers