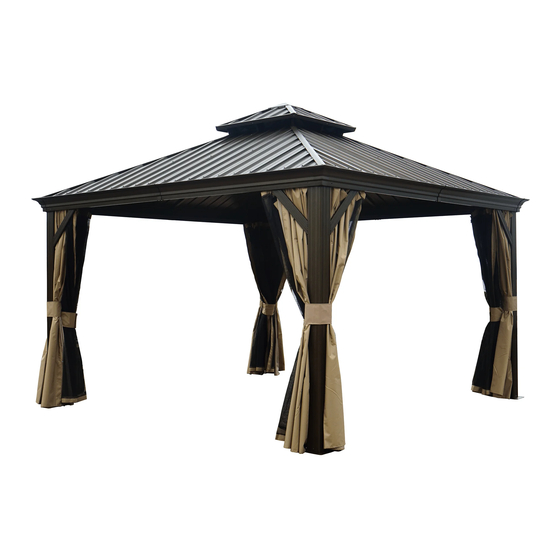
Kozyard Alexander Assembly Manual
12'x12' hardtop gazebo with double roof
Hide thumbs
Also See for Alexander:
- Assembly manual (28 pages) ,
- Assembly manual (26 pages) ,
- Assembly manual (28 pages)
Summary of Contents for Kozyard Alexander
- Page 1 12’x12’ Alexander hardtop gazebo with double roof Assembly Manual Kozyard LLC Products © Copyright 2016 - 2020 Kozyard LLC. | All Rights Reserved.
- Page 2 8.For ease of construction, you may 4.You may need a safety hat. need to use a drill. 9.Lay every part on soft surface to avoid any scratches . Alexander 12x12' ANCHOR BLUEPRINT 361cm/11.9' 15cm/5.9" 30x30cm/11.8"x11.8" 361cm/11.9' 331cm/10.9' 30x30cm/11.8"x11.8"...
-
Page 3: Description Qty
A x4 L1 x4 L2 x4 B x4 B1 x4 R1 x4 B2a x4 M1 x4 M2 x8 B2b x4 M3 x4 M4 x4 D x4 M5 x92+5 W x4 E x4 W1 x4 E1 x4 ITEM DESCRIPTION Pole Beam F1 x4 Beam Sidewall Track... - Page 4 Q x112+6 R x72+2 S x8+2 M6*47 T x72+7 D1 x16+1 M6*23 U x20+3 M6*23 18 x1 V x228+10 M6*15 Curtain X x16+2 M6*10 X1 x8+2 M6*42 Y x24+5 P x4 P1 x4 Wa x1 W2 x1 Z x1 ITEM DESCRIPTION Metal Bracket 16+1...
- Page 5 Step 1: Parts Required: Set up poles (Part A) with stand plates (Part M1) using screws V as shown in diagram. M1 x4 A x4 page 3...
-
Page 6: Parts Required
Parts Required: B x4 D x4 B1 x4 Step 2 : Connect (Part B) and (Part B1) into one beam using union bar (Part D) with screws V. Tip: page 4... - Page 7 Parts Required: V x88 F1 x4 F2 x4 B2b x4 Q x112 B2a x4 Step 3 :Put 7 hooks into each slot of sidewall track (Part B2a & Part B2b) B2a / B2b Tip: F1 B2a F2 B2b Connect parts (B2a&B2b) to the finished beam (Part B1& Part B) using screws V as shown in diagram.
- Page 8 Parts Required: Step 5 : Use screws (U & X) to connect poles and beams together as shown in diagram. ① ① ② ② Tip: At least two people since this step. page 6...
- Page 9 Parts Required: L1 x4 L2 x4 Step 6: Affix the frame with corner solidifying bars (Parts L1 & L2) using screws V as shown in diagram. Tip: Please measure diagonally from corner to corner.If your structure is square, those two measurements will be the same distance.
- Page 10 Parts Required: W1 x4 W x4 ① ② Step 7: Affix middle beams using joint cover (Part W1) and screws Y Finish connecting beams using and V as shown in diagram. corner covers (Part W) and screws Y as shown in diagram.
- Page 11 Parts Required: Reminder: with silicone rubber to seal after finishing the assembly it will be better for no water leaking in heavy rain. page 9...
- Page 12 Parts Required: M2 x4 E x4 K1 x1 R1 x4 V x16 Step 8: Set up roof frame Connect the inside roof connect(Part K1) with the corner roof bar (Part E)using screws V. Attach corner roof bar(Part E) to main frame using screw V as shown in diagram ②...
- Page 13 Parts Required: E1 x4 ZS3 x4 Step 9: Upward View Attach roof bar(Part E1) to inside roof connector using screws V, Attach net frames (Part ZS ) to finishing bars (Part R1 ) using screws V as shown in diagram. ①...
- Page 14 Parts Required: K x1 Wa x1 Upward View Step 10 :Connect outside roof connctor (Part K) to inside roof (Part K1 )using screw Wa as shown in diagram. page 12...
- Page 15 Parts Required: D1 x16 R x72 P x4 P1 x4 N x4 N1 x4 N2 x4 N3 x4 N4 x4 N5 x4 N6 x4 N7 x4 Step 11: Cover metal bracket (Part D1&R) to roof panels as shown in diagram. Tip: Wearing protective gloves is recommended.
- Page 16 Parts Required: V x8 J x4 M2 x4 P x4 P1 x4 Downward View Step 12 Attach finishing bars (Part J1&J)to upper roof with finish end (Part M2) Push the roof panels using screws V as shown in diagram. (Part P,P1)to upper roof as shown in diagram.
- Page 17 Parts Required: H x8 M3 x4 M4 x4 V x24 ② ② ① Step 13: Affix solidifying bars to roof corner Affix solidifying bars (Part H )together bar using iron angle (Part M4) and to roof bar using iron angle (Part M3) and screw V as shown in diagram.
- Page 18 Overall roof assembly: Please put the panels on the frame anti-clockwisely Connect roof as below: Tip: Wearing protective gloves is recommended. page 16...
- Page 19 Parts Required: M5 x92 T x72 X1 x8 M6*23 M6*47 M6*23 M6*42 Step 15: Affix roof panels using screws and spacers (Part M5) as shown in diagram. Attention: Put on one roof panel and fasten it accordingly before attaching second roof panel. ①...
- Page 20 Parts Required: Curtain Secure curtain and netting Step 16 : Hang up mosquito sidewalls and solid sidewalls as shown in diagram. 334 cm Curtain Curtain Attention: In the end,Check all screws are fixed tightly before using. page 18...
- Page 24 Kozyard LLC 10808 6th ST, Unit 100, Rancho Cugamonga,CA 91730 © Copyright 2016 - 2020 Kozyard LLC. | All Rights Reserved.


Need help?
Do you have a question about the Alexander and is the answer not in the manual?
Questions and answers